
Related Manuals for DREAMS Nebula TV Bed Sleepmotion Lifestyle 200i


Summary of Contents for DREAMS Nebula TV Bed Sleepmotion Lifestyle 200i
- Page 1 Nebula TV Bed Sleepmotion Lifestyle 200i 1.5 hour approx Two person assembly time assembly MK1 230930...
-
Page 2: Assembly Tips
Thank You Dear Customer, Thank you for choosing to purchase your bed from Dreams - we hope it brings you your best ever night’s sleep. Before you begin building your bed, please take a moment to read through the instructions and make sure that you've got all the relevant parts listed on the following pages. - Page 3 Headboard Footboard Sleepmotion Side Rails CTN: CTN: CTN:1 HDMI Leads Aerial Lead HDMI 90° Power Lead Cable Ties 2.8 metre 4 metre adaptor 3. 5 metre CTN:2 CTN:2 CTN:2 CTN:2 CTN:2 Connection Cable Clips Connection Connection Cable (4 Pin) Cable (5 Pin) Cable For LED HB SS Speaker USB/Headphone...
- Page 4 Hardware needed for fitting side rails to headboard & footboard Packed in footboard Pack 2 - hardware Pack (A) 10 20 30 40 50 60 70 Code Quantity Bolt (M8x30mm) Spring Washer (For M8 bolt) Flat Washer (For M8 bolt) Allen key (For M8 bolt) Hardware needed for installation of the TV...
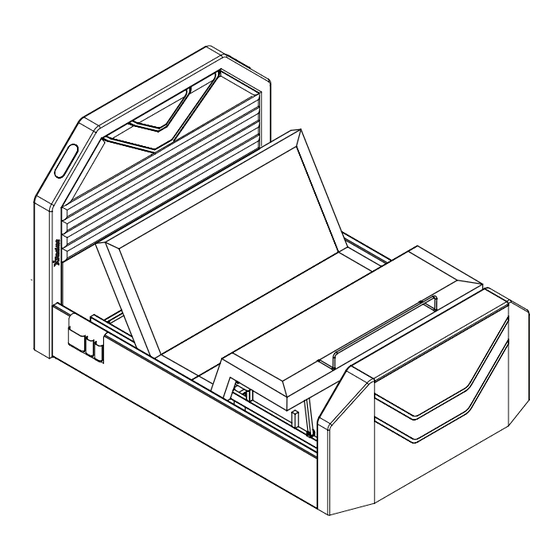
- Page 5 Important: Before starting assembly please refer to the owners manual supplied with your sleepmotion 200i electric bed base and follow the instructions taking note of any safety precautions or operational safety requirements of the installation. In the room where bed will be used, first prepare the bed base by fitting the eight long legs - 6‘’ (15cm). Connect the power and check the operation then step by step follow the bed assembly instructions below, to build the bedstead around the sleepmotion 200i bed base.
- Page 6 Screw in the eight 6" (15cm) legs as shown. Place the headboard in the position in which it shall be used and attach the right hand side rail using hardware from pack (A). Making sure the bed base is correct way round, with mattress stopper at the foot end, carefully lift and place bed base into the corner between headboard and side rail as shown - it is heavy so please get help.
- Page 7 4 x1 Nebula Sleepmotion Lifestyle TV Bed - Assembly guide - Page 7...
- Page 8 Plug the small power plug on one end of the mains power lead (M) into the socket at the bottom of the footboard. On the other end of the lead bring the 3 pin plug out under the headboard and connect it to your wall socket - for safety this must be an earthed power supply.
- Page 9 57.5 cm iii) Nebula Sleepmotion Lifestyle TV Bed - Assembly guide - Page 9...
- Page 10 If hardware is not supplied with the TV, choose suitable fittings from the TV Kit Bolt sets (M8 x 25mm) Countersunk screw sets (M6x12mm). Countersunk screw sets (M 4 x12mm). Allen Key (4mm). Allen Key (2.5mm). Nebula Sleepmotion Lifestyle TV Bed - Assembly guide - Page 10...
- Page 11 Before connecting the television, please read the important information below. The bed is fitted with a real 5.1 six channel surround sound amplifier that should be connected to the television fitting the HDMI plug into the HDMI ARC socket on the side of the TV. The HDMI ARC connection on the TV is the OUTPUT of audio from television to the amplifier which is then processed and sent by the amplifier to the various speakers.
- Page 12 RC controls the 5.1 Surround Sound amplifier, please read the Operation Guide on page 17. The RC is also used to move the TV up and down. Sub Woofer Footboard Headboard Keep wires tight so they TV Power Lead can't get snagged. Peel off cover from cable clips &...
- Page 13 TV Power lead Lower the TV lift. 2 x4 1 x4 3 x4 4 x1 100% Nebula Sleepmotion Lifestyle TV Bed - Assembly guide - Page 13...
- Page 14 30mm 20mm Nebula Sleepmotion Lifestyle TV Bed - Assembly guide - Page 14...
- Page 15 Technical Specifications Max TV Size: 975 x 575 x 85 (WHDmm) Overall Dimensions (LWH mm) Small Double: 2265 x 1365 x 1245 Double: 2265 x 1515 x 1245 King: 2365 x 1665 x 1245 Internal Dimensions (LWH mm) Small Double : 1930 x 1230 Double: 1930 x 1380...
- Page 16 DOWNLOAD ON THE GET IT ON APP STORE GOOGLE PLAY Need Help? Contact X Rocker at: www.dreams.co.uk/help IMPORTANT: You must keep your original retail receipt as proof of purchase Please retain for future reference...
- Page 17 Real 5.1 SS Audio System HDMI (ARC) amplifier system Music Power total = 210 Watts. x60W Three front speakers x30W Two Rear speakers x30W One Sub Woofer OPERATION GUIDE TURN AMPLIFIER ON or OFF. 1) Turn on the mains power to the TV Bed. Remote Control (W) 2) Press the Remote Control (RC) ON button for 2 seconds to synchronise and prepare the system, system voice shall say 'Power On'.
-
Page 18: Care And Maintenance
Care and maintenance Here are some tips to keep your new bed in tip-top condition Cleaning To clean your new bed, we'd advise using a warm damp cloth or if fabric, remove dust using a low suction vacuum cleaner. Please do not use abrasive chemicals or bleach as this may damage the product. Checking and moving Periodically we recommend you check that the screws or fixtures haven't become loose over time. - Page 19 Little dreamers Keep the little ones entertained while you assemble your new purchase.
Need help?
Do you have a question about the Nebula TV Bed Sleepmotion Lifestyle 200i and is the answer not in the manual?
Questions and answers