Advertisement
Quick Links
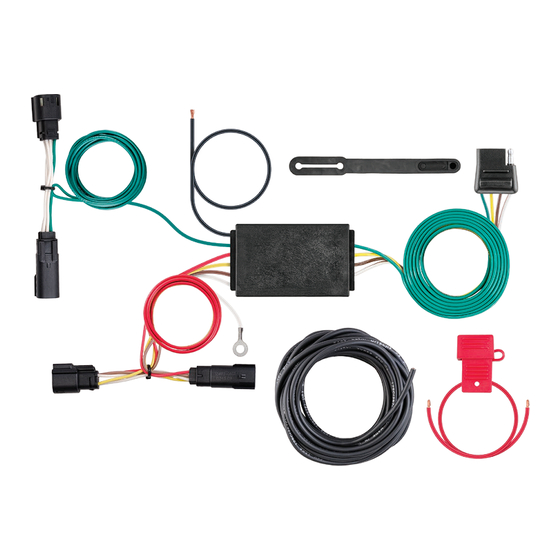
INSTALLATION INSTRUCTIONS
WARNING: DO NOT EXCEED PRODUCT RATING OR TOW VEHICLE LAMP LOAD RATING, WHICHEVER IS LOWER
APPLICATIONS
Make
Model
Ford
Escape
CUSTOM WIRING HARNESS
WIRING LOCATION GUIDE
SUVS, MINI & FULL-SIZED VANS ( S )
Representative vehicle shown below
S1 - Behind driver side taillight housing
S2 - Behind passenger side taillight housing
S1
NOTICE
All steps must be followed to ensure the wiring harness
will function properly. Once installed, test for proper function
by using a test light or connecting a properly wired trailer.
TOOLS NEEDED
8mm socket
10mm socket
T-25 Torx bit
Ratchet
Panel trim removal tool
WARNING
The battery connection must be fuse-protected, 10-amp max.
Exceeding the product rating can cause loss of warranty,
overheating and potential fire. Do not exceed product rating
or tow vehicle lamp load rating, whichever is lower.
Signal Circuits - 3.0 amps per side
Tail / Running Circuits - 6.0 amps total
Check vehicle owner's manual or contact
the vehicle manufacturer for more information.
S2
Flat blade screwdriver
Wire stripper
Crimping tool
Cutting tool
Pick tool
PAGE 1 • 56320-INS-RB
Advertisement

Related Manuals for curt 51160


Summary of Contents for curt 51160
- Page 1 INSTALLATION INSTRUCTIONS WARNING: DO NOT EXCEED PRODUCT RATING OR TOW VEHICLE LAMP LOAD RATING, WHICHEVER IS LOWER APPLICATIONS WIRING LOCATION GUIDE SUVS, MINI & FULL-SIZED VANS ( S ) Make Model Representative vehicle shown below Ford Escape S1 - Behind driver side taillight housing S2 - Behind passenger side taillight housing CUSTOM WIRING HARNESS NOTICE...
- Page 2 INSTALLATION / SAFETY INSTRUCTIONS Step 7 Step 1 On the outside of the vehicle, locate the two fastener caps Locate vehicle battery on the driver side under the and remove them (M). Remove the two fasteners securing the hood and disconnect the negative battery terminal. taillight (N).
- Page 3 INSTALLATION / SAFETY INSTRUCTIONS Step 11 Step 15 Reseat the grommet and use sealant (not provided) Route the custom wiring harness end with the green wire to seal the cut in the grommet and around all the wires. to the passenger side behind the removed scuff panel. Repeat steps 6-12 on the passenger side using the harness Step 12 end with the green wire.
Need help?
Do you have a question about the 51160 and is the answer not in the manual?
Questions and answers