Chapters
Table of Contents

Related Manuals for Kenmore 75063 - 6,000 BTU Slider/Casement Air Conditioner


Summary of Contents for Kenmore 75063 - 6,000 BTU Slider/Casement Air Conditioner
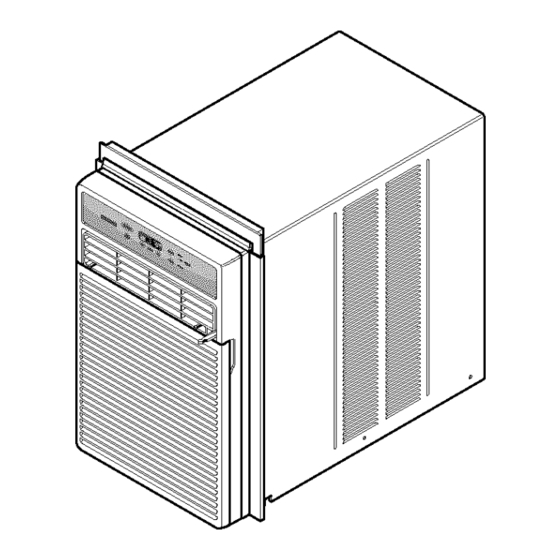
- Page 1 Owner's Manual Manual del Propietario ® SLIDER/CASEMENT AIR CONDITIONER HORIZONTAUMARCO ACONDICIONADOR DEAIRE Model, Modelo 580. 75063 580. 75123 Sears, Roebuck and Co., Hoffman Estates, IL 60179 U.S.A. www.sears.com...
-
Page 2: Table Of Contents
FULL ONE YEAR WARRANTY CONTACTING SEARS SERVICE AT ROOM AIR CONDITIONER 1-800-4-MY-HOME ®. For one year from the date of purchase, when this Warranty coverage applies only to air conditioners air conditioner is operated and maintained for used for non-commercial,... -
Page 3: Safety
IMPORTANT SAFETY INSTRUCTIONS The safety instructions below will tell you how to use your room air conditioner to avoid harm to yourself or damage to your ROOM AIR CONDITIONER. FOR YOUR SAFETY Avoid fire hazard or electric shock. Do not store or use gasoline or other flammable Do not use an extension cord or an adapter plug. -
Page 4: Electrical Requirements
Failure to follow these instructions can result in 20A, 250V AC circuit breaker. death, fire, or electrical shock. You can choose between the two methods below according to your preference and window sill shape. USING SLIT "A" USING SLIT "B"... -
Page 5: Installation
If your present wall outlet does through the condenser for heat remove. not match your plug, call a qualified electrician to The rear of the unit must be outdoors, not inside a make the necessary corrections. building or garage. -
Page 6: Installation
INSTALLATION INSTALLATION HARDWARE Pick a location that will allow the air conditioner to blow the cold air into the area you want. Windows used for installation must be strong enough to support the weight of the air conditioner. Good installation with special attention to the proper position of the unit will lessen the chance that service will be needed. - Page 7 Curtain. (Fig. 5) downward toward the outside for proper drainage. Tighten the nut. (Fig. 3) NOTE: DO NOT drill a hole in the bottom of the base pan The air conditioner is designed to operate with the bottom of the base pan approximately half-full of water.
-
Page 8: Casement Window Installation
Base Guide. Screw 4 Type C will need to installa filler panel. Ma_e this panel from 3/4 screws through the holes. (Fig. 8) inch thick wood and run it the full length of the window. _l_lf this is a casement window installation, Attach it securely to the window frame and paint it to proceed to Casement Window Installation. -
Page 9: Operation
Aside from the regular fan motor and compressor sounds coming from your air conditioner, you will once in a while hear a pinging sound, This is the result of moisture being picked up from the air in the room and thrown against the air conditioner's fan. -
Page 10: Features
6. Once the room has cooled, adjust the TEMP and Mode Control to the setting you find most comfortable. NOTE : If the air conditioner is turned off, wait 3 minutes before restarting. This allows pressure inside the compressor to equalize, Failure to wait 3 minutes before restarting may cause inefficient operation. -
Page 11: Display
• Every lime you push Timer button, it advances the Timer electrical power failure, the unit will begin When power is restored after an setting as follows: 1 Hour _ 2 Hours _ etc. _ 12 Hours to run at its last setting maximum. -
Page 12: Remote Control
• Thisburton takes priodtyover any other burton. • Remove the batteries from the remote controller if the air • When you first turn it on, the unit is in ccol mode, High conditioner is not going to be used for an extended fan speed, Temperature se_ing at 72'F. -
Page 13: Maintenance
• Open the inlet grille downward. • Remove the screw securing the Front Grille, • Push the grille up from the bottom and pull the top of the grille away from the case to lift the top tabs out of their slots, FIG. -
Page 14: Troubleshooting
NOISE WHEN UNIT IS COOLING, Check if,,, Then... Soul_d o ffal__-_ing _ator- frorrl t homoisture nercoval s,f_el_. This[snarrnsl _ e_ httr_)[dity is high.Clocodsors,v_'ndo_,a_qd rogistor& W ndswvbin€ion - _or nstalaCon. Referto ns_ laton nstrvcCons or chockw_th nstaer. WATER DRIPPING INSIDE ROOM WHEN UNIT IS COOLING. - Page 15 -15-...
-
Page 16: Espanol
DE AIRE ACONDICIONADO CONTACTO EL CENTRO DE SEARS AL DE HABITACI()N 1-SO0-4-MY-HOME _ Dumnte un a_o complete a partir de la fecha de compra, si este equipo de aire acondieionado recibe La proteccion de garantfa cubre unicamente a los mantenimiento... -
Page 17: Seguridad
IMPORTANTES INSTRUCCIONES DE SEGURIDAD Las siguientes instrucciones de seguridad le indicar_n c6mo usar su equipo de sire acondioionado habitaoi6n papa evitar da_os pars usted mismo y para su EQUIPO DE AIRE ACONDICIONADO, POR SU SEGURIDAD Evrtelospeligros de insendios y No alrnacene ni use gasolina u otros vapores y desosrgasel_;_ioss.No use un cable de exlensi6n ni un... -
Page 18: Requerimientos Electricos
8i no se siguenest_sinstrucciones, p uede ocasionarse 20A, 250V AC Int_rrap|or _Je20AMP. la muerte, un incendio oun cheque el_trico. Puede escogerentre los dos m_todos abajo descritosde acuerdo ala forma del tabureIe de su ventana y su preferencia. UTILIZANDO LA RANURA "B" UTILIZANDO LA RANURA "A"... -
Page 19: Instalacion
Cornpruebe cu_l ee la alirnentaci6n el_ctric_que Ilega a su dornioilio. L_ slirnentaci6n el_ctdca dispanible debe ser Estas Jnstrucoiones son pars una ventana la rnisma que se rnuestra en Is plata del "fsbdcantede la corredera horizontal o un marco de ventana. -
Page 20: Installaci6N
INSTALACION PIEZAS DE INSTALACION Escoja un lugar que le permita Ilevar el aire fris al &rea MONTAJE que desea. Las vestanas que se usen pare la ins'talaciOn debes tarter la resis'tescia suficiente para espsrtar el peso del equips de aire acondicionado. Una buena instalaci6n con a'tenciOn especial a la correcta posici6n de la unidad disminuir&... - Page 21 FIG, 5 I[_J Deslizar la cortina en la cortina del marco con el lado m_s suave hacia la habitaci6n. Deslizar la cortina del marco en las guras laterales del armario del aire acondicionado. Asegurarse de que la cortina queda firmemente sujeta en todos los lados _or el marco.
-
Page 22: Instalacion Deventana Con Marco
• El proceso de montaje es el mismo proceso descd'_ de la parte superior y laterales de la ventana. Cornpahere en los pasos 1 a 11 y paso 13 de la in_talaciSn de frente del $oporte del sorcheta con la Gufa baja que ventana corredera horizontal. -
Page 23: Operacion
El sire pasa entonces Vibracionee do la per un serpontin de enfriamiento que refrigera el unidad aire y elimina el excess de humedad. El mismo sire regress ententes al enfriador, secador y limpiador La unidsd puede vibrar y hair ruidsdebids a la del sire del ambiente. -
Page 24: Capacidad Y Tiempo Do Funcionamiento,-23 Caracterieticae
De Aire habitaci6n y Io expulsa hacia fuera. El aire fresco (Bandejade Entrada) es Ilevado hacia el interbr de la habitaci6n a tray, s 5, Fitro De Aire de los pasajes normales de aire que se hallan en 6, Grillage... - Page 25 • Elvenlilador s o dotienecuando el compresordoia do enlriar. cne 'redo oeenlriame°dom_ altoy latem;c'a:,ra en 72"F. Aproximadamenle cada3 mirMos elvo_lilador s e oncender& CONTROL REMOTO RECEPTOR DE SEIgAL_ y sovoriflcar_ [atemperature d o la habitseiSn p ara ver si es necesario enlriar. TEMPORIZADOR VELOCIDAD...
-
Page 26: Mantenimiento
• Este bot6n tiene la pdoridad sobre cuslesqurereotres funcionsmiento. botones. • Saque las bater{ss del control r emote si no va s utilizer el • CuandoIo enciendepor primere vez, el aire sire aesndicionadopot un periodo prolongsdo. aesndicionsdo est_ en el rnodode enfrrsmientom_s site •... -
Page 27: Correccion De Fallas
• Abre la rejilla de entrada de aire hacia ardba "tirandode la parts supedor de esta rejilla. (Figure "18) COMO SACAR LA REJILLA • Remueva el fll'tro de aire de la pardlla fron_ haland el fi'tm suavemente hacia arribo. (Figure 19) FRONTAL •... - Page 28 El¢onducto de d_t_:_i5n ce for_poratur_ do% e" co"_¢-_ Endoreco ol co"d.,cto lejm_ ce la bobinado ova_rador. conla _oi'a de _vapo'acor, ubicad_ tr_s la tea fron:al EL AIREA00N DlCl0NAD0ENFR_ PER0 EL CLIA E"0 E$'T/_ D EI_A_IADO C/_UDO- SEES'[AFORI_AN DOHIEL01_ LAREJILLA DEENI]_DA. Compfu_be sl... Despu_s...
- Page 30 - 30 -...
- Page 31 You can call anytime day or night, or schedule a su aparaIo. Adorers, pcdr_ hoccrlo en ouolquior momenta service appointment online. dol die o de la nocho, o solioilar una cite pore prectaoi6n do sorvicios onlir]o. Sears has over 12,000 professional repair Soars cuonIa _n rn_s do 12.000 t_ni_s profesionalos specialists, who have access to over 4.5 million...
- Page 32 Call anytime,day or night(U.S.A. and Canada) www.sears.com www.sears.ca Our Home For repair of carry-in items like vacuums, lawn equipment, and electronics, call or go on-line for the location of your nearest Sears Parts & Repair Center. 1-800-488-1222 Call anytime, day or night (U.S.A. only) ",_"W'WJ_,a i_ .c;o m...
Need help?
Do you have a question about the 75063 - 6,000 BTU Slider/Casement Air Conditioner and is the answer not in the manual?
Questions and answers