
Related Manuals for Kenmore 75062 - 6,000 BTU Single Room Air Conditioner


Summary of Contents for Kenmore 75062 - 6,000 BTU Single Room Air Conditioner
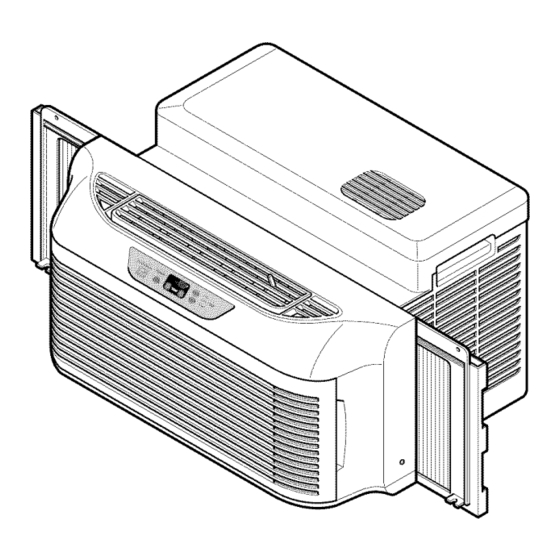
- Page 1 Owner's Manual Manual del Propietario ® ROOM AIR CONDITIONER ACONDICIONADOR DE AIRE DE VENTANA Model, Modelo 580.75062 Sears, Roebuck and Co., Hoffman Estates, IL 60179 U.S.A. www.sears.com...
-
Page 2: Table Of Contents
FULL FIVE-YEAR WARRANTY This warranty gives you specific legal rights, SEALED REFRIGERATION SYSTEM you may also have other right which vary from state to state. For five years from the date of purchase, when this Sears, Roebuck and Co., D/817WA,... -
Page 3: Safety
IMPORTANT SAFETY INSTRUCTIONS The safety instructions below will tell you how to use your room air conditioner to avoid harm to yourself damage to your ROOM AIR CONDITIONER. YOUR SAFETY Do not store or use gasoline or other flammable Avoid... - Page 4 DO NOT, UNDER ANY CIRCUM8TANCE8, REMOVE THE POWER 8UPPLY CORD GROUND PRONG. ELECTRICAL GROUND IS REQUIRED ON THIS APPLIANCE. A 115-volt 60 Hz, AC only, 15A fused and properly grounded electrical supply is required. A time delay fuse or time delay circuit breaker is recommended.
-
Page 5: Installation
To avoid risk of personal injury, property damage, Interior wall " FIG. 1 or product damage due to the weight of this device and sharp edges that may be exposed: ELECTRICAL SERVICE • Air conditioners covered in this manual pose an... -
Page 6: Installation
(ITEM D) for possible shipping damage. Pick a location which provided. will allow you to blow the cold air into the area you Adjust leveling bolt so that the air conditioner will be want. Windows used for installation must be strong installed with a very slight tilt (about 1/4") downward... - Page 7 Be careful not to hurt waist in this slight resistance. This is normal. operation. • Use the two hand grips on top sides of unit to lift unit. FOAM SEAL WINDOW LOCK • Make sure that support bracket...
-
Page 8: Removal From Window
Remove the unit carefully to avoid water being spilled out on floor, always store unit fiat on its base. Do not stand on end. Be sure to remove support bracket, L bracket, and foam seal from window and save. Window will not close if support... -
Page 9: Operation
NOTE : In humid weather, excess water may cause comfort for the area you want to cool. The proper the BASE PAN to overflow and be splashed on the size is determined by the number of square feet in louver. -
Page 10: Features
To begin operating the air conditioner after installation, follow these steps: 1. Plug in the air conditioner.(To prevent electrical hazards, do not use an extension cord or an adapter plug.) 2. Set the TEMP Control to the coolest setting. -
Page 11: Display
COOL, ENERGY SAVER and FAN. • This button takes priority over any other buttons. - ENERGY SAVER • When you first turn it on, the unit is in cool mode, • The fan stops when the compressor stops cooling. High fan speed, Temperature setting at 72'_F. -
Page 12: Remote Control
• This button takes priority over any other button. • Remove the batteries from the remote controller if the air • When you first turn it on, the unit is in cooi mode, High conditioner is not going to be used for an extended fan speed, Temperature setting at 72°F. -
Page 13: Air Filter Cleaning
• Attach the front grille to the cabinet by inserting The cabinet may be washed with mild soap or the tabs on the grille into the tabs on the front of detergent and lukewarm water, then polished with the cabinet. -
Page 14: Maintenance
Then... Sound of fan hittingwater- from the moisture removal system. This is normal when humidity is high. Close doors, windows, and registers. Window vibration - poor installation. Refer to nsta at on nstruct ons or check w th nsta er. -
Page 15: Contenido
PantaNa. -..........UN ANO DE GARANTiA COMPLETA sistema sellado de refrigeracion (que consta de refrigerante, tuberias de conexion y compresor), sin EN DISPONIBLE AIRE costa, si presenta defectos en el material o mano de ACONDICIONADO obra. EL SERVlClO DE GARANTiA ESTA... -
Page 16: Seguridad
• Siva a instalar el aire acondicionado en una ventana, probabtemente deseara limpiar antes ambos lados del Reponga cristal. Si la ventana es del tipo de tres rieles con una Cable de corriente rejilla, quiza desee retirar la rejilIa comptetamente antes... -
Page 17: Electricos
DE ESTE APARATO. Se requiere un suministro electrico de 115 voltios a 60 Hz, solo CA, con fusible de 15A y tierra fisica. Se recomienda el uso de un fusible de paso o un disyuntor. Use un circuito dedicado que de servicio solamente a este aparato. -
Page 18: Instalacion
TORNILLO: 5/8" hoja normales con aberturas de 66 cm a 1 metro (26 a 39 3/8 pulgada) (FIG. 1 ). La hoja inferior de la ventana debe SELLO DE ESPUMA abrirse Io suficiente para crear una abertura verticai de ClNTA DE ESPUMA 30.5 cm (12 pulgadas). -
Page 19: Como Instalarlo
Tambien, puede seleccionar la posici6n deI orificio en Ia mensula. Coloque Ia mensula en el alf¢izar a 1 pulgada (25.4 ram) a la Saque con cuidado el aire acondicionado de su caja, revise que no tenga daises por el embarque. - Page 20 • Instale la mensula L para prevenir que la ventana sea durante este procedimiento. levantada io cual puede resuitar en ia caida de ia • Baje el marco de la ventana superior todo Io posible de unidad. forma que el marco se sienta firmemente...
-
Page 21: Retiro De La Ventana
• Desatomille los tomillos Iaterales que instalo en et Paso 5.6. • Losairesacondicionados q ue secubrenen este • Cierre Ia cortina y retire el sello det marco y ta mensuIa L de manual r epresentan un riesgopor su pesoexcesivo. tas ventanas. -
Page 22: Operaclon
Esto disminuira su costo su vida en climas c&lidos: por el uso. • Enfria y circula aire en la habitaci6n. • Reduce... -
Page 23: Caracteristicas
MODE en el nivel mas alto de enfriamiento COOL. 4. Ajuste las rejillas para un flujo de aire apropiado. 5. Una vez que haya enfriado la habitacion, ajuste los controles TEMP y MODE al nivel que sienta mas confortable. -
Page 24: Ajuste De La Direccion Del Aire
• El ventilador se detiene cuando et cornpresor deja de enfriar. en e] modode enffiamiento mas alto y latemperatura en 72°F. Aproximadamente carla 3 minutes et ventilador se encendera CONTROLREMOTORECEPTORDE SENAL....... y se verificara la temperatara de la habitaci6n para vet si es necesario enfriar. TEMPORIZADOR _ VELOClDAD... -
Page 25: Control Remoto
• Este boton tiene ta prioridad sobre cuaiesquiera otros funcionamiento. botones. • Saque las baterias del control remoto si no va a utiIizar et • Cuando Io enciende por primera vez, et aire aire acondicionado por un periodo prolongado. acondicionado esta en el modo de enfriamiento m&s alto •... -
Page 26: Imianteniimiiento
• Retire el tornillo que sujeta la rejilla frontal. semanas. Si el filtro de aire se queda Ileno de polvo, el flujo de aire disminuye y la capacidad • Empuje la rejilla hacia arriba desde la parte inferior enfriamiento se reduce, y puede daSarse la unidad. -
Page 27: De Problemas
Entonces... t Sonido d el v entilador quegolpea a gua- d elahumedad queseretira del a mbiente [ Esto esnormal cuando lahumedad esaita.Cierre puertas, ventanas, registros, etc Vibraci6n de laventana - mala instalaci6n. / Consultelas instrucciones de instalaci(_n o verifique con suinstalador. -
Page 31: Master Protection Agreements
Ademas, podra hacerlo en cualquier momento service appointment online. del d{a o de la noche, o solicitar una cita para prestacion de servicios online. Sears has over 12,000 professional repair Sears cuenta con mas de 12.000 tecnicos profesionales... - Page 32 (U.S.A. and Canada) www.sears.com www.sears.ca Our Home For repair of carry-in items like vacuums, lawn equipment, and electronics, call or go on-line for the location of your nearest Sears Parts & Repair Center, 1-800-488-1222 Call anytime, day or night (U.S.A. only) www.sears,com...
Need help?
Do you have a question about the 75062 - 6,000 BTU Single Room Air Conditioner and is the answer not in the manual?
Questions and answers