Table of Contents
Advertisement
Quick Links
Scan the QR code and select the Manuals and Support quick links from
Scannez le code QR et sélectionnez les liens rapides Manuals and Support
Scannerizzare il codice QR e selezionare i Link veloci Manuali e Supporto
HBZ-1250
Instruction Manual | Bedienungsanleitung
Manuel d'utilisation | Manuale di Istruzioni
833079
Created 03/24
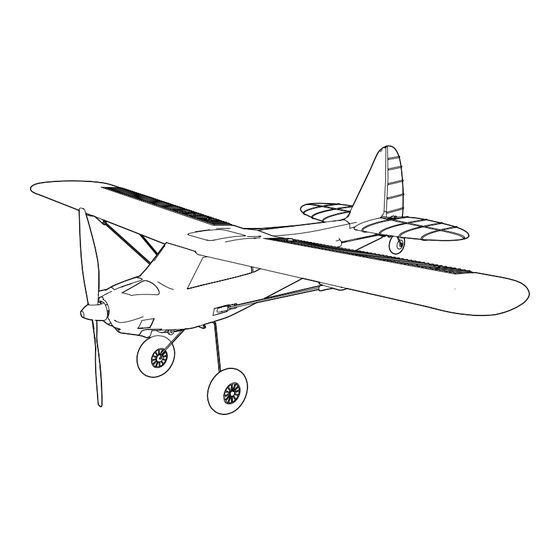
XCub 450mm
the product page for the most up-to-date manual information.
Scannen Sie den QR-Code und wählen Sie auf der Produktseite
die Quicklinks Handbücher und Unterstützung, um die aktuellsten
sur la page du produit pour obtenir les informations les plus récentes
dalla pagina del prodotto per le informazioni manuali più aggiornate.
Informationen zu Handbücher.
sur le manuel.
Advertisement
Table of Contents

Related Manuals for Horizon Hobby HobbyZone XCub HBZ-1250


Summary of Contents for Horizon Hobby HobbyZone XCub HBZ-1250
- Page 1 XCub 450mm Scan the QR code and select the Manuals and Support quick links from the product page for the most up-to-date manual information. Scannen Sie den QR-Code und wählen Sie auf der Produktseite die Quicklinks Handbücher und Unterstützung, um die aktuellsten Informationen zu Handbücher.
- Page 2 NOTICE All instructions, warranties and other collateral documents are subject to change at the sole discretion of Horizon Hobby, LLC. For up-to-date product literature, visit www.horizonhobby.com or www.towerhobbies.com and click on the support or resources tab for this product. Meaning of Special Language:...
-
Page 3: Table Of Contents
Registration Specifications Wingspan 17.7" (450mm) Register your product today to join Length 12.6" (320mm) our mailing list and keep up to date Without Battery: 2.08oz (59.1g) with product updates, offers and HobbyZone news. Weight* ® With Recommended 1S 400mAh Flight Battery: 2.48oz (70.4g) * The weight provided is for the aircraft and flight control components. -
Page 4: Aircraft Components
Aircraft Components Typical Control Components Servo Control Horn Pushrod Z-Bend Length Adjustment Flight Battery Horizontal Stabilizer Elevator Servo Elevator Motor Receiver Spinner Electronic Speed Control (ESC) Propeller Rudder Servo Aileron Servo Vertical Stabilizer Rudder... -
Page 5: Preflight Checklist
Preflight Checklist Find a safe and open area. Perform control direction test. Charge the flight battery. Plan flight for flying field conditions. Install the transmitter batteries. Set a flight timer for 7 minutes. Install the flight battery. Have fun! Charging Warnings The included USB charger has been designed to safely charge •... -
Page 6: Assemble The Aircraft
Assemble the Aircraft 1. Carefully install the main landing gear into the plastic slot on the bottom of the fuselage, just behind the battery compartment. The landing gear wire is fully seated when it snaps into the mount. -
Page 7: Install The Transmitter Batteries
Install the Transmitter Batteries 1. Remove the screw securing the battery compartment cover using the provided Phillips-head screwdriver, and remove the battery hatch from the transmitter. 2. Install four included AA batteries (noting proper polarity). 3. Reinstall the battery cover. Battery Cover Transmitter Layout Aerobatics Button... -
Page 8: Install The Flight Battery And Arm The Aircraft
Install the Flight Battery and Arm the Aircraft CAUTION: Always keep hands away from the propeller. When armed, the motor will turn the propeller in response to any throttle movement. 1. Ensure the transmitter throttle stick is in the lowest position. The motor will not arm if the throttle is not set to the lowest position when powering on the aircraft. -
Page 9: Control Horn Locations And Surface Centering
Control Horn Locations and Surface Centering Control Horn Locations The elevator, rudder, and aileron linkages should be connected to the center hole of the control horns, as shown in the illustrations. Center hole Elevator, viewed from the left Center hole Rudder, viewed from below (Some detail removed for clarity) Center hole... -
Page 10: Control Direction Test
Control Direction Test Test the controls prior to the first flight to ensure none of the Stick Movement Control Surface Reaction servos, linkages or parts were damaged during shipping and handling and the controls function in the correct directions. Ailerons Move the aileron stick to the right. -
Page 11: Before Your First Flight
A spektrum transmitter may be connected to a PC for simulator use with a standard USB-C cable. Featuring six popular Horizon Hobby trainer aircraft and built-in Virtual Flight Instructor lessons, new pilots can learn to fly successfully by... -
Page 12: Transmitter Trims
Transmitter Trims The included transmitter features digital trim buttons next to the control sticks to make fine adjustments during flight. The transmitter beeps when a trim button is pressed. The tone changes slightly when the trim value is centered. To quickly re-center the trims, press both the left and right sticks at the same time. -
Page 13: Sensor Assisted Flight Envelope (Safe) Flight Modes
Sensor Assisted Flight Envelope (SAFE) Flight Modes Activating SAFE Technology You control the help SAFE technology provides while you learn ® to fly. As your flying skills grow, decrease SAFE technology Once the SAFE technology is active, the control surfaces may assistance. - Page 14 SAFE technology is a revolutionary flight training system designed to give you a stable platform for safely developing SAFE Flight Modes your flying skills. This is not an autopilot or self-guiding system. The sensors and software in this system help you fly the aircraft where you want to go while decreasing the risk of an out-of-control crash.
-
Page 15: Safe System Calibration
SAFE System Calibration 1. Place the aircraft on a flat horizontal surface. 2. Lower the throttle stick completely. 3. Power ON the transmitter, then connect the flight battery to the aircraft. 4. Do not move the throttle. 5. Move and hold the transmitter sticks to the position shown in the image until the transmitter beeps. -
Page 16: Repairs
Repairs Repair this aircraft using CA glue or clear tape. NOTICE: Use of CA accelerant on your aircraft can damage paint. DO NOT handle the aircraft until adhesive fully dries. Post Flight Checklist Disconnect the flight battery. Repair or replace all damaged parts. Power OFF the transmitter. -
Page 17: Troubleshooting
Troubleshooting Problem Possible Cause Solution Reset controls with throttle stick and throttle trim at Aircraft will not Throttle stick and/or throttle trim is too high lowest setting respond to throttle but responds to Open fuselage and ensure the plug for the motor is Motor is disconnected from receiver other controls properly installed... -
Page 18: Replacement Parts List
Horizon exceed the individual price of the Product on which liability is asserted. As Horizon has no control over use, Horizon Hobby, LLC, (Horizon) warrants to the original purchaser setup, final assembly, modification or misuse, no liability shall that the product purchased (the “Product”) will be free from... -
Page 19: Warranty And Service Contact Information
United States 2904 Research Rd (Product Technical Assistance) of America 877-504-0233 Champaign, IL 61822 websales@horizonhobby.com Sales 800-338-4639 Horizon Technischer Service service@horizonhobby.eu Hanskampring 9 European Union D 22885 Barsbüttel, Germany Sales: Horizon Hobby GmbH +49 (0) 4121 2655 100 XCub 450mm... -
Page 20: Fcc Information
• Consult the dealer or an experienced radio/TV technician for Operation is subject to the following two conditions: help. (1) This device may not cause harmful interference, Horizon Hobby, LLC and (2) this device must accept any interference received, 2904 Research Rd., including interference that may cause undesired operation. - Page 21 © 2024 Horizon Hobby, LLC HobbyZone, the HobbyZone logo, E-flite, DSM, DSM2, DSMX, and the Horizon Hobby logo are trademarks or registered trademarks of Horizon Hobby, LLC. www.horizonhobby.com Created 03/24 833079 HBZ-1250...
Need help?
Do you have a question about the HobbyZone XCub HBZ-1250 and is the answer not in the manual?
Questions and answers