Table of Contents
Advertisement
Advertisement
Table of Contents

Related Manuals for Horizon Hobby Hobbyzone Mini AeroScout


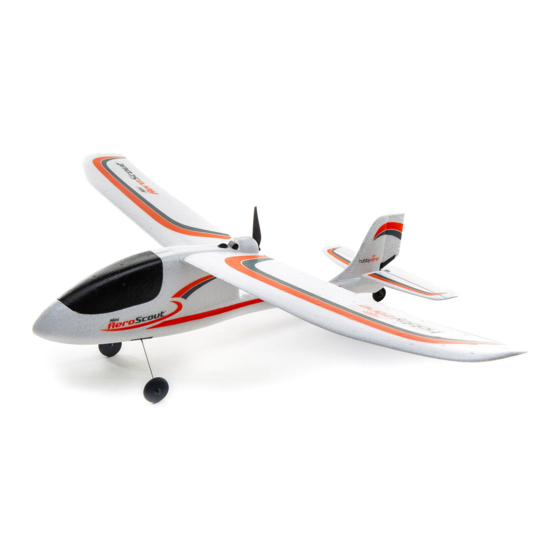
Summary of Contents for Horizon Hobby Hobbyzone Mini AeroScout
- Page 1 Instruction Manual Bedienungsanleitung Manuel d’utilisation Manuale di Istruzioni...
- Page 2 NOTICE All instructions, warranties and other collateral documents are subject to change at the sole discretion of Horizon Hobby, LLC. For up-to-date product literature, visit www.horizonhobby.com or www.towerhobbies.com and click on the support or resources tab for this product. Meaning of Special Language:...
-
Page 3: Table Of Contents
Box Contents Table of Contents Specifi cations ................ 3 Transmitter Dual Rates ............9 Prefl ight Checklist ..............4 Transmitter Trims ..............9 Charging Warnings..............4 Flying ..................9 Charge the Flight Battery ............4 Post Flight Checklist ............10 Assemble the Aircraft ............. -
Page 4: Prefl Ight Checklist
Prefl ight Checklist Find a safe and open area. Perform control direction test. Charge the fl ight battery. Plan fl ight for fl ying fi eld conditions. Assemble the aircraft. Set a fl ight timer for 10 minutes. Install the transmitter batteries. Have fun! Install the fl... -
Page 5: Assemble The Aircraft
Assemble the Aircraft 1. Remove the battery hatch cover from the fuselage by lifting from the rear of the hatch and rotating forward. The hatch is held in place by a foam tab at the front and a magnet at the back. 2. -
Page 6: Install The Transmitter Batteries
Install the Transmitter Batteries 1. Remove the battery cover from the back of the transmitter. 2. Install four included AA batteries (noting proper polarity). 3. Reinstall the battery cover. Battery Cover Transmitter Layout Dual Rate Bind Button Button Throttle Stick Elevator/Rudder Stick Elevator Trim Throttle Trim... -
Page 7: Install The Flight Battery
Install the Flight Battery 1. Apply the soft, loop side of the hook and loop tape to the battery tray inside the fuselage. 2. Apply the hook side to the battery. TIP: Do not cover the battery label information with the hook material. -
Page 8: Control Horn Locations And Surface Centering
Control Horn Locations and Surface Centering Both the elevator and rudder clevises should be in the outer The rudder should be centered with centered trim. If either holes of the control horns, as shown in the illustrations. surface is not positioned correctly, gently open the clevis and pull the pin from the control horn. -
Page 9: Transmitter Dual Rates
When your timer expires, prepare for landing. Set a timer for 10 minutes. Landing TIP: The HobbyZone Mini AeroScout can normally fly 12-15 Always land into the wind. Fly the landing pattern with a minutes on a fully charged flight battery. This time will slightly nose high attitude. -
Page 10: Post Flight Checklist
Repairs Crash damage is not covered under warranty. NOTICE: Use of foam-compatible CA accelerant on your aircraft can damage paint. DO NOT handle the aircraft until Repair this aircraft using foam-compatible CA glue or clear accelerant fully dries. tape. Only use foam-compatible CA glue as other types of glue can damage the foam. -
Page 11: Troubleshooting
Propeller Removal/Replacement WARNING: Always disconnect the fl ight battery from the model before removing the propeller. The propeller is press fi t onto the motor shaft. To remove the propeller: 1. Grasp the propeller at the hub. 2. Gently pull the propeller from the motor shaft. 3. -
Page 12: Parts List
Product(s) involved in a warranty claim. Service or replacement decisions are at the sole discretion of Horizon. Proof of Horizon Hobby, LLC, (Horizon) warrants to the original purchaser purchase is required for all warranty claims. SERVICE OR that the product purchased (the “Product”) will be free from REPLACEMENT AS PROVIDED UNDER THIS WARRANTY IS THE defects in materials and workmanship at the date of purchase. -
Page 13: Warranty And Service Contact Information
United States 2904 Research Rd (Product Technical Assistance) of America 877-504-0233 Champaign, IL 61822 websales@horizonhobby.com Sales 800-338-4639 Horizon Technischer Service service@horizonhobby.eu Hanskampring 9 European Union D 22885 Barsbüttel, Germany Sales: Horizon Hobby GmbH +49 (0) 4121 2655 100 Mini AeroScout... -
Page 14: Fcc Information
EU Compliance Statement: in the European Union HBZ Mini AeroScout (HBZ5700) Horizon Hobby, LLC hereby declares that this This product must not be disposed of with other product is in compliance with the essential waste. Instead, it is the user’s responsibility to... - Page 15 © 2020 Horizon Hobby, LLC HobbyZone, the HobbyZone logo, AeroScout, E-fl ite, DSM, DSM2, DSMX, and the Horizon Hobby logo are trademarks or registered trademarks of Horizon Hobby, LLC. www.horizonhobby.com Created 01/20 61813 HBZ5700...
Need help?
Do you have a question about the Hobbyzone Mini AeroScout and is the answer not in the manual?
Questions and answers