
Related Manuals for Horizon Hobby HobbyZone Carbon Cub S2


Summary of Contents for Horizon Hobby HobbyZone Carbon Cub S2
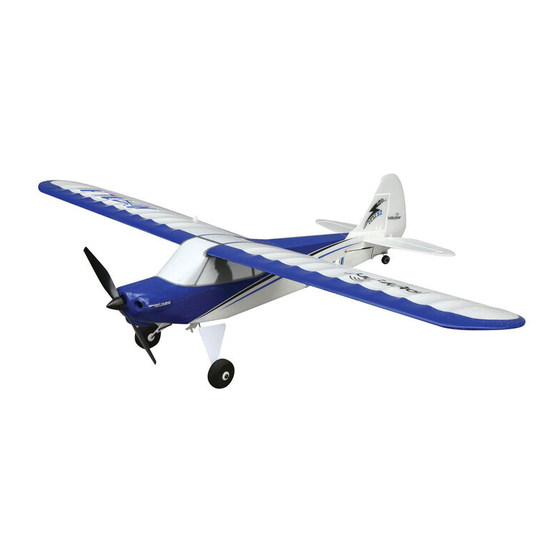
- Page 1 Carbon Cub S2 Instruction Manual • Bedienungsanleitung • Manuel d’utilisation • Manuale di Istruzioni...
- Page 2 Carbon Cub S2 NOTICE All instructions, warranties and other collateral documents are subject to change at the sole discretion of Horizon Hobby, LLC. For up-to-date product literature, visit horizonhobby.com or towerhobbies.com and click on the support or resources tab for this product.
-
Page 3: Table Of Contents
Carbon Cub S2 Box Contents Table of Contents Specifications ....................3 Flying ......................17 Optional Upgrades ..................4 Landing ......................19 From the Box to the Air ................... 4 Installing Optional Flaps ................20 Charge the Flight Battery ................5 PNP Receiver Selection and Installation ............ -
Page 4: Optional Upgrades
Carbon Cub S2 Optional Upgrades (not included) Landing Assist Sensor (LAS) GPS Module When added, the LAS module will work hand-in-hand with the AutoLand When added, advanced SAFE+ features can keep the aircraft within a given feature for a picture perfect landing every time. When the aircraft is on distance to the pilot (Virtual Fence), can return the model to home at the press of approach and approximately 1m from the ground, the LAS module will level a button (Holding Pattern), can return home automatically if the controller signal... -
Page 5: Charge The Flight Battery
Carbon Cub S2 Charge the Flight Battery The recommended battery for the E-flite Carbon Club S2 aircraft, included To charge the included flight battery: with the RTF version, is an 11.1V, 2200mAh 3S 30C Smart Technology 1. Using the supplied Type-C USB cable, connect the S120 charger to a USB LiPo battery with an IC3 connector (SPMX22003S30). -
Page 6: Rtf Transmitter
Carbon Cub S2 Transmitter Installing the Transmitter Batteries Remove the battery cover, install the four included batteries (noting proper polarity) and reinstall the battery cover. Low Battery Alarm The LED indicator flashes and the transmitter beeps pro- gressively faster as the battery voltage drops.Replace the transmitter batteries when the transmitter begins to beep. -
Page 7: Bnf Transmitter Setup
Carbon Cub S2 Transmitter Setup IMPORTANT: The included flight controller has been Computerized Transmitter Setup programmed for operation specifically in this aircraft. The (DX6 Gen2, DX6e,DX7 Gen2, DX8 Gen2, DX9, DX18 and DX20) programming in this flight controller cannot be changed by the user. -
Page 8: Assembly
Carbon Cub S2 Applies only when the optional GPS module is installed IMPORTANT: IF THE OPTIONAL GPS MODULE IS INSTALLED the aircraft will not respond to transmitter commands after binding if it cannot acquire a GPS signal. Binding: After binding with the GPS module installed, the aircraft will search for a GPS lock, indicated by the elevator slowly cycling up and down. After acquiring a GPS lock, all flight controls will respond normally except throttle. - Page 9 Carbon Cub S2 Install the Tail 1. Install the horizontal tail (A) on the fuselage as shown. 2. Carefully insert the 2 pins of the vertical fin (B) through the horizontal tail holes and the fuselage holes. Turn the rudder so the control horn is under the horizontal tail. 3.
- Page 10 Carbon Cub S2 Install the Wing Assembly 1. Install the vortex generators (A) in the wing channels (B) by using double-sided tape (C). 2. Slide the wing tube (D) in the hole in the left wing. 3. Slide the other end of the wing tube into the hole in the right wing until both wings meet.
-
Page 11: Factory Settings For The Control Horns And Servo Arms
Carbon Cub S2 Factory Settings for the Control Horns and Servo Arms The Illustration shows recommended hole settings in the Elevator Ailerons Rudder servo arms and control horns. Flight Control For smooth control of your aircraft, always make small Transmitter command Aircraft Response corrections. -
Page 12: Install The Flight Battery
Carbon Cub S2 Install the Flight Battery Battery Selection • We recommend the E-flite 2200mAh 11.1V 3S 30C ® Li-Po (SPMX22003S30). • If using another battery, the battery must be at least a 2200mAh battery. • The battery should be approximately the same capacity, dimensions and weight as the E-flite Li-Po battery to fit in the fuselage without changing the center of gravity a large amount. -
Page 13: Control Direction Test
If the control surfaces do not respond as shown, DO NOT FLY. Refer to the Troubleshooting Guide for more informa- tion. If you need more assistance, contact the appropriate Horizon Hobby Product Support department. If the aircraft responds as shown, continue on to the Flight Control section. -
Page 14: Range Test
9. If control issues exist, do not attempt to fly. Refer to the contact table at the end of the this manual to contact Horizon Hobby product support. Also, see the Spektrum website for more information. 10. When the range check is successfully completed, release the bind button to exit range check mode. -
Page 15: Compass Calibration Procedure
Carbon Cub S2 Compass Calibration Procedure Perform the compass calibration before the first flight or to correct the heading during auto landing if it varies significantly from the heading set during takeoff. 1. Remove the propeller if it is installed or activate throttle cut. -
Page 16: Install The Propeller
Carbon Cub S2 Install the Propeller WARNING: Do not install the propeller until the aircraft has been completely assembled, all systems have been checked thoroughly and you are located at a suitable flying site. Follow the instructions below to install the propeller and spinner: 1. -
Page 17: Flying
Carbon Cub S2 Manually Adjusting Trim WARNING: Do not perform any maintenance with the propeller installed on the aircraft. Serious injury or property damage could result from the motor starting inadvertently. The SAFE flight mode switch should be set to Experienced mode (position 2) before manually adjusting the trim settings. - Page 18 Carbon Cub S2 Takeoff Wind Set the flight mode switch to Beginner Mode (position 0) for your first flights. Slowly advance Set a flight timer for 6–8 minutes. the throttle stick. Ground Launch Once you have established a home position and the aircraft is ready for flight, slowly advance the throttle to start the takeoff roll into the wind.
-
Page 19: Landing
Carbon Cub S2 Landing Landing Manually If it is necessary to land the aircraft manually: 1. Reduce the throttle to around 50% to slow the airspeed. 2. Fly the aircraft downwind past the end of the runway. 3. Turn the aircraft into the wind and line the aircraft up with the runway center line. -
Page 20: Installing Optional Flaps
Carbon Cub S2 Installing Optional Flaps IMPORTANT: The optional flaps for this aircraft require a Fig. 1 computer transmitter with at least 7 channels*. The RTF DXS transmitter is not compatible with the optional flaps. The optional flaps should be installed before installing the wing. 1. -
Page 21: Flying With The Optional Float Set
Carbon Cub S2 Flying With the Optional Float Set (HBZ7390) To fly this aircraft off water, install the optional HobbyZone Float Set (HBZ7390, sold separately). Float ® Aileron struts, strut brackets and 4 screws are included with the aircraft. Rear bracket screws are included with the floats. Follow the instructions included with the optional float set to install them to the aircraft. -
Page 22: Service And Repairs
Carbon Cub S2 Service and Repairs WARNING: Do not perform this or any other equipment maintenance with the propeller installed on the aircraft. Serious injury or property damage could result from the motor starting inadvertently. NOTICE: Crash damage is not covered under warranty. NOTICE: After any impact or replacement always ensure the flight controller/GPS module is secure in the fuselage. -
Page 23: Optional Landing Assist Sensor (Las) Upgrade
Carbon Cub S2 Optional Landing Assist Sensor (LAS) Upgrade The Carbon Cub S2 is upgradable with the addition of the optional LAS module (SPMA3180 not included) this allows the advanced SAFE features to be combined with an Landing Assist Sensor (LAS) for smoother gentler landings. -
Page 24: Optional Safe+ Gps Upgrade
Carbon Cub S2 Optional SAFE + GPS Upgrade 1. Charge the flight battery. From the Box to the Air 2. Set up your transmitter (BNF only). Adding the SAFE+ GPS Module 3. Install the GPS module.* 4. Find a safe and open area. The Carbon Cub S2 flight controler includes SAFE technology out of the box. - Page 25 Carbon Cub S2 Compass Calibration Compass calibration might be required after installing the GPS module, before flight. The aircraft will automatically enter compass calibration on the first power up after the GPS module is installed, after binding. IMPORTANT: The aircraft must be outside and needs to acquire a GPS lock in order to begin compass calibration.
- Page 26 Carbon Cub S2 Powering ON, GPS Initialization and Establishing Home Location Airfield Virtual Fence: CAUTION: Keep aircraft away from magnetic sources such as cameras, camera mounts, speakers etc. These may interfere with Set the home location the GPS system and loss of control may result. and aircraft heading 1.
- Page 27 Carbon Cub S2 Flight Modes Beginner, Intermediate and Experienced modes still operate the same with SAFE+ as they did with SAFE. With SAFE+, The Holding Pattern (HP) and AutoLand (AL) modes may be used as well. HP/AL button Holding Pattern and AutoLand Trigger Holding Pattern: Press and release the HP/AL (Bind) button.
- Page 28 Carbon Cub S2 Virtual Fence Mode and GPS Virtual Fence Mode Transmitter Stick Position Virtual Fence OFF CAUTION: Keep aircraft away from magnetic sources such as • Low throttle cameras, camera mounts, speakers etc. These may interfere with • Full right aileron the GPS system and loss of control may result.
- Page 29 Carbon Cub S2 Holding Pattern (HP) Mode Holding Pattern Mode If at anytime the aircraft seems too far away, press and release the HP/AL (bind) button on the transmitter. The aircraft will maneuver to an altitude of approximately 120 feet (36m) and begin to fly a circular pattern over the home location.
- Page 30 Carbon Cub S2 AutoLand Mode Hold for 3 sec. to activate To activate AutoLand mode, press and hold the HP/AL AutoLand mode (bind) button for 3 seconds. The aircraft will immediately turn to align itself for an upwind approach and maneuver to an altitude of approximately 65 ft (20m) and 295 ft (90m) downwind from the takeoff point.
- Page 31 Carbon Cub S2 Deactivating GPS Deactivating GPS in the Air The GPS system is activated when the aircraft is powered ON. If for any reason you wish to deactivate the GPS system, such as to perform a control If for any reason you wish to deactivate the GPS system while the aircraft direction test indoors or to simply enjoy the aircraft without GPS features, is airborne, such as if the GPS system is not calibrated correctly or is not follow the directions below:...
-
Page 32: As3X System Troubleshooting Guide
Carbon Cub S2 AS3X System Troubleshooting Guide ® Problem Possible Cause Solution Trim is not at neutral To adjust the trim more than 8 clicks, return the trim to neutral and manually adjust the clevis to center the trim Trim change when flight mode is Sub-Trim is not at neutral Do not use Sub-Trim. -
Page 33: Ama National Model Aircraft Safety Code
Carbon Cub S2 AMA National Model Aircraft Safety Code Effective January 1, 2014 A. GENERAL B. RADIO CONTROL A model aircraft is a non-human-carrying aircraft capable of sustained flight 1. All pilots shall avoid flying directly over unprotected people, vessels, in the atmosphere. -
Page 34: Limited Warranty
Product, (iv) attempted service by using a shipping carton. Please note that original boxes may be included, anyone other than a Horizon Hobby authorized service center, (v) Product not but are not designed to withstand the rigors of shipping without additional purchased from an authorized Horizon dealer, or (vi) Product not compliant with protection. -
Page 35: Contact Information
Carbon Cub S2 BNF Basic (HBZ32500) EU Compliance Statement: Horizon Hobby, LLC hereby declares EU Compliance Statement: Horizon Hobby, LLC hereby declares that this that this product is in compliance with the essential requirements product is in compliance with the essential requirements and other relevant and other relevant provisions of the RED, EMC, and LVD Directives. - Page 36 Carbon Cub S2 Replacement Parts • Ersatzteile • Pièces de rechange • Pezzi di ricambio Part # | Nummer Description Beschreibung Description Descrizione Numéro | Codice Régulateur de vitesse électronique 30A SMART ESC 30A SMART Geschwindigkeitsregler Regolatore elettronico SMART 30A SMART 30A Servocomando SV80 con cavo corto SV80 Short Lead 3-Wire Servo...
- Page 37 HobbyZone, the HobbyZone logo, E-flite, SAFE, the SAFE logo, Z-Foam, DSM, DSM2, DSMX, EC3, Bind-N-Fly, the BNF logo, and the Horizon Hobby logo are trademarks or registered trademarks of Horizon Hobby, LLC. The Spektrum trademark is used with permission of Bachmann Industries, Inc.
Need help?
Do you have a question about the HobbyZone Carbon Cub S2 and is the answer not in the manual?
Questions and answers