FLOS SUPERARCHIMOON Manual
Hide thumbs
Also See for SUPERARCHIMOON:
- Instruction for correct installation and use (13 pages) ,
- Instruction for correct installation and use (9 pages)

Related Manuals for FLOS SUPERARCHIMOON


Summary of Contents for FLOS SUPERARCHIMOON
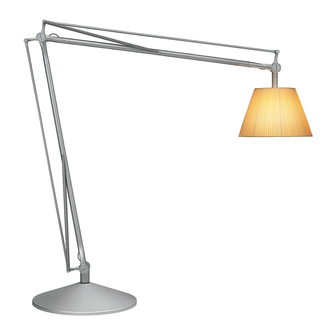
- Page 1 SUPERARCHIMOON DESIGN BY PHILIPPE STARCK 18185 ISTR.MONT.SUPERARCHIMOON_DM EUR.indd 1 20/06/2016 10:43:29...
- Page 2 -Should the external trailing cable get damaged,it must - Se il cavo flessibile si danneggia, deve essere sostituito da be replaced by FLOS or by qualified personnel in order FLOS o da personale qualificato al fine di evitare pericoli. to avoid any danger.
- Page 3 Veraenderung desselben kann die manière que ce soit, toute modification peut compromettre Sicherheit in Frage stellen und somit gefaehrlich werden. la sécurité de celui-ci en le rendant dangereux. FLOS décline FLOS lehnt jede Verantwortung fuer unsachgemaess toute responsabilité pour les produits modifiés.
- Page 4 - Se o cabo flexível está danificado, deve ser substituído - Si el cable externo se estropea, debe ser sustituido pela FLOS ou por pessoal qualificado para evitar qualquer por FLOS o por personal cualificado con el fin de evitar perigo. situaciones peligrosas.
-
Page 5: Технические Данные
с устройством, убедиться в снятии напряжения питания. - Устройство не может изменяться или разбираться, любые изменения могут нарушить надёжность, делая его опасным. FLOS не несёт ответственность за измененную продукцию. приведённое на устройстве, - Обозначение указывает на необходимость использования самозащищаемых лампочек. - Page 6 CORPO DIFFUSORE STRUCTURE DIFFUSER KÖRPER DIFFUSOR CORPS DIFFUSEUR CUERPO DIFUSOR DO CORPO DIFUSOR КОРПУС ДИФФУЗОР Fig. 1 BASE ZAVORRA (Nr. 3) BASE BALLAST (Nr. 3) BASIS BALLAST (Nr. 3) BASE LEST (Nr. 3) BASE LASTRE (Nr. 3) BASE DO REATOR (Nr. 3) ОСНОВАНИЕ...
- Page 7 Fig. 2 Fig. 3 Fig.2 Avvitare a fondo i piedini (F) nella base (B). Fig.3 Posizionare accuratamente la base (B) con il lato “FRONT” <IT> nella direzione di lavoro della lampada. <GB> Fig.2 Screw completely the feet (F) in the base (B). Fig.3 Carefully position the base (B) with the “FRONT”...
- Page 8 Fig. 4 Fig. 5 Fig.4 Avvitare e svitare i piedini per ottenere l’esatta planarità della base. Una volta effettuata la regolazione, <IT> bloccare i piedini serrando il controdado (N). Fig.5 Fissare le zavorre (T) con le viti (A). <GB> Fig.4 Screw and unscrew the feet until you get the right levelness of the base.
- Page 9 Fig. 6 <IT> Fig.6 Montare la copertura (E) sulla base avendo cura di far passare il cavo di alimentazione (W) dal foro centrale della copertura stessa; connettere lo spinotto (G) del cavo al connettore (H) della struttura. <GB> Fig.6 Mount the cover (E) on the base taking care to pass the power supply cable (W) through the central hole of the same cover;...
- Page 10 Fig. 7 Fig. 8 CLAC Introdurre la struttura (S) fino a fondo corsa. Rimuovere la fettuccia di sicurezza. Fig.8 Avvitare la Fig.7 <IT> lampada (L). Insert the structure (S) right to the end stroke. Remove the safety band. Fig.8 Screw on the lamp (L). <GB>...
- Page 11 Fig.9 Fig.10 <IT> Avvitare il diffusore (D). Fig.9 Fig.10 Per regolare la posizione dell’apparecchio utilizzare il braccio superiore; evitare di movimentare l’apparecchio prendendolo dal diffusore. Screw on the diffuser (D). <GB> Fig.9 Fig. 10 Use the upper arm to adjust the position of the device. Do not move the device by holding it by the diffuser.
- Page 12 18185 ISTR.MONT.SUPERARCHIMOON_DM EUR.indd 12 20/06/2016 10:43:34...
Need help?
Do you have a question about the SUPERARCHIMOON and is the answer not in the manual?
Questions and answers