
Related Manuals for Genevac miVac


Summary of Contents for Genevac miVac
- Page 1 Issue 2-1 – October 2008 Part Number 04-6001...
-
Page 3: Table Of Contents
These instructions are subject to change without notice. No part of these instructions may be reproduced in any form or be processed, duplicated or distributed by electronic or optical means without the written permission of Genevac Limited. All rights reserved. © Genevac Limited. 04-6001 Issue 2-1 October 2008... -
Page 4: Intoduction
Use the miVac Pressure Controller User Manual in conjunction with the miVac Modular Concentrator Series User Manual. It is advisable to keep these manuals near the place of use so they are available to personnel when required. -
Page 5: Safety And Maintenance Notes
Any repair of this product should be carried out by Genevac personnel (or approved representatives of Genevac) using only approved Genevac spare parts. Limitations of use Your miVac Pressure Controller is unsuitable for use with strong acids such as HCl, TFA and HBr at all concentrations. 04-6001 Issue 2-1 October 2008... -
Page 6: Installation
Installation Upon Delivery Please unpack your system at the point of receipt. Check the contents of the delivery as soon as possible against the delivery note. Notify your miVac Distributor immediately of any missing or damaged parts. Installation Overview Follow the step by step instructions on the following page to install the pressure controller. The illustration below shows a typical installation of a miVac concentrator, speedTrap, pressure controller and pump. -
Page 7: Parts Of The Pressure Controller Connection Kit
Electrical Cable Installing the Pressure Controller If connecting the pressure controller to an existing miVac concentrator system, first remove the 1/2” hose that connects the pump to the speedTrap. Then proceed as follows. Connect a 1/2” hose (55mm long) to a 3/8” hose (1m long) using a 1/2”- 3/8” reducer. Seal the connections using a 33mm and 25mm hose clip. -
Page 8: General
April 2007. The date of manufacture is shown on the instrument’s serial plate. miVac Systems and Combustible Solvents Please note it remains the responsibility of the user to consider safety when evaporating any combustible solvents and to ensure the system is placed in a well-ventilated environment. -
Page 9: Operation
There is a short initialising routine, during which a beep sounds and all light elements light up briefly to confirm operation. Switch on the miVac Modular Concentrator and set the run type to “---” (no venting) see the miVac Modular Concentrator User Manual for details. The operation of the pressure controller may be erratic if alternative concentrator methods H2O (water) or –OH (alchohols) are selected. -
Page 10: Operating Modes Of The Pressure Controller: An Overview
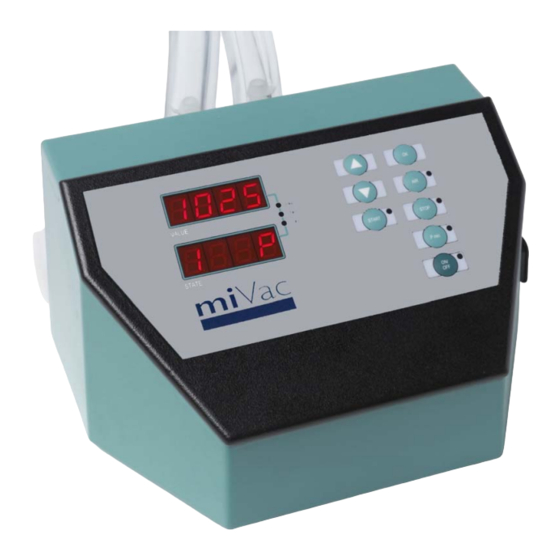
Pressure Controller Operating Modes of the Pressure Controller: an Overview Set the miVac concentrator run type to “---“ (no venting) before operating the miVac system with the pressure controller. One of four operating modes may be selected on the miVac Pressure Controller. Enter control parameter settings for each operating mode to set up optimum vacuum control profiles for specific applications. -
Page 11: Activating / Deactivating The Selected Operating Mode
Press either the the Manual start key or the Auto start key on the miVac concentrator. Wait for the pump to start, then press the START key on the pressure controller. A dash symbol appears in the second position of the STATE display to confirm the system is operating in the displayed mode. -
Page 12: Control Parameters
Threshold value for detecting the boiling Point in Automatic mode Modes 5, 6 Time setting Time for the pressure reduction to PL (pressure Lowered) Modes 2, 6 Not relevant for miVac application Modes 1, 2, 5, 6 Pressure sensor calibration Calibration point at normal pressure (High) Set this last Calibration point at Low pressure (at lowest possible pressure, e.g. -
Page 13: Changing The Control Parameters
Pressure Controller Changing the Control Parameters The Pressure Controller must be inactive to allow access to the control parameter settings. Press the STOP key to deactivate the pressure controller. Select the required operating mode. See Selecting the Operating Mode for details. -
Page 14: Changing The Pressure Set Point During Operation
Take no action. The set point reverts to the previously set value when the STOP key is pressed. Additional Information The miVac Pressure Controller is not compatible for use with the H2O (water) and –OH (alchohols) run type settings of the miVac concentrator. This is because the concentrator controls the system vacuum using a timed pump venting sequence when these run types are selected. -
Page 15: Operating Modes Of The Pressure Controller: In Detail
Reset the control parameters (if required) using the procedure Changing the Control Parameters on page 11. Press a miVac concentrator START key. Wait until the vacuum pump starts before proceeding. Press the START key on the pressure controller to operate the mode. -
Page 16: Mode 2
Reset the control parameters (if required) using the procedure Changing the Control Parameters on page 11. Press a miVac concentrator START key. Wait until the vacuum pump starts before proceeding. Press the START key on the pressure controller to operate the mode. -
Page 17: Mode 5
Reset the control parameters (if required) using the procedure Changing the Control Parameters on page 11. Press a miVac concentrator START key. Wait until the vacuum pump starts before proceeding. Press the START key on the pressure controller to operate the mode. -
Page 18: Mode 6
Reset the control parameters (if required) using the procedure Changing the Control Parameters on page 11. Press a miVac concentrator START key. Wait until the vacuum pump starts before proceeding. Press the START key on the pressure controller to operate the mode. -
Page 19: Calibration
Recalibrate the pressure controller every six months to compensate for any drift in the pressure sensor output signal. Recalibrate also if the pressure shown on the display is implausible. Connect a comparison measurement device (a vacuum gauge) to a vacuum pipe of the miVac system via a T piece. -
Page 20: Technical Data
Pressure Controller Technical Data Sensor Integrated Sensor type Ceramic Measuring Range 1-1100mbar Measuring uncertainty ±2; FSmbar Controller Sensor interface Conductor interface Scan frequency 10Hz Resolution ADC 12Hz Power Supply +5V stabilised Sensor signal 0.5 to 4.5V (optimally also 0..5V or 4..20mA) -
Page 21: Ec Declaration Of Conformity
Pressure Controller EC Declaration of Conformity The miVac Pressure Controller conform to the following directives: 73/23/EU Low Voltage Directive 98/37/EU Machinery Directive 89/336/EU Electromagnetic Compatibility Directive The miVac Pressure Controller fulfils the following product standards: BS EN 61010-1 Safety requirements for electrical equipment for measurement, control, or laboratory use. - Page 22 Pressure Controller Notes Page 20 of 22 04-6001 Issue 2-1 October 2008...
- Page 23 Pressure Controller Notes 04-6001 Issue 2-1 October 2008 Page 21 of 22...
-
Page 24: Warranty Statement
Disposal and Recycling Fax (1) 845 267 2212 Email: salesinfo@genevacusa.com ___________________________________ The miVac product should not be discarded in your regular disposal stream. Contact your For main Distributor listing, visit: Distributor or Genevac for proper disposal instructions. Within the EU, it is Genevac’s responsibility www.mivac.co.uk/contact/distributors.html...
Need help?
Do you have a question about the miVac and is the answer not in the manual?
Questions and answers