
Related Manuals for Genevac EZ-2plus


Summary of Contents for Genevac EZ-2plus
- Page 1 Issue 1-6 –October 2008 Part Number 04-5359...
-
Page 3: Amendment Control Form
General Information This manual has been produced to assist in the daily running and routine maintenance of the Genevac Evaporator. Amendment Control Form Only the affected pages and the Front Page will display the Revision Number all others will stay at initial issue. -
Page 5: Table Of Contents
INTRODUCTION SAFETY AND MAINTENANCE NOTES 2.1 Symbols 2.2 Safety 2.3 Collection jar – fitting and removing 2.4 Cleaning 2.5 Genevac Evaporators and Combustible Solvents 2.6 Safe loading of rotor 2.7 Lid operation 2.8 Limitations of use SECTION 1 GENERAL Chapter 1 UNPACKING AND SETTING UP Flight Case. -
Page 6: Introduction
Genevac EZ-2 Series Personal Evaporator – User Manual SECTION 3 MAINTENANCE Chapter 1 Software Introduction Safety and Maintenance Notes Special tools and equipment Preparation Uploading Testing Errors Completion Chapter 2 Drive Belt Introduction Safety and Maintenance Notes Special tools and equipment... - Page 7 Genevac EZ-2 Series Personal Evaporator – User Manual Chapter 7 Pump Introduction Safety and Maintenance Notes Special tools and equipment Removal Refitting Testing Completion Chapter 8 Pump Head Components Introduction Safety and Maintenance Notes Special tools and equipment Removal Refitting...
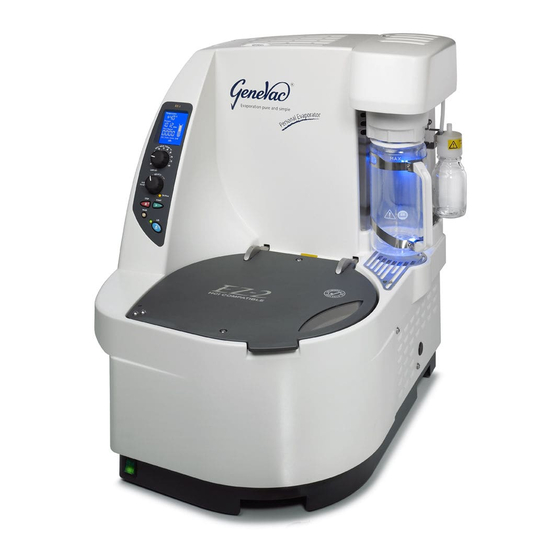
- Page 8 Genevac EZ-2 Series Personal Evaporator – User Manual Introduction Using the most advanced proven technology in evaporation science, the EZ-2 Series has been designed specifically for solvent removal in life science research, be that concentration of samples or complete drying. Genevac’s fifteen years of experience in vacuum engineering has resulted in the creation of a compact sample concentrator combining great performance, ease of use greater than a rotary evaporator and compatibility with all commonly used solvents and acids.
- Page 9 Fig 2 - EZ-2 Control Panel Compared with a typical rotary evaporator, the EZ-2 Series can process many more samples per unit time. Simply select the solvent type and the maximum allowable sample temperature. Smart evaporation software in the EZ-2 Series does the rest for you; setting the vacuum conditions and gradient, whilst controlling the heater lamp and automatically stopping the run once the samples are dry.
-
Page 10: 2.1 Symbols
Genevac EZ-2 Series Personal Evaporator – User Manual Safety and Maintenance Notes 2.1 Symbols The following safety symbols are used throughout this manual and can be found on the equipment. The definitions and scope of each symbol is as described below. -
Page 11: 2.3 Collection Jar - Fitting And Removing
Please note it remains the responsibility of the user to consider safety when evaporating any combustible solvents and ensure the system is placed in a well ventilated environment. Genevac's position regarding evaporation of such solvents, particularly with respect to the European ATEX directive, is available on our website or from your local sales representative. -
Page 12: 2.6 Safe Loading Of Rotor
Do not use worn or scratched tubes or vials. Do not load tubes or vials into sample holders other than those types that have been approved by Genevac Ltd. Do not use sample holders that have not been supplied with this system without consulting Genevac Service. - Page 14 Genevac EZ-2 Series Personal Evaporator – User Manual SECTION 1 GENERAL Chapter 1 UNPACKING AND SETTING UP ......................Chapter 2 QUICK START............................Chapter 3 DETAILED OPERATION ........................04-5359 Issue 2 – July 2006 Section 1...
- Page 15 Genevac EZ-2 Series Personal Evaporator – User Manual Chapter 1 UNPACKING AND SETTING UP 04-5359 Issue 1-6 –October 2008 Section 1 Chapter 1 - Page 1...
- Page 17 Genevac EZ-2 Series Personal Evaporator – User Manual Flight Case. Undo 4 quick release fasteners. Carefully remove lid. Refer to photographs on Pages 2 to 4 inclusive of this Chapter for aditional guidance. Position base and EZ-2 near to operating bench / location.
- Page 18 Genevac EZ-2 Series Personal Evaporator – User Manual Consumer Packaging Before signing for package or before opening case, check for damage. (If there is, contact Genevac service): UK Service: +44 (0) 1473 243000 USA Service: (1) 845-267-2211 Remove clips that retain the lid, and remove lid.
- Page 19 Genevac EZ-2 Series Personal Evaporator – User Manual Ensure that there is 50mm clearance from edge of bench and other equipment. (The system can be easily moved by placing paper or similar under feet. If this is employed, ensure all traces are removed on completion.)
- Page 20 Genevac EZ-2 Series Personal Evaporator – User Manual Fit Condenser Jar. DURING ITEM 12. THE EXHAUST HOSE MUST BE FITTED; THIS HOSE MUST THEN BE DUCTED TO A SUITABLE EXTRACTION UNIT/AREA OR A FUME HOOD. Connect the long exhaust hose (supplied) and duct into fume hood. This is particularly important if HCl or other acids are being used.
- Page 21 Genevac EZ-2 Series Personal Evaporator – User Manual Chapter 2 QUICK START 04-5359 Issue 1.6 – October July 2008 Section 1...
- Page 23 Genevac EZ-2 Series Personal Evaporator – User Manual 3 10 Empty Condenser Jar. Close lid. Switch ON. Set Max temperature as you would on a rotary evaporator. Press and wait for 90 second safety countdown. Select solvent type (see Quick Reference).
- Page 24 HCl. Set the Solvent Group Selector to Aqueous and press Evaporation of Di-ethyl ether Genevac supply an optional inert gas purge system, this is mandatory if Di-ethyl ether is to be evaporated safely. &...
- Page 25 Genevac EZ-2 Series Personal Evaporator – User Manual If an error occurs during a run then one of 2 things will happen: The run will be terminated. This means that the EZ-2 has detected a failure in something that may have an effect on:...
- Page 27 Genevac EZ-2 Series Personal Evaporator – User Manual Chapter 3 DETAILED OPERATION 04-5359 Issue 1.6 – October 2008 Section 1...
- Page 29 SOLVENT LIMITATIONS Evaporation of Acid Chlorides The solvent compatibility of your EZ-2 Series evaporator is indicated on the lid. If ‘NOT HCl COMPATIBLE VERSION’ is indicated then do not attempt to evaporate this class of solvent in your system. If ‘HCl COMPATIBLE’...
- Page 30 Genevac EZ-2 Series Personal Evaporator – User Manual plus Solvent Group Guide – EZ-2 & EZ-2 (Complete) Solvent Abbreviation Group Acetic acid HOAc, EtOOH (ethanoic acid) LOW BP/MEDIUM BP Acetonitrile LOW BP Ammonia LOW BP/MEDIUM BP Dimethylamine LOW BP N,N-Dimethylformamide...
- Page 31 Genevac EZ-2 Series Personal Evaporator – User Manual Power Up The LCD (See Display) is made up of 110 segments and when the system is switched ON, it will illuminate for 1 second so that the you have time to observe that there are no segments missing. The display will then clear and display “Sys Test”...
- Page 32 Genevac EZ-2 Series Personal Evaporator – User Manual Refer to Page vi Paragraph 2 Safety and Maintenance Notes. To open the lid press LID button – then open the lid. The lid remains unlocked for 10 seconds once the LCD indicates 'OPn Lid'.
- Page 33 Genevac EZ-2 Series Personal Evaporator – User Manual Changing the Run You are able to change the run type at any time, even during a run. The system will automatically re-program the system to the new settings. The new run is only accepted after a 3 second ‘thinking time’, incase you change your mind and re-select the original run.
- Page 34 Genevac EZ-2 Series Personal Evaporator – User Manual During a run Elapsed time will be incrementing as the run progresses (HH:MM). The run progress indicator (Test tube) will show that the run is in progress by repeatedly lighting the ‘solvent vapour’ icon.
- Page 35 Genevac EZ-2 Series Personal Evaporator – User Manual Stopping a Run This can be manual or automatic: Manual: Press the Stop button while in the run. The system will vent and then the rotor will be brought to a halt.
- Page 36 Inert purge gases The system is suitable for use with either nitrogen or argon, which should be dry. Consult Genevac Service if you intend to use an alternative inert gas. 04-5359 Issue 1-6 –October 2008 Section 1 Chapter 3 - Page 8...
- Page 38 Genevac EZ-2 Series Personal Evaporator – User Manual SECTION 2 FAULT FINDING / DIAGNOSTICS Safety Interlocks and Errors Audible Warnings User Vacuum test Trouble shooting 04-5359 Issue 1-6 – October 2008 Section 2...
- Page 40 Genevac EZ-2 Series Personal Evaporator – User Manual Safety Interlocks and Errors If an error occurs during a run then one of 2 things will happen: The run will be terminated. This means that the EZ-2 has detected a failure in something that may have an effect on:...
- Page 41 Genevac EZ-2 Series Personal Evaporator – User Manual Audible Warnings Critical Error / User Warning Audible warning format Shutdown Errors Series of 4 long beeps as run ends Repeats every 5 minutes until any user interaction (Button pressed, Run select switch moved, Lid opened)
- Page 43 Genevac EZ-2 Series Personal Evaporator – User Manual Other Troubleshooting (Continued) SYMPTOM CAUSE ACTION Lid glass is loose. The lid is designed so that This is correct an no action is required. the glass ‘floats’ this makes it feel loose.
-
Page 44: Maintenance
Genevac EZ-2 Series Personal Evaporator – User Manual SECTION 3 MAINTENANCE Chapter 1 Software Chapter 2 Drive Belt Chapter 3 Fuses Chapter 4 Lamp Unit Chapter 5 Lamp Glass Assembly Chapter 6 Lid Seal Chapter 7 Pump Chapter 8 Pump Head Components To request your spares and consumables online, click on the link below or copy and paste it into your browser. -
Page 46: Chapter 1 Software
Genevac EZ-2 Series Personal Evaporator – User Manual Chapter 1 Software 04-5359 Issue 1-6 – October 2008 Section 3... -
Page 47: Special Tools And Equipment
Machine and Software requirements ANY MAINTENANCE OR REPAIR OF THIS PRODUCT NOT DETAILED IN THIS MANUAL SHALL BE CARRIED OUT BY GENEVAC PERSONNEL (OR APPROVED REPRESENTATIVES OF GENEVAC) USING ONLY APPROVED SPARE PARTS. OBSERVE PRECAUTIONS, ELECTROSTATIC SENSITIVE DEVICES. 04-5359 Issue 1-6 –October 2008... -
Page 48: Preparation
Genevac EZ-2 Series Personal Evaporator – User Manual Preparation Ensure that evaporator is switched OFF. Remove blanking cap from connector on evaporator. Plug software “Data Key” into connector. Uploading Switch on evaporator. The evaporator will automatically load software. The existing code has to be deleted first. The display will show ‘ErS bLc n’ where n is the block number. -
Page 50: Chapter 2 Drive Belt
Genevac EZ-2 Series Personal Evaporator – User Manual Chapter 2 Drive Belt 04-5359 Issue 1-6 – October 2008 Section 3... -
Page 51: Introduction
ENSURE THAT EVAPORATOR IS ISOLATED FROM MAINS POWER SUPPLY. ANY MAINTENANCE OR REPAIR OF THIS PRODUCT NOT DETAILED IN THIS MANUAL SHALL BE CARRIED OUT BY GENEVAC PERSONNEL (OR APPROVED REPRESENTATIVES OF GENEVAC) USING ONLY APPROVED SPARE PARTS. 04-5359 Issue 1-6 –October 2008... -
Page 52: Removal
Genevac EZ-2 Series Personal Evaporator – User Manual Removal Remove ALL samples, sample holders and swings from evaporator. Remove condenser jar, catchpot and drip plate. Ensure that the lid is closed and locked. Failure to do so could result in damage to the system when placing evaporator on its back/side. -
Page 53: Refitting
Genevac EZ-2 Series Personal Evaporator – User Manual 4.16 If belt tension cannot be achieved replace belt as detailed in items 4.18 to 4.21 inclusive. 4.17 If belt is broken remove belt and check condition of drive pulleys. 4.18 Loosen the 4 drive motor securing screws (maximum 3 turns). -
Page 54: Chapter 3 Fuses
Genevac EZ-2 Series Personal Evaporator – User Manual Chapter 3 Fuses 04-5359 Issue 1-6 – October 2008 Section 3... -
Page 55: Introduction
ENSURE THAT EVAPORATOR IS ISOLATED FROM MAINS POWER SUPPLY. ANY MAINTENANCE OR REPAIR OF THIS PRODUCT NOT DETAILED IN THIS MANUAL SHALL BE CARRIED OUT BY GENEVAC PERSONNEL (OR APPROVED REPRESENTATIVES OF GENEVAC) USING ONLY APPROVED SPARE PARTS. 04-5359 Issue 1-6 – October 2008... -
Page 56: Removal
Re apply mains power. Completion Dispose of defective fuses. If a fuse blows more than once, please contact Genevac Service Department. To ensure uninterrupted service always ensure a spare fuse is available. 04-5359 Issue 1-6 – October 2008 Section 3, Chapter 3 – Page 2... -
Page 57: Chapter 4 Lamp Unit
Genevac EZ-2 Series Personal Evaporator – User Manual Chapter 4 Lamp Unit 04-5359 Issue 1-6 – October 2008 Section 3... -
Page 59: Introduction
ENSURE THAT EVAPORATOR IS ISOLATED FROM MAINS POWER SUPPLY. ANY MAINTENANCE OR REPAIR OF THIS PRODUCT NOT DETAILED IN THIS MANUAL SHALL BE CARRIED OUT BY GENEVAC PERSONNEL (OR APPROVED REPRESENTATIVES OF GENEVAC) USING ONLY APPROVED SPARE PARTS. THIS SYMBOL MEANS THAT YOU SHOULD NOT TOUCH SURFACES IN THESE AREAS. -
Page 60: Removal
Genevac EZ-2 Series Personal Evaporator – User Manual Removal Open lid. LAMP UNIT MAY BE HOT! Allow lamp to cool if system used recently. Disconnect mains power supply. Using allen key remove the 3 securing screws from lamp access panel (located on the right hand side, viewed from the front). -
Page 61: Refitting
Genevac EZ-2 Series Personal Evaporator – User Manual Disconnect lamp power lead from lamp unit by pulling gently on ceramic holder (not leads). PULL GENTLY TO DISCONNECT SLIDE SIDEWAYS OUT OF CLIPS Carefully withdraw lamp unit from clip assembly by sliding sideways. -
Page 63: Chapter 5 Lamp Glass Assembly
Genevac EZ-2 Series Personal Evaporator – User Manual Chapter 5 Lamp Glass Assembly 04-5359 Issue 1-6 – October 2008 Section 3... -
Page 65: Introduction
ENSURE THAT EVAPORATOR IS ISOLATED FROM MAINS POWER SUPPLY. ANY MAINTENANCE OR REPAIR OF THIS PRODUCT NOT DETAILED IN THIS MANUAL SHALL BE CARRIED OUT BY GENEVAC PERSONNEL (OR APPROVED REPRESENTATIVES OF GENEVAC) USING ONLY APPROVED SPARE PARTS. THIS SYMBOL MEANS THAT YOU SHOULD NOT TOUCH SURFACES IN THESE AREAS. -
Page 66: Removal
Genevac EZ-2 Series Personal Evaporator – User Manual Removal Remove Lamp as detailed in Chapter 4. LAMP GLASS ASSEMBLY MAY BE HOT! Allow assembly to cool if system used recently. Using allen key remove lamp assembly securing screw. SECURING SCREW Remove lamp assembly. -
Page 67: Testing
Genevac EZ-2 Series Personal Evaporator – User Manual Testing For an EZ-2, select AQUEOUS. For an EZ-2plus, select Medium Boiling Point. For an EZ-Bio, select H2O. Set temperature to 60ºC Press START button. Ensure that pressure drops to below 500 mbar and continues to drop. -
Page 68: Chapter 6 Lid Seal
Genevac EZ-2 Series Personal Evaporator – User Manual Chapter 6 Lid Seal 04-5359 Issue 1-6 – October 2008 Section 3... -
Page 69: Introduction
04-5094/S ANY MAINTENANCE OR REPAIR OF THIS PRODUCT NOT DETAILED IN THIS MANUAL SHALL BE CARRIED OUT BY GENEVAC PERSONNEL (OR APPROVED REPRESENTATIVES OF GENEVAC) USING ONLY APPROVED SPARE PARTS. Traces of solvents may be present that could be harmful to your health or lead to material damage. -
Page 70: Removal
Genevac EZ-2 Series Personal Evaporator – User Manual Removal Switch evaporator ON. Press LID OPEN button. Open lid. Check for traces of solvent on seal and wipe clean before removing seal. The seal material may absorb significant quantities of some solvents. - Page 72 Genevac EZ-2 Series Personal Evaporator – User Manual Chapter 7 Pump 04-5359 Issue 1-6 – October 2008 Section 3...
- Page 73 ENSURE THAT EVAPORATOR IS ISOLATED FROM MAINS POWER SUPPLY. ANY MAINTENANCE OR REPAIR OF THIS PRODUCT NOT DETAILED IN THIS MANUAL SHALL BE CARRIED OUT BY GENEVAC PERSONNEL (OR APPROVED REPRESENTATIVES OF GENEVAC) USING ONLY APPROVED SPARE PARTS. Traces of solvents may be present that could be harmful to your health or lead to material damage.
- Page 74 Genevac EZ-2 Series Personal Evaporator – User Manual Removal Disconect mains power supply. From rear of evaporator undo the securing screws (qty 4) that secure pump tray assembly. Do not subject the PTFE hoses and cables to undue strain. Carefully withdraw pump tray assembly.
- Page 75 Genevac EZ-2 Series Personal Evaporator – User Manual Testing Reconnect mains power supply. Power up evaporator. For an EZ-2 select AQUEOUS. For an EZ-2plus select Medium Boiling Point. For an EZ-Bio select H2O. Press START button. IF PUMP LINES ARE INCORRECTLY FITTED THE PUMP COULD PRESSURISE THE SYSTEM CAUSING DAMAGE: TURN SYSTEM OFF IF PRESSURE INCREASE OCCURS DURING ITEM 6.7.
-
Page 77: Chapter 8 Pump Head Components
Genevac EZ-2 Series Personal Evaporator – User Manual Chapter 8 Pump Head Components 04-5359 Issue 1-6 – October 2008 Section 3... -
Page 79: Introduction
ENSURE THAT EVAPORATOR IS ISOLATED FROM MAINS POWER SUPPLY. ANY MAINTENANCE OR REPAIR OF THIS PRODUCT NOT DETAILED IN THIS MANUAL SHALL BE CARRIED OUT BY GENEVAC PERSONNEL (OR APPROVED REPRESENTATIVES OF GENEVAC) USING ONLY APPROVED SPARE PARTS. Traces of solvents may be present that could be harmful to your health or lead to material damage. -
Page 80: Removal
Genevac EZ-2 Series Personal Evaporator – User Manual Removal PUMP HEAD ASSEMBLY Fig 1 Remove pump as detailed in Chapter 7. and place on suitable work surface. Remove pump from tray by removing attachment screws. Note and mark position of PTFE tubes. - Page 81 Genevac EZ-2 Series Personal Evaporator – User Manual 4.10 Using Pulley Spanner, carefully locate in Strain Washer and rotate anticlockwise. Fig 4 4.11 Remove Strain Washer, Diaphragm and Pressure Disc assembly. PRESSURE PLATE CONNECTING HEAD “O” RING PUMP PRESSURE DIAPHRAGM STRAIN SEALS &...
-
Page 82: Testing
Genevac EZ-2 Series Personal Evaporator – User Manual Refitting Remove replacement components from service kit packaging. Ensure that all items are correct (Fig 5). Do not use any assembly oils or fluids when reassembling the pump. Clean distilled water may be used to locate seals and valves during assembly. -
Page 84: Technical Specification
Genevac EZ-2 Series Personal Evaporator – User Manual SECTION 4 TECHNICAL SPECIFICATION 04-5359 Issue 1-6 – October 2008 Section 4... -
Page 85: Mechanical Data
Genevac EZ-2 Series Personal Evaporator – User Manual plus MODEL: EZ-2 EZ-2 EZ-Bio Mechanical Data Max RPM 2150 2150 2150 Max G 500 G 500 G 500 G Drive system Direct Direct Direct Sample load including swings 1.5 kg 1.5 kg 1.5 kg... -
Page 86: Power Supplies
120V 60Hz 1800VA 100V 50/60Hz 1200VA Note: The systems may momentarily take current in excess of the figures quoted above. Genevac therefore recommends the use of appropriately rated type D circuit breakers on the main supply to the EZ-2. Environment... -
Page 87: Environment
Genevac EZ-2 Series Personal Evaporator – User Manual EC Declaration of Conformity Safety We Genevac Limited Declare that this product: EZ-2 Evaporating System WARNING! Complies with the relevant Essential Health and THIS SYSTEM MUST BE EARTHED Safety Requirements of the European Machinery... - Page 88 3. All vapours must be ducted away from the system as described in the installation instructions and operator manual 4. Unit only used for purpose it was sold, and in accordance with Genevac published solvent list. 5. Preventative maintenance to be adhered to as detailed in operator’s manual.
- Page 89 If you need to contact Genevac for assistance, use The Sovereign Centre either the telephone or fax Hotlines given. Farthing Road It will always help Genevac Service if you have the Ipswich model and serial numbers at hand for the IP1 5AP...
Need help?
Do you have a question about the EZ-2plus and is the answer not in the manual?
Questions and answers