
Subscribe to Our Youtube Channel
Related Manuals for Häfele HC-H902WC


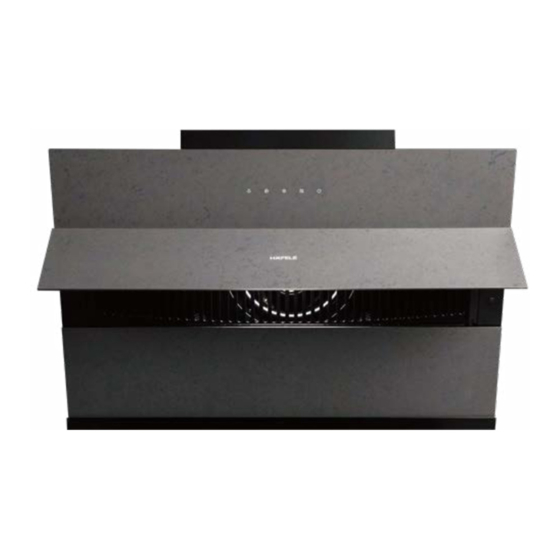
Summary of Contents for Häfele HC-H902WC
- Page 1 User manual Scan Code For Warranty Registration & Policy Product Name: WALL-MOUNTED CERAMIC STONE GLASS HOOD HC-H902WC Products Applied: 538.81.742...
- Page 2 K K K K K K K COOKER HOOD INSTRUCT ON MANUAL Read this manual carefully before operation Pictures in this manual are for reference only, the product in kind prevail.
- Page 3 Warnings This appliance is not intended for use by persons (including children) with reduced physical, sensory or mental capabilities, or lack of experience and knowledge, unless they have been given supervision or instruction concerning use of the appliance by a person responsible for their safety.
- Page 4 Warnings non-combustible parts of range hoods, and parts operating at safety extra low voltage, Provided these parts do not give access to live parts if deformed;) Regulations concerning the discharge of air have to be fulfilled. CAUTION: Accessible parts may become hot when used with cooking appliances.
-
Page 5: Safety Warning
Safety Warning The appliance is not intended for use by young children or infirm persons without supervisions. Young children should be supervised to ensure they do not play with the appliance. Plug the power cord to socket outlet with earthing continuity terminal. ... -
Page 6: Installation Instruction
Installation instruction Determine location Range hood should be installed horizontaly on the top of the stove, the installation diagram is as follows: Suspended Exhaust pipe ceiling Chimney Cupboard 905~915... - Page 7 Installation instruction Schematic diagram of the hole size of the exhaust pipe at the ceiling Note: This installation height is only applicable to electric stove, if installed above the gas stove, the installation height should be in accordance with the installation height requirements of gas stove.
- Page 8 Installation instruction nstall plate hood on the installation plate, fasten four screws M5X50, avoid the hood slide off accidently First, use a screwdriver to fix 3 ST4.2*16 screws into the corresponding 3 screw holes on the top plate of the box body, then put the buckle holes of the folding side of the bottom of the decorative cover into the root of the corresponding 3...
- Page 9 Accessories Range hood body Exhaust pipe Check valve Check valve Sealing gasket Installation plate Expansion bolt (8 x 60) Screws (ST2.9x9.5) Screws (ST4.2x16) Screws (M5x50) Screws (M5x16) Decorative Cover Hanging Plate Chimney Cover Oil cup Screw package...
- Page 10 First Using Range hood can be used after power. Speed Turbo Switch light Delay off Short press: Turn on/off the light; Light Delay off Short press: Startup (02 speed). OFF after 3 min Short press: Startup (03 speed), return to 02 speed after Turbo 3 min, please select manually if needs it to continue.
-
Page 11: Maintenance
Maintenance Cleaning on the surface 1.The surface of the range hood and filter should be clean regularly, do not use clean balls, brushes, coarse cloth, so as not to scratch the surface of the machine. Cleaning mode (Cleaning the surface manually Return your hands horizontally Draw out the oil cup with Clean the oil cup and wipe it... -
Page 12: Main Parameters
Main Parameters Voltage 220-240V~/50Hz Rated Power 253W Lighting Power Motor Power 250W 170mm Diameter of air tube 17m³ /min Air flow The air flow parameter is tested under conditions of 230V /50Hz when the voltage is 220 - 240V ~50Hz LED light information Max Power Voltage... -
Page 13: Troubleshooting
Trouble Shooting Solution Fault Both light and motor Unplug power plug and reconnect the power supply. do not work Oil cup tilt, please reinstall. Oil cup full lled with oil, please dump the oil. Oil leakage Oil-way blockage caused by long time uncleaned internal oil-way, needs professionals to wash the hood. -
Page 14: Warranty Notice
Warranty notice First, to safeguard your interests, please fill out the installation service card carefully and retain the receipt for warranty. Second, the product purchased in our company that has breakdown due to quality problem can be repaired at designated special service department based on valid purchase proof. -
Page 15: Hướng Dẫn Sử Dụng
HƯỚNG DẪN SỬ DỤNG Quét Mã Để Đăng Ký Bảo Hành & Chính Sách Bảo Hành Tên sản phẩm: MÁY HÚT MÙI GẮN TƯỜNG HC-H902WC Mã sản phẩm áp dụng: 538.81.742... - Page 16 Đọc kỹ hướng dẫn sử dụng này trước khi dùng Các hình ảnh trong Hướng dẫn chỉ mang tính tham khảo, vui lòng tìm hiểu sản phẩm thực tế...
- Page 17 Cảnh báo Thiết bị này không được thiết kế để cho những người (kể cả • trẻ nhỏ) bị suy giảm khả năng thể chất, giác quan hoặc tinh thần, hoặc thiếu kinh nghiệm và kiến thức sử dụng, trừ khi người chịu trách nhiệm về...
- Page 18 Cảnh báo Các bộ phận không bắt lửa của máy hút mùi và các bộ phận hoạt động ở điện áp thấp đảm bảo an toàn; Các bộ phận này không cho phép tiếp xúc với các bộ phận mang điện nếu bị biến dạng; Phải thực hiện các quy định liên quan đến việc xả...
- Page 19 Cảnh báo Nếu phích cắm hoặc dây nguồn bị hỏng, vui lòng liên hệ với • trung tâm dịch vụ sau bán hàng. Có thể xảy ra hỏa hoạn nếu không vệ sinh theo đúng hướng • dẫn. Trong trường hợp dây điện bị hỏng, vui lòng liên hệ với nhà sản •...
-
Page 20: Hướng Dẫn Lắp Đặt
Hướng dẫn Lắp đặt Xác định vị trí Nên lắp đặt máy hút mùi theo chiều ngang ở phía trên bếp, sơ đồ lắp đặt như sau: Ống xả Trần treo Ống khói Tủ bát 905~915... - Page 21 Hướng dẫn Lắp đặt Sơ đồ kích thước lỗ của ống xả ở trần nhà Lưu ý: Chiều cao lắp đặt này chỉ áp dụng cho bếp điện, nếu lắp phía trên bếp gas thì chiều cao lắp đặt phải phù hợp với yêu cầu về chiều cao lắp đặt của bếp gas.
- Page 22 Hướng dẫn Lắp đặt Lắp đặt tấm Máy hút mùi được lắp đặt trên tấm đỡ, siết chặt 4 vít M5x50, không để máy hút mùi trượt rơi ra ngoài. Đầu tiên, dùng tua vít để cố định 3 vít ST4.2*16 vào 3 lỗ...
- Page 23 Hướng dẫn Lắp đặt Thân máy hút mùi Ống xả Van 1 chiều Gioăng đệm van 1 chiều Tấm lắp đặt Bu lông giãn nở (8 x 60) Vít (ST2.9x9.5) Vít (ST4.2x16) Vít (M5x50) Vít (M5x50) Vít (M5x16) Tấm treo trang trí Nắp ống khói Cốc chứa dầu Gói vít...
- Page 24 Sử dụng lần đầu Có thể sử dụng máy hút mùi ngay sau khi cấp điện. Speed Turbo Switch light Delay off Đèn báo Nhấn nhanh: tắt/bật đèn Delay OFF Nhấn nhanh: Khởi động ( tốc độ 2 ), TẮT sau 3 phút Nhấn nhanh: Khởi động ( tốc độ...
- Page 25 Vệ sinh bề mặt 1. Bề mặt của máy hút mùi và bộ lọc phải được vệ sinh, làm sạch thường xuyên, không sử dụng bóng giặt, chổi, vải thô để tránh làm xước bề mặt của máy. và tránh dầu nhỏ giọt vào bếp. Chế...
- Page 26 Thông số kỹ thuật của sản phẩm Điện áp 220-240V~/50Hz Điện áp định mức 253W Cường độ chiếu sáng Công suất động cơ 250W 170mm Đường kính ống dẫn khí 17m³ /min Luồng khí Thông số dòng khí được thử nghiệm trong điều kiện 230V~/50Hz khi điện áp là...
- Page 27 Khắc khục sự cố Giải pháp Sự cố Cả đèn và động cơ không Rút phích cắm ra và cắm lại làm việc Cốc dầu bị nghiêng, lắp lại Cốc bị tràn dầu, đổ dầu Rò rỉ dầu Đường dẫn dầu bị tắc do thời gian dài không vệ sinh, cần chuyên gia có...
- Page 28 Phiếu Bảo hành Trước tiên, để bảo vệ quyền lợi của người sử dụng, vui lòng điền đầy đủ thông tin vào phiếu dịch vụ lắp đặt và lưu lại biên lai bảo hành. Thứ hai, nếu sản phẩm được mua tại công ty chúng tôi bị hỏng hóc do vấn đề chất lượng có...
- Page 32 Häfele VN LLC. Phone: (+84 28) 39 113 113 Email: info@hafele.com.vn P/N:16 1730 00A21887...
Need help?
Do you have a question about the HC-H902WC and is the answer not in the manual?
Questions and answers