Table of Contents
Advertisement
Quick Links
Advertisement
Table of Contents

Related Manuals for Calomax ECLIPSE PB3C10


Summary of Contents for Calomax ECLIPSE PB3C10
- Page 1 INSTALLATION, OPERATION AND SERVICING INSTRUCTIONS FOR THE ECLIPSE PUSH BUTTON WATER BOILERS Please read these instructions carefully before operating your boiler for the first time Calomax Limited Lupton Avenue, Leeds LS9 7DD Tel. 0113 249 6681 email: service@calomax.co.uk www.calomax.co.uk...
-
Page 2: Table Of Contents
CONTENTS PAGE INTRODUCTION CHECK LIST APPROVALS CONSTRUCTION INSTALLATION LOCATION COLD WATER INLET ACCESS INSTRUCTIONS VENT / OVERFLOW ELECTRICAL CONNECTIONS USER INSTRUCTIONS SCALE CLEANING GENERAL OPERATION TROUBLE SHOOTING ACCESSORIES SPARE PARTS 12/13 EXPLODED DIAGRAM 14/15/16/17 SERVICE INSTRUCTIONS 18/19 GENERAL FUNCTION WIRING DIAGRAM DIMENSIONS AND WEIGHTS WARRANTY PRODUCT SPECIFICATION... -
Page 3: Introduction
INTRODUCTION Thank you for purchasing a boiler from the Calomax Eclipse range. All our products are designed to give years of simple, reliable operation. To ensure this, it is important that the installation and subsequent servicing and maintenance is carried out by a suitably qualified person in accordance with these instructions. -
Page 4: Construction
Install the boiler on a surface or wall suitable for the working weight of the boiler. Allow clearance for ventilation and for the easy removal of the outer casing lid and front panel. Calomax recommend a minimum clearance of 50mm on all sides of the boiler. A suitably qualified engineer must install this unit. -
Page 5: Cold Water Inlet
The water inlet fittings are designed for push-fit connections. Compression fittings can be used if preferred but these should be connected directly to the copper pipe (not the plastic push-fit) using the Ø12-15mm compression reducing sets supplied. Ø12-15mm Push Fit Ø12-15mm Compression Fit Cold water inlet Vent &... -
Page 6: Access Instructions
ACCESS INSTRUCTIONS Access to the internals of the machine is gained by the removal of the front panel. Prise off the outercasing lid from its mounting clips. remove the top two panel mounting screws. The front panel can now be removed by prising off the remaining two retaining clips at the bottom of the panel. -
Page 7: Vent / Overflow
VENT & OVERFLOW The vent / overflow pipe must be extended and laid with a continuous fall, discharging to a safe and visible point. The pipe should not be directly connected to a closed waste, as taste problems may occur and should never be allowed to become blocked or restricted.15mm copper or ‘Speedfit’... -
Page 8: Electrical Connections
Children should NOT be allowed to play or use this appliance. In the event of the power supply lead to the boiler becoming damaged, the appliance must be removed from service. A replacement genuine part is available from Calomax Ltd, and must be fitted by a suitably qualified engineer. COMISSIONING Turn on the water supply and then switch on the electrical supply. -
Page 9: Scale
SUBSEQUENT USE After the boiler has finished the commissioning cycle, and water is dispensed from the boiler, water will be replenished in short cycles (small amount of water and then heat). The solenoid and element will never be on at the same time unless the boiler is switched off and on again (re-setting commission mode). -
Page 10: General Operation
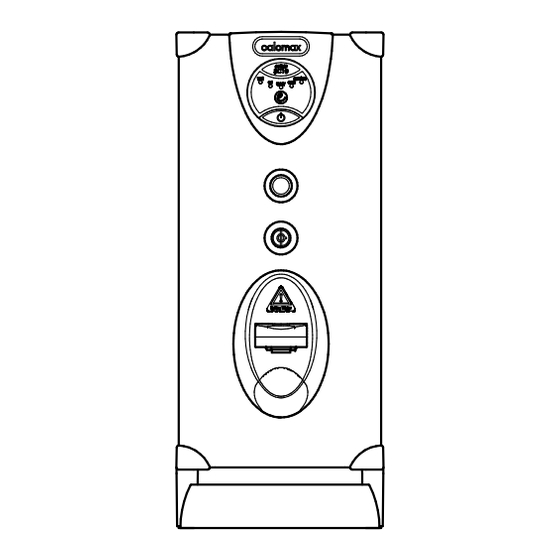
GENERAL OPERATION • Hold a cup below the dispense nozzle or place large vessels on the drip tray. Care must be taken to avoid injury through splashing or over-filling. • To begin filling, press the dispense button – hot water begins to flow. -
Page 11: Accessories
Ref. 7DPIT Max 3 kW Water filter kit (To reduce taste & odour problems) Ref. CWFK Filter Cartridge (Replacement filter for kit shown above) Ref. CWFC1 For more information visit our website at www.calomax.co.uk or call 0113 249 6681 Page 11... -
Page 12: Spare Parts
Spare parts are usually available ex-stock. Please quote Model & Serial Number. EPBPCBT ELPCBT E3BRK ETAK ECLIPSE ECLIPSE P.C.B. ECLIPSE LIGHT PCB ELEMENT 3kW THERMISTOR RESET KIT ASSEMBLY KIT X8 various sizes EPBSV MBLG1 MBLG2 ESSK SOLENOID VALVE BODY LID GASKET BODY LID GASKET ECLIPSE SILICONE FOR PB3C10... - Page 13 ESLFK SPARE KEYS (x2) FOR ESLM Page 13...
- Page 14 Exploded parts view for Eclipse Push Button wall mounted boilers (To be read in conjunction with the spare parts list) * Complete set of 8 seals (2 sizes) Page 14...
- Page 15 (Behind moulding) (Behind cap) If parts required are not identified, please contact Calomax Limited Page 15...
- Page 16 Exploded parts view for Eclipse Counter Top Models. (To be read in conjunction with the spare parts list) * Complete set of 8 seals (2 sizes) Page 16...
- Page 17 If parts required are not identified, please contact Calomax Limited (behind moulding) (behind cap) Page 17...
-
Page 18: Service Instructions
The unit can be used normally while the service indicator is flashing a 4x pulse. For further assistance, contact our service department on 0113 249 6681, email service@calomax.co.uk or find a local service engineer at www.calomax.co.uk Access to internal components can be gained by the removal of the outer casing lid and front panel. - Page 19 Abrasive cleaning materials containing scouring powders and detergents must not be used, such materials can cause taste problems. The integral scale-inhibitor of every Calomax boiler allows for a manual / chemical-free descale. Caustic chemical de-scalents should not be used.
-
Page 20: General Function
Heat transfer compound is also supplied with all replacement circuit boards. ADJUSTING THE WATER TEMPREATURE SET POINT The temperature potentiometer (Pot) is pre-set at Calomax and will only require adjustment in exceptional circumstances. Contact Calomax for advice. -
Page 21: Wiring Diagram
Page 21... -
Page 22: Dimensions And Weights
DIMENSIONS AND WEIGHTS Push Dispense MODEL PB3C10 Height (mm) Depth (mm) Width (mm) Drip tray clearance (mm) Working weight (Kg) 30.5 Push Dispense MODEL PB3W5 Height (mm) Depth (mm) Width (mm) Working weight (Kg) Page 22... -
Page 23: Warranty
WARRANTY GUARANTEE (UK Mainland customers only) Calomax have manufactured water boilers in the UK for over 70 years. We are proud of our products and the back-up service we provide. Properly maintained and serviced, a Calomax boiler should last many years and we have no hesitation in providing a 2 year warranty. -
Page 24: Product Specification
220 - 240 V ac 50-60 Hz Power rating All Models 3kW (MAX) Note: All measurements are approximate PLEASE CONTACT OUR SERVICE DEPARTMENT FOR ASSISTANCE Calomax Limited, Lupton Avenue, Leeds LS9 7DD Tel: 0113 249 6681 email: service@calomax.co.uk Page 24...
Need help?
Do you have a question about the ECLIPSE PB3C10 and is the answer not in the manual?
Questions and answers