
Subscribe to Our Youtube Channel
Related Manuals for InHand Industrial Router


Summary of Contents for InHand Industrial Router
-
Page 1: Table Of Contents
InHand Networks Industrial Router IR302 Product Quick Guide Table of contents Overview 1.1 General 1.2 RF exposure 1.3 Operating conditions 1.4 Faulty and damaged products 1.5 Electrical safety 1.6 Product handing 2. Packing list 4. Installation of Wireless Routers https://help.inhand.com/portal/en/kb/articles/industrial-router-ir302-product-quick-guide... - Page 2 https://help.inhand.com/portal/en/kb/articles/industrial-router-ir302-product-quick-guide...
-
Page 3: Overview
This manual is for the installation and operation of InRouter302 series routers of InHand Networks Company. InHand makes every effort to provide accurate information in this manual, but InHand does not guarantee that there is no error in the manual. All statements, information and recommendations in this manual do not constitute any expressed or implied warranty. -
Page 4: Faulty And Damaged Products
Ensure that the voltage and the rated current of the power source match the device’s requirements. Do not connect the device to an inappropriate power source. During a thunderstorm, no operations should be carried out on the device and cables. https://help.inhand.com/portal/en/kb/articles/industrial-router-ir302-product-quick-guide... -
Page 5: Packing List
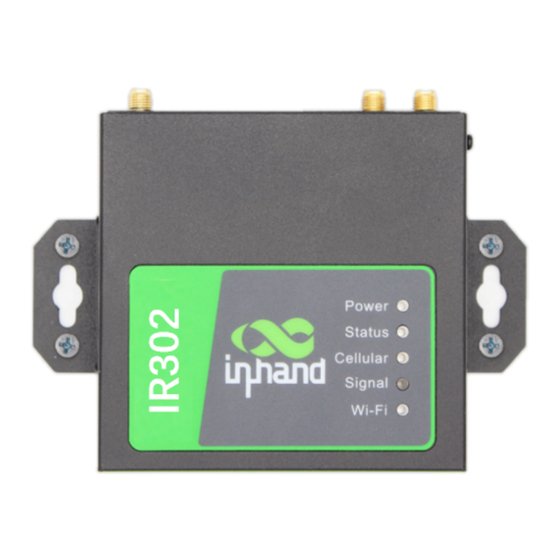
Each IR302 product includes common accessories (such as standard accessories list), please check carefully, when you receive our products. Please contact the sales staff of InHand, if there is any missing or damage. In addition, according to different site characteristics, InHand can provide customers with optional accessories. For details, please refer to the list of optional accessories. - Page 6 3. Panel Introduction and Structural Size 3.1 Panel Introduction Fig. 3-1 Equipment Panel 3.2 Structural Size https://help.inhand.com/portal/en/kb/articles/industrial-router-ir302-product-quick-guide...
-
Page 7: Installation Of Wireless Routers
Step 2: Tilt the equipment to the right 45°, so that the upper part of the DIN-rail seat is stuck on the DIN-rail, holding the lower end of the equipment, up slightly to rotate the equipment, the DIN-rail seat can be stuck on the DIN-rail. Verify that the equipment is fixed on DIN-ail. https://help.inhand.com/portal/en/kb/articles/industrial-router-ir302-product-quick-guide... - Page 8 4.2.1 Wall Hanging Installation The steps are as follows: Step 1: Fix the hanging ear to both sides of the device with screws Step 2: Fix the hanging ear to the wall with screws. Fig. 4-2-1 Wall Hanging Installation 4.2.2 Wall Hanging Disassembly https://help.inhand.com/portal/en/kb/articles/industrial-router-ir302-product-quick-guide...
- Page 9 IR302 support dual SIM card, hold down SIM pop-up button will pop up the card holder, load the SIM card. Fig. 4-3 SIM Card Installation 4.4 Antenna Installation Rotate the metal interface clockwise until the movable part cannot be rotated, do not hold the black glue stick to twist the antenna. https://help.inhand.com/portal/en/kb/articles/industrial-router-ir302-product-quick-guide...
- Page 10 IR302 support dual antennas, ANT antenna and AUX antenna. The ANT antenna is the antenna which receives and transmits data, AUX antenna can only enhance the antenna signal degree and cannot receive and sent data, so it can’t be used alone. Generally, only use ANT antenna. 4.5 Power Installation https://help.inhand.com/portal/en/kb/articles/industrial-router-ir302-product-quick-guide...
- Page 11 The device supports three ways of accessing the Internet: Wired, Cellular Dial-Up, Wi-Fi note: when the device does not use Cellular Dial-up access, the "dial-up interface" must be disabled, otherwise the device cycle dial-up to the maximum number, it will lead to device restart, network business interruption. https://help.inhand.com/portal/en/kb/articles/industrial-router-ir302-product-quick-guide...
- Page 12 Step 2: Set the PC in the same network segment as the IP address of gateway device. Method 1: DHCP automatically get the address (Recommended). Method 2: Use fixed IP address, set the PC and gateway in the same address segment(DHCP Server for LAN2 Port is default enabled). https://help.inhand.com/portal/en/kb/articles/industrial-router-ir302-product-quick-guide...
- Page 13 Step 4: Configuration WAN port, click on the navigation bar "Network >>WAN/LAN Switch" , select WAN mode to configure IP address of Wan port, so that the device can access to the Internet.. (Make sure the interface is in WAN mode, initial default LAN mode) https://help.inhand.com/portal/en/kb/articles/industrial-router-ir302-product-quick-guide...
- Page 14 Fig. 5-1-4 WAN Port Setup Step 5: Three ways to assign address, dynamic DHCP( recommended), static address, ADSL dial (click application after configuration is completed) Fig. 5-1-4-a Dynamic Ip Configure of WAN https://help.inhand.com/portal/en/kb/articles/industrial-router-ir302-product-quick-guide...
- Page 15 Fig. 5-1-4-b Static Ip Configuration of WAN Fig. 5-1-4-c ADSL Dial-up of WAN Step 6: Use the PING tool to verify your network connection. https://help.inhand.com/portal/en/kb/articles/industrial-router-ir302-product-quick-guide...
- Page 16 Step 4: The device supports dual card mode, when the SIM card insert card slot 2, need to enable dual SIM card function in advanced settings, private network dial parameters can be set in the dial parameter set, new click on the application, and then select at the cellular network operator. https://help.inhand.com/portal/en/kb/articles/industrial-router-ir302-product-quick-guide...
- Page 17 Internet through the connection to the AP. Ensure that the device has been connected to the Internet through the above wired, cellular dialing mode. You can set the SSID name and encryption authentication, and choose the terminal connection password according to your needs. https://help.inhand.com/portal/en/kb/articles/industrial-router-ir302-product-quick-guide...
- Page 18 AP, such as the PC device. Step 3:Click on the navigation bar "Network >>WLAN Mode Switch" to switch the working mode to the STA, then apply and restart the device as prompted. Fig. 5-3-2- WLAN Mode Switch Fig. 5-3-2- Reboot Device https://help.inhand.com/portal/en/kb/articles/industrial-router-ir302-product-quick-guide...
- Page 19 Fig. 5-3-4 Selected SSID Step 5: Click on the navigation bar "Network >>WAN (STA)", set WAN port IP parameter. Three ways: dynamic address (recommended), static IP, ADSL dial. Fig. 5-3-5-a Dynamic Acquisition WAN (STA) Address Fig. 5-3-5- b Static IP Configuration of WAN (STA) https://help.inhand.com/portal/en/kb/articles/industrial-router-ir302-product-quick-guide...
- Page 20 (Follow-up version supports user experience plan, which can automatically access Inhand Cloud Platform and enjoy efficient and convenient service) Server address: the address of the Device Manager. The address of the Device Manager developed by InHand is as follows: Device Manager: iot.inhandnetworks.com...
- Page 21 InConnect: ics.inhandnetworks.com Fig. 6-1 Remote Platform Configuration 6.2 Platform Account Creation Jump to the registration/login page through the link below for user registration. Link: https://iot.inhandnetworks.com. Fig. 6-2 Account Registration/Login 6.3 Add Device to Platform https://help.inhand.com/portal/en/kb/articles/industrial-router-ir302-product-quick-guide...
- Page 22 Login to the WEB page, click on the "System>> Configuration Management" menu in the navigation tree to enter the "configuration management" interface. Click the "restore factory settings" button to determine the recovery of the factory after the configuration, restart the system, restore factory success. https://help.inhand.com/portal/en/kb/articles/industrial-router-ir302-product-quick-guide...
- Page 23 Click Browse to select the profile, and then click the Import button. After importing the configuration file, restart the system to take effect. Click Backup to export the currently applied configuration parameter file, and the exported file is in “.dat” format, with the default file name config.dat https://help.inhand.com/portal/en/kb/articles/industrial-router-ir302-product-quick-guide...
- Page 24 Fig. 7-3 Diagnostic Log Function 8. Description of panel indicator 8.1 Panel LED Indicator Description Fig. 8-1 Led Indicator Description Equipment LED Light Description Table: Power( Status( Cellular( Definition red) Green) Wong) No Power System Fault Module or SIM Card not identified https://help.inhand.com/portal/en/kb/articles/industrial-router-ir302-product-quick-guide...
- Page 25 Signal value 21~30 Not enabled Destruction Wi-Fi( Flash Green) Data flash Driven Yellow green, data Lamps Control flash Contact Us Add: 43671 Trade Center Place, Suite 100, Dulles, VA 20166 USA E-mail: support@inhandneworks.com T: +1 (703) 348-2988 URL: www.inhand.com https://help.inhand.com/portal/en/kb/articles/industrial-router-ir302-product-quick-guide...
Need help?
Do you have a question about the Industrial Router and is the answer not in the manual?
Questions and answers