Advertisement
Available languages
Available languages
Quick Links
The assembly manual of
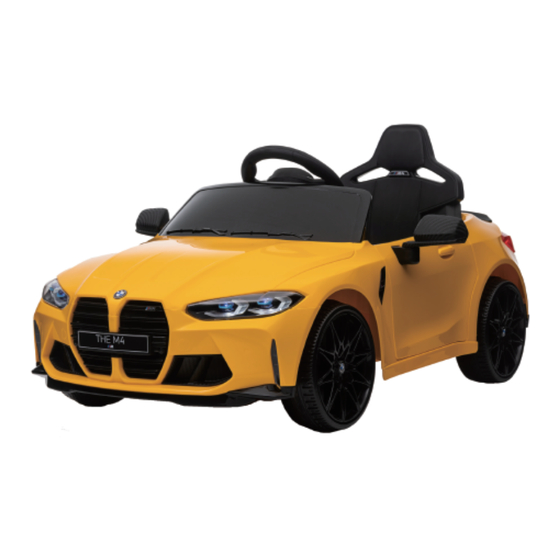
battery operated car
Executive standard:
EN71-1
EN71-2
EN71-3
EN62115
ASTM F963
Please read the manual before using the product. The manual and carton contain
important information, please keep them properly for later references. If failure to
following the instruction in the manual, it might be dangerous for your child.
In order to improve the product and quality, we may change the parts of structure,
appearance, packing method, assembly method and function of the product without
any notice. When there is any difference between the manual and the product,
please subject to the actual product. We are sorry for any inconvenience.
Products should be assembled by an adult. Protective equipment should be
worn. Not to be used in traffic. Not suitable for children under 3 years. Choking
hazard- small parts. In unassembled state, contains potentially hazardous small
parts. Please keep out of the reach of small children. Pay attention to the
potential hazards of using the toy in areas other than private grounds.
IMPORTANT, RETAIN FOR FUTURE REFERENCE: READ CAREFULLY
370-311V70_370-311V90
INSTRUCTION MANUAL
IN240300103V01_UK_DE_ES_IT
EN
Advertisement

Subscribe to Our Youtube Channel
Related Manuals for Aiyaplay 370-311V70


Summary of Contents for Aiyaplay 370-311V70
- Page 1 IN240300103V01_UK_DE_ES_IT 370-311V70_370-311V90 The assembly manual of battery operated car Executive standard: EN71-1 EN71-2 EN71-3 EN62115 ASTM F963 Please read the manual before using the product. The manual and carton contain important information, please keep them properly for later references. If failure to following the instruction in the manual, it might be dangerous for your child.
- Page 2 Parts Name Pictures ① Car body Backrest ② ③ Seat ④ Windshield ⑤ Steering wheel Front wheel ⑥ Rear wheel ⑦ Wheel cover ⑧ Mirror ⑨ ⑩ Steering axle Wrench Charger Remote control User manual...
- Page 3 ⓬ ⓭ ⓫...
- Page 4 Disclaimer: The pictures in this instruction are for assembly reference only. Please refer to the actual product. Warning: This product is not the vehicle for transportation, it should be used under adult guidance. Parents should ensure that children have taken the safety measures before use. The toy should be used with caution since skill is required to avoid falls or collisions causing injury to the user or third party.
- Page 5 Assembly instruction Car assembling should be done by the adults. Take care of small parts. To avoid choking hazard, keep children away while assembling. Children under 36 months are prohibit- ed to use. Please count all the parts carefully before assembling and dispose the plastic bag properly.
- Page 6 10mm 10mm washer washer lock nut washer washer lock nut ⓫ 2.Rear wheel assembly Use the wrench ⓫ to remove the lock nus from rear axle, then remove two 8mm washers, keep them for later use. Insert two rear wheels ❼ and two 8mm washers into rear axle on each side, use the wrench ⓫...
- Page 7 3.Mirror assembly Insert two mirrors ❾ into corresponding posi�on on car body, push them into place. 4.Steering axle assembly A.Insert the steering axle ❿ into car body, make sure the hook on steering axle ❿ pass through the hole on front axle as shown in picture (a).
- Page 8 5.Windshield assembly Using the screwdriver, remove two M4*16 screws from the car body, se�ng them aside for later. Insert the windshield ❹ into correspond- ing posi�on on car body, push it into place, �ghten two M4*16 screws using the screwdriver.
- Page 9 M4*16 screw M4*16 screw 6.Ba�ery connec�on Match two red plugs to connect the power. 7.Seat assembly There are two M4*16 screws on the seat. Insert backrest ❷ into corresponding posi�on on car body, a�ach the seat ❸ with car body, �ghten two M4*16 screws using the screwdriver.
- Page 10 M4*16 screw M4*16 screw SECURITY WARNING 1.The installation and charging of vehicle should be under adult supervision at all times. 2.This product is limited to the children from 37-95 months old, 25kgs (55lbs) weight limit. 3.This product is ideal for driving on a hard flat surface. 4.It is strictly prohibited in the streets or the road, pot holes, and slopes.
- Page 11 7.While children are driving, it is parents' duty to supervise at all time to avoid accidents. 8.Avoid driving in rains or flooded pathways. By doing so it can damage the motor, circuit and other electrical equipments. 9.Battery charger should be regularly inspected by parents to insure that the wires, plugs, crusts and other components are not damaged.
- Page 12 For example: a.The trenches, the riverside, slope or uneven ground; b.Road or other places for driving and walking; c.The obstruction which is easily hitting and causing injury; d.Other unsafe zones. To avoid accident, please use only in daytime or bright place, avoid using under low visibility.
- Page 13 MP3 Player Electric capacity display Big memory Mode Early education / Audio input Story / Pause / Play Music / Volume up Volume down Remote control instruction Speed indicator Stop Forward Right Speed Back Left Code...
- Page 14 2.4G Remoter Control Instructions For the first time need to code,this product has a memory function, replacement battery next time, you do not need to match the code Once again. ①.Long press "M" button more than three seconds, until the first LED lights flashing.
- Page 15 7. In order to avoid damaging the remote control, please take out the batteries if not use the remote control for a long time to avoid battery leakage and circuit corrosion. 8. Avoid dropping the remote control during using. 9. Install batteries with right polarity to avoid battery short circuit. 10.
- Page 16 Charging port Charging port WARNING: 1 The toy is to be assembled by an adult. In unassembled state, it contains potentially hazardous sharp points & small parts, so please keep out of baby's reach. 2 CHOCING HAZARD – Small parts. 3 Not for children under 3 yrs.
- Page 17 ·The battery will be little warm when being charged, it is normal. If not, it may be caused from the short circuit of charger or circuit board. ·Must use the pressing plate to fix the battery. ·Run out of battery must be handled by adults, remove the battery which has run out from toys to recycle properly and shall not be arbitrarily discard.
- Page 18 7, When stopping or storing the car, please cut off the power and make sure all switches are in the ‘STOP’ or ‘OFF’ position. 8, Do not use fuses different from the specifications of this product. 9, Do not change the product structure and circuit system. Maintenance and repair work must be done under the guidance of the professional or technical personnel in place.
- Page 19 WARNING: This toy contains batteries that are non-replaceable. A recommendation for adult supervision of young children. WARNING: To reduce risk of injury, adult supervision is required. Never use in roadways, near motor vehicles, on or near steep inclines of steps, swimming pools or other bodies of water, always wear shoes, and never allow more 1 rider.
- Page 20 IN240300103V01_UK_DE_ES_IT 370-311V70_370-311V90 Die Montageanleitung für das batteriebetriebene Auto Ausführungsstandard: EN71-1 EN71-2 EN71-3 EN62115 ASTM F963 Bitte lesen Sie vor der Verwendung des Produkts die Anleitung. Die Anleitung und der Karton enthalten wichtige Informationen. Bitte bewahren Sie sie für spätere Referenzen ordnungsgemäß...
- Page 21 Teilenamen Anzahl Bilder Karosserie ① Rückenlehne ② ③ Sitz ④ Windschutzscheibe ⑤ Lenkrad ⑥ Vorderrad ⑦ Hinterrad ⑧ Radkappe ⑨ Spiegel ⑩ Lenkachse Schraubenschlüssel Ladegerät Fernbedienung Benutzerhandbuch...
- Page 22 ⓬ ⓭ Werkzeuge: ⓫ Schraubenzieher (nicht enthalten)
- Page 23 Haftungsausschluss: Die Bilder in dieser Anleitung dienen nur als Montagebezug. Bitte beachten Sie das tatsächliche Produkt. Warnung: Dieses Produkt ist kein Transportmittel und sollte unter der Aufsicht Erwachsener verwendet werden. Eltern sollten sicherstellen, dass Kinder vor der Verwendung Sicherheitsmaßnahmen ergriffen haben. Das Spielzeug sollte mit Vorsicht verwendet werden, da Geschick- lichkeit erforderlich ist, um Stürze oder Kollisionen zu vermeiden, die dem Benutzer oder Dritten Verletzungen zufügen könnten.
- Page 24 Montageanleitung Der Zusammenbau des Autos sollte von Erwachsenen durchgeführt werden. Achten Sie auf Kleinteile. Um Erstickungsgefahr zu vermeiden, halten Sie Kinder während des Zusammenbaus fern. Kinder unter 36 Monaten dürfen es nicht benutzen. Bitte zählen Sie alle Teile sorgfältig vor dem Zusammenbau und entsorgen Sie den Plastikbeutel ordnungsgemäß.
- Page 25 10mm 10mm Unterlegscheibe Unterlegscheibe Sicherungsmu�er Unterlegscheibe Unterlegscheibe Sicherungsmu�er ⓫ 2. Montage des Hinterrads Verwenden Sie den Schraubenschlüssel ⓫, um die Sicherungsmu�er von der Hinterachse zu lösen, en�ernen Sie dann zwei 8-mm-Unter- legscheiben und behalten Sie sie für später. Setzen Sie zwei Hinter- räder ❼...
- Page 26 3. Montage des Spiegels Setzen Sie zwei Spiegel ❾ an der entsprechenden Posi�on an der Karosserie ein und drücken Sie sie an ihren Platz. 4. Montage der Lenkachse A. Setzen Sie die Lenkachse ❿ in die Karosserie ein und stellen Sie sicher, dass der Haken an der Lenkachse ❿...
- Page 27 Schraubenzieher (nicht enthalten) 5. Montage der Windschutzscheibe Mit dem Schraubenzieher die beiden M4*16 Schrauben von der Karosserie en�ernen und sie für später beiseitelegen. Die Windschutzscheibe ❹ an der entsprechenden Posi�on an der Karosserie einsetzen und festdrücken. Die beiden M4*16 Schrauben mit dem Schraubenzieher festziehen.
- Page 28 Schraubenzieher (nicht enthalten) M4*16 Schraube M4*16 Schraube 6. Ba�erieverbindung Stellen Sie sicher, dass zwei rote Stecker übereins�mmen, um die Strom- verbindung herzustellen. 7. Montage des Sitzes Auf dem Sitz befinden sich zwei M4*16 Schrauben. Setzen Sie die Rücken- lehne ❷ an der entsprechenden Posi�on an der Karosserie ein und befes�- gen Sie den Sitz ❸...
- Page 29 Schraubenzieher (nicht enthalten) M4*16 Schraube M4*16 Schraube SICHERHEITSHINWEIS 1. Die Installation und das Aufladen der Fahrzeuge sollten jederzeit unter Aufsicht eines Erwachsenen stattfinden. 2. Dieses Produkt ist für Kinder im Alter von 37-95 Monaten geeignet und hat ein Gewichtslimit von 25 kg (55 lbs). 3.
- Page 30 7. Während Kinder fahren, obliegt es den Eltern, jederzeit die Aufsicht zu führen, um Unfälle zu vermeiden. 8. Vermeiden Sie das Fahren bei Regen oder überfluteten Wegen. Dadurch kann der Motor, die Elektronik und andere elektrische Geräte beschädigt werden. 9. Der Batterieladegerät sollte regelmäßig von den Eltern inspiziert werden, um sicherzustellen, dass Kabel, Stecker, Gehäuse und andere Komponenten nicht beschädigt sind.
- Page 31 Zum Beispiel: a. Gräben, Flussufer, Hang oder unebener Boden; b. Straßen oder andere Orte zum Fahren und Gehen; c. Hindernisse, die leicht zu treffen und Verletzungen verursachen können; d. Andere unsichere Bereiche. Um Unfälle zu vermeiden, verwenden Sie das Produkt nur tagsüber oder an hellen Orten und vermeiden Sie die Verwendung bei schlechter Sicht.
- Page 32 MP3-Player Anzeige der Batteriekapazität Großer Speicher Modus Frühkindliche Erziehung Audiokabelanschluss Geschichte / Pause / Lautstärke verringern Musik / Lautstärke erhöhen / Wiedergabe Anleitung zur Fernbedienung Geschwindigkeitsanzeige Stop Vorwärts Rechts Geschwindigkeit Rückwärts Links Code...
- Page 33 2,4G-Fernbedienungsanleitung Für die erste Verwendung muss zuerst eine Codierung erfolgen. Dieses Produkt verfügt über eine Speicherfunktion, daher ist beim nächsten Batteriewechsel keine erneute Code-Eingabe erforderlich. ① Drücken Sie die "M"-Taste länger als drei Sekunden, bis die erste LED blinkt. ② Schalten Sie die Stromversorgung des Fahrzeugs ein. Wenn eine LED dauerhaft leuchtet, war die Code-Eingabe erfolgreich.
- Page 34 7. Um Schäden an der Fernbedienung zu vermeiden, nehmen Sie bitte die Batterien heraus, wenn die Fernbedienung längere Zeit nicht verwendet wird, um Batterieleckage und die Korrosion des Schaltkreises zu verhin- dern. 8. Vermeiden Sie das Herunterfallen der Fernbedienung während der Verwendung.
- Page 35 Ladeanschluss Ladeanschluss WARNUNG: 1. Das Spielzeug sollte von einem Erwachsenen montiert werden. Im unmontierten Zustand enthält es potenziell gefährliche spitze Teile und Kleinteile, daher bitte außerhalb der Reichweite von Babys aufbewahren. 2. ERSTICKUNGSGEFAHR - Kleinteile. 3. Nicht für Kinder unter 3 Jahren geeignet. 4.
- Page 36 · Die Batterie wird beim Aufladen leicht warm, das ist normal. Wenn nicht, kann dies auf einen Kurzschluss des Ladegeräts oder der Leiterplatte zurückzuführen sein. · Verwenden Sie unbedingt die Druckplatte, um die Batterie zu fixieren. · Verbrauchte Batterien müssen von Erwachsenen behandelt werden. Entfernen Sie die leere Batterie ordnungsgemäß...
- Page 37 7. Beim Anhalten oder Lagern des Autos schalten Sie bitte die Stromversorgung ab und stellen Sie sicher, dass alle Schalter in der "STOP" oder "AUS" Position stehen. 8. Verwenden Sie keine Sicherungen, die von den Spezifikationen dieses Produkts abweichen. 9. Ändern Sie nicht die Produktstruktur und das Schaltkreissystem. Wartungs- und Reparaturarbeiten müssen unter Anleitung von Fachpersonal oder technischem Personal vor Ort durchgeführt werden.
- Page 38 WARNUNG: Dieses Spielzeug enthält nicht austauschbare Batterien. Eine Empfehlung zur Aufsicht von Erwachsenen bei jungen Kindern. WARNUNG: Um das Verletzungsrisiko zu verringern, ist eine Aufsicht durch Erwachsene erforderlich. Verwenden Sie es niemals auf Straßen, in der Nähe von Fahrzeugen, auf oder in der Nähe von steilen Treppen, Swimmingpools oder anderen Gewässern.
- Page 39 IN240300103V01_UK_DE_ES_IT 370-311V70_370-311V90 El manual de montaje del coche de batería Norma ejecutiva: EN71-1 EN71-2 EN71-3 EN62115 ASTM F963 Por favor, lea el manual antes de usar el producto. El manual y el embalaje contienen información importante, guárdelos adecuadamente para futuras consul- tas.
- Page 40 CANT Imágenes Nombre de las piezas Carrocería ① Respaldo ② ③ Asiento ④ Parabrisas ⑤ Volante ⑥ Rueda delantera ⑦ Rueda trasera ⑧ Cubre ruedas ⑨ Espejo ⑩ Eje de dirección Llave inglesa Cargador Control remoto Manual de usuario...
- Page 41 ⓬ ⓭ Herramientas ⓫ Destornillador (no incluido)
- Page 42 Descargo de responsabilidad: Las imágenes en esta instrucción son solo de referencia para el montaje. Por favor, consulte el producto real. Advertencia: Este producto no es un vehículo de transporte, debe ser utilizado bajo la supervisión de un adulto. Los padres deben asegurarse de que los niños hayan tomado las medidas de seguridad antes de usarlo.
- Page 43 Instrucciones de montaje El ensamblaje del automóvil debe ser realizado por adultos. Tenga cuidado con las piezas pequeñas. Para evitar el riesgo de asfixia, mantenga a los niños alejados durante el montaje. Los niños menores de 36 meses tienen prohibido su uso. Por favor, cuente todas las piezas cuidadosamente antes del montaje y deseche la bolsa de plástico adecuadamente.
- Page 44 10mm 10mm arandela arandela tuerca de bloqueo arandela arandela tuerca de bloqueo ⓫ 2. Ensamblaje de la rueda trasera Use la llave ⓫ para quitar la tuerca de bloqueo del eje trasero, luego re�re dos arandelas de 8 mm, guárdelas para usar más tarde. Inserte dos ruedas traseras ❼...
- Page 45 3. Ensamblaje del espejo: Inserte los dos espejos ❾ en la posición correspondiente de la carrocería del automóvil, empújelos hasta que encajen en su lugar. 4. Ensamblaje del eje de dirección: A. Inserte el eje de dirección ❿ en la carrocería del automóvil, asegúrese de que el gancho del eje de dirección ❿...
- Page 46 Destornillador (no incluido) 5. Ensamblaje del parabrisas: Usando el destornillador, re�re dos tornillos M4*16 de la carrocería del automóvil, guárdelos para usar más tarde. Inserte el parabrisas ❹ en la posición correspondiente de la carrocería del automóvil, empújelo hasta que encaje en su lugar, apriete los dos tornillos M4*16 usando el destornillador.
- Page 47 Destornillador (no incluido) M4*16 Tornillo M4*16 Tornillo 6. Conexión de la batería: Haga coincidir los dos enchufes rojos para conectar la alimentación. 7. Ensamblaje del asiento: Hay dos tornillos M4*16 en el asiento. Inserte el respaldo ❷ en la posición correspondiente de la carrocería del automóvil, sujete el asiento ❸...
- Page 48 Destornillador (no incluido) M4*16 Tornillo M4*16 Tornillo ADVERTENCIA DE SEGURIDAD 1. La instalación y carga de los vehículos debe realizarse bajo la supervisión de un adulto en todo momento. 2. Este producto está limitado a niños de 37 a 95 meses de edad, con un límite de peso de 25 kg (55 lbs).
- Page 49 7. Mientras los niños conducen, es deber de los padres supervisar en todo momento para evitar accidentes. 8. Evite conducir bajo la lluvia o en áreas inundadas. Esto puede dañar el motor, el circuito y otros componentes eléctricos. 9. Los padres deben inspeccionar regularmente el cargador de batería para asegurarse de que los cables, enchufes, cubiertas y otros componentes no estén dañados.
- Page 50 Por ejemplo: a. Zanjas, orillas de los ríos, pendientes o terrenos irregulares; b. Carretera u otros lugares para conducir y caminar; c. Obstáculos que son fáciles de golpear y causar lesiones; d. Otras zonas inseguras. Para evitar accidentes, use solo durante el día o en lugares bien iluminados, evite usarlo en condiciones de baja visibilidad.
- Page 51 Reproductor MP3 Indicador de capacidad eléctrica Gran memoria Modo Educación temprana / Entrada de audio Historia / Pausa / Reproducir Volumen bajo Música / Volumen alto Instrucciones del control remoto Indicador de velocidad Detener Adelante Derecha Velocidad Atrás Izquierda Código...
- Page 52 Instrucciones del control remoto de 2.4G Para la primera vez, se necesita hacer el código. Este producto tiene una función de memoria, la próxima vez que se reemplace la batería, no es necesario volver a hacer coincidir el código. ①.Mantenga presionado el botón "M" durante más de tres segundos, hasta que el primer LED parpadee.
- Page 53 7. Para evitar dañar el control remoto, saque las pilas si no va a usar el control remoto durante mucho tiempo para evitar fugas de batería y corrosión del circuito. 8. Evite dejar caer el control remoto durante su uso. 9.
- Page 54 Puerto de carga Puerto de carga ADVERTENCIA: 1. El juguete debe ser ensamblado por un adulto. En estado desmontado, contiene piezas pequeñas y puntiagudas potencialmente peligrosas, por lo que debe mantenerse fuera del alcance de los niños. 2. PELIGRO DE ASFIXIA - Contiene piezas pequeñas. 3.
- Page 55 · La batería estará un poco caliente cuando se esté cargando, esto es normal. Si no es así, puede ser causado por un cortocircuito del cargador o de la placa de circuito. · Se debe utilizar una placa de presión para fijar la batería. ·...
- Page 56 7. Al detener o almacenar el automóvil, corte la energía y asegúrese de que todos los interruptores estén en la posición "STOP" o "OFF". 8. No use fusibles diferentes a las especificaciones de este producto. 9. No cambie la estructura y el sistema de circuito del producto. El mantenimiento y las reparaciones deben realizarse bajo la guía de personal profesional o técnico.
- Page 57 ADVERTENCIA: Este juguete contiene pilas no reemplazables. Se recomienda la supervisión de un adulto para niños pequeños. ADVERTENCIA: Se requiere supervisión de adultos para reducir el riesgo de lesiones. Nunca use en vías públicas, cerca de vehículos, en pendientes pronunciadas, piscinas u otras masas de agua. Use siempre zapatos y nunca permita que más de 1 persona la use.
- Page 58 IN240300103V01_UK_DE_ES_IT 370-311V70_370-311V90 Il manuale di montaggio della macchina a batteria Standard esecutivo: EN71-1 EN71-2 EN71-3 EN62115 ASTM F963 Si prega di leggere il manuale prima di utilizzare il prodotto. Il manuale e la confezione contengono informazioni importanti, si prega di conservarli correttamente per riferimenti futuri.
- Page 59 NUM. Immagini Nome delle parti Carrozzeria ① Schienale ② ③ Sedile ④ Parabrezza ⑤ Volante ⑥ Ruota anteriore ⑦ Ruota posteriore ⑧ Coprimozzo ⑨ Specchietto ⑩ Asse di sterzo Chiave inglese Caricatore Telecomando Manuale dell'utente...
- Page 60 ⓬ ⓭ Strutture: ⓫ Cacciavite (non incluso)
- Page 61 Disclaimer: Le immagini in queste istruzioni sono solo per riferimento durante il montaggio. Fare riferimento al prodotto effettivo. Avvertenza: Questo prodotto non è un veicolo per il trasporto, dovrebbe essere utilizzato sotto la supervisione di un adulto. I genitori devono assicu- rarsi che i bambini abbiano preso le misure di sicurezza prima dell'uso.
- Page 62 Istruzioni di montaggio Il montaggio dell'auto dovrebbe essere effettuato dagli adulti. Fare attenzione alle piccole parti. Per evitare il rischio di soffocamento, tenere i bambini lontani durante il montaggio. I bambini sotto i 36 mesi sono vietati dall'uso. Si prega di contare tutte le parti attentamente prima del montaggio e di smaltire correttamente il sacchetto di plastica.
- Page 63 10mm 10mm rondella rondella dado di bloccaggio rondella rondella dado di bloccaggio ⓫ 2. Montaggio delle ruote posteriori Usa la chiave ⓫ per rimuovere i da� di bloccaggio dall'asse posterio- re, quindi rimuovi due rondelle da 8 mm, �enile per dopo. Inserisci due ruote posteriori ❼...
- Page 64 3. Montaggio degli specchie� Inserisci due specchie� ❾ nella posizione corrispondente sulla carrozzeria dell'auto, spingili in posizione. 4. Montaggio dell'asse di sterzo A. Inserisci l'asse di sterzo ❿ nella carrozzeria dell'auto, assicura� che il gancio sull'asse di sterzo ❿ passi a�raverso il foro sull'asse anteriore come mostrato in figura (a).
- Page 65 Cacciavite (non incluso) 5. Montaggio del parabrezza U�lizzando il cacciavite, rimuovi due vi� M4 * 16 dalla carrozzeria dell'auto, me�le da parte per dopo. Inserisci il parabrezza ❹ nella posizione corrispon- dente sulla carrozzeria dell'auto, spingilo in posizione, stringi due vi� M4 * 16 u�lizzando il cacciavite.
- Page 66 Cacciavite (non incluso) M4*16 Vite M4*16 Vite 6. Connessione della ba�eria Corrispondi due spine rosse per collegare l'alimentazione. 7. Montaggio del sedile Sul sedile ci sono due vi� M4 * 16. Inserisci lo schienale ❷ nella posizione corrispondente sulla carrozzeria dell'auto, a�acca il sedile ❸ alla carrozzeria dell'auto, stringi le due vi�...
- Page 67 Cacciavite (non incluso) M4*16 Vite M4*16 Vite AVVERTENZA DI SICUREZZA 1. L'installazione e la ricarica del veicolo devono essere supervisionate sempre da un adulto. 2. Questo prodotto è limitato ai bambini dai 37 ai 95 mesi, con un limite di peso di 25 kg (55 lb).
- Page 68 7. Mentre i bambini guidano, è compito dei genitori supervisionare in ogni momento per evitare incidenti. 8. Evitare di guidare sotto la pioggia o su strade allagate. Questo può danneggiare il motore, il circuito e altri componenti elettrici. 9. I genitori devono ispezionare regolarmente il caricatore della batteria per assicurarsi che i cavi, i connettori e gli altri componenti non siano danneggiati.
- Page 69 Per esempio: a. Fossati, riva del fiume, pendenza o terreno irregolare; b. Strade o altri luoghi per la guida e il transito; c. Ostacoli che possono essere facilmente colpiti e causare lesioni; d. Altre zone non sicure. Per evitare incidenti, utilizzare solo durante il giorno o in luoghi luminosi, evitare di utilizzare in condizioni di scarsa visibilità.
- Page 70 Lettore MP3 Display della capacità elettrica Grande memoria Modalità Educazione precoce / Ingresso audio Storia / Pausa / Riproduci Abbassa il volume Musica / Alza il volume Istruzioni per il telecomando Indicatore di velocità Stop Avanti Destra Velocità Indietro Sinistra Codice...
- Page 71 Istruzioni per il telecomando 2.4G La prima volta è necessario effettuare una codifica, questo prodotto ha una funzione di memoria, la prossima volta che si sostituisce la batteria, non è necessario abbinare nuovamente il codice. ① Premere a lungo il pulsante "M" per più di tre secondi, fino a quando il primo LED lampeggia.
- Page 72 7. Per evitare di danneggiare il telecomando, si prega di togliere le batterie se non si utilizza il telecomando per lungo tempo per evitare perdite della batteria e corrosione del circuito. 8. Evitare di far cadere il telecomando durante l'uso. 9.
- Page 73 Presa di ricarica Presa di ricarica AVVERTENZA: 1. Il giocattolo deve essere montato da un adulto. In stato smontato, contiene punti appuntiti potenzialmente pericolosi e parti piccole, quindi tenere fuori dalla portata dei bambini. 2. PERICOLO DI SOFFOCAMENTO: Parti piccole. 3.
- Page 74 · La batteria diventerà leggermente calda durante la ricarica, è normale. Se ciò non accade, potrebbe essere dovuto a un cortocircuito del caricatore o della scheda del circuito. · Utilizzare il piastrino di pressione per fissare la batteria. · Le batterie esaurite devono essere gestite dagli adulti, rimuovere correttamente la batteria esaurita dai giocattoli per riciclarla e non gettarla in modo arbitrario.
- Page 75 7. Quando si ferma o si conserva l'auto, tagliare l'alimentazione e assicurarsi che tutti gli interruttori siano nella posizione "STOP" o "OFF". 8. Non utilizzare fusibili diversi dalle specifiche di questo prodotto. 9. Non modificare la struttura e il sistema di circuito del prodotto. Il lavoro di manutenzione e riparazione deve essere svolto sotto la guida di personale professionale o tecnico competente.
- Page 76 ATTENZIONE: Questo giocattolo contiene batterie non sostituibili. Si raccomanda la supervisione di un adulto per i bambini piccoli. ATTENZIONE: Per ridurre il rischio di lesioni, è necessaria la supervisione di un adulto. Non utilizzare su strade, vicino a veicoli a motore, su o vicino a rampe ripide o scale, piscine o altre parti d'acqua, indossare sempre scarpe e non consentire più...
Need help?
Do you have a question about the 370-311V70 and is the answer not in the manual?
Questions and answers