Table of Contents
Advertisement
Available languages
Available languages
Quick Links
Advertisement
Table of Contents

Related Manuals for Makita XML07PT1


Summary of Contents for Makita XML07PT1
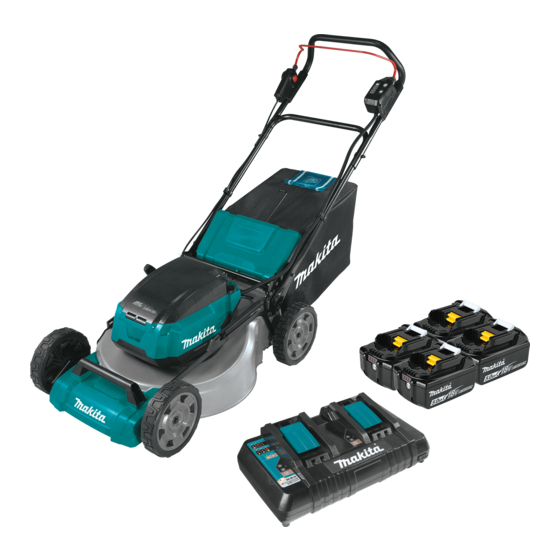
- Page 1 User Manual of Product 1: Makita XML07PT1 36V (18V X2) LXT® Brushless 21" Commercial Lawn Mower Kit with 4 Batteries (5.0Ah), Teal User Manual of Product 2: Makita XRU15Z 36V (18V X2) LXT® Brushless String Trimmer, Tool Only...
- Page 2 INSTRUCTION MANUAL MANUAL DE INSTRUCCIONES Cordless Lawn Mower Cortadora de Cesped XML06 XML07 XML08 IMPORTANT: Read Before Using. IMPORTANTE: Lea antes de usar.
-
Page 3: Specifications
ENGLISH (Original instructions) SPECIFICATIONS Model: XML06 XML07 XML08 Mowing width (blade diameter) No load speed 2,500 /min 2,300 /min Maximum speed 3,300 /min 2,800 /min Part number of replacement mower blade 191D51-9 191D52-7 Dimensions L: 1,610 mm to 1,690 mm (L x W x H) H: 980 mm to 1,095 mm Traveling speed... - Page 4 Watch for holes, ruts, bumps, rocks, or other 13. Do not operate machine without the entire grass catcher, discharge guard, rear guard, or hidden objects. Uneven terrain could cause a slip and fall accident. Tall grass can hide obstacles. other safety protective devices in place and working.
- Page 5 Maintenance and storage Battery tool use and care Store Idle Lawn Mower Indoors - When not in Prevent unintentional starting. Ensure the and locked-up place - out of reach of children. to battery pack, picking up or carrying the machine. Maintain Lawn Mower With Care - Keep cutting on the switch or energizing machine that have the edges sharp and clean for best and safest per-...
- Page 6 13. If the tool is not used for a long period of time, direct current the battery must be removed from the tool. SAVE THESE INSTRUCTIONS. no load speed CAUTION: Only use genuine Makita batteries. Use of non-genuine Makita batteries, or batteries that revolutions or reciprocation per minute charger. 5 ENGLISH...
-
Page 7: Installing The Handle
Tips for maintaining maximum tightened in step 1 using box wrench 13. battery life Align the hole in the lower handle with the hole in Charge the battery cartridge before completely dis- the upper handle, then insert the bolt from inside, and charged. -
Page 8: Removing The Mulching Plug
Hold the handle of the grass basket, and then Removing the mulching plug Open the rear cover. 1. Rear cover 1. Rod 2. Handle 3. Grass basket Remove the mulching plug while holding down the To remove the grass basket, open the rear cover, and lever. - Page 9 Attaching the discharge attachment FUNCTIONAL DESCRIPTION For XML07/XML08 Installing or removing battery cartridge Open the rear cover, and then remove the grass basket. CAUTION: installing or removing of the battery cartridge. CAUTION: Hold the machine and the battery car- CAUTION: Make sure that you lock the battery cover before use.
-
Page 10: Overheat Protection
Overload protection NOTE: as far as it will go. the application that caused the machine to become overloaded. Then turn the machine on to restart. Overheat protection cool before turning the machine on again. Overdischarge protection Indicating the remaining battery capacity latched with the locking lever. - Page 11 Indicating the remaining battery NOTE: Depending on the conditions of use and the capacity Control panel The control panel has the main power switch, the mode switch- Battery indicator status Remaining battery capacity 50% - 100% 20% - 50% 0% - 20% NOTE: conditions.
-
Page 12: Adjusting The Mowing Height
down the switch button. Release the switch button as down the switch button. Release the switch button as soon as the motor starts running. soon as the motor starts running. 1. Switch button 2. Switch lever 1. Switch button 2. Switch lever NOTE: NOTE: While holding the switch lever, push the drive lever... -
Page 13: Adjusting The Handle Height
When the grass basket is almost full, the indicator does Number Mowing height Hold the front grip or the lower handle with one hand, the other hand. 1. Grass level indicator NOTE: This indicator is a rough guide. Depending on the conditions of inside of the basket, this indicator Adjusting the handle height CAUTION:... -
Page 14: Operation
• Electric brake This machine is equipped with an electric brake. the mower blades after releasing the switch lever, have the machine serviced at Makita Authorized Service Center. 1. Speed lever OPERATION and to increase the speed, turn the lever forward. -
Page 15: Emptying The Grass Basket
Mowing a long-grass lawn The center lines of the front wheels are guidelines to mowing width. Using the center lines as guidelines, NOTE: Mowing long grass to a short length all at Emptying the grass basket WARNING: To reduce a risk of accident, reg- ularly check the grass basket for any damage or weakened strength. -
Page 16: Maintenance
Carrying the mower MAINTENANCE WARNING: Always be sure that the lock key and battery cartridge are removed from the mower before storing or carrying the mower or attempting to perform inspection or maintenance. WARNING: Always remove the lock key when the mower is not in use. - Page 17 Turn the bolt counterclockwise with box wrench 17. 1. Mower blade 2. Pin 3. Box wrench Remove the bolt, and then mower blade. 1. Blade support 2. Mower blade 3. Bolt 4. Protrusion NOTICE: When installing the mower blade, make in the holes in the mower blade.
-
Page 18: Troubleshooting
Mower blade does not rotate: Abnormal vibration: Replace the blade. OPTIONAL ACCESSORIES CAUTION: These accessories or attachments are recommended for use with your Makita other accessories or attachments might present a risk ment for its stated purpose. Center. • Mower blade... -
Page 19: Especificaciones
ESPAÑOL (Instrucciones originales) ESPECIFICACIONES Modelo: XML06 XML07 XML08 Amplitud de corte del césped (diámetro de la cuchilla) Velocidad sin carga 2 500 r/min 2 300 r/min Velocidad máxima 3 300 r/min 2 800 r/min Número de pieza de la cuchilla de repuesto de la cortadora de 191D51-9 191D52-7 césped... - Page 20 Use gafas de seguridad - Siempre utilice • Pare la cortadora de césped. Suelte el interruptor. Espere hasta que la cuchilla se careta o máscara contra polvo si la operación es polvorienta. detenga por completo. Los objetos que sean golpeados por la cuchi- lla de la cortadora de césped pueden causar lesiones personales graves.
- Page 21 21. Evite usar la cortadora de césped en pasto Revise el canasto para césped con frecuencia para ver si presenta desgaste o deterioro. Al húmedo. almacenar el equipo, asegúrese siempre de 22. Pare la operación inmediatamente si nota algo vaciar el canasto para césped. Por seguridad, anormal.
- Page 22 Desconecte el paquete de baterías de la herra- No cargue la batería bajo la lluvia ni en lugares mienta antes de hacer cualquier ajuste, cam- mojados. biar accesorios o almacenar la herramienta. No cargue la batería en exteriores. Estas medidas de seguridad preventivas reducen No manipule el cargador, incluida la clavija el riesgo de poner en marcha la herramienta del cargador, ni los terminales con las manos...
-
Page 23: Montaje
Antes de utilizar el cartucho de batería, lea todas Utilice únicamente baterías las instrucciones e indicaciones de precaución originales de Makita. en el (1) el cargador de batería, (2) la batería, y (3) el producto con el que se utiliza la batería. - Page 24 Instalación del mango del mango superior, a continuación inserte el perno por el interior, luego apriete la tuerca por el exterior con la AVISO: Cuando instale los mangos, posicione los cables de tal manera que no queden engan- otro lado. chados con nada entre los mangos.
- Page 25 Extracción del tapón para mantillo luego enganche el canasto para césped en la barra del cuerpo de la cortadora de césped tal como se muestra Abra la cubierta posterior. 1. Cubierta posterior 1. Barra 2. Mango 3. Canasto para césped Retire el tapón para mantillo mientras sostiene Para retirar el canasto para césped, abra la cubierta mango.
-
Page 26: Descripción Del Funcionamiento
Acoplamiento del aditamento de el aditamento de descarga. descarga barra de la cubierta del lado derecho. Para los modelos XML07/XML08 para césped. 1. Cubierta posterior 2. Canasto para césped Acople el tapón para mantillo mientras presiona 1. Cubierta del lado derecho 2. Aditamento de descarga bloquear el tapón para mantillo. -
Page 27: Protección Contra Sobrecarga
Para instalar el cartucho de batería; Para retirar el cartucho de batería; máquina mientras desliza el botón en la parte delantera del cartucho. Saque la llave de cierre. Cambio de los cartuchos de batería 2. Palanca de bloqueo un clic. a la vez. -
Page 28: Panel De Control
Protección en caso de Panel de control sobredescarga El panel de control contiene el interruptor de alimenta- Indicación de la capacidad restante de la batería Únicamente para cartuchos de batería con el indicador 1. Luces indicadoras 2. 2. Luz indicadora de conmu- tación de modo 3. - Page 29 Puede conmutar el modo de operación pulsando el botón de conmutación de modo. Cuando se enciende, la máquina arranca en el modo normal. Cuando se su centro de servicio autorizado de Makita más cercano oprime el botón de conmutación de modo, la máquina para su inspección.
- Page 30 Para el modelo XML07 La tabla a continuación muestra la relación entre el altura aproximada de corte del césped. Número Altura de corte del césped Oprima el interruptor de alimentación principal. Tire de la palanca interruptora hacia usted mien- tras mantiene presionado el botón interruptor. Suelte el botón interruptor tan pronto como el motor arranque.
- Page 31 Indicador del nivel de césped Retire los pernos superiores del mango inferior El indicador del nivel de césped muestra el volumen inferiores. de césped podado. Cuando el canasto para césped no está lleno, el indicador oscila mientras las cuchillas están en funcionamiento. 1.
-
Page 32: Operación
Esta máquina está equipada con un freno eléc- trico. Si la máquina falla constantemente en dete- ner rápidamente las cuchillas de la cortadora de césped tras soltar la palanca interruptora, lleve la máquina a servicio a un centro de servicio autori- zado de Makita. uniforme. 31 ESPAÑOL... -
Page 33: Mantenimiento
NOTA: Cortar césped largo para lograr que quede corto en una sola pasada puede causar que el cés- ped se marchite. Además de que el césped podado puede causar una obstrucción en el interior del cuerpo de la cortadora de césped. Vaciado del canasto para césped ADVERTENCIA: Para reducir el riesgo de... - Page 34 Traslado de la cortadora de césped Para trasladar la cortadora de césped hacen falta dos de servicio autorizados o de fábrica Makita, empleando siempre repuestos Makita. Mantenimiento Coloque de lado la cortadora de césped de tal césped quede orientada hacia el lado de arriba. Limpie parte interna de la carcasa de la cortadora de césped.
- Page 35 Extracción de la cuchilla de la Instalación de la cuchilla de la cortadora de césped cortadora de césped Coloque de lado la cortadora de césped de tal ADVERTENCIA: Instale la cuchilla de la cortadora de césped con cuidado. Ésta tiene una césped quede orientada hacia el lado de arriba.
-
Page 36: Resolución De Problemas
Antes de solicitar alguna reparación, primero realice una inspección por su cuenta. Si detecta algún problema que no esté explicado en el manual, no intente desarmar la máquina. En vez de esto, solicite la reparación a un centro de servicio autorizado de Makita, usando siempre piezas de repuesto Makita. Estado de la anomalía Causa probable (avería) - Page 37 Makita Corporation 3-11-8, Sumiyoshi-cho, 885760-940 XML06-1 Anjo, Aichi 446-8502 Japan EN, ESMX 20191018 www.makita.com...
- Page 38 INSTRUCTION MANUAL MANUAL DE INSTRUCCIONES Cordless Grass Trimmer Cortador Inalámbrico de Pasto XRU15 IMPORTANT: Read Before Using. IMPORTANTE: Lea antes de usar.
-
Page 39: Important Safety Instructions
ENGLISH (Original instructions) SPECIFICATIONS Model: XRU15 Handle type Loop handle No load speed Nylon cutting head 3: 6,500 /min (at each rotation speed level) 2: 5,300 /min 1: 3,500 /min Overall length 1,758 mm (69-1/4″) (without cutting tool) Nylon cord diameter 2.0 - 2.3 mm (0.08 - 0.09″) Applicable cutting tool and Nylon cutting head... - Page 40 10. Stay Alert - Watch what you are doing. Use common sense. Do not operate appliance when you are tired. Store idle appliances indoors. 12. Keep fingers away from switch trigger when not operating the tool and when moving from one operating position to another.
- Page 41 Do not use a cutting tool which is not recom- 12. Do not modify or attempt to repair the machine mended by Makita. or the battery pack except as indicated in the Method of operation instructions for use and care.
- Page 42 17. Cutting elements continue to rotate after the WARNING: Use of this product can create motor is switched off. dust containing chemicals which may cause 18. Do not operate power tools in explosive atmo- respiratory or other illnesses. Some examples of spheres, such as in the presence of flammable these chemicals are compounds found in pesti- liquids, gases or dust.
- Page 43 Use of non-genuine Makita batteries, or batteries that have been altered, may result in the battery bursting causing fires, personal injury and damage. It will also void the Makita warranty for the Makita tool and charger. Tips for maintaining maximum...
-
Page 44: Parts Description
PARTS DESCRIPTION Speed indicator ADT indicator Power lamp Main power button (ADT = Automatic Torque Drive Technology) Reverse button Battery cartridge Lock-off lever Switch trigger Hanger Handle Protector (for nylon Shoulder harness cutting head) 7 ENGLISH... -
Page 45: Functional Description
FUNCTIONAL Status Speed indicator Blinking DESCRIPTION Overload WARNING: Always be sure that the tool is switched off and the battery cartridge is removed before adjusting or checking function on the tool. Overheat Failure to switch off and remove the battery cartridge may result in serious personal injury from accidental start-up. - Page 46 Press the check button on the battery cartridge to indi- Switch action cate the remaining battery capacity. The indicator lamps light up for a few seconds. WARNING: For your safety, this tool is Indicator lamps Remaining equipped with lock-off lever which prevents the capacity tool from unintended starting.
-
Page 47: Electric Brake
Speed adjusting Indicator Mode Rotation speed 3,500 - 6,500 /min You can adjust the tool speed by tapping the main power button. Each time you tap the main power button, Reverse button for debris removal the level of speed will change. WARNING: Switch off the tool and remove the battery cartridge before you remove entan-... -
Page 48: Electronic Function
Electronic function Hex wrench storage Constant speed control CAUTION: Be careful not to leave the hex wrench inserted in the tool head. It may cause The speed control function provides the constant rota- injury and/or damage to the tool. tion speed regardless of load conditions. When not in use, store the hex wrench as illustrated to Soft start feature keep it from being lost. - Page 49 NOTE: Turn the tool upside down so that you can replace the cutting tool easily. NOTICE: Be sure to use genuine Makita nylon cutting head. ► 1. Hook 2. Hanger ► 1. Nylon cutting head 2. Receive washer 3. Spindle 4.
- Page 50 Adjust the shoulder harness to a comfortable Loosen the hex socket head bolt on the hanger. Move working position. the hanger to a comfortable working position and then tighten the bolt. The shoulder harness features a means of quick ► 1. Hanger 2. Hex socket head bolt release.
- Page 51 Discoloration, deformation or cracks may result. To maintain product SAFETY and RELIABILITY, repairs, any other maintenance or adjustment should be performed by Makita Authorized or Factory Service Centers, always using Makita replacement parts. Replacing the nylon cord WARNING: Use only the nylon cord with diameter specified in this instruction manual.
- Page 52 95-M10L 3 m (9 ft) 100 mm (3-15/16″) 80 mm (3-1/8″) 15 ENGLISH...
- Page 53 B&F ECO 4L 3 m (9 ft) 100 mm (3-15/16″) 80 mm (3-1/8″) 16 ENGLISH...
- Page 54 For Ultra Auto 4 3 m (9 ft) 100 mm (3-15/16″) 80 mm (3-1/8″) 17 ENGLISH...
- Page 55 UN-74N 3 m (9 ft) 100 mm (3-15/16″) 80 mm (3-1/8″) 18 ENGLISH...
- Page 56 Manual feed type When the nylon cord gets short, pull it out from the eyelet and feed it from the another eyelet. 0.75 m (2.5 ft) 1 mm (1/32″) 150 mm (5-29/32″) 19 ENGLISH...
- Page 57 Before asking for repairs, conduct your own inspection first. If you find a problem that is not explained in the manual, do not attempt to dismantle the tool. Instead, ask Makita Authorized Service Centers, always using Makita replace- ment parts for repairs.
- Page 58 ESPAÑOL (Instrucciones originales) ESPECIFICACIONES Modelo: XRU15 Tipo de mango Mango redondo Velocidad sin carga Cabezal de corte de nailon 3: 6 500 r/min (en cada nivel de la velocidad 2: 5 300 r/min de rotación) 1: 3 500 r/min Longitud total 1 758 mm (69-1/4″) (sin la herramienta de corte) Diámetro del cordón de nailon...
- Page 59 La desbrozadora deberá apagarse inmediata- Use gafas de seguridad. El visor del casco (o gafas mente si muestra alguna señal de operación protectoras como alternativa) protege la cara de los anormal. residuos y piedras que salgan proyectados. Use siem- pre gafas protectoras o visor para evitar lesiones en los No fuerce la herramienta.
- Page 60 Éstos pueden ser No utilice una herramienta de corte que no sea tóxicos si se llegan a tragar. recomendada por Makita. 15. No cargue la batería bajo la lluvia ni en lugares mojados.
- Page 61 23. No arranque la herramienta cuando la herra- Retire la arena, piedras, clavos, etc. que encuentre en el área de trabajo. Las partículas mienta de corte quede enredada con el césped extrañas podrían dañar el cabezal de corte de cortado. nailon.
- Page 62 (3) el producto con el que se utiliza lesiones personales y daños. Asimismo, esto inva- la batería. lidará la garantía de Makita para la herramienta y el No desarme el cartucho de batería. cargador Makita. Si el tiempo de operación se ha acortado en Consejos para alargar al máximo...
-
Page 63: Descripción De Las Piezas
DESCRIPCIÓN DE LAS PIEZAS Indicador de velocidad Indicador de ADT Luz de alimentación Botón de encendido (ADT = Automatic principal Torque Drive Technology (Tecnología de acciona- miento automático de torsión)) Botón de inversión Cartucho de batería Palanca de desbloqueo Gatillo interruptor Colgador Mango Protector (para el cabe-... - Page 64 Sistema de protección para la DESCRIPCIÓN DEL herramienta/batería FUNCIONAMIENTO La herramienta está equipada con un sistema de pro- tección de la herramienta/batería. Este sistema corta ADVERTENCIA: Asegúrese siempre de que la en forma automática el suministro de energía al motor herramienta esté...
- Page 65 Indicación de la capacidad restante de la batería Únicamente para cartuchos de batería con el indicador ► 1. Indicador de velocidad 2. Botón de encendido principal 3. Luz de alimentación NOTA: La herramienta se apagará automáticamente si no es operada durante cierto periodo de tiempo. Accionamiento del interruptor ►...
-
Page 66: Ajuste De Velocidad
Para encender la ADT, mantenga oprimido el botón de inversión hasta que el indicador de ADT se encienda. Para detener la ADT, mantenga oprimido el botón de inversión hasta que el indicador de ADT se apague. ► 1. Palanca de desbloqueo 2. Gatillo interruptor Ajuste de velocidad ►... - Page 67 Instalación del mango NOTA: Durante la rotación inversa, la herramienta sólo funcionará durante un breve lapso de tiempo y luego se detendrá automáticamente. Coloque las abrazaderas superior e inferior en el amortiguador. NOTA: Una vez que se haya detenido la herramienta, la rotación regresará...
-
Page 68: Instalación Del Protector
AVISO: Asegúrese de utilizar un cabezal de corte Combinación correcta de la de nailon original de Makita. herramienta de corte y el protector PRECAUCIÓN: Utilice siempre la combinación correcta de herramienta de corte y el protector. Una combinación incorrecta podría no protegerlo de la herra-... - Page 69 Colóquese el arnés para hombro en su hombro izquierdo. ► 1. Hebilla Ajuste de la posición del colgador Abroche el gancho en la correa para hombro en el colgador de la herramienta. Para una manipulación más cómoda de la herramienta, puede cambiar la posición del colgador.
-
Page 70: Mantenimiento
Para mantener la SEGURIDAD y FIABILIDAD del pro- ducto, las reparaciones, y cualquier otra tarea de man- tenimiento o ajuste deberán ser realizadas en centros de servicio autorizados o de fábrica Makita, empleando siempre repuestos Makita. Cuando utilice un cabezal de corte de nailon (de tipo golpe y alimentación) - Page 71 Reemplazo del cordón de nailon ADVERTENCIA: Utilice el cordón de nailon únicamente con el diámetro especificado en este manual de instrucciones. Nunca use una línea más pesada, alambre de metal, cuerda o simila- res. El no hacerlo podría causar daños a la herra- mienta y resultar en lesiones personales graves.
- Page 72 95-M10L 3 m (9 ft) 100 mm (3-15/16″) 80 mm (3-1/8″) 35 ESPAÑOL...
- Page 73 B&F ECO 4L 3 m (9 ft) 100 mm (3-15/16″) 80 mm (3-1/8″) 36 ESPAÑOL...
- Page 74 Para el Ultra Auto 4 3 m (9 ft) 100 mm (3-15/16″) 80 mm (3-1/8″) 37 ESPAÑOL...
- Page 75 UN-74N 3 m (9 ft) 100 mm (3-15/16″) 80 mm (3-1/8″) 38 ESPAÑOL...
- Page 76 Tipo alimentación manual Cuando el cordón de nailon queda corto, sáquelo del ojal y aliméntelo a través del otro ojal. 0.75 m (2.5 ft) 1 mm (1/32″) 150 mm (5-29/32″) 39 ESPAÑOL...
- Page 77 Antes de solicitar alguna reparación, primero realice una inspección por su cuenta. Si detecta algún problema que no esté explicado en el manual, no intente desensamblar la herramienta. En vez de esto, solicite la reparación a un centro de servicio autorizado de Makita, usando siempre piezas de repuesto Makita. Estado de la anomalía Causa probable (avería)
- Page 81 Makita Corporation 3-11-8, Sumiyoshi-cho, 885716-943 Anjo, Aichi 446-8502 Japan XRU15-1 EN, ESMX 20190213 www.makita.com...
Need help?
Do you have a question about the XML07PT1 and is the answer not in the manual?
Questions and answers