
Related Manuals for Makita XRU15


Summary of Contents for Makita XRU15
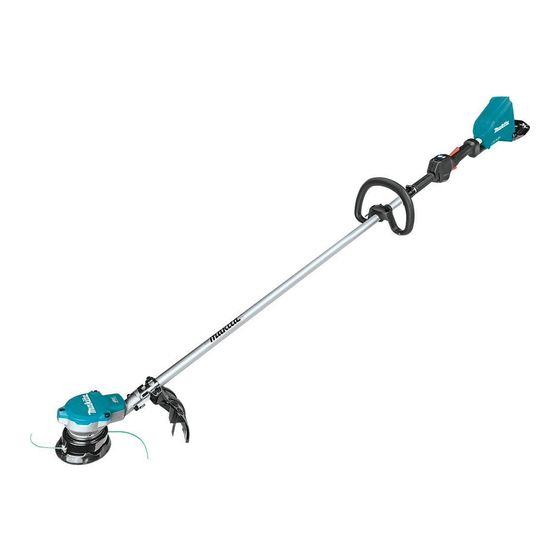
- Page 1 INSTRUCTION MANUAL MANUAL DE INSTRUCCIONES Cordless Grass Trimmer Cortador Inalámbrico de Pasto XRU15 IMPORTANT: Read Before Using. IMPORTANTE: Lea antes de usar.
-
Page 2: Specifications
ENGLISH (Original instructions) SPECIFICATIONS Model: XRU15 Handle type Loop handle No load speed Nylon cutting head 3: 6,500 /min (at each rotation speed level) 2: 5,300 /min 1: 3,500 /min Overall length 1,758 mm (69-1/4″) (without cutting tool) Nylon cord diameter 2.0 - 2.3 mm (0.08 - 0.09″) - Page 3 10. Stay Alert - Watch what you are doing. Use common sense. Do not operate appliance when you are tired. Store idle appliances indoors. 12. Keep fingers away from switch trigger when not operating the tool and when moving from one operating position to another.
- Page 4 Do not use a cutting tool which is not recom- 12. Do not modify or attempt to repair the machine mended by Makita. or the battery pack except as indicated in the Method of operation instructions for use and care.
- Page 5 17. Cutting elements continue to rotate after the WARNING: Use of this product can create motor is switched off. dust containing chemicals which may cause 18. Do not operate power tools in explosive atmo- respiratory or other illnesses. Some examples of spheres, such as in the presence of flammable these chemicals are compounds found in pesti- liquids, gases or dust.
- Page 6 Use of non-genuine Makita batteries, or batteries that have been altered, may result in the battery bursting causing fires, personal injury and damage. It will also void the Makita warranty for the Makita tool and charger. Tips for maintaining maximum...
-
Page 7: Parts Description
PARTS DESCRIPTION Speed indicator ADT indicator Power lamp Main power button (ADT = Automatic Torque Drive Technology) Reverse button Battery cartridge Lock-off lever Switch trigger Hanger Handle Protector (for nylon Shoulder harness cutting head) 7 ENGLISH... -
Page 8: Functional Description
FUNCTIONAL Status Speed indicator Blinking DESCRIPTION Overload WARNING: Always be sure that the tool is switched off and the battery cartridge is removed before adjusting or checking function on the tool. Overheat Failure to switch off and remove the battery cartridge may result in serious personal injury from accidental start-up. -
Page 9: Main Power Switch
Press the check button on the battery cartridge to indi- Switch action cate the remaining battery capacity. The indicator lamps light up for a few seconds. WARNING: For your safety, this tool is Indicator lamps Remaining equipped with lock-off lever which prevents the capacity tool from unintended starting. -
Page 10: Electric Brake
Speed adjusting Indicator Mode Rotation speed 3,500 - 6,500 /min You can adjust the tool speed by tapping the main power button. Each time you tap the main power button, Reverse button for debris removal the level of speed will change. WARNING: Switch off the tool and remove the battery cartridge before you remove entan-... -
Page 11: Electronic Function
Electronic function Hex wrench storage Constant speed control CAUTION: Be careful not to leave the hex wrench inserted in the tool head. It may cause The speed control function provides the constant rota- injury and/or damage to the tool. tion speed regardless of load conditions. When not in use, store the hex wrench as illustrated to Soft start feature keep it from being lost. -
Page 12: Operation
NOTE: Turn the tool upside down so that you can replace the cutting tool easily. NOTICE: Be sure to use genuine Makita nylon cutting head. ► 1. Hook 2. Hanger ► 1. Nylon cutting head 2. Receive washer 3. Spindle 4. - Page 13 Adjust the shoulder harness to a comfortable Loosen the hex socket head bolt on the hanger. Move working position. the hanger to a comfortable working position and then tighten the bolt. The shoulder harness features a means of quick ► 1. Hanger 2. Hex socket head bolt release.
-
Page 14: Maintenance
Discoloration, deformation or cracks may result. To maintain product SAFETY and RELIABILITY, repairs, any other maintenance or adjustment should be performed by Makita Authorized or Factory Service Centers, always using Makita replacement parts. Replacing the nylon cord WARNING: Use only the nylon cord with diameter specified in this instruction manual. - Page 15 95-M10L 3 m (9 ft) 100 mm (3-15/16″) 80 mm (3-1/8″) 15 ENGLISH...
- Page 16 B&F ECO 4L 3 m (9 ft) 100 mm (3-15/16″) 80 mm (3-1/8″) 16 ENGLISH...
- Page 17 For Ultra Auto 4 3 m (9 ft) 100 mm (3-15/16″) 80 mm (3-1/8″) 17 ENGLISH...
- Page 18 UN-74N 3 m (9 ft) 100 mm (3-15/16″) 80 mm (3-1/8″) 18 ENGLISH...
- Page 19 Manual feed type When the nylon cord gets short, pull it out from the eyelet and feed it from the another eyelet. 0.75 m (2.5 ft) 1 mm (1/32″) 150 mm (5-29/32″) 19 ENGLISH...
-
Page 20: Troubleshooting
Before asking for repairs, conduct your own inspection first. If you find a problem that is not explained in the manual, do not attempt to dismantle the tool. Instead, ask Makita Authorized Service Centers, always using Makita replace- ment parts for repairs. -
Page 21: Especificaciones
ESPAÑOL (Instrucciones originales) ESPECIFICACIONES Modelo: XRU15 Tipo de mango Mango redondo Velocidad sin carga Cabezal de corte de nailon 3: 6 500 r/min (en cada nivel de la velocidad 2: 5 300 r/min de rotación) 1: 3 500 r/min Longitud total 1 758 mm (69-1/4″) - Page 22 La desbrozadora deberá apagarse inmediata- Use gafas de seguridad. El visor del casco (o gafas mente si muestra alguna señal de operación protectoras como alternativa) protege la cara de los anormal. residuos y piedras que salgan proyectados. Use siem- pre gafas protectoras o visor para evitar lesiones en los No fuerce la herramienta.
- Page 23 Éstos pueden ser No utilice una herramienta de corte que no sea tóxicos si se llegan a tragar. recomendada por Makita. 15. No cargue la batería bajo la lluvia ni en lugares mojados.
- Page 24 23. No arranque la herramienta cuando la herra- Retire la arena, piedras, clavos, etc. que encuentre en el área de trabajo. Las partículas mienta de corte quede enredada con el césped extrañas podrían dañar el cabezal de corte de cortado. nailon.
- Page 25 (3) el producto con el que se utiliza lesiones personales y daños. Asimismo, esto inva- la batería. lidará la garantía de Makita para la herramienta y el No desarme el cartucho de batería. cargador Makita. Si el tiempo de operación se ha acortado en Consejos para alargar al máximo...
-
Page 26: Descripción De Las Piezas
DESCRIPCIÓN DE LAS PIEZAS Indicador de velocidad Indicador de ADT Luz de alimentación Botón de encendido (ADT = Automatic principal Torque Drive Technology (Tecnología de acciona- miento automático de torsión)) Botón de inversión Cartucho de batería Palanca de desbloqueo Gatillo interruptor Colgador Mango Protector (para el cabe-... -
Page 27: Descripción Del Funcionamiento
Sistema de protección para la DESCRIPCIÓN DEL herramienta/batería FUNCIONAMIENTO La herramienta está equipada con un sistema de pro- tección de la herramienta/batería. Este sistema corta ADVERTENCIA: Asegúrese siempre de que la en forma automática el suministro de energía al motor herramienta esté... - Page 28 Indicación de la capacidad restante de la batería Únicamente para cartuchos de batería con el indicador ► 1. Indicador de velocidad 2. Botón de encendido principal 3. Luz de alimentación NOTA: La herramienta se apagará automáticamente si no es operada durante cierto periodo de tiempo. Accionamiento del interruptor ►...
-
Page 29: Ajuste De Velocidad
Para encender la ADT, mantenga oprimido el botón de inversión hasta que el indicador de ADT se encienda. Para detener la ADT, mantenga oprimido el botón de inversión hasta que el indicador de ADT se apague. ► 1. Palanca de desbloqueo 2. Gatillo interruptor Ajuste de velocidad ►... -
Page 30: Montaje
Instalación del mango NOTA: Durante la rotación inversa, la herramienta sólo funcionará durante un breve lapso de tiempo y luego se detendrá automáticamente. Coloque las abrazaderas superior e inferior en el amortiguador. NOTA: Una vez que se haya detenido la herramienta, la rotación regresará... -
Page 31: Operación
AVISO: Asegúrese de utilizar un cabezal de corte Combinación correcta de la de nailon original de Makita. herramienta de corte y el protector PRECAUCIÓN: Utilice siempre la combinación correcta de herramienta de corte y el protector. Una combinación incorrecta podría no protegerlo de la herra-... - Page 32 Colóquese el arnés para hombro en su hombro izquierdo. ► 1. Hebilla Ajuste de la posición del colgador Abroche el gancho en la correa para hombro en el colgador de la herramienta. Para una manipulación más cómoda de la herramienta, puede cambiar la posición del colgador.
-
Page 33: Mantenimiento
Para mantener la SEGURIDAD y FIABILIDAD del pro- ducto, las reparaciones, y cualquier otra tarea de man- tenimiento o ajuste deberán ser realizadas en centros de servicio autorizados o de fábrica Makita, empleando siempre repuestos Makita. Cuando utilice un cabezal de corte de nailon (de tipo golpe y alimentación) - Page 34 Reemplazo del cordón de nailon ADVERTENCIA: Utilice el cordón de nailon únicamente con el diámetro especificado en este manual de instrucciones. Nunca use una línea más pesada, alambre de metal, cuerda o simila- res. El no hacerlo podría causar daños a la herra- mienta y resultar en lesiones personales graves.
- Page 35 95-M10L 3 m (9 ft) 100 mm (3-15/16″) 80 mm (3-1/8″) 35 ESPAÑOL...
- Page 36 B&F ECO 4L 3 m (9 ft) 100 mm (3-15/16″) 80 mm (3-1/8″) 36 ESPAÑOL...
- Page 37 Para el Ultra Auto 4 3 m (9 ft) 100 mm (3-15/16″) 80 mm (3-1/8″) 37 ESPAÑOL...
- Page 38 UN-74N 3 m (9 ft) 100 mm (3-15/16″) 80 mm (3-1/8″) 38 ESPAÑOL...
- Page 39 Tipo alimentación manual Cuando el cordón de nailon queda corto, sáquelo del ojal y aliméntelo a través del otro ojal. 0.75 m (2.5 ft) 1 mm (1/32″) 150 mm (5-29/32″) 39 ESPAÑOL...
-
Page 40: Resolución De Problemas
Antes de solicitar alguna reparación, primero realice una inspección por su cuenta. Si detecta algún problema que no esté explicado en el manual, no intente desensamblar la herramienta. En vez de esto, solicite la reparación a un centro de servicio autorizado de Makita, usando siempre piezas de repuesto Makita. Estado de la anomalía Causa probable (avería) - Page 44 Makita Corporation 3-11-8, Sumiyoshi-cho, 885716-943 Anjo, Aichi 446-8502 Japan XRU15-1 EN, ESMX 20190213 www.makita.com...
Need help?
Do you have a question about the XRU15 and is the answer not in the manual?
Questions and answers
I.need a new bump head. What size is the shift that so news in to the head
The shaft size for the bump head on the Makita XRU15 is not specified in the provided context.
This answer is automatically generated
how do you remove the head to replace the line
What size string for xru15