Table of Contents
Advertisement
Advertisement
Table of Contents

Related Manuals for Makita XRU15PT


Summary of Contents for Makita XRU15PT
- Page 1 INSTRUCTION MANUAL Cordless Grass Trimmer XRU15 IMPORTANT: Read Before Using.
-
Page 2: Specifications
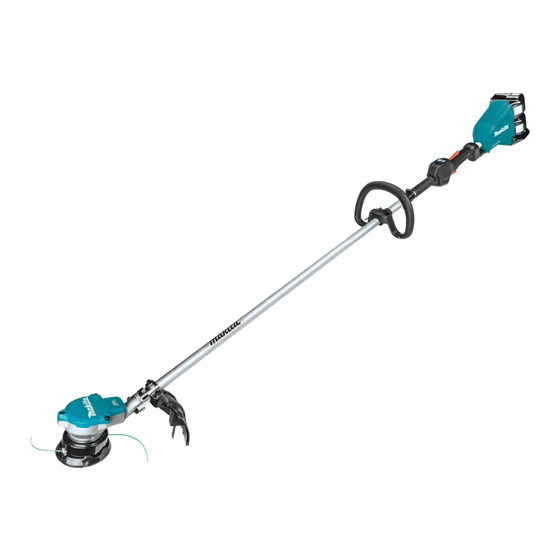
ENGLISH (Original instructions) SPECIFICATIONS Model: XRU15 Handle type Loop handle No load speed Nylon cutting head 3: 6,500 /min (at each rotation speed level) 2: 5,300 /min 1: 3,500 /min Overall length 1,758 mm (69-1/4″) (without cutting tool) Nylon cord diameter 2.0 - 2.3 mm (0.08 - 0.09″) Applicable cutting tool and Nylon cutting head... - Page 3 10. Stay Alert - Watch what you are doing. Use common sense. Do not operate appliance when you are tired. Store idle appliances indoors. 12. Keep fingers away from switch trigger when not operating the tool and when moving from one operating position to another.
- Page 4 Do not use a cutting tool which is not recom- 12. Do not modify or attempt to repair the machine mended by Makita. or the battery pack except as indicated in the Method of operation instructions for use and care.
- Page 5 17. Cutting elements continue to rotate after the WARNING: Use of this product can create motor is switched off. dust containing chemicals which may cause 18. Do not operate power tools in explosive atmo- respiratory or other illnesses. Some examples of spheres, such as in the presence of flammable these chemicals are compounds found in pesti- liquids, gases or dust.
- Page 6 Use of non-genuine Makita batteries, or batteries that have been altered, may result in the battery bursting causing fires, personal injury and damage. It will also void the Makita warranty for the Makita tool and charger. Tips for maintaining maximum...
-
Page 7: Parts Description
PARTS DESCRIPTION Speed indicator ADT indicator Power lamp Main power button (ADT = Automatic Torque Drive Technology) Reverse button Battery cartridge Lock-off lever Switch trigger Hanger Handle Protector (for nylon Shoulder harness cutting head) 7 ENGLISH... -
Page 8: Functional Description
FUNCTIONAL Status Speed indicator Blinking DESCRIPTION Overload WARNING: Always be sure that the tool is switched off and the battery cartridge is removed before adjusting or checking function on the tool. Overheat Failure to switch off and remove the battery cartridge may result in serious personal injury from accidental start-up. -
Page 9: Main Power Switch
Press the check button on the battery cartridge to indi- Switch action cate the remaining battery capacity. The indicator lamps light up for a few seconds. WARNING: For your safety, this tool is Indicator lamps Remaining equipped with lock-off lever which prevents the capacity tool from unintended starting. -
Page 10: Electric Brake
Speed adjusting Indicator Mode Rotation speed 3,500 - 6,500 /min You can adjust the tool speed by tapping the main power button. Each time you tap the main power button, Reverse button for debris removal the level of speed will change. WARNING: Switch off the tool and remove the battery cartridge before you remove entan-... -
Page 11: Electronic Function
Electronic function Hex wrench storage Constant speed control CAUTION: Be careful not to leave the hex wrench inserted in the tool head. It may cause The speed control function provides the constant rota- injury and/or damage to the tool. tion speed regardless of load conditions. When not in use, store the hex wrench as illustrated to Soft start feature keep it from being lost. -
Page 12: Operation
NOTE: Turn the tool upside down so that you can replace the cutting tool easily. NOTICE: Be sure to use genuine Makita nylon cutting head. ► 1. Hook 2. Hanger ► 1. Nylon cutting head 2. Receive washer 3. Spindle 4. - Page 13 Adjust the shoulder harness to a comfortable Loosen the hex socket head bolt on the hanger. Move working position. the hanger to a comfortable working position and then tighten the bolt. The shoulder harness features a means of quick ► 1. Hanger 2. Hex socket head bolt release.
-
Page 14: Maintenance
Discoloration, deformation or cracks may result. To maintain product SAFETY and RELIABILITY, repairs, any other maintenance or adjustment should be performed by Makita Authorized or Factory Service Centers, always using Makita replacement parts. Replacing the nylon cord WARNING: Use only the nylon cord with diameter specified in this instruction manual. - Page 15 95-M10L 3 m (9 ft) 100 mm (3-15/16″) 80 mm (3-1/8″) 15 ENGLISH...
- Page 16 B&F ECO 4L 3 m (9 ft) 100 mm (3-15/16″) 80 mm (3-1/8″) 16 ENGLISH...
- Page 17 For Ultra Auto 4 3 m (9 ft) 100 mm (3-15/16″) 80 mm (3-1/8″) 17 ENGLISH...
- Page 18 UN-74N 3 m (9 ft) 100 mm (3-15/16″) 80 mm (3-1/8″) 18 ENGLISH...
- Page 19 Manual feed type When the nylon cord gets short, pull it out from the eyelet and feed it from the another eyelet. 0.75 m (2.5 ft) 1 mm (1/32″) 150 mm (5-29/32″) 19 ENGLISH...
-
Page 20: Troubleshooting
Before asking for repairs, conduct your own inspection first. If you find a problem that is not explained in the manual, do not attempt to dismantle the tool. Instead, ask Makita Authorized Service Centers, always using Makita replace- ment parts for repairs.
Need help?
Do you have a question about the XRU15PT and is the answer not in the manual?
Questions and answers