
Related Manuals for Makita XML13


Summary of Contents for Makita XML13
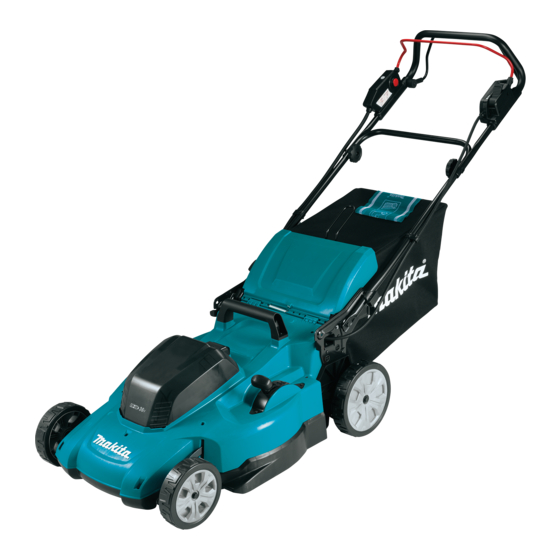
- Page 1 INSTRUCTION MANUAL MANUAL DE INSTRUCCIONES Cordless Lawn Mower Cortadora de Cesped XML10 XML11 XML13 XML14 IMPORTANT: Read Before Using. IMPORTANTE: Lea antes de usar.
-
Page 2: Specifications
ENGLISH (Original instructions) SPECIFICATIONS Model: XML10 XML11 XML13 XML14 Mowing width (blade diameter) 534 mm (21″) 480 mm (18-7/8″) No load speed 3,000 /min 3,100 /min Part number of replacement mower blade 191V96-5 191V97-3 Dimensions (L x W x H) - Page 3 Dress Properly - Do not wear loose clothing or 10. Never direct discharged material toward jewelry. They can be caught in moving parts. Use anyone. Avoid discharging material against a wall or obstruction. Material may ricochet back of rubber gloves and substantial footwear is recom- mended when working outdoors.
- Page 4 Maintenance and storage Recharge only with the charger specified by the manufacturer. A charger that is suitable for Store Idle Lawn Mower Indoors - When not in one type of battery pack may create a risk of fire use, lawn mower should be stored in an indoor dry when used with another battery pack.
- Page 5 12. Use the batteries only with the products specified by Makita. Installing the batteries to non-compliant products may result in a fire, exces- sive heat, explosion, or leak of electrolyte. 13. If the tool is not used for a long period of time, the battery must be removed from the tool.
-
Page 6: Installing The Handle
Use of non-genuine Makita batteries, or batteries that have been altered, may result in the battery bursting causing fires, personal injury and damage. It will also void the Makita warranty for the Makita tool and charger. Tips for maintaining maximum... -
Page 7: Removing The Mulching Plug
Turn the knob 90° while pulling the knob on the Lift up the mulching plug slightly, and then remove lower handle to release the locking pin. Perform the same procedure on the other side. Raise the handle, and then turn the knob on both sides 90°. Make sure that the knobs are securely fixed. - Page 8 Make sure that there is no sagging on the corners Installing or removing the grass of the grass basket. basket To install the grass basket, follow the steps below. Open the rear cover. Fig.8 Open the upper clip, and attach it to the frame. Fig.11 ►...
-
Page 9: Functional Description
Attaching the mulching plug FUNCTIONAL DESCRIPTION Open the rear cover, and then remove the grass basket. Installing or removing battery cartridge CAUTION: Always switch off the machine before installing or removing of the battery cartridge. CAUTION: Hold the machine and the battery cartridge firmly when installing or removing bat- tery cartridge. -
Page 10: Overload Protection
Let the machine and battery(ies) cool down. If no improvement can be found by restoring protection system, then contact your local Makita Service Center. NOTICE: If the machine stops due to a cause not described above, refer to the section for troubleshooting. -
Page 11: Main Power Switch
Indicating the remaining battery Main power switch capacity WARNING: Always turn off the main power Only for battery cartridges with the indicator switch when not in use. Fig.19 ► 1. Indicator lamps 2. Check button Press the check button on the battery cartridge to indi- cate the remaining battery capacity. -
Page 12: Adjusting The Mowing Height
Install the battery cartridges. Insert the lock key, lock key or switch, stop the operation immediately and and then close the battery cover. have them checked by your nearest Makita Authorized Press the main power switch. Service Center. Pull the switch lever toward you while holding For XML11/XML14 down the switch button. -
Page 13: Adjusting The Handle Height
The table below shows the relationship between the When the grass basket is almost full, the indicator does number on the mower body and the approximate mow- not float while the blades are running. In this case, stop ing height. the operation immediately and empty the basket. -
Page 14: Electronic Function
If the machine consistently fails to quickly stop ► 1. Speed lever the mower blades after releasing the switch lever, have the machine serviced at Makita Authorized The traveling speed can be adjusted with the speed Service Center. lever. To decrease the speed, pull the lever toward you, and to increase the speed, turn the lever forward. -
Page 15: Operation
The center lines of the front wheels are guidelines to mowing OPERATION width. Using the center lines as guidelines, mow in strips. Overlap by one half to one third the previous strip to mow the lawn evenly. Mowing WARNING: Before mowing, clear away sticks and stones from mowing area. -
Page 16: Emptying The Grass Basket
Damaged or missing parts should be repaired or Release the switch lever and drive lever (for XML11/ replaced. XML14), or release the switch lever (for XML10/XML13). Store the mower in a safe place out of the reach of Remove the lock key. -
Page 17: Carrying The Mower
Turn the knob 90° while pulling the knob on the Carrying the mower lower handle to release the locking pin. Perform the same procedure on the other side, and then fold the CAUTION: Before carrying the mower, make handle. sure that the battery cartridge and lock key are removed. - Page 18 For XML10/XML13 Store the grass basket as shown in the figure. Fig.45 ► 1. Grass basket Fig.43 ► 1. Knob Fig.46 NOTICE: Be careful not to pinch the cords when ► 1. Grass basket folding the handle. Loosen the thumb nuts on both sides, and then Removing or installing the mower fold the upper handle as shown in the figure.
- Page 19 Removing the mower blade Installing the mower blade Put the mower on its side so that the mowing WARNING: Install the mower blade carefully. height adjusting lever comes to the lower side. It has a top/bottom facing. To lock the blade, insert the pin into the hole on WARNING: Tighten the bolt clockwise firmly the mower body as far as it will go.
-
Page 20: Troubleshooting
Before asking for repairs, conduct your own inspection first. If you find a problem that is not explained in the manual, do not attempt to disassemble the machine. Instead, ask Makita Authorized Service Centers, always using Makita replacement parts for repairs. -
Page 21: Especificaciones
ESPAÑOL (Instrucciones originales) ESPECIFICACIONES Modelo: XML10 XML11 XML13 XML14 Amplitud de corte del césped (diámetro de la cuchilla) 534 mm (21″) 480 mm (18-7/8″) Velocidad sin carga 3 000 r/min 3 100 r/min Número de pieza de la cuchilla de repuesto de la cortadora de césped... - Page 22 Preparación Quite la batería de la cortadora de césped - Quite la batería si no la está usando, y antes Mantenga a los niños alejados - Todos los visi- de dar mantenimiento, limpiarla, retirar material tantes deberán ser mantenidos a una distancia acumulado en la cortadora de césped o reem- segura del área de trabajo.
- Page 23 19. Nunca intente hacer ajustes en la altura de Mantenga apretadas todas las tuercas, pernos y corte mientras la cortadora de césped esté tornillos para asegurar que el equipo se encuen- funcionando, si ésta cuenta con la caracterís- tre en condiciones seguras de operación. tica de ajuste en la altura de corte.
- Page 24 No utilice un paquete de baterías o una herra- Después de retirar la batería de la máquina o mienta que esté dañado/dañada o haya sido el cargador, asegúrese de acoplar la cubierta modificado/modificada. Las baterías dañadas de la batería a la batería y de guardarla en un o modificadas podrían comportarse de manera lugar seco.
- Page 25 El cartucho de batería lesiones personales y daños. Asimismo, esto inva- puede explotar si se tira al fuego. lidará la garantía de Makita para la herramienta y el No clave, corte, aplaste, lance o deje caer el cargador Makita.
-
Page 26: Montaje
Para la XML10/XML13 MONTAJE ADVERTENCIA: Asegúrese siempre de que la llave de cierre y el cartucho de batería se hayan extraído antes de realizar cualquier trabajo en la cortadora de césped. El no extraer la llave de cierre y el cartucho de batería puede ocasionar lesiones personales graves debido a un encendido accidental. - Page 27 Inserte el marco en el canasto para césped lo Extracción del tapón para mantillo máximo que se inserte, mientras sostiene el mango del marco. Abra la cubierta posterior. Fig.7 Fig.4 ► 1. Mango ► 1. Cubierta posterior AVISO: No inserte el mango en el canasto para Levante el tapón para mantillo ligeramente, y césped.
- Page 28 Coloque los demás sujetadores de presión, como Sostenga el mango del canasto para césped y se muestra en la ilustración. Asegúrese de que los luego enganche el canasto para césped en la barra del sujetadores de presión queden colocados firmemente cuerpo de la cortadora de césped tal como se muestra al marco.
-
Page 29: Descripción Del Funcionamiento
Coloque el tapón para mantillo al empujarlo hasta el Para instalar el cartucho de batería; máximo que avance, de modo que las protuberancias del tapón Jale hacia arriba la palanca de bloqueo y luego para mantillo encajen dentro de los orificios de la máquina. abra la cubierta de la batería. -
Page 30: Protección Contra Sobrecarga
Deje que la máquina y la(s) batería(s) se enfríen. Si no hay ninguna mejora al restaurar el sistema de protec- ción, comuníquese con su centro local de servicio Makita. AVISO: Si la máquina se detiene debido a una causa no descrita anteriormente, consulte la sec- ción de detección y solución de problemas. - Page 31 Makita más cercano para su inspección. Para la XML11/XML14 Instale los cartuchos de batería. Inserte la llave de cierre y luego cierre la cubierta de la batería.
- Page 32 Suelte la palanca de accionamiento y la palanca interruptora para detener la máquina. Fig.24 Para la XML10/XML13 ► 1. Palanca de ajuste de la altura de corte del Instale los cartuchos de batería. Inserte la llave de césped cierre y luego cierre la cubierta de la batería.
- Page 33 Ajuste de la altura del mango NOTA: Las figuras que muestran la altura de corte del césped deben usarse únicamente como guía. Dependiendo de las condiciones del césped o el La altura del mango se puede ajustar en dos niveles. suelo, la altura real del césped puede variar ligera- Sostenga el mango inferior, y luego gire la perilla mente de la altura establecida.
-
Page 34: Operación
Si la máquina falla constantemente en dete- ner rápidamente las cuchillas de la cortadora de césped tras soltar la palanca interruptora, lleve la máquina a servicio a un centro de servicio autori- zado de Makita. Fig.30 OPERACIÓN ► 1. Palanca de velocidad La velocidad de recorrido se puede ajustar con la palanca de velocidad. - Page 35 Sujete el mango firmemente con ambas manos al cortar Cambie la dirección del corte de césped cada vez para el césped. La referencia de velocidad del corte es de evitar que el patrón de grano del césped se forme sólo aproximadamente 7 metros a 14 metros (23 ft.
-
Page 36: Mantenimiento
Para mantener la SEGURIDAD y FIABILIDAD del pro- ducto, las reparaciones, y cualquier otra tarea de man- tenimiento o ajuste deberán ser realizadas en centros de servicio autorizados o de fábrica Makita, empleando Fig.39 siempre repuestos Makita. 36 ESPAÑOL... - Page 37 Gire la perilla 90° mientras tira de la perilla del Traslado de la cortadora de césped mango inferior para liberar el pasador de bloqueo. Realice el mismo procedimiento en el otro lado, y luego PRECAUCIÓN: Antes de transportar la corta- pliegue el mango.
- Page 38 Para la XML10/XML13 Almacene el canasto para césped como se mues- tra en la figura. Fig.45 ► 1. Canasto para césped Fig.43 ► 1. Perilla AVISO: Tenga cuidado de no pellizcar los cables Fig.46 cuando pliegue el mango. ► 1. Canasto para césped...
- Page 39 Extracción de la cuchilla de la Instalación de la cuchilla de la cortadora de césped cortadora de césped Coloque de lado la cortadora de césped de tal ADVERTENCIA: Instale la cuchilla de la forma que la palanca de ajuste de la altura de corte del cortadora de césped con cuidado.
-
Page 40: Resolución De Problemas
Antes de solicitar alguna reparación, primero realice una inspección por su cuenta. Si detecta algún problema que no esté explicado en el manual, no intente desarmar la máquina. En vez de esto, solicite la reparación a un centro de servicio autorizado de Makita, usando siempre piezas de repuesto Makita. Estado de la anomalía Causa probable (avería) - Page 44 Makita Corporation 3-11-8, Sumiyoshi-cho, 885927A914 Anjo, Aichi 446-8502 Japan XML10-2 EN, ESMX 20221004 www.makita.com...
Need help?
Do you have a question about the XML13 and is the answer not in the manual?
Questions and answers