
Related Manuals for Makita XML10


Summary of Contents for Makita XML10
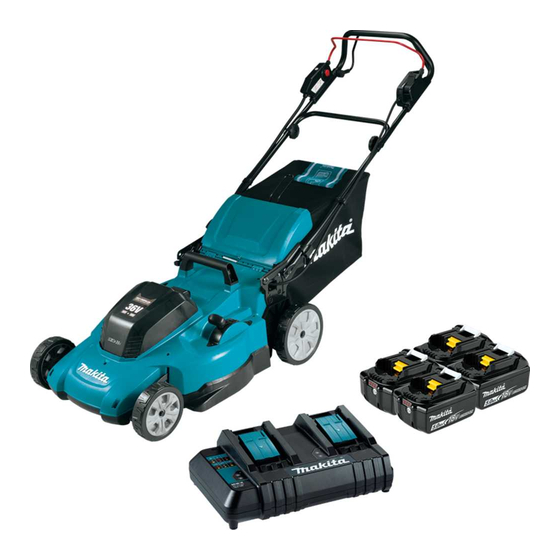
- Page 1 INSTRUCTION MANUAL MANUAL DE INSTRUCCIONES Cordless Lawn Mower Cortadora de Cesped XML10 XML11 IMPORTANT: Read Before Using. IMPORTANTE: Lea antes de usar.
-
Page 2: Specifications
ENGLISH (Original instructions) SPECIFICATIONS Model: XML10 XML11 Mowing width (blade diameter) 534 mm (21″) No load speed 3,000 /min Part number of replacement mower blade 191V96-5 Dimensions L: 1,780 mm to 1,840 mm (70″ to 72-1/2″) (L x W x H) W: 580 mm (22-3/4″) - Page 3 Watch for holes, ruts, bumps, rocks, or other 14. Stop the motor and remove the lock key when- hidden objects. Uneven terrain could cause a slip ever you leave the equipment, before cleaning the mower or unclogging the chute and mak- and fall accident.
- Page 4 Check the blade mounting bolt at frequent Follow all charging instructions and do not intervals for proper tightness. charge the battery pack or machine outside of the temperature range specified in the instruc- Keep all nuts, bolts, and screws tight to tions.
- Page 5 Do not touch the terminals with any con- causing fires, personal injury and damage. It will ductive material. also void the Makita warranty for the Makita tool and Avoid storing battery cartridge in a con- charger. tainer with other metal objects such as nails, coins, etc.
-
Page 6: Installing The Handle
For XML10 ASSEMBLY WARNING: Always be sure that the lock key and battery cartridge are removed before carrying out any work on the mower. Failure to remove the lock key and the battery cartridge may result in seri- ous personal injury from accidental start-up. -
Page 7: Removing The Mulching Plug
Insert the frame into the grass basket as far as it Removing the mulching plug will go while holding the handle of the frame. Open the rear cover. Fig.7 ► 1. Handle Fig.4 ► 1. Rear cover NOTICE: Do not insert the handle into the grass basket. - Page 8 Attach all the other clips as shown in the figure. Hold the handle of the grass basket, and then Make sure that all the clips are securely attached to the hook the grass basket on the rod of the mower body as frame.
-
Page 9: Functional Description
Attach the mulching plug by pushing it as far as it To install the battery cartridge; will go so that the protrusions on the mulching plug fit Pull up the locking lever, and then open the battery into the holes on the machine. cover. -
Page 10: Overload Protection
Let the machine and battery(ies) cool down. If no improvement can be found by restoring protection Lighted Blinking system, then contact your local Makita Service Center. 75% to 100% NOTICE: If the machine stops due to a cause not described above, refer to the section for 50% to 75% troubleshooting. -
Page 11: Main Power Switch
If you notice anything unusual with either of the lock key Main power switch or switch, stop the operation immediately and have them checked by your nearest Makita Authorized Service Center. For XML11 WARNING: Always turn off the main power switch when not in use. -
Page 12: Adjusting The Mowing Height
The table below shows the relationship between the stop the machine. number on the mower body and the approximate mow- ing height. For XML10 Install the battery cartridges. Insert the lock key, Number Mowing height and then close the battery cover. -
Page 13: Adjusting The Handle Height
When the grass basket is almost full, the indicator does Adjust the handle height, and then turn the not float while the blades are running. In this case, stop knob on both sides 90°. Make sure that the knobs are the operation immediately and empty the basket. -
Page 14: Operation
This machine is equipped with an electric brake. If the machine consistently fails to quickly stop the mower blades after releasing the switch lever, have the machine serviced at Makita Authorized Service Center. Fig.33 NOTE: When cutting long lawn or dense lawn, if the... -
Page 15: Emptying The Grass Basket
Replace the grass basket if necessary. Release the switch lever and drive lever (for XML11), or release the switch lever (for XML10). Fig.34 Remove the lock key. ► 1. Mowing width 2. Overlapping area 3. Center line Open the rear cover and take out the grass basket by holding the handle. -
Page 16: Carrying The Mower
Maintenance Carrying the mower Remove the lock key and battery cartridges, and CAUTION: Before carrying the mower, make then close the battery cover. sure that the battery cartridge and lock key are Put the mower on its side. Clean grass clippings removed. - Page 17 Turn the knob 90° while pulling the knob on the For XML10 lower handle to release the locking pin. Perform the same procedure on the other side, and then fold the handle. Fig.41 ► 1. Knob NOTE: Supporting the handle makes it easier to release the locking pin when pulling the knob.
- Page 18 Store the grass basket as shown in the figure. Turn the bolt counterclockwise with box wrench 17. Fig.45 ► 1. Grass basket Fig.47 ► 1. Mower blade 2. Pin 3. Box wrench Remove the bolt, and then mower blade. Fig.46 ►...
-
Page 19: Troubleshooting
Before asking for repairs, conduct your own inspection first. If you find a problem that is not explained in the manual, do not attempt to disassemble the machine. Instead, ask Makita Authorized Service Centers, always using Makita replacement parts for repairs. -
Page 20: Especificaciones
ESPAÑOL (Instrucciones originales) ESPECIFICACIONES Modelo: XML10 XML11 Amplitud de corte del césped (diámetro de la cuchilla) 534 mm (21″) Velocidad sin carga 3 000 r/min Número de pieza de la cuchilla de repuesto de la cortadora de 191V96-5 césped Dimensiones... - Page 21 Use vestimenta adecuada - No use prendas Mantenga las manos y los pies alejados del sueltas ni joyas. Éstas podrían engancharse en área de corte. Manténgase alejado de la aber- tura de descarga en todo momento. las piezas móviles. Cuando se trabaje en exterio- res es recomendable usar guantes de hule y un Si la cortadora de césped llega a golpear algún calzado resistente.
- Page 22 20. Corte el césped transversalmente a través de 10. Nunca quite ni altere los dispositivos de las pendientes, nunca hacia arriba ni hacia seguridad. Verifique con regularidad que fun- abajo. Aplique extrema precaución al cambiar cionen correctamente. Nunca haga nada que la dirección en las pendientes.
- Page 23 No utilice un paquete de baterías o una herra- Después de retirar la batería de la máquina o mienta que esté dañado/dañada o haya sido el cargador, asegúrese de acoplar la cubierta modificado/modificada. Las baterías dañadas de la batería a la batería y de guardarla en un o modificadas podrían comportarse de manera lugar seco.
- Page 24 Asimismo, esto inva- No clave, corte, aplaste, lance o deje caer el lidará la garantía de Makita para la herramienta y el cartucho de batería, ni golpee un objeto sólido cargador Makita.
-
Page 25: Montaje
Para la XML10 MONTAJE ADVERTENCIA: Asegúrese siempre de que la llave de cierre y el cartucho de batería se hayan extraído antes de realizar cualquier trabajo en la cortadora de césped. El no extraer la llave de cierre y el cartucho de batería puede ocasionar lesiones personales graves debido a un encendido accidental. - Page 26 Inserte el marco en el canasto para césped lo Extracción del tapón para mantillo máximo que se inserte, mientras sostiene el mango del marco. Abra la cubierta posterior. Fig.7 Fig.4 ► 1. Mango ► 1. Cubierta posterior AVISO: No inserte el mango en el canasto para Levante el tapón para mantillo ligeramente, y césped.
- Page 27 Coloque los demás sujetadores de presión, como Sostenga el mango del canasto para césped y se muestra en la ilustración. Asegúrese de que los luego enganche el canasto para césped en la barra del sujetadores de presión queden colocados firmemente cuerpo de la cortadora de césped tal como se muestra al marco.
-
Page 28: Descripción Del Funcionamiento
Coloque el tapón para mantillo al empujarlo hasta NOTA: La máquina no funciona con solo un cartucho el máximo que avance, de modo que las protuberancias de batería. del tapón para mantillo encajen dentro de los orificios de la máquina. Para instalar el cartucho de batería;... -
Page 29: Protección Contra Sobrecarga
Deje que la máquina y la(s) batería(s) se enfríen. Si no hay ninguna mejora al restaurar el sistema de protección, comuníquese con su centro local de servi- cio Makita. AVISO: Si la máquina se detiene debido a una causa no descrita anteriormente, consulte la sec- ción de detección y solución de problemas. - Page 30 Makita más cercano para su inspección. Para la XML11 Instale los cartuchos de batería. Inserte la llave de cierre y luego cierre la cubierta de la batería.
- Page 31 Suelte la palanca de accionamiento y la palanca interruptora para detener la máquina. Para la XML10 Instale los cartuchos de batería. Inserte la llave de cierre y luego cierre la cubierta de la batería.
- Page 32 Sujete el mango inferior con una mano, y luego mueva Cuando el canasto para césped está casi lleno, el la palanca de ajuste de la altura de corte del césped indicador deja de oscilar mientras las cuchillas están en con la otra mano. funcionamiento.
- Page 33 Makita. 33 ESPAÑOL...
-
Page 34: Operación
OPERACIÓN NOTA: Cuando se corta césped largo o espeso, si se encuentra una irregularidad en la longitud del césped o un acabado deficiente después de cortar el césped, Corte del césped o si se encuentra una disminución de la velocidad del motor durante el corte, disminuya la velocidad de corte a un nivel menor al recomendado en este ADVERTENCIA:... -
Page 35: Mantenimiento
NOTA: Si se encuentra una irregularidad en la longi- de servicio autorizados o de fábrica Makita, empleando tud del césped o un acabado deficiente después de siempre repuestos Makita. - Page 36 Almacene la cortadora de césped en un lugar Para trasladar la cortadora de césped, sostenga la empuñadura seguro y fuera del alcance de los niños. trasera y la parte de sujeción inferior al frente de la máquina con la ayuda de dos personas, tal como se muestra en la figura. Para la XML11 AVISO: No vierta agua en la zona que se muestra...
- Page 37 Almacene el canasto para césped como se mues- tra en la figura. Fig.42 ► 1. Perilla Para la XML10 Fig.45 ► 1. Canasto para césped Fig.46 ► 1. Canasto para césped Fig.43 ►...
- Page 38 Retire el perno y luego la cuchilla de la cortadora Extracción o instalación de la de césped. cuchilla de la cortadora de césped ADVERTENCIA: La cuchilla continuará moviéndose por inercia durante algunos segun- dos tras haber soltado el interruptor. No realice ninguna operación hasta que la cuchilla se haya detenido por completo.
-
Page 39: Resolución De Problemas
Antes de solicitar alguna reparación, primero realice una inspección por su cuenta. Si detecta algún problema que no esté explicado en el manual, no intente desarmar la máquina. En vez de esto, solicite la reparación a un centro de servicio autorizado de Makita, usando siempre piezas de repuesto Makita. Estado de la anomalía Causa probable (avería) - Page 40 Makita Corporation 3-11-8, Sumiyoshi-cho, 885927A940 Anjo, Aichi 446-8502 Japan XML10-1 EN, ESMX 20210908 www.makita.com...
Need help?
Do you have a question about the XML10 and is the answer not in the manual?
Questions and answers
hi i have a xml 10 mower does power go up to controls them back to motor cause new batteries the indicator for batteries is not lit mower wont come on