Page 1
X Series ELECTRIC FORKLIFT TRUCK CPD60/70/80/90/100-XC4(-I) CPD60/70/80/90/100-XC5(-I) CPD60/70/80/90/100-XD3(-I) CPD80-XLC4(-I) CPD80-XLC5(-I) CPD80-XLD3(-I) OPERATION AND MAINTENANCE MANUAL Original Instruction HANGCHA GROUP CO., LTD 03/2023...
Page 2
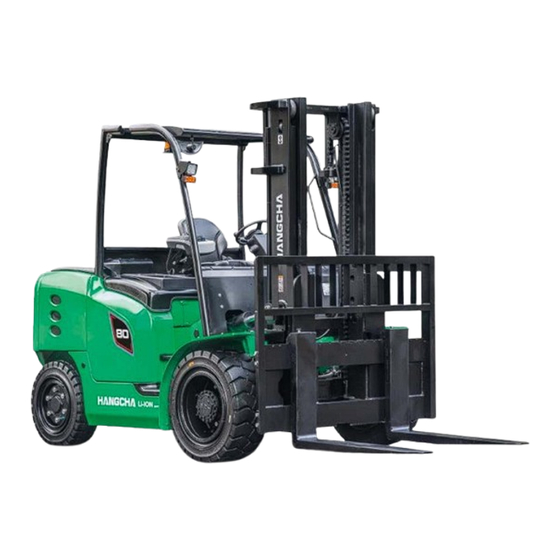
Thanks for purchasing Hangcha J series four-wheel Electric Counterbalanced Forklift Truck X series four-wheel electric forklift truck is a new product with a small turning radius, an attractive design, a small and compact structure, a low centre of gravity, good stability and superior performance.
1. Appearance and Main Components Item Description Item Description Fork Left side plate Load bracket Rear wheel Mast Counterweight Lift cylinder Towing pin Tilt cylinder Rear cover Overhead guard Front cover Front wheel Seat Left side door...
Multi-function display Curtis electric-controlled model The multi-function display shows the battery capacity, the service hours, the operating mode, the travel speed and fault code information. Graphic illustrations on the multi-function display act as warning indicators. Through the multi-function display on the right button can also check fault code and parameter setting.
Page 8
interface, press ▲ to move the menu option up. The setting mode is slow mode; when the meter is in the password interface, press ▼ to switch the user password or OEM password input setting; when the meter is in the menu interface, press ▼...
Page 10
Battery level display [A] work in this mode in normal work-time. SPE mode: The truck is in Safety Mode. In this mode, maximum traveling speed is limited to 7km/h. it is very good for working in a crowd warehouse or other compact space. In this Shows the remaining capacity of the battery.
Page 11
1.Steering direction display: the arrow is turned to the left around the center of the circle, then it is turned left; when it is deflected to the right, it is turned right. When parking brake applied, the light up. 2.Steering angle display: The larger the deflection angle, the larger the turning angle.
Page 12
Enter the number "1" for the password. Enter the number "2" for the password. Enter the number "3" for the password. Enter the number "4" for the When the meter is in the fault interface, password. press again and the meter will return to the main interface display.
Page 13
INMOTION electric-controlled model The multi-function display shows the battery capacity, the service hours, the operating mode, the travel speed and fault code information. Graphic illustrations on the multi-function display act as warning indicators. Through the multi-function display on the right button can also check fault code and parameter setting.
Page 14
Main display interface hour. Operating mode display[C] E S P E As the diagram shows, the pictures from the left to the right represent the mode of S mode→ P mode → E mode → SPE mode. S mode is super mode, thus the truck’s Battery capacity display[A] acceleration, deceleration rate, max climbing gradient and so on is much higher.
Page 15
Battery low capacity indicator[H](Red) power cutting every time, the work mode resets to mode E no matter which mode it is before power When there is only one line for the power, the cutting, but the switch key is still in indicator will be on to remind the user to the mode before turn off.
Page 16
Mode settings In the main display interface, the button 、 , corresponding S mode、 、 、 P mode、E mode、SPE mode. For example: In the main display interface, (2) Language switch setting: This instrument supports two languages, Chinese and English, press the button , the screen shows as which will be adjusted to the language you need follows:...
Page 17
Select the "Language" option by moving up ④ ) or down ( Press the menu key ( ) to enter the language setting state. ⑥ Use the up key ( ) or down key ( ) to select the Chinese language. Refer to steps ⑤...
Controls forward. hand brake equipped with Emergency power off [1] micro-switch on the left side that stops the forklift from moving when the brake lever is engaged. WARNING parking slope unavoidable, block the wheels with solid wedge. Forward/Reverse selector switch [3] Turn on or off the power.
Page 19
when the key switch is turned to ON. In this situation, return the direction lever to the neutral position and take your foot off the accelerator pedal before attempting to start the forklift. Steering wheel [4] Control turn light, headlight and front signal light.
Page 20
Control the forks’ forward and backward tilting. CAUTION The tilt lever is used to tilt the mast forward If the direction lever is not in neutral and backward. Push forward to tilt forward, accelerator pedal pull backward to tilt back. The tilting speed is depressed, the forklift will not start determined by the distance that the lever is when the key switch is turned to ON.
Page 21
It is used when installing attachment like paper roll clamp or rotator. Steering column positioning device [11] Adjust and fix steering column according to needed distance. In order to meet operator’s need, the tilting angle of steering column is adjustable. Pull the lever upward, the steering column is released;...
Page 22
Fork stopper fork position. Used when adjusting the spacing of the forks. Pull up the fork stopper and rotate it 90°, then adjust the forks to the desired positions according to the load to be handled. WARNING Fork spacing should be adjusted ...
Others Overhead guard The overhead guard protects the operator against injury from falling objects. It must have sufficient impact strength. Loose installation, dismantlement or remould of the overhead guard is dangerous, and may cause major accident. The gap on it is used to lift the battery.
Seat The seat design satisfies the maximum comfort, and can adjust as follows: ①Weight adjusting lever ②Seat forward-backward adjusting lever ③Backrest adjusting lever ④ Safety belt ⑤ Document box Adjust driver seat according to weight: In order to get ideal damping effect, adjust the seat according to driver’s weight Driver sits on.
Page 25
Safety belt Fasten safety belt④ before driving. It protects driver when accidents happen. Regularly clean and check safety belt, avoid dirt. Correctly use safety belt: – Sit on the seat correctly. – Check if the safety belt twisted. – Place the safety belt on the hip. –...
OPS in the startup state. OPS abnormal function handling Park the truck in safe place and contact Hangcha agency to check if any below condition is occurred. a. after the driver leaves the seat, the seat indicator light does not light up;...
Page 27
Caution As to forklift equipped with safety belt protection switch, after driver sits on the seat correctly, it also needs fasten safety belt, then can operate the truck normally. When driving on the uphill, starting the OPS will cut off the drive power and make the truck slip.
3. Labels Labels, like warning label, load curve and nameplate, must be clear and readable. Replace when necessary. 起吊方法 警 告 不遵守以下规则会使自己或他人受到严重伤害 未经正规培训的人员不得操作此叉车 仔细阅读操作指南和所有的标示,熟悉此叉车,操作指南随此叉车一起提供 每次使用前后都必须对叉车进行常规检查,不得操作有故障或损坏的叉车 只有经过正规培训的修理人员方可修理此叉车 一定要安装好护顶架和挡货架以防重物砸下 叉车工作前应保证蓄电池电量充足,各类开关、插接件、操作手柄、踏板、轮胎气压及紧固件处于正常状态; 车辆的起动过程如下:松开刹车手柄,开启电门开关,置方向开关手柄于前进或后退档,踩下加速踏板即可 ; 在狭小场地或恶劣路面作业时,应注意间距,避免碰撞 MEETS DESIGN SPECIFICATIONS OF ANSI / ITSDF B56.1 STANDARD I N EFFECT AT TI M E OF MANUFACTURE 载货时,货物重量及尺寸应符合载荷曲线图规定,并使货物重心处于门架中心位置,切勿超载或偏位...
places, be safely secured and take care Safety instructions not to slip. Only trained and accredited operators are Be careful do not be scalded when – permitted to operate the forklift truck. inspecting the motor, controller and etc. Whenever you discover a fault, stop the forklift, hang a "DANGER"...
Page 48
Never direction of travel when reversing. use damaged or deformed pallets. 13. Other person is not allowed to sit on the fork, 19. Hangcha can provide users with a variety tray or forklift. of attachments including rotating clamps, flat...
Page 49
clamps, side-shift forks, jibs, etc. Such height. If unavoidable, make the load stable attachments for special uses only. and secure. When handling bulky loads which Modifications attachments must restrict your vision, operate the forklift in authorized by the manufacturer. Do not reverse or have a guide.
Page 50
Slow down and sound the horn at cross – aisles and other locations where vision is obstructed. – Turning speed should be limited to 1/3 of the vehicle's top speed. 28. Make sure to keep your distance from the roadside or platform edge. 31.
Page 51
unbalance the load. 38. The labels and signs on the vehicle Slow down on wet/slippery areas. Do not provide warnings and operating instructions. – During operation, adhere to the requirements drive near the edge of the travel path; if unavoidable, be extra cautious. of the manual as well as the labels and signs on the vehicle.
Page 52
industrial truck, provided, however, that the user. Arranges for the modification or alteration to be designed, tested and implemented by an engineer(s) expert in industrial trucks and their safety, Maintains a permanent record of the design, test(s) and implementation of the modification or alteration, Approves makes...
6. Truck Lifting, Carrying and Towing Lifting Securely fasten wire ropes to the lifting holes in both ends of the outer mast crossbar and to the counterweight hook, and then hoist the forklift with a lifting device. The wire rope fastened to the counterweight end must pass through the gap in the overhead guard, without putting stress on the overhead guard.
Carrying Forklift trucks are generally used for loading, unloading and short-distance transportation. They are not designed to be a long-distance mode of transport. A forklift that needs to be transported over a long distance should be transported in a ship, train or a truck having a load capacity over 13T.
Towing Forklift is not permitted to use for daily traction or traction task Towing pin in the lower counterweight is only used for the following occasions: Forklift malfunctions on the working road and move the truck urgently. – Use when forklift gets into trouble and cannot drive(wheels get stuck in pits etc.) –...
7. The structure and stability of truck Prevent the forklift to turn over! It is very important for operator to know the truck’s structure and relationship between load and stability. The structure CAUTION of the truck The forklift truck essentially consists of the lifting device (forks and mast) and the truck itself (with tires).
Page 57
the max load and load center CAUTION The horizontal distance between the centre of gravity of the load on the forks and the backrest or the front face of the forks (whichever is shorter) is called the load centre distance. Maximum load is the maximum load that a forklift truck can carry at a standard load centre distance.
Page 58
Gravity and CAUTION stability Forklift stability depends on the common centre of gravity of the forklift. When the forklift is unloaded, the centre of gravity (CoG) remains unchanged. When the forklift is loaded, the centre of gravity is formed by the combined centre of gravity of the forklift and load.
Page 59
the load CAUTION capability chart This graph shows the relationship between the position of the load centre distance and the maximum load. Prior to loading, check whether the load and the load centre distance are within the limits of the load capacity graph. If a load has a complex shape, the heaviest part of the load should be centred over the forks and close to the load bracket.
8. During running-in New forklifts should initially be run under low-load conditions. In particular the following requirements should be met within the first 100 hours of operation: Battery over discharge must be prevented during initial use. – In general, the battery should be recharged promptly when the charge level has decreased to –...
Routine Maintenance Careful, all-round maintenance will keep the forklift truck in good working condition. It guarantees the safety of the forklift and your personal safety at work. WARNING In addition to testing lights and checking operating performance, before checking electrical system, turn off the key switch and disconnect the battery plug.
Page 62
○ Adjust tire pressure to specified value. Front wheel ① Park forklift truck on level concrete; ② Start engine and raise mast about 100mm height. ③ Place chocks behind rear wheels to prevent movement of forklift; ④ Loosen wheel nuts 1-2 turns each by turning them counter-clockwise;...
Page 63
Warning Do not remove wheel nuts until rear tires are raised from ground. Raise the forklift with jack until rear ⑤ wheels off the ground. Support forklift truck by putting additional wooden blocks under both sides of the front truck frame as shown below.
Page 64
the hand brake lever returns to its original the marks. Add if necessary and then close the position effectively. cover. CAUTION Depressing the brake pedal helps to tighten or loosen the hand brake lever. "65" 5. Accelerator pedal check "60"...
Page 65
loose or damaged. Adjust or replace the wiring lubrication intervals accordingly. During busy if necessary. months, increase the number of lubricated parts. Depending on the operation of the forklift, coat the lift guide wheel and the contact surfaces on the inner and outer sides of the mast with a layer of grease.
Page 66
properly. Press the horn button to check the sound of the horn. Check all other lights and the reversing buzzer. 18. Battery maintenance Refer to Battery section. 19. Others Check for abnormal noise.
10. Starting and Operation Driving Slowly depress the accelerator pedal until the WARNING forklift starts to travel forward or backward. Never start the truck before any Decelerating damage or failure to the truck has Slowly release the accelerator pedal, the been settled.
Lifting the load: – CAUTION - First raise the forks 5–10cm off the Drive slowly operate ground and make sure that the load is steering wheel carefully. Ensure that secure. there is sufficient room for the rear - Tilt the mast all the way back, raise the end to swing out when making the load 5–10 cm off the ground, then move turn.
forks and then check that the load is CAUTION safely deposited. When it is difficult to insert the forks To perform necessary lifting and tilting – fully into the pallet, drive forward so operations, reverse the forklift to remove that the forks are inserted to 3/4 of the forks from the loads.
11. Storage the battery electrolyte on a monthly basis. Apply one equalizing charging every – Daily storage month. Park the forklift in a designated area and – WARNING chock the wheels. The wooden blocks must be single Put the shift lever in neutral. –...
(8)Measures in winter: Maintain a good temperature, please contact the agent or charging environment. Do not park the truck Hangcha after-sales service. out in the cold or in the freezer for long time 1.1 Maintenance precautions especially after the battery is used, it is (...
1.2 Daily, weekly, monthly, long-term Time Content storage maintenance The battery should be stored in a Time Content dry, ventilated place. Before storing 1. After the battery is discharged, it the battery, fully charge it, and then needs to be charged in time. charge it once every 30 days.
Use a hydrometer to measure the specific Warning gravity of electrolyte. 1. Using a battery when the electrolyte level is low may lead to overheating and shorten the life span of the battery. 2. When the amount of electrolyte is not correct, it will cause the battery to overheat and even burn the battery and electrical system components.
(5)After topping up, tightly fasten the vent or battery caps. ( 6 ) Use a damp cloth to wipe clean the surface of each battery cell. (7) Use a squeeze ball pipette to draw off any excess water. Procedures: Warning 1.
Page 75
~ 1 / 7) 630 = 63A ~ 90A, the choice of the manual. If it is not enough, add 70A-80A charger is most suitable. distilled water (filled with Hangcha pure Please use the Hangcha pure charger. distilled water). 4.2 Daily charging procedures (9)For those equipped with automatic water...
Page 76
(Automatic Water Filling System of Battery (optional)). (10)Close the vent cover, clean the battery surface, and close the battery cover. Plug the forklift cable plug into the battery socket and the charging is completed. 4.3 Equalizing charge 4.3.1 Reason of equalizing charge With time, the voltage, density and capacity of a battery tend to become unbalanced.
Battery specification Battery of this truck is formed by front and rear batteries in series. CPD60-XC4 CPD70-XC4 CPD80-XC4 CPD90-XC4 CPD100-XC4 CPD80-XLC4 Item Model CPD60-XC5 CPD70-XC5 CPD80-XC5 CPD90-XC5 CPD100-XC5 CPD80-XLC5 Length [L] 1420 1420 1420 1420 1420 1420 Width [W] Height [H] Height [H1] mm Voltage Capacity...
Battery charging Park the truck at the appointed charging – area. Open the cover – Take out the battery charging plug from the – truck outlet Open each battery filling cap. –...
Page 79
Connect the battery charging plug to the – charger plug WARNING Charging cable polarity must keep the same with the charger output terminal polarity. When the charging cable is connected to the battery plug, notice that the polarity keep the same. Otherwise it may damage battery.
Page 80
Battery replacement CAUTION Before replacing a battery, make sure that the voltage, capacity, weight and dimensions of the new battery match the forklift specifications. Do not use replacement batteries with a different voltage, weight or dimensions without the manufacturer's permission. Park the truck at the appointed area.
Page 81
Dismantle the battery plug and place the – battery cable in the battery box. Take down the front/rear battery box locating – pins. Choose proper lifting appliance to hook up the – four lifting holes of the battery box.
Page 82
Lift out the battery. – WARNING Lift the battery by attaching hooks to all 4 lifting holes. Do not lift with only 2 of the holes as this may subject the casing to uneven stress, causing the cells to rupture. ...
Safety instructions protected to prevent the installation personnel from contacting during the installation process. 1.1.1 It is strictly forbidden to touch the positive When installing system, mechanical and negative poles of the battery box with both hoisting should be adopted. When moving to hands at any time.
Refers to the percentage of battery remaining Discharge Temperature : -28 ℃ ~55 ℃ , electricity. Storage Environment Temperature: -28 ℃ 1.3.3 Nominal voltage ~55℃. An appropriate approximate value used to 1.4.2 Pre-departure inspection:After the key represent the voltage of a battery. switch is closed, confirm that the instrument 1.3.4 Rated capacity panel has no battery system alarm information.
Maintenance the process of charging and using, the abnormalities that may occur in the power 1.5.1 Outside appearance of inspection box: battery system are as follows: Battery systems Check whether there are any debris, obvious or local temperatures rise sharply. There is deformation, rust other...
SLC-96250 Operation instructions for intelligent charger (CATL battery charger) Start-up interface Start-up interface Click on the icon: , Enter the help description interface. Click on the icon: , on-off alarm sound, to turn on the alarm sound state,...
Page 88
turn off the alarm sound state. The control operation requires password permission. The default password is: 123456. Click on the boot icon: toggle charging control to turn on or off. Click on the purple part of the charging status information bar, enter into the single charging module information display bar.
Page 89
Password input interface: Enter the correct password in the password entry box. The default password is 888888. Click on the icon: , return to help description interface. Click on the icon:, enter the password modify interface. Click on the icon: , if the password is entered correctly, enter the parameter setting interface, otherwise the password input error is prompted.
Page 90
Enter in sequence according to the prompt: Enter the user's old password, enter the new password for the first time and enter the new password for the second time. Click on the icon: , if the user's old password is entered correctly, the first time the new password is entered and the second time the new password is entered, the modification is successful.
Page 91
number is easy for the user to distinguish, and the user can set it at will. Debug interface for the factory to adjust the test, users can not operate at will. Click on the icon: , switch module information backward. Click on the icon:, return to the main interface.
Page 92
Charging process explanation The charging step: 1. Choose "turn on" charging control mode. The "CAN" and "485" indicator lights are bright green. 2. DC charging gun and battery connection is normal. 3. "Residual capacity" is less than "allowed to charge the SOC limit" to start charging. 4.
Page 93
Cautions a. Before the charger is turned on, it should be checked whether the battery box wiring is correct, whether there will be a short circuit or a positive and negative electrode connection. To avoid overloading the charging machine and burning components or lines. b.
Lithium battery charging Note: There is a thin slot above the socket, which is used to buckle the lock when Park the forklift safely. Open the charging door cover the charging gun is inserted into the charging. Note: The flat side of the plug is The charging port of the lithium battery is equipped with a locking hook, which is used visible, and the charging port is covered with a...
Daily battery maintenance and care (1) Check before use After the vehicle key switch is closed, confirm that the instrument panel has no battery system alarm information. Please check the remaining power before use. It is recommended to use SOC between 50% and 100%.
battery case to see if the battery P+/C+ and P-/C- lines or solder joints are damaged. If there is any damage, they need to be replaced. Then the battery is odored by the method of incitement. If there is an exciting electrolyte odor, the battery has been leaked. It needs to test the battery of each battery.
Page 97
Using carbon dioxide fire extinguishers or dry powder fire extinguishers to extinguish smoke or fire site under the condition of ensuring the safety of personnel. d. Notify our company personnel as soon as possible to deal with.
Inspection and maintenance is often easily overlooked. Early detection enables problems to – be addressed in a timely manner. Use original Hangcha Group spare parts. – Do not use different types of oil when changing or topping up oil. –...
Forklift used oil and lubrication Oil filler for hydraulic oil Drain plug for hydraulic oil tank Oil filler plug for main axle housing of Oil control plug for main axle drive axle housing of drive axle Oil filler/drain plug for hub reduction Drain plug main...
Page 107
Replace hydraulic oil Hydraulic oil should be changed every half year: Park the truck on level ground; – Turn the steering wheel right to the end, make the oil drain plug have enough space; – Tilt the mast backward to the end and drop the forks on the ground; –...
Periodic replacement of safety-critical parts Some parts are difficult to inspect during periodic maintenance. Therefore, in order to further – improve safety, users should carry out periodic replacement of the parts listed in the following table. If any of these parts are found to be damaged or faulty before they are due for replacement, –...
15. The use, install and safety rules of attachment HANGCHA will choose attachment that in accordance with International standard ISO2328 Forklift pothook fork and installation size of carriage, such as sideshifters, fork positioner, rotator, push/pull and clamp ect. sideshifter fork positioner...
Page 111
Prohibit the cargo at a high position when truck moves with attachment. If the size of cargo is – too big, prohibit the truck move on. Transport the cargo, make sure that the distance of bottom of cargo and ground is less than 300mm and mast incline back. The weight of cargo couldn’t exceed the limited value of combination carrying capacity of –...
Attachment check and maintenance Check the clearance of carriage beam and below catch of attachment if meet the attachment – manual. Check the rise catch is right on the flute of fork carriage. – Use the auto general lithium-grease per 500 hours to bearing surface. –...
16. Battery automatic filling water system(Option) Makeup of the automatic filling watering system: Automatic Watering Plug – End Plug – Floater – T-piece & L-piece – Flow Indicator(with filter) – 6mm, 8mm ,10mm watering pipe – Male & Female couplings (Kv10 and –...
Page 114
Watering Flow 10mm T-piece head Battery Male/female Water tank indicator Watering Watering (6-10-6) spec. plug Spec. pipe pipe T-piece (filter) 12 pcs 1 pc 1 pc 2 pcs 1 pc 30L 1 pc 24 pcs 1 pc 1 pc 2 pcs 1 pc 30L 1 pc 40 pcs...
Page 115
-(5~17mm) T Length 50.5 Float 16.5 Watering pipe Our company offers watering pipes of different types and the clients can choose what they need according to the specification of the battery. The watering pipe must be perfectly sealed with T-piece and L-piece. Notes during the filling process:...
Page 116
open close Structure Diagram of the Watering Plug Characteristics of the automatic filling watering system: No need to water by hand, labor saving. – No malfunction factor leading to damage the battery. – Easy operation, safe. – Ensure a precise electrolyte level in every battery cell. –...
Page 117
Related safety standards (for trucks exporting to Europe) The TRUCKS covered are conform to the following European Directives and standards: 2006/42/EC Machinery Directive 2014/30/EU EMC Directive EN ISO 12100:2010 Safety of machinery — General principles for design — Risk assessment and risk reduction EN ISO 3691-1:2015+A1:2020 Industrial trucks —...
Page 118
Maintenance record Date Service content Serviceman...
Need help?
Do you have a question about the X Series and is the answer not in the manual?
Questions and answers