Table of Contents
Advertisement
Quick Links
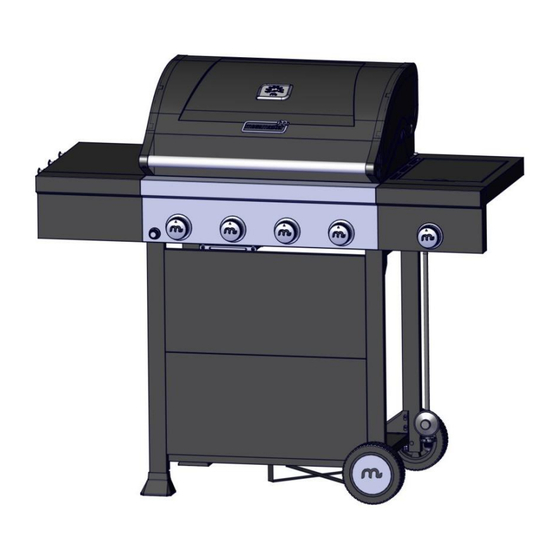
SIZZLER 420
Patio Gas Braai
Product code: 720-0967B
LPGSASA Permit Number
(1185/18/RSA-08/A)
www.megamaster.co.za
Manufactured in China · Distributed by Mega Group · PO Box 15, Woodlands, 0072, South Africa · Tel: +27 (0) 12 802 1515
ASSEMBLY & OPERATING INSTRUCTIONS
Important: Read these instructions for use carefully so as to familiarize yourself with the
appliance before connecting it to its gas container. Keep these instructions for future
reference.
1
Advertisement
Table of Contents

Related Manuals for Megamaster SIZZLER 420


Summary of Contents for Megamaster SIZZLER 420
- Page 1 SIZZLER 420 Patio Gas Braai Product code: 720-0967B LPGSASA Permit Number (1185/18/RSA-08/A) www.megamaster.co.za Manufactured in China · Distributed by Mega Group · PO Box 15, Woodlands, 0072, South Africa · Tel: +27 (0) 12 802 1515 ASSEMBLY & OPERATING INSTRUCTIONS Important: Read these instructions for use carefully so as to familiarize yourself with the appliance before connecting it to its gas container.
-
Page 2: Table Of Contents
TABLE OF CONTENTS Safety Information ......................3 Package Contents List ...................... 7 Preparation ........................8 Assembly Instructions ....................... 9 Installation Instructions...................... 17 Operating Instructions ....................... 20 Care and Maintenance ...................... 22 Troubleshooting ........................ 24 Warranty ........................... 26 Replacement Parts List ..................... 27 Recipe List…………………………………………………………………………………………29 DANGER WARNING... - Page 3 SAFETY INFORMATION WARNING Do not try lighting this appliance without first reading WARNING the “LIGHTING INSTRUCTIONS” section of this manual. WARNING – Hazards or unsafe practices which COULD result in severe personal injury or death. WARNING This grill is not intended to be installed in or on recreational CAUTION vehicles and/or boats.
- Page 4 WARNING WARNING Do not leave the grill unattended while cooking. Spiders and insects can nest inside the burners of the grill and disrupt gas flow. WARNING Inspect the grill at least twice a year. Failure to properly place the burner over the orifice could cause a fire to occur behind and beneath the valve panel, thereby damaging the grill and making CAUTION...
- Page 5 Do not use indoors. WARNING Do not try lighting this appliance without first reading the “LIGHTING INSTRUCTIONS” section of this manual. SAFETY PRACTICES TO AVOID INJURY When properly cared for, your grill will provide safe, reliable service for many years. However, extreme care must be used as the grill produces intense heat that can increase accident potential.
- Page 6 Never use a dented or rusty propane cylinder. Turn off all control knobs and make certain the grill is cool before using any type of aerosol cleaner on or around it. The chemical that produces the spraying action could, in the presence of heat, ignite or cause metal parts to corrode.
-
Page 29: Installation Instructions
INSTALLATION INSTRUCTIONS GAS HOOK-UP Only the pressure regulator and hose assembly supplied with the grill should be used. Any replacement pressure regulator and hose assembly must be specified by the grill manufacturer. This grill is configured for LP Gas. Do not use a Natural Gas supply. Total gas consumption (per hour) with all burners set on “HI”: Main burners 48,000 BTU/Hr. - Page 30 LEAK TESTING GENERAL Although gas connections on the grill are leak tested prior to shipment, a complete leak test must be performed at the installation site. Before each use, check all gas connections for leaks using the procedures listed below. If the smell of gas is detected at any time, you should immediately check the entire system for leaks.
- Page 31 It is very important to keep your appliance’s clear and away from any combustible materials. Maintain at least 24 inches of clearance from sides and back and do not use under overhead combustible construction. No overhead combustible construction...
-
Page 32: Operating Instructions
OPERATING INSTRUCTIONS General Use of the Grill Each main burner is rated at 12,000 BTU/Hr. The main grill burners encompass the entire cooking area and are side ported to minimize blockage from falling grease and debris. Above the burners are flame tamers. The igniter knobs are located on the center portion of the valve panel. - Page 33 TO LIGHT THE SIDE BURNER 1. Push and turn Side Burner control knob to IGNITE/HI, at the same time, press and hold electronic ignition button to light the burner. 2. Once the burner is lit, release the electronic ignition button and knob. 3.
-
Page 34: Care And Maintenance
Fig. 23 IGNITE / HIGH CARE AND MAINTENANCE Stainless Steel There are many stainless steel cleaners available. Always use the mildest cleaning process first, scrubbing in the direction of the grain. Do not use steel wool as it will scratch the surface. To touch up noticeable scratches in the stainless steel, sand very lightly with dry 100 grit sand paper in the direction of the grain. - Page 35 and behind the main control panel. To reinstall the main burners: 1. Insert the burner over the main burner gas valve (part# 15 on Page 24). 2. Make sure the orifice stud is inside the burner venture. 3. Align the burner screw hole with the firebox hole, insert screw and tighten. CAUTION 1.
-
Page 36: Troubleshooting
TROUBLESHOOTING Problems Possible Solutions Grill will not light. 1. Push and turn the knob and check for sparks. 2. If there is a spark, check to make sure gas is supplied to the burner. a. Purge the line of any trapped air. b. - Page 37 Problems Possible Solutions Burner blows out. 1. Check for any burner defects. 2. Check for proper burner installation. 3. Make certain the fuel mixture is not too lean. 4. Make sure the gas supply is sufficient. 5. See if the LP gas cylinder is empty. Low heat, LP gas.
-
Page 38: Warranty
Warranty This grill has a one (1) year limited warranty. The warranty period is valid from the date of purchase. This is subject to correct assembly, use, storage and regular maintenance of the product. Please refer to page 10 of this manual for list of replacement parts. Please Note: the main burner has a warranty of three (3) years. -
Page 39: Replacement Parts List
Sizzler 420 PATIO GAS BRAAI FOR OUTDOOR USE ONLY WARNING Read and follow all Safety, Assembly, and Use & Care Instructions in this guide before assembling and cooking with this grill. Failure to follow all instructions in this Use & Care Guide may lead to fire or explosion, which could result in property damage, personal injury or death.
Need help?
Do you have a question about the SIZZLER 420 and is the answer not in the manual?
Questions and answers