Table of Contents
Advertisement
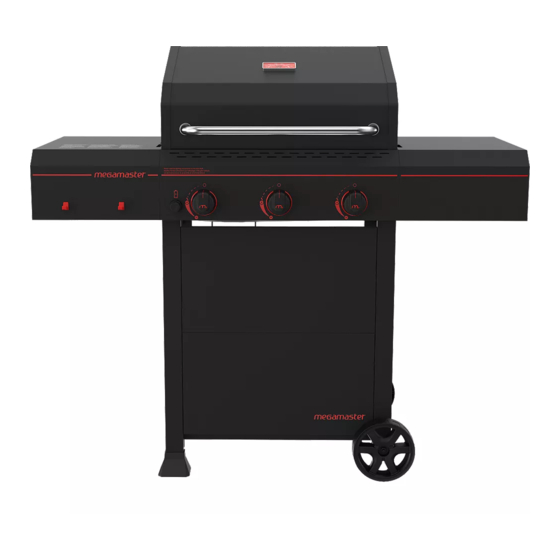
3 BURNER PATIO GAS
BRAAI
ORIGIN SERIES
ASSEMBLY & OPERATING
INSTRUCTIONS
LPGSASA Permit Number (1185-79/1-RSA-17-A)
This instructions manual contains important information necessary
for the proper assembly and safe use of the appliance.
Read these instructions and warnings carefully so as to familiarize
yourself with the appliance before connecting it to its gas
container.
Keep this manual for future reference.
1
MODEL NO. 720-0804C
Questions, problems, missing parts?
Before returning to your retailer, call our
Customer Service Department at Tel:
(010) 001 6342, 8 a.m. - 5 p.m., CAT,
Monday-Thursday and Friday till 3 p.m.
Or send us an E-mail at
service@megagroup.co.za. Visit us online
at: www.megamaster.co.za
Advertisement
Table of Contents

Related Manuals for Megamaster ORIGIN SERIES


Summary of Contents for Megamaster ORIGIN SERIES
- Page 1 3 BURNER PATIO GAS BRAAI ORIGIN SERIES ASSEMBLY & OPERATING INSTRUCTIONS LPGSASA Permit Number (1185-79/1-RSA-17-A) This instructions manual contains important information necessary for the proper assembly and safe use of the appliance. Read these instructions and warnings carefully so as to familiarize yourself with the appliance before connecting it to its gas container.
- Page 2 BUT THAT’S NOT WHERE IT BELONGS We get it. You’ve just unboxed your Megamaster Patio Gas braai Braai and you can’t wait to fire it up. Those steaks, fish, vegetables and everything else you could possibly imagine certainly aren’t going to braai themselves.
-
Page 3: Table Of Contents
TABLE OF CONENTS Gas Hookup Instructions... . Safety Warnings ....Leak Test Instructions ... . . Braai Clearance Information . -
Page 4: Braai Clearance Information
BRAAI USAGE INFORMATION DANGER Never use your gas braai in a garage, porch, shed, or any other enclosed area. DO NOT use this appliance under overhead combustible surfaces. Do not install this unit in combustible enclosures. The minimum air space clearance from sides and back of unit to combustible construction is 36 in. - Page 5 GAS HOOKUP WARNINGS WARNING Do not try lighting this appliance without reading the “LIGHTING INSTRUCTIONS” section of this manual. BRAAI INSTALLATION 1. Check your local building codes for the proper method of installation. In the absence of local codes, this unit should be installed in accordance with the South African National Standard 1539, Storage and Handling of Liquefied Petroleum Gases, Correct LP Gas Cylinder Use.
-
Page 6: Operation Warnings
OPERATION WARNINGS SAFETY PRACTICES TO AVOID PERSONAL INJURY When properly cared for your braai will provide safe, reliable service for many years. However, extreme care must be used as the braai produces intense heat that can increase risk of injury. When using this appliance basic safety practices must be followed, including the following: •... -
Page 7: Lp Gas Supply Safety
LP GAS SUPPLY SAFETY • If this information is not followed exactly, a fire • When your gas braai is not in use the gas must resulting in death or serious injury could occur. be turned off at LP gas cylinder. •... - Page 8 NOW THAT WE GOT ALL THE SAFETY INFORMATION OUT OF THE WAY, LET’S START WITH SOME ELBOW GREASE!
-
Page 9: Package Parts List
PACKAGE PARTS LIST... - Page 10 PACKAGE PARTS LIST...
- Page 11 PACKAGE PARTS LIST...
-
Page 12: Tools Needed
TOOLS NEEDED Some parts come with Screws pre- installed. Loosen and tighten for final assembly. HARDWARE PACK LIST Truss head screw Truss head screw Flat Washer (Black) (Black) 1/4” 5/32-32 x 2/5” 1/4-20x1/2” B x18 A x30 Flat Washer 5/32” 5/16”... -
Page 13: Assembly Instructions
ASSEMBLY INSTRUCTIONS... -
Page 26: Gas Hookup Instructions
GAS HOOK-UP INSTRUCTIONS NEVER CONNECT AN UNREGULATED GAS SUPPLY LINE TO THE APPLIANCE. USE THE REGULATOR/HOSE ASSEMBLY SUPPLIED. This is a LP Gas configured braai. Do not attempt to use a natural gas supply unless the braai has been reconfigured for natural gas use. Total gas consumption (per hour) of this stainless steel gas braai with all burners on “HIGH”: Main burner - 12,000 Btu/hr. -
Page 27: Leak Test Instructions
LEAK TEST INSTRUCTIONS GENERAL Although all gas connections on the braai are leak tested at the factory prior to shipment, a complete gas tightness check must be performed at the installation site due to possible mishandling in shipment, or excessive pressure unknowingly being applied to the unit. Periodically check the whole system for leaks following the procedures listed below. - Page 28 We feel much better knowing you’re safer for having taken the time to go through that first section thoroughly. Now, let’s get on with putting your Megamaster braai together so you can unleash your inner kebab/ pesto mushrooms / gourmet boerie roll...
- Page 29 BRAAI IGNITION INSTRUCTIONS CAUTION: DO NOT LEAVE THE BRAAI UNATTENDED WHILE COOKING. USING THE BRAAI Each main burner is rated at 12,000 Btu/hr. The main braai burners encompass the entire cooking area and are side ported to minimize blockage from falling grease and debris. The igniter knobs are located on the lower center portion of the valve panel.
-
Page 30: Ignition Instructions
IGNITION INSTRUCTIONS FLAME CHARACTERISTICS 1. Check for proper burner flame characteristics. 2. Burner flames should be blue and stable with no yellow tips, excessive noise, or lifting. If any of these conditions exist call our customer service line. If the flame is yellow, this is a indication of insufficient air. -
Page 31: Care And Maintenance
CARE AND MAINTANENCE STAINLESS STEEL There are many different stainless steel cleaners available. Always use the mildest cleaning procedure first, scrubbing in the direction of the grain. Do not use steel wool as it will scratch the surface. Specks of grease can gather on the surfaces of the stainless steel and bake on to the surface and give the appearance of rust. -
Page 32: Troubleshooting Guide
TROUBLESHOOTING GUIDE PROBLEM SOLUTION Make sure you have a spark while you are trying to light the burner (if no spark) . Check if the battery is installed properly. Ensure that the wire is connected to the electrode assembly. When attempting to light my Clean wire (s) and / or electrode with rubbing alcohol and a clean braai, it will not light swab. -
Page 33: Burner Replacement
MAIN BURNER REPLACEMENT WARNING: If you wish to replace the main burner, we strongly recommend that you hire a professionally trained technician to replace it. Please understand that we will not be responsible for any liability, personal injury, or property damage resulting from an improperly assembled burner. HOW TO REPLACE THE MAIN BURNER 1. -
Page 34: Parts Diagram
PARTS DIAGRAM... - Page 35 PARTS LIST Warranty Warranty Part (Description) coverage QTY No. Part (Description) coverage (year) (year) Main lid Main manifold Main lid screw Main gas valve Temperature gauge Regulator, LP Hood buffer A Control knob Lid handle Side shelf, right Warming rack Side shelf control panel, right Cooking grid Grease tray assembly...
-
Page 36: Warranty
You may also have other rights which vary from state to state. If you wish to obtain performance of any obligation under this limited warranty, you should write to: Megamaster Customer Service PO Box 15, Woodlands,0072, South Africa All consumer returns, parts orders, general questions, and troubleshooting... - Page 37 THANK YOU. You are now a Megamaster manual pro! Get out there and enjoy making your braaing experience even better. For great inspiration and recipes to use your braai, check out the recipe pages on our website www.megamaster.co.za Finally, don’t forget to keep this manual in a safe place for future reference.
Need help?
Do you have a question about the ORIGIN SERIES and is the answer not in the manual?
Questions and answers
how to replace ignition batteries
To replace ignition batteries in the Megamaster series:
1. Unscrew the module cap and plastic nut.
2. Remove the old battery.
3. Make sure the plastic is removed from the new battery.
4. Insert the new battery with the positive side facing you.
5. Screw the ignitor button back on the top.
6. Press the button to check if it ignites.
This answer is automatically generated