Advertisement
Quick Links
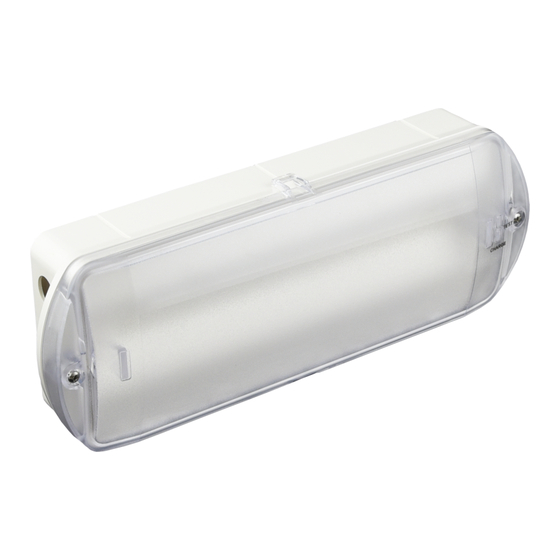
Package Contents
1
Luminaire
3
Pictograms (R/L/D)
Mounting accessories
1
1
Manual
General
These devices are used in places where emergency light is needed. Each
device must be permanently connected to mains power supply. In normal
operation the battery is charging. In case of a mains power supply failure, the
luminaire enters emergency mode and the illumination LED turns on. When
the mains power supply is restored the device turns to normal operation.
Maintained / non maintained operation
There is an option to select the non-maintained or maintained operation
by placing the jumper to the appropriate position (page 3).
Manual Operational Test
An operational test is initiated by placing the test card Α-1900 beside the
indicators LED. The light source and the emergency circuit of the device are
tested. The manual test can be conducted only if the mains power supply and
the battery are connected. During this test period, the light source and the
two yellow indicators turns on. The battery must have adequate charge. This
test continues as long as the card remains in place.
ΑΤΤΕΝΤΙΟΝ!!!
1. Operations for installation, maintainance or testing must be done by
authorized personnel only.
2. Always use in any case round mains cable, with a diameter of 5-10mm
(H05RN-F type 2x1mm² or any other type, at least equal to it's mechanical
and electrical properties). ATTENTION!! The cable must not be deformed in
any way (This requirement is important to ensure the ΙΡ rating).
3. The device must be connected to the mains power supply through a circuit
breaker that is depends on the total line's power load.
4. In case of battery replacement, it must be replaced by the same type, by
the manufacturer or a competent person.
5. In case of inactive use for a period greater than 2 months, disconnect the
battery by pulling out the battery's connector.
6. It is not allowed to discard batteries into common trash bins, they must
be discarded only in battery recycling points. Do not incinerate.
1
Installation
Β
To dismantle the luminaire, simply remove the difussor.
ATTENTION! If the 2 plastic latches (A) are clipped, carefully insert a flat-blade screwdriver to
unclip them. Then, gently lift the diffuser (B) upwards to detach it.
1
Α
Β
Place a flat blade screwdriver to the recesses (A) and pull up gently the reflector (B) to remove it.
2
Install the two rubber gaskets to the holes of the base. Make sure that they are not deformed.
3
Wall Plug
Install the plastic base (with the included mounting accessories).
WARNING!! To preserve the IP65 rating, fit the screws with the metallic washers and rubber
sealing rings.
4
2
923193601_09_009
Α
Α
Α
Screw
Rubber
Sealing Ring
Washer
923193601_09_009
Maintained
Non maintained
operation
operation
CN1
You can control the luminaire's operation by adjusting the jumper. By default, when the
jumper is installed in the middle and the left pins, maintained operation is selected.
Alternatively, when the jumper is installed in the middle and the right pins, non-
maintained operation is chosen.
5
Make a hole in the center of the rubber gasket by using a small screwdriver. Pass the round
cable through the rubber gasket. Connect the mains cable according to the connections
diagrams above.Ν for neutral, L for live wire WARNING!! Isolate the mains power supply
before making the connections.
6
Install the included tie-wrap to the adhesive tether
loop and fasten securely the power cable in order
to anchor it.
7
Place the battery's connector to the
corresponding connector on the PCB.
8
Refit the reflector and then the diffusor, which were removed in steps 1 & 2. Mind the
holes of the indications.
9
Α
Β
Α
The plastic latches (A) must be secured (click sound).
Fasten the 2 screws (B). (Tightening torque 1.2N*m)
10
NOTE!! After finishing the installation you must power the luminaire for at least 24
hours in order to completely charge the battery. The rated autonomy duration can be
achieved after that time.
3
CN1
N
L
N
L
Β
923193601_09_009
Advertisement

Subscribe to Our Youtube Channel
Related Manuals for olympia electronics GR-1935/15L


Summary of Contents for olympia electronics GR-1935/15L
- Page 1 Package Contents Installation Luminaire Maintained Non maintained Pictograms (R/L/D) Mounting accessories operation operation Manual General Α You can control the luminaire's operation by adjusting the jumper. By default, when the These devices are used in places where emergency light is needed. Each jumper is installed in the middle and the left pins, maintained operation is selected.
- Page 2 LABELING EXPLANATION: replacement, as long as the warranty period is valid. X: Self contained Olympia Electronics reserves the right to repair or to replace the returned goods and to or not charge the 1: Maintained/Non maintained operation (*) WATERPROOF buyer depending on the reason of defection. Olympia Electronics reserves the right to charge or not the A: Including test device buyer the transportation cost.
Need help?
Do you have a question about the GR-1935/15L and is the answer not in the manual?
Questions and answers