
Related Manuals for Darwin Fitness HT40


Summary of Contents for Darwin Fitness HT40
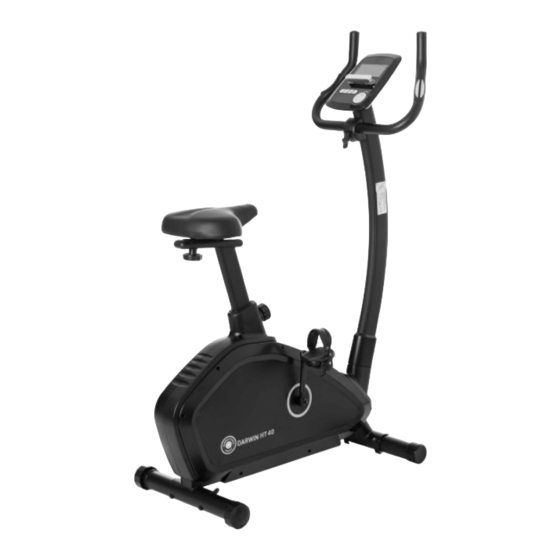
- Page 1 Assembly and Operating Instructions max. 120 kg ~ 30-60 Min. 29 kg L 108 | W 56 | H 139 FSDFHT40.01.01 DF-HT40 DARWIN HT40...
- Page 2 HT40...
-
Page 3: Table Of Contents
Content GENERAL INFORMATION Technical Data Personal Safety Electrical Safety Set-Up Place ASSEMBLY General Instructions Scope of Delivery Assembly OPERATING INSTRUCTIONS Console Display Button Function Turning On and Setting the Equipment Training programme 3.4.1 MANUAL MODE 3.4.2 PROGRAM MODE 3.4.3 H.R.C. MODE 3.4.4 WATT MODE 3.4.5 USER PROGRAM MODE 3.4.6 RECOVERY... - Page 4 ORDERING SPARE PARTS Serial Number and Model Name Parts List Exploded Drawing WARRANTY CONTACT HT40...
- Page 5 European VAT Number: DE813211547 Disclaimer © Darwin Fitness is a registered brand of the company Fitshop GmbH. All rights reserved. Any use of this trademark without the explicit written permission of Fitshop is prohibited. Product and manual are subject to change. Technical data can be changed without advance notice.
- Page 6 (person with legal responsibility). Class H (home use): use at home. These stationary training devices are intended for the use in private homes where access to the training device is regulated by the owner (person with legal responsibility). HT40...
- Page 7 Please pay close attention to the safety and maintenance instructions given here. The contract partner cannot be held liable for damage to health, accidents or damage to the equipment when it is not used in accordance with these instructions. The following safety instructions may appear in this manual: ࣑...
-
Page 8: General Information
28.5 kg Packaging dimensions (L x W x H): 102 cm x 65 cm x 26 cm Set-up dimensions (L x W x H): 108 cm x 56 cm x 139 cm Maximum user weight: 120 kg/264 lbs Use class: HT40... -
Page 9: Personal Safety
Personal Safety ⚠ DANGER Before you start using the equipment, you should consult your physician that this type of exercise is suitable for you from a health perspective. Particularly affected are persons who: have a hereditary disposition to high blood pressure or heart disease, are over the age of 45, smoke, have high cholesterol values, are overweight and/or have not exercised regularly in the past year. -
Page 10: Electrical Safety
The software systems on gym equipment with TFT consoles are set up only for the pre- installed apps. Do not install any additional apps. L NOTICE The pre-installed apps on TFT consoles are produced and provided by external manufacturers. Fitshop does not take any responsibility for the availability, functionality or contents of these apps. HT40... -
Page 11: Set-Up Place
Set-Up Place ⚠ WARNING Do not place the equipment in main corridors or escape routes. ⚠ CAUTION Choose a location in which to place the equipment such that there is enough free space/ clearance to the front, the rear and to the sides of the equipment. The training room should be well ventilated during training and not be exposed to any draughts. -
Page 12: Assembly
To prevent damage to the equipment and the floor, assemble the equipment on a mat or packaging board. L NOTICE In order to make the assembly as simple as possible, some screws and nuts to be used can already be pre-assembled. Ideally, assemble the equipment at its later set-up place. HT40... -
Page 13: Scope Of Delivery
Scope of Delivery The scope of delivery consist of the following parts. At the beginning, check whether all parts and tools belonging to the device are included in the scope of delivery and whether damage has occurred. In the event of complaints, the contractual partner must be contacted directly. ⚠... -
Page 14: Assembly
Adobe Acrobat Reader programme must be installed on your end device in order to open the file. The assembly can also be found as a video under the following link: https:// www.sport-tiedje.co.uk/darwin-exercise-bike-ht40-df-ht40#product- assembly. To go directly to the assembly video, you can alternatively scan the QR code. Step 1:... - Page 15 Step 2: Assembly of saddle and seat tube Mount the seat (10) with a washer (17) and a control knob (18) on the seat post (9). Mount the seat post (9) with a control knob (31) on the main frame (1). Adjust the saddle in vertical and horizontal direction.
- Page 16 Mount the handlebar (36) on the handlebar post (29) with the protective cover (42), a washer (43), a spring washer (12), a bushing (45), and a ball-shaped control knob (37). M8*1.25*15L (x2) D22*D8.5*1.5T (x2) M8*1.25*15L (x4) D16*D8.5*1.2T (x4) Step-3 HT40...
- Page 17 Step 4: Mounting the console and the pedals Connect the upper computer cable (64) and the hand pulse cable (30) with the computer (38). Mount the computer (38) with a screw (59) on the handlebar post (29). ⚠ CAUTION Make sure to screw in the pedals completely. Screw the left pedal (36L) counter-clockwise on the left crank (35L) and the right pedal (36R) clockwise on the right crank (35R).
- Page 18 To get off, grip the handles with both hands and place one foot next to the equipment and then the other foot. HT40...
-
Page 19: Operating Instructions
OPERATING INSTRUCTIONS L NOTICE Familiarise yourself with all the functions and setting options of the device before starting training. Have the proper use of this product explained to you by a specialist. Always start your training with low intensity and increase evenly and gently. End your training with a cool-down phase. -
Page 20: Button Function
Press shortly to return to thesStop mode or enter the training values in the main menu. START/STOP Press to start or pause the training (stop mode). RECOVERY Press to test the heart rate recovery pulse. BODY FAT In stop mode, press to measure the body fat. HT40... -
Page 21: Turning On And Setting The Equipment
Turning On and Setting the Equipment Plug the adapter in the socket and the computer turns on. It displays all segments on the LCD screen for two seconds (fig. 1). Then you start setting the user data. Select U1 to U4 with the jog dial and confirm with MODE. Enter your gender, age, height (fig. -
Page 22: Training Programme
When the resistance level is displayed in the WATT window, the value cannot be adjusted for three seconds. It switches to the display WATT (fig. 9). Press START/STOP to pause the training. Press RESET to return to the main menu. Fig. 4 Fig. 5 Fig. 6 Fig. 7 HT40... -
Page 23: Program Mode
Fig. 8 Fig. 9 3.4.2 PROGRAM MODE Select the training programme P with the jog dial. Select one of the preset profiles P01, P02, P03, etc. and confirm with MODE. Set the resistance level with the jog dial (fig. 10) and confirm with MODE. The default value is 1. Set the training time with the jog dial and confirm with MODE. -
Page 24: H.r.c. Mode
230 with the jog dial and confirm with MODE. Set the training time with the jog dial and confirm with MODE. Press START/STOP to start or pause the training. Press RESET to return to the main menu. Fig. 11 Fig. 12 Fig. 13 Fig. 14 HT40... -
Page 25: Watt Mode
3.4.4 WATT MODE Select the training programme W with the jog dial and confirm with MODE. Set the WATT target (default value: 120, fig. 15) with the jog dial and confirm with MODE. Set the training time with the jog dial and confirm with MODE. Press START/STOP to start the training. -
Page 26: Recovery
LCD screen displays === for eight seconds (fig. 22) until the measuring is finished. The LCD screen displays the BMI (fig. 23), the fat percentage (FAT %, fig. 24), and the body fat symbol (BODY FAT, fig. 25). Fig. 19 Fig. 20 HT40... - Page 27 Fig. 21 Fig. 22 Fig. 23 Fig. 24 Fig. 25 L NOTICE After 4 minutes without pedaling or pulse input, console will enter into power saving mode. Press any key may wake the console up. When computer act abnormal, please plug out the adaptor and plug in again.
-
Page 28: Storage And Transport
After that, you easily can move the equipment to a new position. For long transport distances the equipment should be disassembled and safely packed. Select the new location by following the instructions in the section 1.4 of this manual. HT40... -
Page 29: Troubleshooting, Care And Maintenance
TROUBLESHOOTING, CARE AND MAINTENANCE General Instructions ⚠ WARNING Do not make any improper changes to the equipment. ⚠ CAUTION Damaged or worn components may affect your safety and the life of the equipment. Therefore, immediately replace damaged or worn components. In such a case, contact the contract partner. -
Page 30: Error Codes And Troubleshooting
The materials can be recycled as per their symbols. Through the reuse, recycling of materials or other forms of recovery of old equipment, you make an important contribution to the protection of the environment. HT40... -
Page 31: Recommended Accessories
RECOMMENDED ACCESSORIES To make your training experience even more efficient and pleasant, we recommend that you add suiting accessories to your fitness equipment. For exercise bikes this could for example be a floor mat, which makes your fitness equipment stand more securely and also protects the floor from sweat or silicone spray to keep moving parts in good shape. - Page 32 The exact position of this sticker is shown in the following illustration. Enter the serial number in the appropriate field. Serial number: Brand / Category: Darwin Fitness / ergometer Model Name: HT40 Article Number: DF-HT40 HT40...
- Page 33 Parts List Name Specification Qty. Main frame 800A1-3-1000-J0 Rear stabilizer 16100-6-2101-J1 Adjustable cap 55450-5-0060-B1 Front stabilizer 19000-6-2101-J5 round foot cap 55443-1-0060-B3 Domed nut M8x1.25x15L 55208-6-2015-FA Allen bolt M8*1.25*80L 50308-5-0080-F3 Oval cap 55328-3-2550-B1 Seat post 195S0-3-2200-J3 Seat DD3532 58001-6-1019-B0 Seat adjustment tube sets 70104-3-4000-J0 Spring washer D15.4 XD8.2x2T 55108-2-1520-FA...
- Page 34 Fixing plate for idle wheel 195S0-3-1600-N2 cross Screw M5x0.8x10L 52605-2-0012-F0 hex Nut M8*1.25*6T 55208-2-2006-NA Round magnet 174R4-6-2574-00 cross Screw ST4.2x1.4x20L 53342-2-0020-N0 Bushing D22.5*D17.2*6.4T 80700-6-2781-00 Upper computer cable 1000L 73002-6-2572-00 Lower computer cable 900L 738A2-6-2573-00 Flat washer D16xD8.5x1.2T 55108-1-1612-NA nylon nut 55208-1-2008-NA HT40...
- Page 35 spring 58003-6-1024-N0 Cross bolt M5x0.8x12L 52605-2-0012-N0 Hollow end cap 40x80x129 55302-6-4080-B2 Bolt cover 19100-6-3172-B0 Flat washer D16*D8.5*1.2T 55108-1-1612-FA Tension cable D1.5*460L 801E2-6-2601-00 Motor 73002-6-2571-00 cross screw ST4.2*1.4*15L 53342-2-0015-N0 Plastic washer D50*D10*1.0T 55110-1-5010-BF Flat washer D30*D8.5*2.0T 55108-1-3020-NA hex Bolt M8*25 50108-5-0025-N3 Plastic cover 803K0-6-1082-00 hex Bolt M8*52L...
- Page 36 Exploded Drawing 31 70 87 88 89 47 22 60 78 HT40...
- Page 37 WARRANTY Products from Darwin Fitness® are subject to strict quality control. However, if a fitness equipment purchased from us does not work perfectly, we take it very seriously and ask you to contact our customer service as indicated. We are happy to help you by phone via our service hotline.
- Page 38 For that reason, we also want to resolve your queries quickly and in a straightforward manner. Thus, please always keep your customer number and the serial number of the faulty equipment handy. HT40...
- Page 39 CONTACT �� TECHNIK �� TEKNIK OG SERVICE �� CUSTOMER SUPPORT �� +49 4621 4210-900 80 90 16 50 00800 2020 2772 �� �� +494621 4210 944 �� +49 4621 4210-945 +49 4621 4210-698 �� �� info@fitshop.dk info@fitshop.co.uk �� technik@fitshop.de Åbningstider kan findes på You can find the opening Öffnungszeiten entnehmen Sie hjemmesiden:...
- Page 40 Visit us also on our social media platforms or our blog! HT40...
- Page 41 Notes...
- Page 42 Notes HT40...
- Page 44 DARWIN HT40...
Need help?
Do you have a question about the HT40 and is the answer not in the manual?
Questions and answers