
Related Manuals for Darwin Fitness DF-CAGE


Summary of Contents for Darwin Fitness DF-CAGE
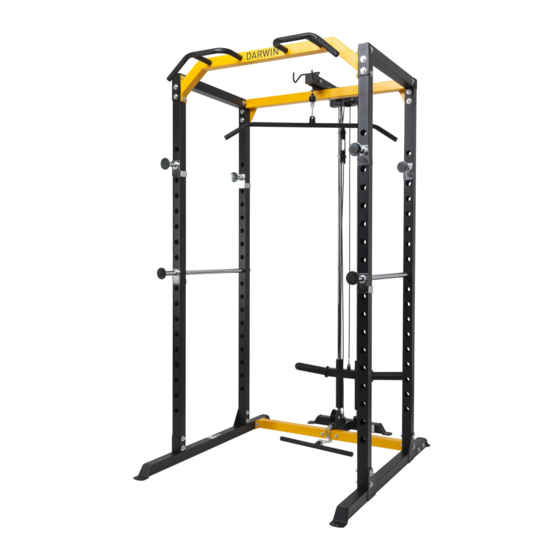
- Page 1 Assembly and Operating instructions DF-CAGE DFCAGE.01.03 DF-CAGE-LAT DF-CAGE-DIP DF-BR DF-CAGE DARWIN Power Cage...
- Page 2 Power Cage...
- Page 3 Dear Customer, Thank you for deciding for a high-quality training equipment of the brand Darwin, the brand that makes athlete‘s hearts beat faster. Darwin offers a wide range of home fitness equipment like elliptical cross trainers, ergometers, tread-mills and rowing machines. Darwin equipment is the optimal equipment for all those who want to train at home independent of goals and fitness level.
-
Page 4: Table Of Contents
Content GERNERAL INFORMATION Technical data Personal Safety Set-Up Place ASSEMBLY General Instructions Assembly ACCESSORIES Assembly Instructions: Lat Pulldown for the Power Cage Assembly Instructions: Dip Station for the Power Cage STORAGE AND TRANSPORT General Instructions TROUBLESHOOTING, CARE AND MAINTENANCE General Instructions Faults and Fault Diagnosis Maintenance and service calendar DISPOSAL... -
Page 5: Gerneral Information
GERNERAL INFORMATION Technical data Power Cage: Article weight (gross, including packaging): 51 kg Article weight (net, without packaging): 48.5 kg Package dimensions (L x W x H): 196 cm x 35 cm x 20 cm Set-up dimensions (L x W x H): 109.5 cm 134.4 cm x 207.6 cm Maximum user weight: 125 kg ACCESSORIES Lat pulldown:... -
Page 6: Personal Safety
Personal Safety DANGER ⚠ Before you start using the equipment, you should consult your physician that this type of exercise is suitable for you from a health perspective. Particularly affected are persons who: have a hereditary disposition to high blood pressure or heart disease, are over the age of 45, smoke, have high cholesterol values, are overweight and/or have not exercised regularly in the past year. -
Page 7: Set-Up Place
Set-Up Place ⚠ WARNING Do not place the equipment in main corridors or escape routes. ⚠ CAUTION The training room should be well ventilated during training and not be exposed to any draughts. Choose the place in which to set up the equipment such that there is enough free space/ clearance to the front, the rear and to the sides of the equipment. -
Page 8: Assembly
ASSEMBLY General Instructions ⚠ DANGER Do not leave any tools, packaging materials such as foils or small parts lying around, as otherwise there is a danger of suffocation for children. Keep children away from the equipment during assembly. ⚠ WARNING Pay attention to the instructions attached to the equipment in order to reduce the risk of injuries. -
Page 9: Assembly
Assembly Before assembly, take a close look at the individual assembly steps shown and carry out the assembly in the order given. NOTICE First loosely screw all parts together and check that they fit properly. Tighten the screws using the tool only when you are instructed to do so. Step 1: 1. - Page 10 Step 2: 1. Attach the four vertical frames (1) to the left and the right base frame (2 & 3) with eight bolts (16), sixteen big washers (17) and eight lock nuts (18). Power Cage...
- Page 11 Step 3: 1. Attach the upper frame (5) to the vertical frame (1) with four bolts (16), eight big washers (17) and four lock nuts (18). 2. Attach the top beam (6) to the upper frame (5) with six bolts (14) and six big washers (17). 3.
- Page 12 Step 4: 1. Attach the left and the right handle (8 & 9) to the chin up bar (7) with four bolts (15) and four large washers (21). 2. Attach the chin up bar (7) to the vertical frame (1) with four bolts (16), eight big washers (17) and four lock nuts (18).
-
Page 13: Accessories
ACCESSORIES The following two training devices are optional accessories for the Darwin Power Cage. The lat- pulldown and the dip station are not part of the scope of delivery of the Power Cage and must be purchased separately. For more information, please contact your contract partner. Assembly Instructions: Lat Pulldown for the Power Cage Step 1: Attach the weight base tube (2) to the power rack with two bolts (17), four washers (21) and two lock... - Page 14 Step 2: Attach the pulley (8) to the weight base tube (2) with one bolt (15), two washers (21) and one lock nut (23). Attach the guide rod (3) and the sliding weight post (4) to the weight base tube (2) with the sliding Sleeves (11) and two square neck bolts (18).
- Page 15 Step 3: 1. Attach the three pulleys (8) to the middle upper post (1) with three bolts (16), six pulley bushings (12), six washers (21) and three lock nuts (23). 2. Attach the middle upper post (1) to the power rack and the guide rod (3) with two bolts (16), two bolts (17), six washers (21) and two lock nuts (23).
- Page 16 Step 4: 1. Pass the cable (24) through a-b-c-d-e, and attach the screw at the end of the cable to the sliding weight post (4) 2. Pass the cable (25) through f-g-h and attach the eyelet end of the cable to the weight base tube (2) with one bolt (19), two washers (20) and one lock nut (22).
-
Page 17: Assembly Instructions: Dip Station For The Power Cage
Assembly Instructions: Dip Station for the Power Cage INSTALLATION STEP Step 1: Step 2: Step 3:... -
Page 18: Storage And Transport
STORAGE AND TRANSPORT General Instructions ࣑ ATTENTION Make sure that the equipment is protected from moisture, dust and dirt in the selected storage location. The storage location should be dry and well ventilated and have a constant ambient temperature between 5°C and 45°C. WARNING ⚠... -
Page 19: Troubleshooting, Care And Maintenance
TROUBLESHOOTING, CARE AND MAINTENANCE General Instructions ⚠ WARNING Do not make any improper changes to the equipment. CAUTION ⚠ Damaged or worn components may affect your safety and the life of the equipment. Therefore, immediately replace damaged or worn components. In such a case, contact the contract partner. -
Page 20: Maintenance And Service Calendar
Maintenance and service calendar To avoid damage from body sweat, the equipment must be cleaned with a damp towel (no solvents!) after each training session. The following routine tasks must be performed at the specified intervals: Part Weekly Monthly Quarterly Half-yearly Yearly Pulling ropes and rollers... -
Page 21: Recommended Accessories
RECOMMENDED ACCESSORIES To make your training experience even more efficient and pleasant, we recommend that you add suiting accessories to your fitness equipment. This could be a floor mat, for example, which makes your fitness equipment stand more securely and also protects the floor from falling sweat, but it could also be additional handrails on some treadmills or silicone spray to keep moving parts in good shape. -
Page 22: Ordering Spare Parts
NOTICE The serial number of your equipment is unique. It’s located on a white sticker. Enter the serial number in the appropriate field. Serial number: Brand / Category: Darwin / Cage Model Name: Power Cage Article Number: DF-Cage Power Cage... - Page 23 Parts list: Power Cage Description Qty. Vertical Frame Left Base Frame Right Base Frame Cross Brace Upper Frame Top Beam Chin Up Bar Left Handle Right Handle Left Safety Catch Right Safety Catch Left Adjustment Bar Right Adjustment Bar Bolt M10*16 Bolt M12*20 Bolt M10*70 Big Washer 10...
- Page 24 Exploded drawing: Power Cage Power Cage...
- Page 25 Parts list: Lat pulldown for the Power Cage Description Specification Qty. Middle Upper Post Weight Base Tube Guide Rod Sliding Weight Post Shiver Bar Lat Bar Bracket Φ90*27 Pulley Φ25MM Weight Holder Φ50*Φ4 Olympic Spring Clip Φ60*Φ25*δ25 Sliding Sleeve Φ15.5*11.5 Pulley Bushing Φ7*70 Hook...
- Page 26 Exploded drawing: Lat pulldown for the Power Cage Power Cage...
- Page 27 Parts list: Dip station for the Power Cage Description Specification Qty. left handle right handle plum bolt Exploded drawing: Dip station for the Power Cage...
- Page 28 DISCLAIMER ©2015 Darwin Fitness is a registered brand of the company Sport-Tiedje GmbH. All rights reserved. Any use of this trademark without the explicit written permission of Sport-Tiedje is prohibited. Product and manual are subject to change. Technical data can be changed without advance notice.
- Page 29 Notes...
- Page 30 Notes Power Cage...
- Page 32 DARWIN Power Cage...
Need help?
Do you have a question about the DF-CAGE and is the answer not in the manual?
Questions and answers