Table of Contents
Advertisement
Quick Links
Advertisement
Table of Contents
Troubleshooting

Related Manuals for Xcel-Arc RAZORWELD ARC 140


Summary of Contents for Xcel-Arc RAZORWELD ARC 140
- Page 1 ⁄ XA-RZARC140 / XA-RZARC180 | Operating Manual...
-
Page 2: Table Of Contents
RAZORWELD ARC 140/180 OPERATING MANUAL 1. Safety 2. Machine Features 3. Machine Specifications 3.1 RAZORWELD ARC 140 3.2 RAZORWELD ARC 180 4. Machine Layout 4.1 Front Panel Layout 4.2 Rear Panel Layout 5. Control Panel Layout 6. Control Panel Details 7. -
Page 3: Safety
RAZORWELD ARC 140/180 OPERATING MANUAL 1. Safety Welding and cutting equipment can be dangerous to both the operator and people in or near the surrounding working area if the equipment is not correctly operated. Equipment must only be used under the strict and comprehensive observance of all relevant safety regulations. - Page 4 RAZORWELD ARC 140/180 OPERATING MANUAL Fire hazard • Welding/cutting on closed containers, such as tanks, drums, or pipes, can cause them to explode. Flying sparks from the welding/cutting arc, hot workpiece, and hot equipment can cause fires and burns. Accidental contact of the electrode to metal objects can cause sparks, explosion, overheating, or fire.
- Page 5 RAZORWELD ARC 140/180 OPERATING MANUAL Caution Working environment • The environment in which this welding/cutting equipment is installed must be free of grinding dust, corrosive chemicals, flammable gas or materials etc., and at no more than a maximum of 80% humidity.
- Page 6 RAZORWELD ARC 140/180 OPERATING MANUAL Attention! - Check For Gas Leakage (WHEN TIG WELDING) At initial set up and at regular intervals we recommend to check for gas leakage Recommended procedure is as follows: 1. Connect the regulator and gas hose assembly and tighten all connectors and clamps.
-
Page 7: Machine Features
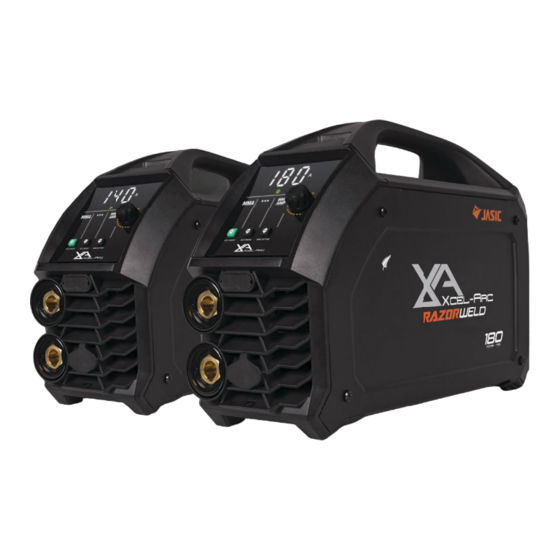
RAZORWELD ARC 140/180 OPERATING MANUAL 2. Machine Features RAZORWELD ARC 140 HD Backlit Interface DC Lift Arc TIG This next generation interface panel is bright and easy to Lift Arc ignition allows the arc to be started easily in DC read in any environment. - Page 8 RAZORWELD ARC 140/180 OPERATING MANUAL RAZORWELD ARC 180 HD Backlit Interface Advanced MMA Features This next generation interface panel is bright and easy to The RAZOR ARC 180 features Anti-Stick technology, as well read in any environment. as adjustable Arc Force and Hot Start functionality. These...
-
Page 9: Machine Specifications
RAZORWELD ARC 140/180 OPERATING MANUAL 3. Machine Specifications 3.1 RAZORWELD ARC 140 3.2 RAZORWELD ARC 180 Technical Data Technical Data Parameter Values Parameter Values XA-RZARC140 XA-RZARC180 Primary Input Voltage 240V Single Phase Primary Input Voltage 240V Single Phase Supply Plug... -
Page 10: Machine Layout
RAZORWELD ARC 140/180 OPERATING MANUAL 4. Machine Layout 4.1 Front Panel Layout 1. Interface Panel 2. “+” Output Terminal 3. “-” Output Terminal 4.2 Rear Panel Layout 4. On/O Switch 5. Input Power Cord... -
Page 11: Control Panel Layout
RAZORWELD ARC 140/180 OPERATING MANUAL 5. Control Panel Layout 1. Numerical Display 5. Parameter Settings Selection Button 2. Multi Function Adjustment Knob 6. Warning Indicators (Overcurrent & Thermal Overload) 3. Welding Mode Selection Button 7. VRD Indicator light 4. MMA Electrode Size Selection Button... -
Page 12: Control Panel Details
RAZORWELD ARC 140/180 OPERATING MANUAL 6. Control Panel Details WELDING PROCESS SELECTION 6.1 MMA 'STICK' Mode This indicates that the machine is in MMA mode. For MMA setup details see page 15. 6.2 DC LIFT TIG Mode This indicates that the machine is in Lift TIG mode. For TIG setup details see page 20. - Page 13 RAZORWELD ARC 140/180 OPERATING MANUAL PARAMETER SELECTION 6.5 Amperage Adjustment When this indicator is lit you are in amperage adjustment mode. It functions for both MMA mode and Lift TIG mode. • Note: When you have a pre-set electrode size activated your amperage adjusment will have limits set on MIN/MAX based on the size you have selected.
-
Page 14: Package Contents
RAZORWELD ARC 140/180 OPERATING MANUAL 7. Package Contents RAZORWELD ARC 140/180 4m Electrode Holder 4m 300 AMP Earth Clamp 10A Plug Fitted 15A Plug Fitted (RAZORWELD ARC 140) (RAZORWELD ARC 180) -
Page 15: Mma: Machine Setup
RAZORWELD ARC 140/180 OPERATING MANUAL 8. MMA: Machine Setup 1. For DC+ electrodes, connect earth clamp to the 2. For DC- electrodes, connect earth clamp to the negative (-) dinse connection, and electrode holder to positive (+) dinse connection, and electrode holder to the positive (+) dinse connection. - Page 16 RAZORWELD ARC 140/180 OPERATING MANUAL 5. Twist electrode holder to loosen grip. 6. Place electrode into electrode holder. 7. Twist electrode holder to tighten and securely grip 8. Using the Electrode Size Selector Button, choose electrode. either manual mode or the size that corresponds with...
- Page 17 RAZORWELD ARC 140/180 OPERATING MANUAL 9. Ensure you are in Amperage Control mode, then adjust 10. Connect earth clamp to your workpiece. your amperage output to suit the material you are welding. 11. Strike electrode to the workpiece to initiate arc.
-
Page 18: Mma: Welding Guide
RAZORWELD ARC 140/180 OPERATING MANUAL 9. MMA: Welding Guide One of the most common types of arc welding is Manual Metal Arc welding, also known as MMA welding. An electric current is used to strike an arc between the base material and a consumable electrode rod or ‘stick’. The electrode rod is made of a material that is compatible with the base material being welded. - Page 19 RAZORWELD ARC 140/180 OPERATING MANUAL 9.1 Electrode Selection As a general rule, the selection of an electrode is straight forward, in that it is only a matter of selecting an electrode of similar composition to the parent metal. However, for some metals, there is a choice of several electrodes, each of which has particular properties to suit specific classes of work.
-
Page 20: Tig: Machine Setup
RAZORWELD ARC 140/180 OPERATING MANUAL 10. TIG: Machine Setup 1. Connect the TIG torch to the negative (-) dinse 2. Connect the earth clamp to the positive (+) dinse connection, twist to lock in place. connection, twist to lock in place. - Page 21 RAZORWELD ARC 140/180 OPERATING MANUAL 5. Place argon flowmeter regulator into your gas outlet. 6. Tighten securely with wrench. XCEL-GAS XCEL-GAS 7. Connect gas hose to the flowmeter outlet and crimp in 8. Adjust gas flow to 8-12L/min. place. XCEL-GAS...
- Page 22 RAZORWELD ARC 140/180 OPERATING MANUAL 9. Set the welding current using the amperage control 10. Connect earth clamp to your workpiece. dial. 11. Turn on the gas valve located on the TIG torch handle. 12. Lay the outside edge of the gas cup on the workpiece...
- Page 23 RAZORWELD ARC 140/180 OPERATING MANUAL 13. With a small movement rotate the gas cup forward so 14. Now rotate the gas cup in the reverse direction to lift that the tungsten electrode touches the workpiece. the tungsten electrode from the workpiece to create the arc.
-
Page 24: Tig: Welding Guide
RAZORWELD ARC 140/180 OPERATING MANUAL 11. TIG: Welding Guide 11.1 DC TIG Welding The DC power source uses what is known as DC (direct current), in which the main electrical component known as electrons flow in only one direction from the negative pole (terminal) to the positive pole (terminal). In the DC electrical circuit, there is an electrical principle at work which should always be taken into account when using any DC circuit. - Page 25 RAZORWELD ARC 140/180 OPERATING MANUAL 11.3 TIG Welding Fusion Technique Manual TIG welding is often considered the most di cult of all the welding processes. Because the welder must maintain a short arc length, great care and skill are required to prevent contact between the electrode and the workpiece. Similar to Oxygen Acetylene torch welding, TIG welding typically requires two hands and in most instances requires the welder to manually feed a filler wire into the weld pool with one hand while manipulating the welding torch in the other.
- Page 26 RAZORWELD ARC 140/180 OPERATING MANUAL 11.5 TIG Tungsten Selection Guide LANTHANATED ATED ZIRCONIATED ATED THORIATED ATED CERIATED ATED (GOLD) (WHITE) (RED) (TURQUOISE) (GREY) AC CURRENT DC CURRENT ALUMINIUM ...
- Page 27 RAZORWELD ARC 140/180 OPERATING MANUAL 11.7 Tungsten Preparation Always use DIAMOND wheels when grinding and cutting. While tungsten is a tough material, the surface of a diamond wheel is harder, and this makes for smooth grinding. Grinding without diamond wheels, such as aluminium oxide wheels, can lead to jagged edges, imperfections, or poor surface finishes not visible to the eye that will contribute to weld...
-
Page 28: Factory Reset
The No-Load voltage is too high. This is likely caused by VRD fault. Possible Solution: Power down and restart machine. After attempting the possible solutions listed in the chart above please contact Xcel-Arc Support Services if you are still experiencing issues with your machine. -
Page 29: Mma (Stick) Troubleshooting
RAZORWELD ARC 140/180 OPERATING MANUAL 15. MMA (STICK) Troubleshooting 15.1 No arc • Incomplete welding circuit: Check earth lead is connected. Check all cable connections. • Wrong mode selected: Check the MMA selector switch is selected. • No power supply: Check that the machine is switched on and has a power supply. -
Page 30: Tig Troubleshooting
RAZORWELD ARC 140/180 OPERATING MANUAL 16. TIG Troubleshooting 16.1 Tungsten burning away quickly • Incorrect gas or no gas: Use pure argon. Check cylinder has gas, connected, turned on, and torch valve is open. • Inadequate gas flow: Check the gas is connected, check hoses, gas valve and torch are not restricted. -
Page 31: Optional Accessories
RAZORWELD ARC 140/180 OPERATING MANUAL 16.6 Arc wanders during DC welding • Poor gas fl ow: Check and set the gas fl ow between 8-12 L/min fl ow rate. • Amperage too low: Increase the amperage. • Incorrect arc length: Lower torch so that the tungsten is o of the work piece 2-5mm. - Page 32 New Zealand Limited Esseti New Zealand Limited PO Box 4189, Palmerston North - 4442 Phone: 06 355 1103 Fax: (06) 354 2437 esseti.co.nz Email: sales@ esseti.co.nz www. Xcel-Arc © Esseti NZ LTD - 2024...
Need help?
Do you have a question about the RAZORWELD ARC 140 and is the answer not in the manual?
Questions and answers