
Related Manuals for Xcel-Arc VIPER CUT 30Mk II


Summary of Contents for Xcel-Arc VIPER CUT 30Mk II
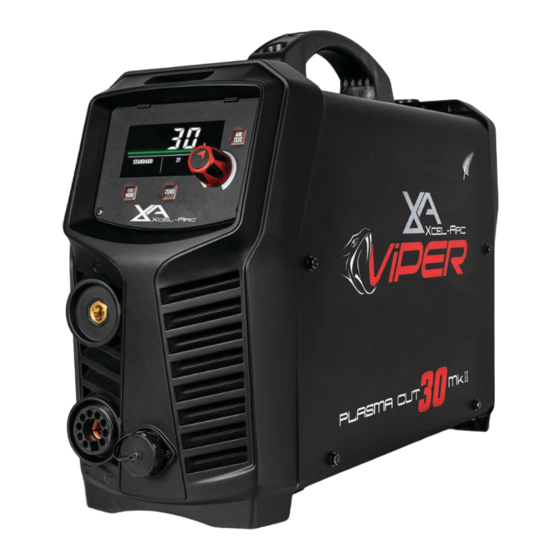
- Page 1 VIPER CUT 30Mk II XA-CUT30VMK2 | Operating Manual YEAR M AC H I NE Please read and understand this instruction manual carefully WARRANTY before the installation and operation of this equipment. © Xcel-Arc 2023...
-
Page 3: Table Of Contents
CONTENTS SAFETY TECHNICAL DATA MACHINE LAYOUT CONTROL PANEL LAYOUT WHAT’S IN THE BOX SETUP FOR PLASMA CUTTING CONTROL PANEL OPERATION PLASMA CUTTING PARAMETER GUIDE PLASMA CUTTING TECHNOLOGY PLASMA CUTTING TIPS & TECHNIQUES TORCH BREAKDOWN & SPARES FAQ & TROUBLESHOOTING WARRANTY TERMS... -
Page 4: Safety
SAFETY Welding and cutting equipment can be dangerous to both the operator and people in or near the surrounding working area if the equipment is not correctly operated. Equipment must only be used under the strict and comprehensive observance of all relevant safety regulations. Read and understand this instruction manual carefully before the installation and operation of this equipment. - Page 5 SAFETY Fire hazard. Welding/cutting on closed containers, such as tanks, drums, or pipes, can cause them to explode. Flying sparks from the welding/cutting arc, hot workpiece, and hot equipment can cause fires and burns. Accidental contact of the electrode to metal objects can cause sparks, explosion, overheating, or fire. Check and be sure the area is safe before doing any welding/cutting.
- Page 6 SAFETY CAUTION 1. Working Environment. i. The environment in which this welding/cutting equipment is installed must be free of grinding dust, corrosive chemicals, flammable gas or materials etc., and at no more than a maximum of 80% humidity. ii. When using the machine outdoors, protect the machine from direct sunlight, rainwater and snow, etc.; the temperature of the working environment should be maintained within -10°C to +40°C.
-
Page 7: Technical Data
TECHNICAL DATA VIPER™ CUT 30MkII Plasma Cutter Key Features: • CNC Connection • 10 AMP Plug • Pilot Arc Start • 10mm Clean Cut • 12mm Severance • Standard / Perforated Cutting Modes • 2T/4T Torch Controls • Air Test TECHNICAL DATA PLASMA CUT SPECIFICATIONS SKU XA-CUT30VMK2... -
Page 8: Machine Layout
MACHINE LAYOUT Front Panel Layout 1. Cut Mode 2. 2T/4T Torch Mode 3. Amperage Control Knob 4. Air Test 5. Earth Clamp Dinse Connector 6. Plasma Torch Connector 7. CNC Connection Rear Panel Layout 8. On/Off Switch 9. Primary Power Input Cable 10. -
Page 9: Control Panel Layout
CONTROL PANEL LAYOUT Front Panel Layout 12. Over Temperature Warning LED 13. Amperage Display 14. Air Test Display 15. Cut Mode Display 16. Torch Mode Display... -
Page 10: What's In The Box
Air Regulator VIPER CUT 30 Mk II XA-CUT30VMK2 | Operating Manual YEAR M ACHI NE Please read and understand this instruction manual carefully WARRANTY before the installation and operation of this equipment. © Xcel-Arc 2022 10 AMP Plug (Fitted) Operating Manual... -
Page 11: Setup For Plasma Cutting
SETUP FOR PLASMA CUTTING Connect the Earth Clamp to the dinse Connect the Plasma Torch into the Plasma connection, twist to lock in place. Torch Connection, and twist to tighten securely. Connect the air supply to the regulator located Turn the machine on. at the rear of the machine. - Page 12 SETUP FOR PLASMA CUTTING Set up cutting parameters (See page 13 for Connect the earth clamp to the work piece. in-depth setup). Place and hold the torch vertical at the edge of Pull the trigger to energise the arc. When the the plate.
-
Page 13: Control Panel Operation
CONTROL PANEL OPERATION Amperage Control Knob • Turn the knob to increase or decrease the desired value displayed on the display. Cut Mode Push the CUT MODE button to cycle through Cut Modes. • Standard - Solid metal • Perforated - Metal with gaps, such as mesh, fencing, etc. 2T/4T Torch Mode Push the 2T/4T button to cycle through Torch Modes. -
Page 14: Plasma Cutting Parameter Guide
PLASMA CUTTING PARAMETER GUIDE The following parameters can be used as a guide to cutting different materials and thicknesses with the VIPER CUT 30MkII. They are intended as a guide only, you may adjust depending on personal preference as well as the condition of the torch/material/air. -
Page 15: Plasma Cutting Technology
PLASMA CUTTING TECHNOLOGY Plasma cutters work by passing an electric arc through a gas that is passing through a constricted opening. The electric arc elevates the temperature of the gas to the point that it enters a 4th state of matter. We all are familiar with the first three: i.e., Solid, liquid, and gas. -
Page 16: Plasma Cutting Tips & Techniques
PLASMA CUTTING TIPS & TECHNIQUES Amperage The standard rule of thumb is the thicker the material, the more amperage required. On thick material, set the machine to full output and vary your travel speed. On thinner material, you need to turn down the amperage and change to a lower-amperage tip to maintain a narrow kerf. - Page 17 PLASMA CUTTING TIPS & TECHNIQUES Electrode condition A fixed gap is established between the electrode and the inside of the cutting tip — electrons arc across the gap, ionizing and superheating the air creating the plasma stream. The electrode contains an insert at the end made of a highly conductive material called hafnium.
-
Page 18: Torch Breakdown & Spares
TORCH BREAKDOWN & SPARES Surecut SC40 Surecut SC40 Rating: 40A Air/N Gas, @ 60% duty cycle. For use on VIPER CUT30 Technical Data Technical Data Max Current Gas Pressure 4.5-5.0 Bar (65-75psi) Duty Cycle Gas Flow 100 l/min Air/N with Pilot Arc Spare Parts Spare Parts Spare Parts... -
Page 19: Faq & Troubleshooting
WARNING: There are extremely dangerous voltage and power levels present inside this unit. Do not attempt to diagnose or repair unit by removing external cover unless you are an authorised repair agent for Xcel-Arc. 1. The cutting torch fails to ignite the arc when the torch trigger is pressed. -
Page 20: Warranty Terms
WARRANTY TERMS ESSETI New Zealand Limited (‘us’, ‘we’) warrants that the products bearing the brand names ESSETI, XCEL-ARC, RAZORWELD, RAZORCUT, JASIC, VIPER, T&R, XCEL-GAS, TECNA & HIT-8SS supplied by us and purchased by you from an Authorised ESSETI (NZ) Ltd. Distributor are free of Material and Faulty Workmanship Defects except for those products listed under ‘Warranty Exclusions’... - Page 21 WARRANTY TERMS WARRANTY / RETURNS / EXCHANGES Our Warranty Returns Policy recognises all and any rights you have under New Zealand Consumer Law and other relevant laws. You shall inspect the goods on delivery and shall within seven (7) days of delivery (time being of the essence) notify the Esseti NZ Ltd.
- Page 22 Tungsten Electrodes, Collet, Collet Body, Alumina Nozzle, Torch Head, Torch Head water Cooled, Torch Head Flexible, Back Caps, Gas Lens, Torch Handle, Cup Gasket, Torch Body Gas Valve, O-ring, All XCEL-ARC TIG Welding Rods, All XCEL-ARC / Magmaweld Electrodes, Arc Leads, Welding Cable, Electrode Holder, Earth Clamps •...
- Page 23 NOTES...
- Page 24 New Zealand Limited Esseti New Zealand Limited PO Box 4189, Palmerston North - 4442 Phone: 06 355 1103 Fax: (06) 354 2437 Email: sales@esseti.co.nz www.esseti.co.nz Xcel-Arc © Esseti NZ LTD - 2023...
Need help?
Do you have a question about the VIPER CUT 30Mk II and is the answer not in the manual?
Questions and answers