Table of Contents
Advertisement
Quick Links
Advertisement
Table of Contents

Related Manuals for Anritsu Site Master MS2085A


Summary of Contents for Anritsu Site Master MS2085A
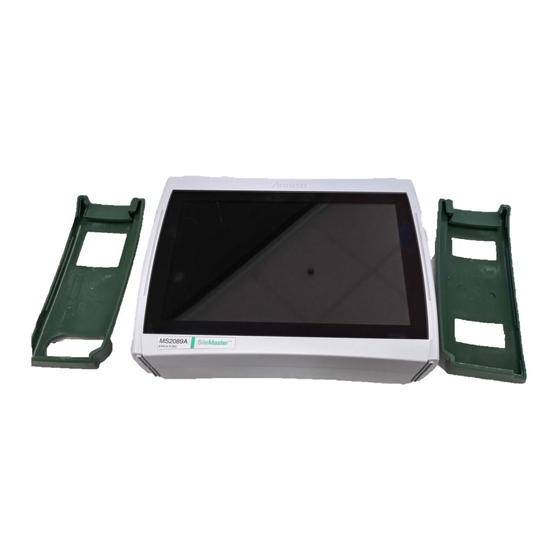
- Page 1 Maintenance Manual Site Master™ MS2085A/MS2089A Handheld Spectrum Analyzer and Cable & Antenna Analyzer Anritsu Company P/N: 10580-00500 490 Jarvis Drive Revision: A Morgan Hill, CA 95037-2809 Published: May 2024 Copyright 2024 Anritsu Company http://www.anritsu.com...
- Page 2 This product and its manuals may require an Export License or approval by the government of the product country of origin for re-export from your country. Before you export this product or any of its manuals, please contact Anritsu Company to confirm whether or not these items are export-controlled.
-
Page 3: Table Of Contents
Contacting Anritsu ........ - Page 4 Table of Contents (Continued) Bumpers Removal ............5-3 Rear Case Removal .
-
Page 5: Chapter 1- General Information
Anritsu recommends that you make a copy of the test records to document the measurements each time a Performance Verification is performed. Continuing to document this process each time it is performed provides a detailed history of instrument performance. -
Page 6: Contacting Anritsu
1-2 Contacting Anritsu General Information Contacting Anritsu To contact Anritsu, visit the following URL and select the services in your region: http://www.anritsu.com/contact-us Required Test Equipment and Tools Table 1-2 Table 1-3 provide a list of the test equipment used for the performance verification tests of the instrument. -
Page 7: Replaceable Parts
General Information 1-4 Replaceable Parts Table 1-4. Required Tools Tools Specification Wrench 5/16” Torx Screwdriver Torx Screwdriver T 20 Phillips Screwdriver Phillips Screwdriver Nut Driver 5.5 mm Hex Socket Driver 6 mm (1/4”) Replaceable Parts The MS2085A/89A replacement parts and their description are listed below in Table 1-5. - Page 8 1-4 Replaceable Parts General Information PN: 10580-00500 Rev. A MS2085A/89A MM...
-
Page 9: Chapter 2-Spectrum Analyzer Verification
Chapter 2 — Spectrum Analyzer Verification Introduction This chapter provides the verification procedures for the MS2089A Site Master. Verification tests that are associated with other instrument options are described in Chapter 5, “Assembly Replacement”. Record the measurement results in the test record templates provided in Appendix B, “MS2089A Test Records”. -
Page 10: Pass/Fail Determination For Instrument Key Parameter Performance Tests
2-1 Introduction Spectrum Analyzer Verification PASS/FAIL Determination for Instrument Key Parameter Performance Tests Figure 2-1 shows the rule that is used to determine the pass/fail status of test results that are associated with warranted specifications. + Uncertainty Measurement Point (Reading) –... -
Page 11: Frequency Accuracy
Use the following procedures to verify the frequency accuracy of the MS2089A without GNSS connection. Equipment Required • Anritsu MG36221A Synthesizer • Anritsu 15NN50-1.5C RF Coaxial Cable • Anritsu 34NFKF50 K(f) to N(f) Adapter • 10 MHz Frequency Reference • BNC(m) to BNC(m) Coaxial Cable • SMA(m) to BNC(f) Adapter Procedure 1. -
Page 12: With Gnss Connection (Option 31)
Appendix Equipment Required • Anritsu MG36221A Synthesizer • 10 MHz Frequency Reference • Anritsu 34NFKF50 Adapter • Anritsu 15NN50-1.5C RF Coaxial Cable • SMA(m) to BNC(f) Adapter • BNC(m) to BNC(m) Coaxial Cable • GNSS antenna Procedure 1. Connect the external 10 MHz Reference to the MG36221A. -
Page 13: Amplitude Accuracy
• Anritsu MG36221A Synthesizer • Weinschel 1870 Power Splitter • Weinschel 44-10 Attenuator • Rohde and Schwarz NRP18T Power Sensor, Qty 2 • Anritsu 15NN50-1.5C Coaxial cable • Anritsu 34NFKF50 Adapter • SMA(m) to BNC(f) Adapter • BNC(m) to BNC(m) Coaxial cable •... - Page 14 2-3 Amplitude Accuracy Spectrum Analyzer Verification frequency of MG36221A as the input signal frequency, which sets the power sensors to the proper power sensor calibration factor. 9. Adjust the power level of the MG36221A to get a reading on Sensor A that matches the test power level in the first column of Table B-3, “Characterization Chart”...
-
Page 15: Absolute Amplitude Accuracy At 50 Mhz - Preamplifier Off
4. Connect the 15NN50-1.5C to the input of the splitter. 5. Connect the NRP18T directly to the output of the power splitter. 6. Connect the Anritsu 34NN50A adapter to the output of the power splitter and N (f) side of the 10 dB attenuator. -
Page 16: Absolute Amplitude Accuracy At 50 Mhz - Preamplifier On
4. Connect the 15NN50-1.5C to the input of the splitter. 5. Connect the NRP18T directly to the output of the power splitter. 6. Connect the Anritsu 34NN50A adapter to the output of the power splitter and N (f) side of the 10 dB attenuator. -
Page 17: Amplitude Accuracy - Preamplifier Off
4. Connect the MG36221A RF Out to the input of the splitter. 5. Connect the NRP18T directly to one output of the splitter. 6. Connect the Anritsu 34NN50A adapter to the output of the power splitter and N (f) side of the 10 dB attenuator. - Page 18 2-3 Amplitude Accuracy Spectrum Analyzer Verification 15. Perform a marker peak search and record the amplitude in Table B-6, “MS2089A Power Level Accuracy (Preamplifier Off)” on page B-4 16. Adjust the Reference Level and Attenuation Level on the MS2089A for the other values in Table B-6, “MS2089A Power Level Accuracy (Preamplifier Off)”...
-
Page 19: Amplitude Accuracy - Preamplifier On
4. Connect the MG36221A RF Out to the input of the splitter. 5. Connect the NRP18T directly to one output of the splitter. 6. Connect the Anritsu 34NN50A adapter to the output of the power splitter and N (f) side of the 10 dB attenuator. - Page 20 2-3 Amplitude Accuracy Spectrum Analyzer Verification 15. Perform a marker peak search and record the amplitude in Table B-8, “MS2089A Power Level Accuracy (Preamplifier On)” on page B-5 16. Adjust the Reference Level and Attenuation Level on the MS2089A for the other values in Table B-8, “MS2089A Power Level Accuracy (Preamplifier On)”...
-
Page 21: Single Side Band (Ssb) Phase Noise
Equipment Required • Anritsu MG36221A • 34NFKF50 Adapter, K(f) to N(f) • SMA(m) to BNC(f) Adapter • Anritsu 15NN50-1.5C Coaxial Cable, N(m) to N(m) • 10 MHz Frequency Reference • BNC(m) to BNC(m) coaxial cable Procedure 1. Connect the external 10 MHz Reference to both the MG36221A and MS2089A. - Page 22 2-4 Single Side Band (SSB) Phase Noise Spectrum Analyzer Verification For example: –80 dBc measured – 30 dB = –110 dBc/Hz 11. Change the Center Frequency to 1000.545 MHz and the Span to 1.1 MHz. Run the sweep of three averages and allow it to finish.
-
Page 23: Second Harmonic Distortion
Before continuing, allow a 30 minute warm-up for the internal circuitry to stabilize. Equipment Required • Anritsu MG36221A Synthesizer • Min-Circuits NLP-50 Low Pass Filter • Anritsu 15NN50-1.5C RF Cable • 10 MHz Frequency Reference • BNC(m) to BNC(m) Coaxial Cable • Ruggedized 34NFK50 Adapter, K(f) to N(f) •... -
Page 24: Displayed Average Noise Level (Danl)
Note Before continuing, allow a 30 minute warm-up for the internal circuitry to stabilize. Equipment Required • Anritsu 28N50-2 Termination MS2089A Procedure 1. Attach the Termination to the RF input of the MS2089A. 2. Set the MS2089A to spectrum analyzer mode and preset the instrument (PRESET > Preset Mode). -
Page 25: Danl - Preamplifier On
Note Before continuing, allow a 30 minute warm-up for the internal circuitry to stabilize. Equipment Required • Anritsu 28N50-2 Termination MS2089A Procedure 1. Attach the Termination to the RF input of the MS2089A. 2. Set the MS2089A to spectrum analyzer mode and preset the instrument (PRESET > Preset Mode). -
Page 26: Residual Spurs
Note Before continuing, allow a 30 minute warm-up for the internal circuitry to stabilize. Equipment Required • Anritsu 28N50-2 Termination MS2089A Procedure 1. Attach the Termination to the RF input of the MS2089A. 2. Set the MS2089A to spectrum analyzer mode and preset the instrument (PRESET > Preset Mode). -
Page 27: Residual Spurs - Preamplifier Off
Appendix Equipment Required • Anritsu 28N50-2 Termination MS2089A Procedure 1. Attach the Termination to the RF input of the MS2089A. 2. Set the MS2089A to spectrum analyzer mode and preset the instrument (PRESET > Preset Mode). -
Page 28: Input Related Spurious
Before continuing, allow a 30 minute warm-up for the internal circuitry to stabilize. Equipment Required • Anritsu MG36221A Synthesizer • Anritsu 34NFKF50 Adapter • Anritsu 15NNF50-1.5C RF Cable • 10 MHz Frequency Reference • BNC(m) to BNC(m) Coaxial Cable • SMA(m) to BNC(f) Adapter MS2089A Procedure 1. -
Page 29: Chapter 3-Cable And Antenna Analyzer Verification
Equipment Required • Open/Short Frequency: DC to 18 GHz Anritsu Model 22N50 • Termination Frequency: DC to 18 GHz, Return Loss: 40 dB min. Anritsu Model 28N50-2 • 6 dB Offset Termination Frequency: DC to 6.0 GHz Anritsu Model SC5905 •... - Page 30 3-1 Return Loss Accuracy Verification Cable and Antenna Analyzer Verification PN: 10580-00500 Rev. A MS2085A/89A MM...
-
Page 31: Chapter 4-Battery Information
Chapter 4 — Battery Information General Information This chapter provides the care and handling information of the Anritsu 633-79 Lithium-Ion batteries. • The battery supplied with the Site Master may need charging before use. Before using the instrument, make sure to charge the internal battery using the AC-DC Adapter. -
Page 32: Battery Pack Removal And Replacement
4-2 Battery Pack Removal and Replacement Battery Information Battery Pack Removal and Replacement This section provides instructions for the removal and replacement of the instrument battery pack. 1. Locate the battery access door on the left side of the unit. 2. - Page 33 Battery Information 4-2 Battery Pack Removal and Replacement 5. With the battery access door removed, grasp the battery lanyard and pull the battery straight out of the unit as illustrated in Figure 4-2. Figure 4-2. Removing the Battery MS2085A/89A MM PN: 10580-00500 Rev.
- Page 34 4-2 Battery Pack Removal and Replacement Battery Information PN: 10580-00500 Rev. A MS2085A/89A MM...
-
Page 35: Chapter 5-Assembly Replacement
Chapter 5 — Assembly Replacement Introduction This chapter describes opening and closing the Site Master case along with basic parts replacement steps. The sections are as follows: • “Battery Pack Removal and Replacement” • “Bumpers Removal” • “Rear Case Removal” •... -
Page 36: Battery Pack Removal And Replacement
5-3 Battery Pack Removal and Replacement Assembly Replacement Battery Pack Removal and Replacement This section provides instructions for the removal and replacement of the instrument battery pack. 1. Locate the battery access door on the left side of the unit. 2. -
Page 37: Bumpers Removal
Assembly Replacement 5-4 Bumpers Removal Bumpers Removal The procedure below provides instructions for removing the bumpers of the instrument: 1. Remove the left and right bumpers by pulling them outward from the bottom. See Figure 5-3. Figure 5-3. Pulling of Side Bumpers 2. -
Page 38: Rear Case Removal
5-5 Rear Case Removal Assembly Replacement Rear Case Removal The procedure below provides instructions for removing the rear case of the instrument: 1. Remove the battery as shown in Section 5-3 “Battery Pack Removal and Replacement” on page 5-2. 2. Remove the side bumpers as shown in Section 5-4 “Bumpers Removal”... -
Page 39: Touchscreen/Lcd Removal
Assembly Replacement 5-6 Touchscreen/LCD Removal Touchscreen/LCD Removal This procedure provides instructions to replace LCD touchscreen. With the rear case removed as shown in Section 5-5 “Rear Case Removal” on page 5-4, the internal assemblies can be removed and replaced as explained below: 1. - Page 40 5-6 Touchscreen/LCD Removal Assembly Replacement 5. Remove the three Torx screws securing the battery shroud using a T10 Torx screw driver. See Figure 5-8. Figure 5-8. Battery Shroud Removal 6. Disconnect the battery cable and remove the battery shroud. See Figure 5-9.
- Page 41 Assembly Replacement 5-6 Touchscreen/LCD Removal 7. Carefully tilt the Main PCB/SPA PCB assembly to view the display cable. See Figure 5-10. Figure 5-10. Display Cable 8. Release the locking connector by slowing lifting the metal flap upwards to disconnect the display cable. Figure 5-11.
- Page 42 5-6 Touchscreen/LCD Removal Assembly Replacement 9. Carefully tilt the Main PCB/SPA PCB assembly to remove the two Wi-Fi antennas. Release the Wi-Fi Antennas by carefully prying the end slots using a straight screw driver. See Figure 5-12. Figure 5-12. Releasing the Wi-Fi antennas 10.
-
Page 43: Spa Pcb Assembly Removal
Assembly Replacement 5-7 SPA PCB Assembly Removal SPA PCB Assembly Removal 1. Remove the four nuts along with four lock washers from the SMA ports on the top connector panel using a 5/16" wrench. See Figure 5-14. Figure 5-14. SPA PCB Removal 2. - Page 44 5-7 SPA PCB Assembly Removal Assembly Replacement 4. Remove the eight Torx screws securing the SPA PCB Assembly to the Main PCB using a T10 Torx driver. Figure 5-16. Figure 5-16. SPA PCB Removal: Torx Screws 5-10 PN: 10580-00500 Rev. A MS2085A/89A MM...
-
Page 45: Main Pcb Removal
Assembly Replacement 5-8 Main PCB Removal Main PCB Removal The semi-rigid cable connecting the RF input adapter and the step attenuator on the SPA PCB is normally a part of the SPA PCB Assembly, which may be replaced independently. 1. Carefully remove the two Wi-Fi cables, the keypad cable, and shielded LCD cable connected to the Main PCB. -
Page 46: Fan Assembly Removal
5-9 Fan Assembly Removal Assembly Replacement Fan Assembly Removal The fan assembly sits in a slot in the front case and is plugged into the Main PCB. 1. Carefully disconnect the harness and lift the fan assembly out of the case. See Figure 5-18. -
Page 47: 5-10 Rf Input Adapter Removal
Assembly Replacement 5-10 RF Input Adapter Removal 5-10 RF Input Adapter Removal The RF input adapter consists of four T10 Torx screws that are secured to the SPA PCB Assembly. Follow the steps below to remove the RF input adapter: 1. -
Page 48: Reassembling The Unit
5-11 Reassembling the Unit Assembly Replacement 5-11 Reassembling the Unit Reassembling the unit is simply a process done in the reverse order of the removal procedure. Use caution while reassembling all the parts together: 1. Ensure to carefully align the cables of the Wi-Fi antenna into the littles grooves of the Main PCB to prevent the Wi-Fi antenna cables from being smashed or crimped. -
Page 49: Chapter 6-Troubleshooting
Chapter 6 — Troubleshooting Introduction This chapter describes the primary troubleshooting operations that can be performed by all Anritsu service centers. Perform the troubleshooting suggestions in the order they are listed. Only qualified Anritsu personnel should replace internal assemblies. Major subassemblies shown in Table 1-5 are typically the items that may be replaced. - Page 50 6-2 Level Accuracy Problems Troubleshooting PN: 10580-00500 Rev. A MS2085A/89A MM...
-
Page 51: Appendix A-Ms2085A/89A Test Records
Appendix A — MS2085A/89A Test Records This appendix provides test records that can be used to record the performance of the MS2085A. Anritsu recommends that you make a copy of the following test record pages and document the measurements each time a Performance Verification is performed. -
Page 52: Test Records For Cable And Antenna Analyzer Verification
A-1 Test Records for Cable and Antenna Analyzer Verification MS2085A/89A Test Records MS2085A Firmware Rev: ______________ Operator: ____________________ Date: _____________ Serial Number: _______________ Options: ___________________________________________________ Test Records for Cable and Antenna Analyzer Verification Table A-1. MS2085A/89A CAA Frequency Accuracy Measurement Frequency Measured Value Error... -
Page 53: Appendix B-Ms2089A Test Records
This appendix provides the test record templates to record the performance of the MS2085A/89A Site Master. Anritsu recommends that you make a copy of the following test record pages and document the measurements each time a performance verification is performed. Continuing to document this process each time it is performed provides a detailed history of instrument performance. -
Page 54: B-2 Test Records For Spectrum Analyzer Verification
B-2 Test Records for Spectrum Analyzer Verification MS2089A Test Records MS2089A Firmware Rev: ______________ Operator: ____________________ Date: ____________ Serial Number: _______________ Options: __________________________________________________ Table B-4. MS2089A Absolute Amplitude Accuracy at 50 MHz (Preamplifier Off) MS2089A MS2089A Input Reference NRP18T Expected Measured Measurement Frequency... - Page 55 MS2089A Test Records B-2 Test Records for Spectrum Analyzer Verification MS2089A Firmware Rev: ______________ Operator: ____________________ Date: ____________ Serial Number: _______________ Options: __________________________________________________ Table B-5. MS2089A Absolute Amplitude Accuracy at 50 MHz (Preamplifier On) MS2089A MS2089A Input Reference NRP18T Expected Measured Measurement Frequency...
- Page 56 B-2 Test Records for Spectrum Analyzer Verification MS2089A Test Records MS2089A Firmware Rev: ______________ Operator: ____________________ Date: ____________ Serial Number: _______________ Options: __________________________________________________ Table B-6. MS2089A Power Level Accuracy (Preamplifier Off) MS2089A MS2089A NRP18T Expected Measured Measurement Frequency Power Level Power Level Power Level Uncertainty...
- Page 57 MS2089A Test Records B-2 Test Records for Spectrum Analyzer Verification MS2089A Firmware Rev: ______________ Operator: ____________________ Date: ____________ Serial Number: _______________ Options: __________________________________________________ Table B-8. MS2089A Power Level Accuracy (Preamplifier On) MS2089A MS2089A NRP18T Expected Measured Measurement Frequency Power Level Power Level Power Level Uncertainty...
- Page 58 B-2 Test Records for Spectrum Analyzer Verification MS2089A Test Records MS2089A Firmware Rev: ______________ Operator: ____________________ Date: ____________ Serial Number: _______________ Options: __________________________________________________ Table B-10. MS2089A Spectral Purity - SSB Phase Noise Offset from 1 GHz Measured Delta with Calculated Value Measurement Specification Frequency...
- Page 59 MS2089A Test Records B-2 Test Records for Spectrum Analyzer Verification Table B-14. MS2089A Residual Spurs (Preamplifier On) Start Stop Measurement Frequency Frequency Measured Value Uncertainty Specification 10 MHz 500 MHz 300 Hz 100 Hz 1.0 dB <–110 dBm, max 500 MHz 1000 MHz 300 Hz 100 Hz...
- Page 60 B-2 Test Records for Spectrum Analyzer Verification MS2089A Test Records MS2089A Firmware Rev: ______________ Operator: ____________________ Date: ____________ Serial Number: _______________ Options: __________________________________________________ Table B-16. MS2089A Input Related Spurs Measured Input Measured Spur Calculated IRS Measurement Signal (742 MHz) (3500.5 MHz) (Input Signal –...
- Page 62 Anritsu Company 490 Jarvis Drive Anritsu utilizes recycled paper and environmentally conscious inks and toner. Morgan Hill, CA 95037-2809 http://www.anritsu.com...
Need help?
Do you have a question about the Site Master MS2085A and is the answer not in the manual?
Questions and answers