Table of Contents
Advertisement
Quick Links
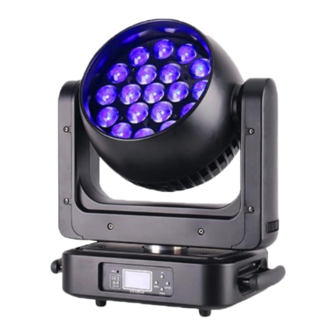
Eye500 Pro
19x25W ZOOM LED Moving Head Light
This product manual contains important information about the safe installation
and use of this projector. Please read and follow these instructions carefully and
keep this manual in a safe place for future reference.
User manual
Please read the instructions carefully before use
1
Advertisement
Table of Contents

Related Manuals for Brighter Eye500 Pro


Summary of Contents for Brighter Eye500 Pro
- Page 1 Eye500 Pro 19x25W ZOOM LED Moving Head Light This product manual contains important information about the safe installation and use of this projector. Please read and follow these instructions carefully and keep this manual in a safe place for future reference.
-
Page 2: Table Of Contents
Please read the instruction carefully before use TABLE OF CONTENTS 1. Safety Instructions .................... 2. Technical Specifications ..................3. How To Set The Unit ..................3.1 Control panel ....................3.2 Main Function .................... 3.3 Home Position Adjustment ..............4. Control By Universal DMX Controller ............. 4.1 DMX 512 Connection ................ -
Page 3: Safety Instructions
1. Safety Instructions Please read the instruction carefully which includes important information about the installation, usage and maintenance. WARNING Please keep this User Manual for future consultation. If you sell the unit to another user, be sure that they also receive this instruction booklet. -
Page 4: Technical Specifications
The fixture should be mounted via its Omega Quick Release Clamp bracket. Always ensure that the unit is firmly fixed to avoid vibration and slipping while operating and make sure that the structure to which you are attaching the unit is secure and is able to support a weight of 10 times of the fixtures weight. Always use a safety cable that can hold 12 times of the weight of the fixture when installing. -
Page 5: Main Function
1. Function Display: Shows the various menus and the selected functions 2. LED: POWER Power On DMX input present 3. Button: MENU To select the programming functions DOWN To go backward in the selected functions To go forward in the selected functions ENTER To confirm the selected functions 4. - Page 7 DMX Functions Enter MENU mode, select DMX Functions, press the ENTER button to confirm, use the UP/DOWN button to select DMX Address, DMX Channel Mode or View DMX Value. DMX Address To select DMX Address, press the ENTER button to show the DMX ADDRESS on the display. Use the UP/DOWN button to adjust the address from 001 to 512, press the ENTER button to setup.
- Page 8 P/T Feedback To select P/T Feedback, press the ENTER button to show the PAN/TILT FEEDBACK on the display. Use the UP/DOWN button to select No (Pan or tilt’s position will not feedback while out of step) or Yes (Feedback while pan/tilt out of step), press the ENTER MENU button back to the last menu or let the unit idle one minute to exit menu mode.
- Page 9 Square Law: Light intensity control is finer at low levels and coarser at high levels. Inverse Square Law: Light intensity control is coarser at low levels and finger at high levels. S‐cure: Light intensity control is finger at low levels and high levels and coarser at medium levels. Dimmer Speed To select Dimmer Speed, press the ENTER button to show the DIMMER SPEED on the display.
- Page 10 UP/DOWN button to adjust the intensity from 1 (dark) to 10 (bright). Once selected, press the ENTER button to setup and store. Press the MENU button back to the last menu or let the unit idle one minute to exit menu mode. Temperature Unit To Select Temperature Unit, press the ENTER button to show the TEMPERATURE UNIT on the display.
- Page 11 select Fixture use time, Lamp On time or Firmware Version. Fixture use time To select Fixture use time, press the ENTER button to show the FIXTURE USE TIME on the display. Press the ENTER button, the fixture working hours will show on the display. Press the MENU button to exit. Lamp On time To select Lamp On time, press the ENTER button to show the LAMP ON TIME on the display.
-
Page 12: Home Position Adjustment
unit will run built‐in program to reset all motors to their home positions) or No, press ENTER button to store. Press MENU button to exit menu mode. Special Functions Enter MENU mode, select Special Functions, press the ENTER button to confirm, use the UP/DOWN button to select Fixture Maintenance or Factory Setting. -
Page 13: Control By Universal Dmx Controller
In the main functions, hold the ENTER button for at least 3 seconds into offset mode, use the DOWN/UP button up to select Pan Offset, Tilt Offset or Zoom Offset, and press the ENTER button to confirm. Use the DOWN/UP button to adjust the home position of the Pan, Tilt or Zoom, Once the position has been selected, press the ENTER button to setup, to go back to the functions without any change press the MENU button again. -
Page 14: Address Setting
4. The DMX output and input connectors are pass‐through to maintain the DMX circuit, when one of the units’ power is disconnected. 5. Each fixture unit needs to have an address set to receive the data sent by the controller. The address number is between 0‐511 (usually 0 &... - Page 15 CHANNEL VALUE FUNCTION Beam electronic shutter effect 000‐019 Shutter closed 020‐024 Shutter open 025‐064 Strobe 1 (fast ‐ slow) 065‐069 Shutter open 070‐084 Strobe 2: opening pulse (fast ‐ slow) 085‐089 Shutter open 090‐104 Strobe 3: closing pulse (fast ‐ slow) 105‐109 Shutter open 110‐124...
- Page 16 070‐074 Fan mode REGULATED2 075‐089 No function 090‐094 Dimmer Curve Line 095‐099 Dimmer Curve Square Law 100‐104 Dimmer Curve Inverse Square Law 105‐109 Dimmer Curve S 110‐114 Fast dimming, speed of changes unrestricted 115‐119 No function 120‐124 Smooth dimming, speed of changes restricted slightly 125‐249 No function 250‐255...
- Page 17 208‐229 Counter‐clockwise, slow ‐ fast 230‐234 Open Random color 235‐239 Fast 240‐244 Medium 245‐249 Slow 250‐255 Open Beam red 000‐255 Red 0‐ 100% Beam green 000‐255 Green 0‐ 100% Beam blue 000‐255 Blue 0‐ 100% Beam white 000‐255 White 0‐ 100% 22-39(2200K),40-57(2400K),58-75(2800K),76-93(3200k),94-111(3600k),112- 129(4200K),130-147(4800K),148-165(5600K),166-183(6500k),184- 201(7500K),202-219(8500k),220-237(9500K),238-255(10000K)
- Page 18 110‐124 Strobe 4: random strobe, fast slow 125‐129 Open 130‐144 Strobe 5: random opening pulse, fast slow 145‐149 Open 150‐164 Strobe 6: random closing pulse, fast slow 165‐169 Open 170‐184 Strobe 7: burst pulse, fast slow 185‐189 Open 190‐204 Strobe 8: random burst pulse, fast slow 205‐209 Open...
-
Page 19: Troubleshooting
204‐210 Color27 211‐217 Color28 218‐225 Color29 226‐232 2700K 233‐240 3200K Color Temperature 241‐247 4200K 248‐255 5600K 000‐255 RING 2 RED (0‐ 100%) 000‐255 RING 2 GREEN (0‐ 100%) 000‐255 RING 2 BLUE (0‐ 100%) 000‐255 RING 2 WHITE (0‐ 100%) RING 2 COLOR PRESET 000‐255 (The same as CH14: RING 1 COLOR PRESET) -
Page 20: Fixture Cleaning
troubleshooting: A. The unit does not work, no light and the fan does not work 1. Check the connection of power and main fuse. 2. Measure the mains voltage on the main connector. 3. Check the power on LED. B. Not responding to DMX controller 1.
Need help?
Do you have a question about the Eye500 Pro and is the answer not in the manual?
Questions and answers