Table of Contents
Advertisement
Quick Links
Compatible with Citroen,
with 7inch, 8inch, 9inch, 10.25inch or 12.3inch monitor
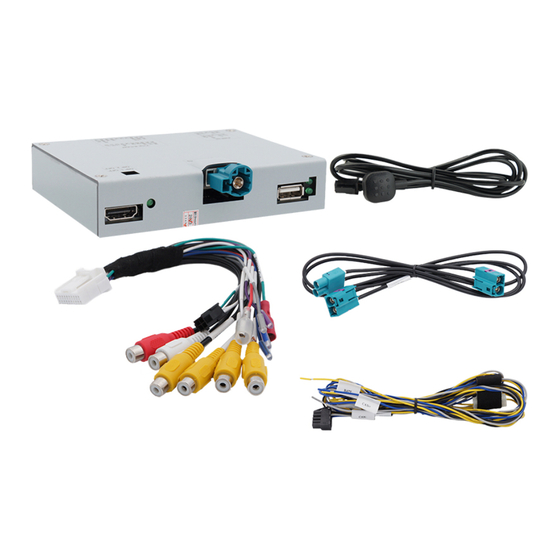
Example pics:
Product features
➢ 1 x CVBS/AHD-input for rear-view camera
➢ 1 x CVBS/AHD-input for front camera
➢ 2 x CVBS/AHD-input for side-cameras or additional after-market video-sources
(e.g., USB-device, DVB-T2 Tuner, etc.)
➢ All inputs NTSC and PAL compatible
Supported AHD resolutions 720p NTSC (30Hz), 720p PAL (25Hz), 960p NTSC (30Hz),
960p PAL (25Hz), 1080p NTSC (30Hz), 1080p PAL (25Hz)
➢
HDV-NAC12 only:
IOS/Android, laptop, streaming stick, DVD-Player, DVB-T2 Tuner, etc.)
Supported HDMI resolutions 720p NTSC (60Hz), 720p PAL (50Hz),
1080p NTSC (60Hz), 1080p PAL (50Hz)
➢ Automatic switching to rear-view camera input while reverse gear is engaged
➢ Automatic front camera switching after reverse gear for 5, 10, 15 or 20 seconds
➢ Activatable driving-path lines for rear-view camera (not available for all vehicles)
➢ Activatable PDC graphic (not available for all vehicles)
➢ Picture free during the car ride (only for inserted video-sources)
Version 16.05.2024
Video inserters
HDV-NAC12 / HDA-NAC12
Opel
with NAC, RCC or IVI infotainment
and separate head-unit
1 HDMI-input for HD rear-view camera or additional HDMI-sources (e.g.,
HW: CAM-AHD(V34)/(V65)
and
Peugeot
vehicles
HDV-NAC12 / HDA-NAC12
Advertisement
Table of Contents
Troubleshooting

Related Manuals for NavLinkz HDV-NAC12


Summary of Contents for NavLinkz HDV-NAC12
- Page 1 Video inserters HDV-NAC12 / HDA-NAC12 Compatible with Citroen, Opel Peugeot vehicles with NAC, RCC or IVI infotainment with 7inch, 8inch, 9inch, 10.25inch or 12.3inch monitor and separate head-unit Example pics: Product features ➢ 1 x CVBS/AHD-input for rear-view camera ➢ 1 x CVBS/AHD-input for front camera ➢...
-
Page 2: Table Of Contents
Case 2: Reverse signal analogue connection After-market front camera After-market side-cameras 2.8.1 Case 1: Turn signal from CAN-bus 2.8.2 Case 2: Turn signal analogue connection HDMI rear-view camera or other HDMI-source (only HDV-NAC12) 2.10 Audio-insertion 2.11 Connection - Interface and external keypad 2.12 OSD-menu settings... -
Page 3: Prior To Installation
Due to changes in the production of the vehicle manufacturer there’s always a possibility of incompatibility. Delivery contents Take down the serial number of the interface and store this manual for support purposes: ____________________ Version 16.05.2024 HW: CAM-AHD(V34)/(V65) HDV-NAC12 / HDA-NAC12... -
Page 4: Checking The Compatibility Of Vehicle And Accessories
Partner III from 062018 up Rifter from 09/2018 up Traveller from 09/2016 up ProAce II from 09/2016 up Toyota ProAce City from 04/2020 up NAC Low or RCC (Bosch) with 7inch monitor ProAce Verso from 09/2016 up Version 16.05.2024 HW: CAM-AHD(V34)/(V65) HDV-NAC12 / HDA-NAC12... -
Page 5: Limitations
PDC display will not be supported. NAC high-version If the female double HSD connector of the vehicle harness cannot be separated in two female single HSD connectors, the optionally available cable CAB-HSD-MF026 is required. Version 16.05.2024 HW: CAM-AHD(V34)/(V65) HDV-NAC12 / HDA-NAC12... -
Page 6: Warnings
NAC high version head-unit (Double black male 4pin HSD on the backside) RCC head-units (examples RCC A2 with DAB) IVI head-units (examples High/Mid) Please, carefully follow the corresponding parts of the manual for your identified head-unit! Version 16.05.2024 HW: CAM-AHD(V34)/(V65) HDV-NAC12 / HDA-NAC12... -
Page 7: Boxes And Connectors - Interface
The interface converts connected after-market sources’ video-signals into a video-signal compatible with the factory monitor. It can then be inserted, using separate trigger options. The interface also reads the vehicle’s CAN-bus signals and uses them for own functions. * HDMI-input only available on HDV-NAC12 Version 16.05.2024 HW: CAM-AHD(V34)/(V65) -
Page 8: Settings - 8Dip Switch Bench (Interface Functions)
In the OSD-menu settings it is possible to set the automatic front camera display time from 5, 10; 15 or 20 seconds or shut it off. Therefore, it is also possible to connect a video-source other than from camera. Version 16.05.2024 HW: CAM-AHD(V34)/(V65) HDV-NAC12 / HDA-NAC12... -
Page 9: Rear-View Camera Settings (Dip 4)
Note: On vehicles, where the PDC-graphic due to lack of CAN-bus compatibility cannot be used or is subject to post installation problems, the function cannot be used. In this case set dip 8 = OFF. * HDMI-input only available on HDV-NAC12 Power reset interface after each dip change to activate changes! Version 16.05.2024... -
Page 10: Settings - 2Dip Switch Bench (Monitor Definition)
As on any installation of retrofit equipment, a stand-by test is necessary after installation to ensure that the retrofit products switch off after the vehicle enters sleep mode. Place of connection The video-interface has to be connected at the head-unit’s rear side. Version 16.05.2024 HW: CAM-AHD(V34)/(V65) HDV-NAC12 / HDA-NAC12... -
Page 11: Connection Schema
Connection schema Version 16.05.2024 HW: CAM-AHD(V34)/(V65) HDV-NAC12 / HDA-NAC12... -
Page 12: Connection - Picture Signal Cable
Disconnect single black female HSD connector of factory harness from rearside of head-unit and connect it to waterblue male HSD connector of picture signal cable. Connect waterblue female 4pin HSD connector to black male HSD connector at rear-side of head-unit. Version 16.05.2024 HW: CAM-AHD(V34)/(V65) HDV-NAC12 / HDA-NAC12... -
Page 13: Nac High Version (Double Hsd)
Attention: Above schema might show the double female HSD connector reversed. Make sure that the white female HSD connector is reconnected to the same position of the head-unit, where it has been connected before! Version 16.05.2024 HW: CAM-AHD(V34)/(V65) HDV-NAC12 / HDA-NAC12... -
Page 14: Ivi Und Rcc Versions
Disconnect black female HSD connector of factory harness at rear-side of head-unit and connect it to waterblue male HSD connector of picture signal cable. Connect waterblue female HSD connector to black male HSD connector at rear-side of head-unit. Version 16.05.2024 HW: CAM-AHD(V34)/(V65) HDV-NAC12 / HDA-NAC12... -
Page 15: Connection - Harnesses, Power Supply And Can-Bus Or Analogue Without Can-Bus
20pin connector of interface. Connect black GND wire of 10pin power/CAN cable to stabile vehicle’s negative ground. Connect yellow +12V ACC/S-contact wire 10pin power/CAN cable +12V ACC (terminal 15r) or S-contact (terminal 86s) of vehicle. Version 16.05.2024 HW: CAM-AHD(V34)/(V65) HDV-NAC12 / HDA-NAC12... -
Page 16: Connection With Can-Bus
2.4.1 Connection with CAN-bus Connect grey wire 10pin power/CAN cable to vehicle’s CAN-low (see following chapters for place of connection). Connect blue wire 10pin power/CAN cable to vehicle’s CAN-high. (see following chapters for place of connection). Version 16.05.2024 HW: CAM-AHD(V34)/(V65) HDV-NAC12 / HDA-NAC12... -
Page 17: Place Of Connection Power/Can - Nac And Rcc Head-Unit
22pin section. Connect blue CAN-high wire, grey CAN-low wire and black GND wire of 10pin power/CAN cable to corresponding chambers of female 22pin section of factory harness. Attention: cable colors in vehicle may vary! Version 16.05.2024 HW: CAM-AHD(V34)/(V65) HDV-NAC12 / HDA-NAC12... -
Page 18: Place Of Connection Power/Can - Ivi Head-Unit
12pin connector of vehicle harness. There are two known vehicle pin definition variants displayed above. Tip: If CAN-bus is on chambers 4 and 10, chambers 5 and 11 are usually not occupied. Attention: cable colors in vehicle may vary! Version 16.05.2024 HW: CAM-AHD(V34)/(V65) HDV-NAC12 / HDA-NAC12... -
Page 19: Analogue Connection Without Can-Bus
• With analogue connection of interface (without CAN-bus), the connection of rear-view camera and side-cameras must also be made analogue. See chapters: 2.6.2 Case 2: Reverse signal analogue connection 2.8.2 Case 2: Turn signal analogue connection Version 16.05.2024 HW: CAM-AHD(V34)/(V65) HDV-NAC12 / HDA-NAC12... -
Page 20: Power Supply Outputs
CAN-bus or by trigger wires (see following chapters for connection). * HDMI-input only available on HDV-NAC12 Version 16.05.2024 HW: CAM-AHD(V34)/(V65) HDV-NAC12 / HDA-NAC12... -
Page 21: Connection And Power-Supply - Video-Sources Rear-View Camera, Front Camera And 2 Side-Cameras
Connect power supply for all after-market cameras to green wire CAM power +12V (max 3A) 20pin interface cable. Note: The type of camera switching (by CAN-bus or trigger cables) can be preset in the OSD-menu settings individually for each input. Version 16.05.2024 HW: CAM-AHD(V34)/(V65) HDV-NAC12 / HDA-NAC12... -
Page 22: Connection And Power-Supply - Video-Sources Rear-View Camera, Front Camera And 2 Video
Connect power supply for other video-sources to red cable ACC out +12V (max 3A) 20pin interface cable. Note: The type of camera switching (by CAN-bus or trigger cables) can be preset in the OSD-menu settings individually for each input. Version 16.05.2024 HW: CAM-AHD(V34)/(V65) HDV-NAC12 / HDA-NAC12... -
Page 23: After-Market Rear-View Camera
5, V4-Reverse input remains without function! If reverse gear detection of interface by CAN-bus does not work, reverse gear signal has to be connected analogue. * HDMI-input only available on HDV-NAC12 Version 16.05.2024 HW: CAM-AHD(V34)/(V65) HDV-NAC12 / HDA-NAC12... -
Page 24: Case 2: Reverse Signal Analogue Connection
Connect output connector (87) of relay to power cable of rear-view camera, additionally to green wire Trig-Rear. Connect stabile and permanent +12V to input connector (30) of relay. * HDMI-input only available on HDV-NAC12 Version 16.05.2024 HW: CAM-AHD(V34)/(V65) HDV-NAC12 / HDA-NAC12... -
Page 25: After-Market Front Camera
CAN-bus and with analogue connection of the rear camera. Note: In addition, manual switching to front camera input (short press) is possible by external button from any image mode (see chapter 3 Interface operation). Version 16.05.2024 HW: CAM-AHD(V34)/(V65) HDV-NAC12 / HDA-NAC12... -
Page 26: After-Market Side-Cameras
(some cameras are not continuously current stable). Note: If turn signal detection of interface is not compatible with the vehicle CAN-bus, the turn signals must be connected analogue. Version 16.05.2024 HW: CAM-AHD(V34)/(V65) HDV-NAC12 / HDA-NAC12... -
Page 27: Case 2: Turn Signal Analogue Connection
Connect output connector (87) of relay to power cable of rear-view camera, additionally to light blue wire Trig-Left. Connect stabile and permanent +12V to input connector (30) of relay. Same connection applies to right side-camera just the dark blue wire Trig-Right. Version 16.05.2024 HW: CAM-AHD(V34)/(V65) HDV-NAC12 / HDA-NAC12... -
Page 28: Hdmi Rear-View Camera Or Other Hdmi-Source (Only Hdv-Nac12)
V3-Front is also displayed for the preset time when reverse gear is disengaged. Power supply can be taken from green wire CAM power 12V (max3A). * HDMI-input only available on HDV-NAC12 Version 16.05.2024 HW: CAM-AHD(V34)/(V65) HDV-NAC12 / HDA-NAC12... -
Page 29: Audio-Insertion
Inserted video-signal can be switched simultaneously to any audio mode of the factory infotainment. * HDMI-input only available on HDV-NAC12 2.11 Connection - Interface and external keypad Connect female 4pin connector of keypad to male 4pin connector of 20pin interface cable. -
Page 30: Osd-Menu Settings
The following video-source signal types can be selected: CVBS video-sources: NTSC, PAL AHD video-sources: 720p NTSC, 960p NTSC, 1080p NTSC, 720p PAL, 960p PAL, 1080p PAL Version 16.05.2024 HW: CAM-AHD(V34)/(V65) HDV-NAC12 / HDA-NAC12... - Page 31 The following video-source signal types can be used: CVBS video-sources: NTSC, PAL AHD video-sources: 720p NTSC, 960p NTSC, 1080p NTSC, 720p PAL, 960p PAL, 1080p PAL * HDMI-input only available on HDV-NAC12 Version 16.05.2024 HW: CAM-AHD(V34)/(V65) HDV-NAC12 / HDA-NAC12...
- Page 32 HDMI-input* is defined as rear-view camera input (dip 5 = ON). But the function “Trigger” of HDMI-input* must be set in menu of V4-Reverse. * HDMI-input only available on HDV-NAC12 Version 16.05.2024 HW: CAM-AHD(V34)/(V65) HDV-NAC12 / HDA-NAC12...
-
Page 33: Interface Operation
V2-Right Note: The interface only switches after releasing the switch (after long press). * HDMI-input only available on HDV-NAC12 ➢ Short press of keypad (only if dip 3 is set to ON) Short press of external keypad, switches from any video mode to front camera input V3-Front and next short press switches back to the previous video mode. -
Page 34: Faq - Trouble Shooting Interface Functions - General
Test camera under natural light outside the garage. flickers. directly into the camera. Camera input picture is Protection sticker not Remove protection sticker from lens. bluish. removed from camera lens. Version 16.05.2024 HW: CAM-AHD(V34)/(V65) HDV-NAC12 / HDA-NAC12... - Page 35 Cut the grey wire of 6pin to 8pin and isolate both Interface switches compatibility to vehicle is ends. If problem still occurs, additionally cut the white video-sources by itself. limited. wire of 6pin to 8pin cable and isolate both ends. Version 16.05.2024 HW: CAM-AHD(V34)/(V65) HDV-NAC12 / HDA-NAC12...
-
Page 36: Technical Support
7 Technical Support Please note that direct technical support is only available for products purchased directly from NavLinkz GmbH. For products bought from other sources, contact your vendor for technical support. NavLinkz GmbH Distribution/Tech dealer-support Heidberghof 2 D-47495 Rheinberg +49 2843 17595 00 Email mail@navlinkz.de...
Need help?
Do you have a question about the HDV-NAC12 and is the answer not in the manual?
Questions and answers