Table of Contents
Advertisement
Quick Links
Advertisement
Table of Contents

Subscribe to Our Youtube Channel
Related Manuals for bimota KB4 RC


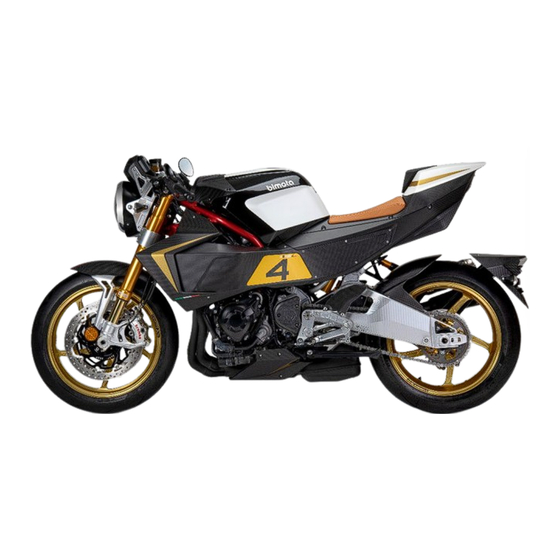
Summary of Contents for bimota KB4 RC
- Page 1 BIMOTA KB4 RC IO.PV.02 _Assembly and preparation manual KB4RC Rev1_19/04/2024...
- Page 2 Foreword DANGER In order to ship Bimota vehicles as efficiently as possible, they are partially disassembled DANGER indicates a hazardous situa- before crating. Since some of the most tion which, if not avoided, will result in commonly removed parts have a direct death or serious injury.
-
Page 3: Table Of Contents
Table of Contents Uncrating ........................ Opening Crate ......................Parts Check ......................Assembly ........................Mirror assy ………………………………………………………………………………..………………………. Preparation ......................Battery Service ......................Engine Oil(4-stroke) ....................Coolant ........................Clutch ……………………………….………………………………………………………………………………... Drive Chain .......................1 Brakes ........................Suspension system ....................Wheels ........................Headlight ......................... Remove anticorrosive treatments . -
Page 4: Uncrating
Uncrating Opening Crate Crates have sharp edges and may have WARNING nails or screws that can cause cuts and injury. Always wear protective gloves, boots protection when uncrating to prevent injury. Figure 1 Screwdriver WARNING The steel crate panel plates and fasten- ers have sharp edges. - Page 5 Opening crate...
- Page 6 Remove fixing stripes and screws from rear stand, then turn the steering wheel to the straight ahead position Remove the bike from the front (example below with Bimota KB4)
- Page 7 Content of the box Dichiarazione CE strumentazione radio (da stampare, piegare ed inserire nella busta) Eccentric adjuster Adjuster point...
-
Page 8: Parts Check
Parts Check • Open the parts box, and check the parts against the illustrations. There may be minor differences between the illustrations and the actual vehicle parts. In the following chart remarks, D =diameter in millimeters, and L=length in millimeters. Part Remarks Name... -
Page 9: Assembly
Assembly... -
Page 10: Mirror Assy
Mirror assy Take an allen key 5mm and fix both mirror to the handlebars. There are two oprions: 1) mirror outside 2) Mirror inside (in this case it is needed to reverse left and right mirror and their expansion devices) -
Page 11: Preparation
Preparation Battery Service The battery used in this motorcycle is a sealed type and never needs to be refilled. Follow the procedure for activating a new battery to ensure the best possible battery performance. attery Removal • Take an allen key 3 to remove the screws. [A] •... - Page 12 If it drops below 12.8 volts, the battery should be charged using an appropriate charger (check with your Bimota dealer). If you will not be using the motorcycle for longer than two weeks, the battery should be charged using an appropriate recharger.
-
Page 13: Engine Oil(4-Stroke)
Engine Oil Oil Level ceck • If the engine is cold, start the engine and run it for several minutes at idle speed. • Stop the engine, then wait several minutes until the oil settles. NOTICE A. Oil Level Inspection Window B. -
Page 14: Coolant
NOTICE If coolant must be added often, or the reserve tank completely runs dry, there is probably leakage in the system. Have the cooling system inspected by your authorized Bimota dealer. Reserve Tank Cap... - Page 15 Coolant Requirement WARNING NOTICE Coolant containing corrosion in- If hard water is used in the system, hibitors for aluminum engines and it causes scale accumulation in the radiators include harmful chemicals water passages, and considerably for human body. Drinking coolant reduces efficiency can result in serious injury or death.
-
Page 16: Clutch
Loosen the locknut, and turn the adjuster so that the clutch lever will have the specified free play. Tighten the locknut. • If it cannot be done, have the clutch cable adjusted by an authorized Bimota dealer NOTE ○ After the adjustment is made, start the engine and check that the clutch does... -
Page 17: Drive Chain
Drive Chain Drive Chain Lubrication Lubrication is necessary after riding through rain or on wet roads, or any time that the chain appears dry. Use a lubricant for sealed chains to Prevent deterioration of chain seals. If the chain is especially dirty, clean it using a cleaner for sealed chains following the instructions supplied by the chain cleaner manufacturer. -
Page 18: Brakes
If you feel there is something wrong when applying the brakes, have the WARNING brake system checked authorized Bimota dealer immediately. Air in the brake lines diminish braking performance cause an accident resulting in in- Brake Fluid Level Inspection jury or death. If the brake lever or... - Page 19 B. Lining Thickness rear brake is applied. C. Service Limit • I fit does not, ask your authorized Bimota dealer to inspect the front Brake lights witch and or the rear brake light switch.
-
Page 20: Suspension System
Suspension System Front Fork NOTICE After riding on the normal road, the WARNING unpaved road and in the rainy weather, clean off any dirt (grit, Improper fork leg adjustment can mud or insect etc.) that stuck to cause poor handling and loss of inner tube before it hardens. - Page 21 Rebound Damping Force Adjustment The adjuster is located at the top of the right front fork leg. Standard NOTICE 20 click closed Do not turn the adjuster beyond the Out from the fully closed position (turned fully seated position fully clockwise). adjusting mechanism •...
- Page 22 Rear Shock Absorber • Turn the adjuster clockwise to increase spring preload. • NOTICE Turn the adjuster counter clockwise To decrease spring preload. Do not turn the adjuster beyond the fully seated position adjusting mechanism damaged. Spring Preload Adjustment The adjuster is located on the right side on the muffler bracket.
- Page 23 Setting tables Front Fork Spring Preload Setting Softest setting limit Standard Hardest setting limit Adjuster Position 8 turns in** 18 turns in** Spring Action Weak ←→ Strong Setting Soft ←→ Hard Load Light ←→ Heavy Road Good ←→ High Speed ←→...
- Page 24 Rear Shock Absorber Spring Preload Setting Softest setting limit Standard Hardest setting limit Compression Position 22 clicks** Rebound postion 22 click** Spring pre-load 8 turns 18 turns Spring Action Weak ←→ Strong Setting Soft ←→ Hard Load Light ←→ Heavy Road Good ←→...
-
Page 25: Wheels
Wheels Tire Pressure Inspection Remove the air valve cap. • Check the tire pressure often, using an accurate gauge. • Make sure to install the air valve cap securely. ○ NOTE ○ Measure the tire pressure when the Tire pressure is affected by changes in tires are cold (that is, when the mo- ambient temperature and altitude, torcycle has not been ridden more... -
Page 26: Headlight
Headlight Headlight aiming should be done by Vertical Adjustment an authorized Bimota dealer. The headlight beam is adjustable vertically with a screwdriver. If adjusted too low, neither low nor high beam will illuminate the road far enough ahead. If adjusted too high, the high beam will... -
Page 27: Remove Anticorrosive Treatments
Cleaning from anticorrosive WARNING treatments An anticorrosive treatment applied to the brake discs will increase braking Clean the front and rear brake discs, swingarm, distance and can cause an accident plate, right footrest support and left footrest support resulting in serious injury or death. using alkaline solvent.
Need help?
Do you have a question about the KB4 RC and is the answer not in the manual?
Questions and answers
I need it in German.