Avaya CU360 Installing And Administering
Collaboration unit
Hide thumbs
Also See for CU360:
- Quick start manual ,
- Installing and administering (145 pages) ,
- Release notes (141 pages)

Related Manuals for Avaya CU360


Summary of Contents for Avaya CU360
- Page 1 Installing and Administering Avaya Collaboration Unit CU360 Release 11.4 Issue 2 October 2022...
- Page 2 RESERVES THE RIGHT TO TAKE LEGAL ACTION AGAINST the express behalf of Avaya. End User agrees to indemnify and hold YOU AND ANYONE ELSE USING OR SELLING THE SOFTWARE harmless Avaya, Avaya's agents, servants and employees against WITHOUT A LICENSE.
- Page 3 CODECS MAY BE OBTAINED FROM MPEG LA, L.L.C. SEE HTTP:// written consent of Avaya can be a criminal, as well as a civil offense WWW.MPEGLA.COM. under the applicable law. Compliance with Laws...
- Page 4 AC adapters shipped with the equipment or specified by Class B Part 15 Statement Avaya to be used with the equipment. If you use any other equipment, it may cause failures, malfunctioning, For product available in the USA/Canada market, only channel 1~11 or fire.
- Page 5 Marks without prior written consent Radio Equipment Directive 2014/53/EU (RED), and LVD Directive from Avaya or such third party which may own the Mark. Nothing 2014/35/EU. A copy of the Declaration may be obtained from...
-
Page 6: Table Of Contents
Avaya CU360 quick setup ........ 43 Configuring Avaya CU360 automatically for Avaya Meetings Server .. 44 Configuring Avaya CU360 automatically for Avaya Meetings Server using the quick setup October 2022 Installing and Administering Avaya Collaboration Unit CU360 Comments on this document? infodev@avaya.com... - Page 7 .......... 46 Configuring Avaya CU360 automatically using the quick setup ....... 46 Configuring Avaya CU360 automatically for device enrollment services Configuring Avaya CU360 automatically for device enrollment services using the quick .......................... 48 setup ....... 49 Viewing the Avaya CU360 endpoint serial number for the Pexip subscription ..........
- Page 8 Configuring the Avaya CU360 video layout in meetings .............. 95 Configuring the USB AV bar mode in Avaya CU360 ........ 96 Connecting the Avaya CU360 endpoint to the computer as a USB AV bar .............. 97 Customizing Avaya CU360 for USB AV bar mode .............. 98 Activating the USB AV bar mode in Avaya CU360 .................... 99...
- Page 9 Configuring Avaya CU360 to remember your favorite layouts ................. 127 Hiding calendar panel in Avaya CU360 .... 128 Configuring Avaya CU360 to send the device name as text overlay in video streams ....... 129 Configuring the maximum call bandwidth and preferred codec in Avaya CU360 .................. 130 Preferences General field descriptions ............
- Page 10 Contents .................. 150 IPv4 Addresses field descriptions ............ 151 Configuring LAN for IPv6 address settings in Avaya CU360 .................. 152 IPv6 addresses field descriptions ............. 153 Configuring network priority settings in Avaya CU360 ............ 154 Configuring bandwidth threshold for LAN in Avaya CU360 ............. 155 Configuring bandwidth threshold for Wi-Fi in Avaya CU360 ............ 155...
- Page 11 .................. 194 New Favorite field descriptions ....... 195 Preventing Avaya Spaces meetings participants from unmuting audio Raising hand in the Avaya CU360 application to seek permission from the moderator to ........................... 196 speak ...... 197 Changing the audio device during a call in the Avaya Spaces application .................
- Page 12 Testing the Avaya CU360 network connections ................ 210 Verifying acoustic pairing in Avaya CU360 .. 210 Testing the Avaya CU360 endpoint as USB bar mode after connecting to computer or laptop ................ 211 Testing acoustic pairing in Avaya CU360 ................ 212 Testing the monitor image of Avaya CU360 .......... 212...
-
Page 13: Chapter 1: Introduction
Chapter 1: Introduction Purpose This document contains information about installing, administering, and maintaining Avaya CU360. Implementation engineers, administrators, and support personnel will find this document useful. Change history Issue Date Summary of changes October 2022 Added the following topics: • “Avaya Tracking Camera TC220 Overview”... -
Page 14: Chapter 2: Avaya Cu360 Overview
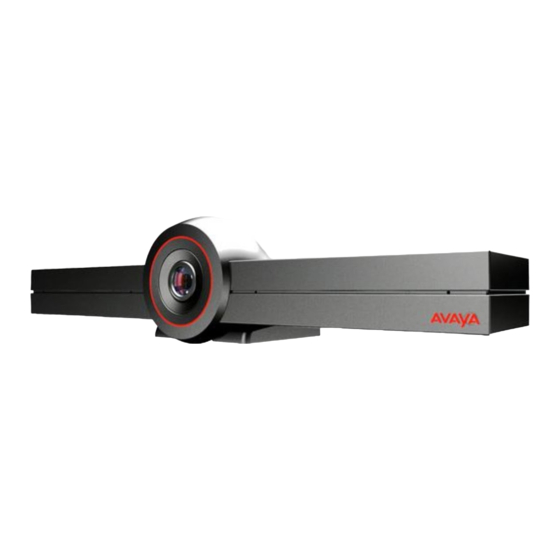
Chapter 2: Avaya CU360 overview Avaya Collaboration Unit CU360 is an all-in-one video conference endpoint. Avaya CU360 has a built-in codec, camera, and microphone, and is ideal for video conferences in small rooms. Avaya CU360 conferences can be hosted on Avaya Meetings Media Server and Avaya Spaces. -
Page 15: Avaya Cu360 Interfaces
Avaya CU360 supports the following interfaces: • A compatible touch screen monitor or external keyboard and mouse connected to Avaya CU360. • The Avaya CU360 remote control unit. You can view the user interface on a connected monitor. • The Avaya CU360 web interface. -
Page 16: Avaya Cu360 Remote Control Unit
Avaya CU360 supports a remote control unit with 2.4GHz optical air mouse and keyboard features. Using the Avaya CU360 remote control unit, you can scroll through menus with the arrow key and pressing the OK key to select options. You can also display or hide the mouse pointer using the Mouse key. - Page 17 Avaya CU360 remote control unit October 2022 Installing and Administering Avaya Collaboration Unit CU360 Comments on this document? infodev@avaya.com...
- Page 18 Avaya CU360 overview BACK & CAPS ENTER PG UP SHIFT < > HOME PG DWN “ SPACE CTRL October 2022 Installing and Administering Avaya Collaboration Unit CU360 Comments on this document? infodev@avaya.com...
-
Page 19: Avaya Cu360 Camera And Led Indicators
Pairing the remote control unit with Avaya CU360 on page 36 Avaya CU360 camera and LED indicators The Avaya CU360 endpoint has a camera and LED indicators. The camera also has a pan and tilt mechanism. October 2022 Installing and Administering Avaya Collaboration Unit CU360... - Page 20 Avaya CU360 overview The Avaya CU360 camera is equipped with two rows of lateral LED strips on the front with a circular crown of LEDs around the camera lens. The LEDs display different colors and animation effects based on the camera status. The camera supports zooming the video from the web interface, the remote control unit, and Avaya Collaboration Control.
-
Page 21: Avaya Cu360 Optimum Room Setup
3m distance. • Medium rooms can be supported using Avaya B129, and Avaya Huddle Camera HC050 or an IP camera. • For larger rooms, audio capture can be supported using the Avaya B199 with IP or USB cameras. October 2022 Installing and Administering Avaya Collaboration Unit CU360 Comments on this document? infodev@avaya.com... -
Page 22: Google Play Store
• Associate a room with Avaya CU360 to use the endpoint as a room in meetings. Avaya CU360 must be able to gain access to the EWS URL on the Internet or a private network. Avaya CU360 must also be able to connect to the Microsoft Exchange server address using an HTTPS connection through your enterprise network firewalls and proxies. -
Page 23: Avaya Spaces Integration
Room Resource and Delegate Account Mode You can create a room as a resource and a delegate account to view the room calendar in Avaya CU360. You must associate the room with Avaya CU360, using which you can add the endpoint to meetings as a room. -
Page 24: Supported Web Browsers
Direct dialing Contact favorites Supported web browsers Avaya CU360 supports the following web browsers for its web interface: • Microsoft Internet Explorer Release 8 or later • Google Chrome Release 11 or later • Mozilla Firefox Release 3.6 or later •... -
Page 25: Supported Resolutions
Avaya CU360 supports installation and use of free Android-based third-party applications. You can install the applications using the Google Play Store or the default web browser of Avaya CU360. Before you install applications, you must authorize installation of applications from unknown sources in the Android settings of Avaya CU360. - Page 26 • Dropbox: Split and share supported, along with use as a standalone application. • Bluejeans: Supported as a standalone application. You can use the Bluejeans application or configure the Bluejeans SIP server to use with the Avaya CU360 video conferencing application.
-
Page 27: Avaya Cu360 Wi-Fi Display
1080p@30 HD video using the H.264 video codec and 5.1 surround sound using the AAC and PCM audio codecs. You can use Avaya CU360 as a Wi-Fi display, and connect a compatible media source to televisions, projectors, and streaming media players that also support Wi-Fi Display. - Page 28 • Avaya CU360 is SIP registered to the Pexip SIP Cloud Service • Use Avaya CU360 for SIP-based calls • Avaya CU360 automatically receives the list of contacts from the Pexip Cloud service When Avaya CU360 is provisioned, even if the automatic synchronization is disabled, you cannot change or edit the following options: •...
-
Page 29: Avaya Cu360 Pre-Installed Applications
While recording the meeting to local storage, Avaya CU360 considers the layouts only for the first monitor. If you connect an additional monitor to the Avaya CU360 endpoint, the touch screen on the first monitor is automatically disabled. Related links... -
Page 30: Avaya Usb Av Bar
101 Avaya USB AV bar Using Avaya USB AV bar mode, you can use the Avaya CU360 endpoint as the external microphone, speaker, and camera of your laptop. With Avaya USB AV bar mode, you can use the preferred video conferencing application on the computer and the Avaya CU360 endpoint microphone and camera. -
Page 31: Avaya Cu360 Supports Avaya Room Camera Rc100
1080p for live video. You can use phones and tablets as IP cameras. You can also install an IP Webcam application for your phone or tablet and use it as live video input connected to your Avaya CU360. Related links... -
Page 32: Avaya Cu360 Camera Automatic Tracking
1.5x zoom position. If Avaya CU360 detects a participant in the same position several times, the timeout increases to 2 minutes. Avaya CU360 detects only faces in front of the camera. If faces are cover by masks Avaya CU360 does not detect them. -
Page 33: Avaya Cu360 Camera Automatic Framing
Avaya CU360 application but also for any third-party application in the USB bar mode. The automatic framing recognizes the people sitting in front of the Avaya CU360 endpoint by their faces and finds the best framing to include all of them. -
Page 34: Chapter 3: Initial Setup And Connectivity
• Avaya Collaboration Control using Android devices Connecting Avaya CU360 About this task Avaya CU360 contains the following standard equipment: • Endpoint • Remote control unit with batteries • HDMI cable October 2022 Installing and Administering Avaya Collaboration Unit CU360... -
Page 35: Switching Avaya Cu360 On Or Off
Switching Avaya CU360 on or off About this task The power button of Avaya CU360 on the rear of the device. You can use the power button to: • Switch Avaya CU360 on or off. • Change the Avaya CU360 mode to standby or wake up the device from the standby mode. -
Page 36: Pairing The Remote Control Unit With Avaya Cu360
LED indicator on Avaya CU360 flashes: • Back • OK 3. When the LED indicator is flashing, insert the power cable plug of Avaya CU360 in the power socket. Ensure that the remote control unit is in proximity to Avaya CU360 when you insert the power cable. -
Page 37: Configuration Of Avaya Cu360 Basic Settings
Avaya Spaces as personal device Using this option, you must log in to an Avaya Spaces account. If you configure Avaya CU360 as a personal device, you can also use it as a room device. -
Page 38: Configuring Avaya Cu360 For Usb Av Bar Mode Using Quick Setup
Manually activate the USB AV bar mode from Avaya CU360 after connecting to the laptop or computer. Enable the Always Active option if you need to use the Avaya CU360 endpoint only in USB AV Bar Mode without connecting any monitor. -
Page 39: Configuring Avaya Cu360 For Avaya Spaces As A Room Device
Configuring Avaya CU360 for Avaya Spaces as a room device About this task You can configure Avaya CU360 as a room endpoint for Avaya Spaces. You can join the Avaya Spaces meeting as a shared room endpoint. The Avaya CU360 endpoint can be associated with an MS exchange room resource. In this case, the email and password correspond to the delegate account, while the room email corresponds to the MS exchange room resource as booked in a scheduled meeting. -
Page 40: Configuring Avaya Cu360 For Avaya Spaces As A Personal Device
100 Configuring Avaya CU360 for Avaya Spaces as a personal device About this task You can configure Avaya CU360 as a personal device for Avaya Spaces. You can join the Avaya Spaces meeting through your personal Microsoft Exchange calendar. Procedure 1. -
Page 41: Configuring Avaya Cu360 For Avaya Cloud Office
Configuration of Avaya CU360 basic settings 8. Type your system name and click Next. Avaya CU360 prompts you to choose how to join your Exchange calendar meetings. 9. Configure the following fields: • Authentication Mode - Basic • Email • Password - Modern (O Auth) 10. -
Page 42: Installing Google Play Store From The Avaya Cu360 Quick Setup
™ After you install Google Play Store , the Avaya CU360 application launches as hidden by default. If you open the Avaya CU360 application manually, you have to complete the quick setup wizard settings. Procedure 1. Do one of the following: •... -
Page 43: Configuring Avaya Cu360 Automatically For Avaya Meetings Server
Configure Avaya CU360 automatically as a video conferencing endpoint in Avaya Meetings Server. Use a wired network connection for best results. The quick setup wizard automatically configures the SIP settings for Avaya CU360. The setup wizard gets the SIP settings from the network server discovered during the automatic configuration process. -
Page 44: Configuring Avaya Cu360 Automatically For Avaya Meetings Server Using The Quick Setup
Configuring Avaya CU360 automatically for Avaya Meetings Server using the quick setup About this task Configure Avaya CU360 automatically as a video conferencing endpoint in Avaya Meetings Server. Use a wired network connection for best results. Procedure 1. Do one of the following: •... -
Page 45: Configuring Avaya Cu360 Automatically
8. Click Next. Result • If you enter the full 12-digit service code, the Avaya CU360 configuration is complete. • If you enter a partial 5-digit service code, Avaya Meetings Management displays a red clock icon against the Avaya CU360 name. The administrator must complete the Avaya CU360 configuration, which is pushed to the endpoint. -
Page 46: Configuring Avaya Cu360 Automatically Using The Quick Setup
Result • If you enter the full 12-digit service code, the Avaya CU360 configuration is complete. • If you enter a partial 5-digit service code, Avaya Meetings Management displays a red clock icon against the Avaya CU360 name. The administrator must complete the Avaya CU360 configuration, which is pushed to the endpoint. - Page 47 Configuration of Avaya CU360 basic settings The administrator must provision Avaya CU360 for automatic configuration and send the service code to users. Procedure 1. Start Avaya CU360. Avaya CU360 displays the quick setup wizard. 2. From the list, select your preferred language.
-
Page 48: Configuring Avaya Cu360 Automatically For Device Enrollment Services Using The Quick Setup
Configuring Avaya CU360 automatically for device enrollment services using the quick setup About this task Avaya CU360 prompts you to enter the service code that initiates the automatic configuration using the quick setup. The administrator must provision Avaya CU360 for automatic configuration and send the service code to users. -
Page 49: Viewing The Avaya Cu360 Endpoint Serial Number For The Pexip Subscription
Viewing the Avaya CU360 endpoint serial number for the Pexip subscription About this task View the serial number of your Avaya CU360 endpoint in the external case label or from the Serial Number option for the Pexip subscription. Procedure Do one of the following: •... -
Page 50: Configuring Avaya Cu360 Automatically For Pexip Meetings Using The Quick Setup
9. Click Activate. Result • Avaya CU360 connects to Pexip Cloud Service. • You can use Avaya CU360 for SIP-based calls. • Avaya CU360 automatically receives the list of contacts from Pexip Cloud Service. Related links Pexip Provisioning on page 27... -
Page 51: Activating The Pexip Provisioning For Avaya Cu360
Configuration of Avaya CU360 basic settings • Avaya CU360 automatically receives the list of contacts from Pexip Cloud Service. Related links Pexip Provisioning on page 27 Activating the Pexip provisioning for Avaya CU360 About this task Configure Avaya CU360 automatically as a video conferencing endpoint in Pexip Cloud Service. -
Page 52: Enabling The Automatic Synchronization In Avaya Cu360
Some settings might be customized for your enterprise. Avaya CU360 automatically displays the quick setup wizard when you switch on Avaya CU360 or log in to the web interface for the first time. - Page 53 • Mode • Gatekeeper Address • E.164 15. (Optional) Click Next. Avaya CU360 displays the SIP settings only if you select SIP or H.323 and SIP in Protocol Type. October 2022 Installing and Administering Avaya Collaboration Unit CU360 Comments on this document? infodev@avaya.com...
-
Page 54: Configuring Avaya Cu360 Manually Using The Quick Setup
17. Click Done. Configuring Avaya CU360 manually using the quick setup About this task Manually configure the Avaya CU360 basic settings, such as the system name, language, and network settings. Some settings might be customized for your enterprise. Procedure 1. Do one of the following: •... - Page 55 E.164 E.164 12. (Optional) Click Next. Avaya CU360 displays the SIP settings only if you select SIP or H.323 and SIP in Protocol Type. On the endpoint, Avaya CU360 displays the Configure SIP window. 13. (Optional) Configure the following fields: •...
-
Page 56: Quick Setup Field Descriptions
Name Description System Name The name of the Avaya CU360 endpoint. Avaya CU360 also uses the system name as the user name to register for SIP and H.323. Country The country where Avaya CU360 is located. The value of Language and the language of the menu automatically changes based on the language of the country you select. - Page 57 The IP address or the DNS name of the gatekeeper. E.164 The H.323–based number of Avaya CU360. User The system name. Avaya CU360 is registered to the SIP server using this name. Avaya CU360 displays this name in conferences. Authentication Name The name used to authenticate Avaya CU360 with the SIP server.
-
Page 58: Setting Up Avaya Cloud Office As The Default Application For Avaya Cu360
The background image of the Avaya Cloud Office page changes according to the time of the day. Before you begin ™ ™ You must have a valid subscription with Avaya Cloud Office to use Avaya Cloud Office meetings. Procedure 1. Do one of the following: •... -
Page 59: Pairing The Controller With The Avaya Cloud Office Rooms Using Controller Application
On Avaya Vantage K175, the controller application is preinstalled if the Vantage is bundled in your ACO offer. ™ Install or upgrade the controller (Vantage K175 or tablet) to Avaya Cloud Office for Rooms App version 22.3.30 (72), or higher. Procedure 1. -
Page 60: Installing Third-Party Applications From Google Play Store In Avaya Cu360
Avaya does not support or test third-party applications. ™ You can install third-party applications from Google Play Store This configuration is available only on the Avaya CU360 endpoint. Procedure 1. Click Play Store application. Avaya CU360 displays a list of suggested applications. -
Page 61: Chapter 4: Initial Administration
Chapter 4: Initial administration Configuring call answering preferences in Avaya CU360 Procedure 1. Do one of the following: • From the endpoint, click Configure > Calling. • From the web interface, click Basic Settings > Call-Answer mode > General. 2. Configure the following fields: •... -
Page 62: Calling Field Descriptions
• On the web interface, click Basic Settings > Preferences > General. • On the endpoint, Avaya CU360 displays the General settings window. • On the web interface, Avaya CU360 displays the Preferences - General settings window. 2. Select Yes for Show Advanced Settings. -
Page 63: Configuring The Avaya Cu360 Advanced Calling Options
• On the web interface, Advanced Options > Direct Call. • On the endoint, Avaya CU360 displays the Advanced Calling Options window. • On the web interface, Avaya CU360 displays the Advanced options - Direct Call window. 3. Configure the following fields: •... -
Page 64: Advanced Calling Options Field Descriptions
Your computer: • Must have Avaya Workplace Client installed. • Must be connected to the same network as Avaya CU360. If your computer and Avaya CU360 are connected to different networks, NAT or a firewall must not be configured between the two networks. -
Page 65: Disabling The Avaya Cu360 Video
Configuring meeting recording in Avaya CU360 About this task Avaya CU360 saves meeting recordings in the MP4 format. The video stream is recorded in the H.264 format, while the audio stream is recorded in the AAC-LC format. You can save meeting recordings on a USB device or on the enterprise network. When you save recordings on a USB device, you can transfer the recordings to an external server, such as a generic FTP server or Avaya Meetings Streaming and Recording. - Page 66 Initial administration • The Avaya CU360 endpoint must be managed by Avaya Meetings Management, and Avaya Meetings Management must have remote access to the endpoint. ® • The meeting must be hosted on Avaya Scopia Elite 6000 MCU or Avaya Meetings Media Server.
-
Page 67: General Field Descriptions
- The Avaya Meetings Server deployment must have a recording server. - The Avaya CU360 endpoint must be managed by Avaya Meetings Management, and Avaya Meetings Management must have remote access to the endpoint. - Page 68 The options are: • Yes • No The format of the date and time depend on the configuration of the date and time in Avaya CU360. Table continues… October 2022 Installing and Administering Avaya Collaboration Unit CU360 Comments on this document? infodev@avaya.com...
- Page 69 If you do not upload your certificate, Avaya CU360 inserts a self-signed certificate to authenticate meeting recordings. When you reset Avaya CU360 to factory settings, your uploaded certificate is deleted. Save to External Server Saves meeting recordings on external FTP servers.
-
Page 70: Configuring The Avaya Cu360 Screen Saver
AESR File Owner The name of the owner of meeting recordings in Avaya Meetings Streaming and Recording. Usually, the owner of recordings in Avaya Meetings Streaming and Recording is an Avaya Meetings Management user, so the name of the owner... -
Page 71: Configuring Avaya Cu360 To Verify Before Disconnecting Calls
Configuring Avaya CU360 to verify before disconnecting calls Configuring Avaya CU360 to verify before disconnecting calls About this task Configure Avaya CU360 to ask for confirmation before disconnecting calls to prevent accidently disconnecting calls. Procedure 1. Do one of the following: •... -
Page 72: Configuring An H.323 Gatekeeper For Avaya Cu360
The default PIN for Advanced settings on the endpoint is 1234. If your administrator configures a PIN to access the advanced settings on the endpoint, Avaya CU360 prompts you to enter the PIN. After entering the PIN, Avaya CU360 displays the Advanced window. -
Page 73: Configuring Wi-Fi Network Connectivity From The Avaya Cu360 Endpoint
Configuring Wi-Fi network connectivity from the Avaya CU360 endpoint About this task To connect Avaya CU360 to the Wi-Fi network, you must select the Wi-Fi network and enter the credentials and authentication type. This configuration is available only on the Avaya CU360 endpoint. -
Page 74: Configuring Bluetooth Connectivity In Avaya Cu360
Disabling Wi-Fi also disables Wi-Fi Display. If you connect the Avaya CU360 web interface using the IP Address through a Wi-Fi network then changing the Wi-Fi network or disconnecting causes the web session to end. A warning message displays on the same web browser. -
Page 75: Installing Google Play Store ™ From The Avaya Cu360 Wizard
After you install Google Play Store , the Avaya CU360 application launches as hidden by default. If you open the Avaya CU360 application manually, you have to complete the quick setup wizard settings. This configuration is available only on the Avaya CU360 endpoint. -
Page 76: Configuring Google Play Store In Avaya Cu360
Insert a USB device or SD memory card in Avaya CU360. b. To close AppsProvider, click Close. 7. Start AppsProvider. • If you inserted a USB device or SD memory card earlier, Avaya CU360 overwrites the updated.zip file on the USB device or SD memory card. October 2022 Installing and Administering Avaya Collaboration Unit CU360 Comments on this document? infodev@avaya.com... - Page 77 Register. Google registers Avaya CU360 with your Google account. You can register an unlimited number of Avaya CU360 devices with your Google account. 14. Follow the instructions in the wizard, and click the text where indicated. Avaya CU360 restarts.
-
Page 78: Installing Third-Party Applications From Google Play Store In Avaya Cu360
Configuring a Microsoft Exchange calendar in Avaya CU360 Before you begin If you want to associate a room resource with Avaya CU360, create a delegate account in Microsoft Exchange calendar that can gain access to all calendar items where the room is added as a participant. -
Page 79: Calendar Field Descriptions
Exchange Server Enabled The option to enable the connection with EWS to get the calendar. Avaya CU360 send a query to the EWS every minute to update the calendar. Avaya CU360 displays only the current and future meetings, and removes the expired meetings 15 minutes after the meetings expire. -
Page 80: Mapping Fqdns With Microsoft Exchange Calendar Meetings
When you map FQDNs of the meeting locations to the number of the virtual room resource, meeting participants can join meetings directly from the Avaya CU360 GUI or web interface with a single click. Avaya CU360 automatically generates the meeting numbers to dial based on the FQDN mapping. -
Page 81: Avaya Cu360 Security
Avaya CU360 security Configuring PIN protection for Avaya CU360 settings About this task Configure PIN for users to enter the PIN when users change the Avaya CU360 configuration, such as changing the interface language. Before you begin To configure PIN from: •... -
Page 82: Preventing Calls To Avaya Cu360 From Invalid Numbers
• A SIP server, incoming SIP-based calls using IP addresses are rejected. Calls must be established using: - The user@host syntax. - The host##user syntax where host is the Avaya CU360 IP address and user is the SIP user name. • A gatekeeper, incoming H323–based calls using IP addresses are rejected. Calls must be established using: - The alias@host syntax. -
Page 83: Restricting Access To Avaya Cu360 Features
Restricting access to some Avaya CU360 features prevents users from using the Android-based features. Users cannot gain access to the Android-based applications and cannot installed new applications. Users also cannot minimize the Avaya CU360 video conferencing application to gain access to the Avaya CU360 desktop and the Android settings. Procedure 1. -
Page 84: Configuring Avaya Cu360 For Port-Based Network Authentication
This configuration is available only on the Avaya CU360 endpoint. Before you begin Ensure that your network components support IEEE 802.1Q. Important: If the components do not support IEEE 802.1Q, and if you enable this feature, Avaya CU360 will not get an IP address. Procedure 1. Click on the navigation bar. -
Page 85: Configuring Avaya Cu360 For Vlan Tagging
About this task If your network is divided into subnetworks to limit the range of broadcasts, known as VLANs, and the network components support IEEE 802.1Q, you can assign a VLAN ID to tag Avaya CU360 to a specific subnetwork. -
Page 86: Connecting Avaya Av Grabber To Avaya Cu360
Connecting Avaya AV Grabber to Avaya CU360 About this task Avaya AV Grabber is an optional cable kit for Avaya CU360. Using Avaya AV Grabber, you can connect a computer to Avaya CU360 with a cable and use the computer to share content in meetings. -
Page 87: Connecting Avaya B109 Conference Phone To Avaya Cu360 Using Bluetooth
Connecting Avaya B109 Conference Phone to Avaya CU360 using Bluetooth When you connect Avaya AV Grabber to Avaya CU360, the video conferencing application detects the video input from Avaya CU360 as an additional USB video input. You can use the USB option to share content from Avaya AV Grabber. -
Page 88: Connecting Avaya B109 Conference Phone To Avaya Cu360 Using Nfc
Initial administration Result After pairing the Avaya B109 Conference Phone, you can do the following actions from the Avaya B109 Conference Phone: • Mute and enable audio • Increase and decrease speaker volume • Disconnect call Connecting Avaya B109 Conference Phone to Avaya... -
Page 89: Casting Your Computer Display On Avaya Cu360 Using Wi-Fi
Wi-Fi Display while Avaya CU360 is active in a meeting using Wi-Fi. If the Wi-Fi connectivity is disabled on your Avaya CU360 by license, you cannot use Wi-Fi Display. Before you begin •... -
Page 90: Casting Your Mobile Device Display On Avaya Cu360 Using Wi-Fi
Configuring the Avaya CU360 pre-installed applications About this task Note the IP address of the Avaya CU360 endpoint with a name assigned to the Avaya CU360 endpoint to recognize it later, such as CU_Room_xyz. Change the default login credentials when you log in to the web interface for the first time. - Page 91 • Log in to the Avaya CU360 web interface using the default login credentials. • Configure Avaya CU360 for facilities preferences related to the location of the Avaya CU360 endpoint, such as LAN or Wi-Fi configuration, time-zone, language, and SIP or H323 calling configuration.
-
Page 92: Wiping User Data From Avaya Cu360
About this task Wipe the user data and accounts without affecting the Avaya CU360 initial configuration. After wiping the user data, log in to the Avaya CU360 web interface using the default user name and password. If you need to restore the Avaya CU360 application, import the Application to Install file from the Avaya CU360 web interface. -
Page 93: Connecting Usb Cameras To Avaya Cu360
• Avaya Room Camera RC100 You can also connect third-party USB cameras to the Avaya CU360 endpoint. For audio, use the Avaya CU360 endpoint mic when connecting the Avaya CU360 endpoint to a USB camera. Third-party apps also support the USB camera. -
Page 94: Connecting Additional Monitor To Avaya Cu360
Always connect the self-powered USB hubs or adapters to prevent unexpected Avaya CU360 turn-off. Do not disconnect the additional monitor during meetings. Restart the Avaya CU360 endpoint after connecting or disconnecting the additional monitor. Avaya CU360 Additional monitor through adapter... -
Page 95: Configuring The Avaya Cu360 Video Layout In Meetings
Manually activate the USB AV bar mode from Avaya CU360 after connecting to the laptop or computer. Enable the Always Active option if you need to use the Avaya CU360 endpoint only in USB AV Bar Mode without connecting any monitor. -
Page 96: Connecting The Avaya Cu360 Endpoint To The Computer As A Usb Av Bar
Use Type-A cable for the computer running macOS to use the USB AV bar mode Do not connect a USB extra camera or other USB devices on Avaya CU360 if you plan to use the Avaya CU360 endpoint as USB camera. -
Page 97: Customizing Avaya Cu360 For Usb Av Bar Mode
Manually activate the USB AV bar mode from Avaya CU360 after connecting to the laptop or computer. Enable the Always Active option if you need to use the Avaya CU360 endpoint only in USB AV Bar Mode without connecting any monitor. -
Page 98: Activating The Usb Av Bar Mode In Avaya Cu360
Avaya CU360 supports excellent video quality with a maximum resolution of 1080p@30fps when using as a USB camera. Tip: You can press the Camera Control key on the remote control of Avaya CU360 to activate the USB Bar Mode. Before you begin Connect the USB 3.0 cable to the USB-C port of the Avaya CU360 endpoint. -
Page 99: Enabling The Avaya Ip Camera
• You can configure the Avaya CU360 microphone and camera as a USB resource from Audio & Video Settings on the computer. • Use the Avaya CU360 remote control to control the pan, tilt, and zoom option and the speaker tracking option. -
Page 100: Configuring The Avaya Cu360 Endpoint For Modern Authentication
The default PIN for Advanced settings on the endpoint is 1234. If your administrator configures a PIN to access the advanced settings on the endpoint, Avaya CU360 prompts you to enter the PIN. After entering the PIN, Avaya CU360 displays the Advanced window. -
Page 101: Pairing Mobile With Personal Ms Exchange Calendar
5. Click Continue to confirm access to the Avaya Devices Calendar Integration service. 6. Close the web page from your mobile phone. Result After a few seconds, on your Avaya CU360 endpoint, you can see the Calendar page populated with your meetings for the current day. Related links... -
Page 102: Configuring Avaya Room Camera Rc100 As Ip Camera For Avaya Cu360
RTSP. Use the IP camera with a maximum resolution of 1080p for live video. Before you begin • Connect one side of the ethernet cable to the Avaya Room Camera RC100 LAN port and the other side to your IP Network. -
Page 103: Configuring Avaya Room Camera Rc100 As Usb Camera For Avaya Cu360
The parameters for controlling the camera are different from the parameters to connect to the camera through the URL. Use the remote control to view the IP address of Avaya Room Camera RC100 from the Network section. 5. On the web interface, click Save. -
Page 104: Configuring Avaya Tracking Camera Tc220 As Ip Camera For Avaya Cu360
Initial administration Before you begin • Connect one side of the USB cable to the Avaya Room Camera RC100 USB port and the other side to the Avaya CU360 USB port. • Connect the power supply plug to the DC IN 12V port of the Avaya Room Camera RC100 and turn on the Avaya CU360 endpoint. - Page 105 • Connect one end of the ethernet cable to the Avaya Tracking Camera TC220 LAN port and the other end to the router/switch of your Local Area Network. Connect one end of the ethernet cable to the router and other end to the Avaya CU360 or connect the Avaya CU360 to the network through Wi-Fi.
-
Page 106: Configuring Avaya Tracking Camera Tc220 As Usb Camera For Avaya Cu360
• IP CONTROL PW: 123456 5. On the web interface, click Save. 6. To control the PTZ option from the Avaya CU360 endpoint through IP, you need to disable the tracking mode on the Avaya Tracking Camera TC220. Using the Avaya Tracking Camera TC220 remote control, enter System >... - Page 107 • Connect one end of the HDMI cable to the Avaya Tracking Camera TC220 HDMI port and the other end to the Avaya AV Grabber HDMI port. • Connect one end of the USB cable to the Avaya AV Grabber USB port and the other end to the Avaya CU360 USB port.
-
Page 108: Configuring The Avaya Cu360 Camera Background
Avaya CU360 camera uses Artificial Intelligence-based algorithms that enable body recognition. The algorithm recognizes people sitting in front of the Avaya CU360 endpoint and blurs the image background. Users can also replace the background with a customizable picture. The virtual background works on camera speaker-tracking or group framing functionalities. -
Page 109: Configuring The Avaya Cu360 Web Proxy For Lan
Avaya CU360 displays the new image as background during the meeting. Configuring the Avaya CU360 web proxy for LAN About this task You can configure Avaya CU360 to set a web proxy server for the ethernet network. Procedure 1. On the endpoint main menu, click Configure. -
Page 110: Configuring The Avaya Cu360 Web Proxy For Wi-Fi
Bypass Proxy for Configuring the Avaya CU360 web proxy for Wi-Fi About this task You can configure Avaya CU360 to set a web proxy server for the Wi-Fi network. Procedure 1. On the endpoint main menu, click Configure. 2. On the endpoint, click Advanced. -
Page 111: Configuring The Avaya Cu360 Netlog
About this task Configure Avaya CU360 to create and collect the customer support package. The Avaya customer support package is protected with a password. Provide the same password to the Avaya Support teams for investigation whenever opening a service request at Avaya Support Website. -
Page 112: Configuring Audio On An Hdmi Monitor Or Built-In Speakers For Avaya Cu360
When the Avaya CU360 endpoint connects to an HDMI monitor, users can choose the audio output from the speakers of the HDMI monitor by default or the Avaya CU360 built-in speakers. Configure Avaya CU360 to use the feature when an HDMI monitor requires external speakers or headsets to hear the audio. - Page 113 Configuring audio on an HDMI monitor or built-in speakers for Avaya CU360 Result The Audio on HD Monitor preference is also applicable for third-party applications and when using the Avaya CU360 endpoint in USB Bar mode. October 2022 Installing and Administering Avaya Collaboration Unit CU360...
-
Page 114: Chapter 5: Advance Administration
The default PIN for Advanced settings on the endpoint is 1234. If your administrator configures a PIN to access the advanced settings on the endpoint, Avaya CU360 prompts you to enter the PIN. After entering the PIN, Avaya CU360 displays the Advanced window. -
Page 115: Date & Time General Field Descriptions
The default PIN for Advanced settings on the endpoint is 1234. If your administrator configures a PIN to access the advanced settings on the endpoint, Avaya CU360 prompts you to enter the PIN. After entering the PIN, Avaya CU360 displays the Advanced window. -
Page 116: Time Zone Field Descriptions
Time Zone field descriptions Name Description Enable Geolocation The option to enable Avaya CU360 to automatically detect the correct time zone and to apply the appropriate daylight time value. The options are: • Yes: This is the default option. • No: Select No to manually specify the time zone using the Time Zone list. -
Page 117: System Name Field Descriptions
System Name field descriptions If your administrator configures a PIN to access the advanced settings on the endpoint, Avaya CU360 prompts you to enter the PIN. After entering the PIN, Avaya CU360 displays the Advanced window. 3. Click System > Location. -
Page 118: Configuring Advanced Regional Audio And Video Settings In Avaya Cu360
Avaya CU360 About this task After you set the country and language of Avaya CU360 in the quick setup wizard, Avaya CU360 defaults to the audio and video standards of that country. This configuration is available only if your administrator enables the advanced settings for users. -
Page 119: Location Field Descriptions
Configuring external user directories in Avaya CU360 About this task You can configure the LDAP directory of Avaya CU360 to store users SIP-based and H323-based call information that integrates with directory and identity management systems. This configuration is available only if your administrator enables the advanced settings for users. - Page 120 • Filter: This option is available only on the Remote H.350 (generic) server. 5. On the web interface, click Save. Related links Enabling the Avaya CU360 advanced settings on page 62 October 2022 Installing and Administering Avaya Collaboration Unit CU360 Comments on this document? infodev@avaya.com...
-
Page 121: Ldap Field Descriptions
The options are: • Avaya XTSeries: Refers to the built-in LDAP server of a different Avaya XTSeries. • Avaya cu360: Refers to the built-in LDAP server of Avaya CU360. • Equinox Management: Refers to the built-in LDAP server of Equinox Management. -
Page 122: Preventing Users From Modifying The Local Directory In Avaya Cu360
The default PIN for Advanced settings on the endpoint is 1234. If your administrator configures a PIN to access the advanced settings on the endpoint, Avaya CU360 prompts you to enter the PIN. After entering the PIN, Avaya CU360 displays the Advanced window. -
Page 123: Hiding The Recent Calls List In Avaya Cu360
The default PIN for Advanced settings on the endpoint is 1234. If your administrator configures a PIN to access the advanced settings on the endpoint, Avaya CU360 prompts you to enter the PIN. After entering the PIN, Avaya CU360 displays the Advanced window. -
Page 124: Hiding The Call Rate Selection List In Avaya Cu360
The default PIN for Advanced settings on the endpoint is 1234. If your administrator configures a PIN to access the advanced settings on the endpoint, Avaya CU360 prompts you to enter the PIN. After entering the PIN, Avaya CU360 displays the Advanced window. -
Page 125: Configuring Wrap-Around Navigation In Avaya Cu360
Configuring wrap-around navigation in Avaya CU360 About this task You can configure the Avaya CU360 to enable the user to cycle among available menu items in the user interface panels using the arrows. You can apply wrap-around navigation only to the home screen panel, camera control panel, and call control panel. -
Page 126: Customizing The Avaya Cu360 Home Screen
The default PIN for Advanced settings on the endpoint is 1234. If your administrator configures a PIN to access the advanced settings on the endpoint, Avaya CU360 prompts you to enter the PIN. After entering the PIN, Avaya CU360 displays the Advanced window. -
Page 127: Hiding Calendar Panel In Avaya Cu360
• Never: Avaya CU360 always reverts to the default layout. This is the default option. • During the call: Avaya CU360 uses the last layout used in the same call for the combination of video flows. When you receive a presentation in the same call next time, Avaya CU360 automatically displays the last layout that you chose. -
Page 128: Configuring Avaya Cu360 To Send The Device Name As Text Overlay In Video Streams
About this task Avaya CU360 supports sending the device name as text overlay in video streams in meetings managed by MCUs that do not support displaying the name for meeting participants. Do not enable this feature for meetings managed by MCUs that support the name overlay feature. -
Page 129: Configuring The Maximum Call Bandwidth And Preferred Codec In Avaya Cu360
Avaya CU360 About this task You can specify the maximum bandwidth that Avaya CU360 can use in meetings. The bandwidth is measured in bit rate. This configuration is available only if your administrator enables the advanced settings for users. -
Page 130: Preferences General Field Descriptions
The default PIN for Advanced settings on the endpoint is 1234. If your administrator configures a PIN to access the advanced settings on the endpoint, Avaya CU360 prompts you to enter the PIN. After entering the PIN, Avaya CU360 displays the Advanced window. -
Page 131: Configuring The Avaya Cu360 Dual Video
The default PIN for Advanced settings on the endpoint is 1234. If your administrator configures a PIN to access the advanced settings on the endpoint, Avaya CU360 prompts you to enter the PIN. After entering the PIN, Avaya CU360 displays the Advanced window. -
Page 132: Dual Video Field Descriptions
For example, when sharing content with others participants in the meeting, one participant is designated as the presenter, and is granted the floor for presenting. All Avaya CU360 endpoints must be aware that the floor is granted to that participant and react appropriately. -
Page 133: Ip Field Descriptions
IP field descriptions If your administrator configures a PIN to access the advanced settings on the endpoint, Avaya CU360 prompts you to enter the PIN. After entering the PIN, Avaya CU360 displays the Advanced window. 3. Click Calls > Preferences > IP. -
Page 134: Configuring The Avaya Cu360 Calls Encryption
The default PIN for Advanced settings on the endpoint is 1234. If your administrator configures a PIN to access the advanced settings on the endpoint, Avaya CU360 prompts you to enter the PIN. After entering the PIN, Avaya CU360 displays the Advanced window. -
Page 135: Enabling The Rtp Firewall In Avaya Cu360
Enabling the RTP firewall in Avaya CU360 About this task Configure Avaya CU360 to check the source of the received audio, video, and presentation (RTP packets) to verify that the source matches the remote endpoint’s IP address. This configuration is available only if your administrator enables the advanced settings for users. -
Page 136: Configuring Calling Number In Avaya Cu360
This configuration is available only if your administrator enables the advanced settings for users. Procedure 1. Do one of the following: • On the endpoint main menu, click Configure. • On the web interface, click Administrator Settings. October 2022 Installing and Administering Avaya Collaboration Unit CU360 Comments on this document? infodev@avaya.com... -
Page 137: Predefined Party Field Descriptions
The default PIN for Advanced settings on the endpoint is 1234. If your administrator configures a PIN to access the advanced settings on the endpoint, Avaya CU360 prompts you to enter the PIN. After entering the PIN, Avaya CU360 displays the Advanced window. -
Page 138: Configuring The Avaya Cu360 Camera
The default PIN for Advanced settings on the endpoint is 1234. If your administrator configures a PIN to access the advanced settings on the endpoint, Avaya CU360 prompts you to enter the PIN. After entering the PIN, Avaya CU360 displays the Advanced window. -
Page 139: Cameras General Field Descriptions
Configuring the Avaya CU360 HD1 port About this task Configure the settings of each camera that you connect to the HD1 port of Avaya CU360. This configuration is available only if your administrator enables the advanced settings for users. Procedure 1. -
Page 140: Hd1 Port Field Descriptions
Advance administration If your administrator configures a PIN to access the advanced settings on the endpoint, Avaya CU360 prompts you to enter the PIN. After entering the PIN, Avaya CU360 displays the Advanced window. 3. Click I/O Connections > Cameras > HD1. -
Page 141: Configuring The Avaya Cu360 Camera To Automatically Focus On Active Speakers In Conferences
About this task Avaya CU360 detects four faces for the speaker tracking feature in the meeting room. You can also use the Bluetooth or USB microphone for the speaker tracking feature. When the automatic tracking mode of the camera is active, you cannot manually pan, tilt, and zoom the camera or use the camera preset settings. -
Page 142: Configuring The Avaya Cu360 Tracking
Configuring the Avaya CU360 USB port About this task Configure the settings of each camera that you connect to the USB port of Avaya CU360. This configuration is available only if your administrator enables the advanced settings for users. Procedure 1. -
Page 143: Configuring The Monitor Settings In Avaya Cu360
Configuring the monitor settings in Avaya CU360 About this task After you connect the single monitor or dual monitor to the Avaya CU360 endpoint, you can configure the monitor settings. This configuration is available only if your administrator enables the advanced settings for users. -
Page 144: Monitors General Field Descriptions
Configuring the Avaya CU360 video layouts About this task After you connect the single monitor or dual monitor to the Avaya CU360 endpoint, you can configure the video layouts. You can also change the video layout from the Avaya CU360 remote control during the meetings. -
Page 145: Pip-Pap-Pop Field Descriptions
The default PIN for Advanced settings on the endpoint is 1234. If your administrator configures a PIN to access the advanced settings on the endpoint, Avaya CU360 prompts you to enter the PIN. After entering the PIN, Avaya CU360 displays the Advanced window. -
Page 146: Configuring Echo Canceler On External Microphones In Avaya Cu360
The default PIN for Advanced settings on the endpoint is 1234. If your administrator configures a PIN to access the advanced settings on the endpoint, Avaya CU360 prompts you to enter the PIN. After entering the PIN, Avaya CU360 displays the Advanced window. -
Page 147: Echo Canceler Field Descriptions
Audio Delay Automatic Improves the echo canceler performance and the audio delay Estimation automatically when you connect a new monitor to Avaya CU360. • Yes: Enables the echo cancellation performance automatically. • No: Disables the automatic echo cancellation performance and you can configure Delay manually for better performance. -
Page 148: Use Ipv6 Addresses Field Descriptions
Advance administration If your administrator configures a PIN to access the advanced settings on the endpoint, Avaya CU360 prompts you to enter the PIN. After entering the PIN, Avaya CU360 displays the Advanced window. 3. Click Networks > Preferences > General. -
Page 149: Configuring Lan For Ipv4 Address Settings In Avaya Cu360
Configuring LAN for IPv4 address settings in Avaya CU360 About this task After you save the settings on Avaya CU360 web interface, you must log in to Avaya CU360 web interface again. This configuration is available only if your administrator enables the advanced settings for users. -
Page 150: Ipv4 Addresses Field Descriptions
The default PIN for Advanced settings on the endpoint is 1234. If your administrator configures a PIN to access the advanced settings on the endpoint, Avaya CU360 prompts you to enter the PIN. After entering the PIN, Avaya CU360 displays the Advanced window. -
Page 151: Configuring Lan For Ipv6 Address Settings In Avaya Cu360
Configuring LAN for IPv6 address settings in Avaya CU360 About this task After you save the settings on Avaya CU360 web interface, you must log in to Avaya CU360 web interface again. This configuration is available only if your administrator enables the advanced settings for users. -
Page 152: Ipv6 Addresses Field Descriptions
• Automatic • Manual The default IP Address Mode is Automatic. IP Address The static IPv6 network address for Avaya CU360. Avaya CU360 discards local loopback, IPv4 mapped, IPv4 compact, and IPv6 multicast addresses. If you do not enter a static IP address, this field displays the allocated dynamic IP address. -
Page 153: Configuring Network Priority Settings In Avaya Cu360
Configure Avaya CU360 to prioritize a specific network connection when Avaya CU360 cannot determine the network port from the destination address in the call signal. When Avaya CU360 cannot determine the route of a call by matching the destination address, Avaya CU360 uses the preferred network port. -
Page 154: Configuring Bandwidth Threshold For Lan In Avaya Cu360
The default PIN for Advanced settings on the endpoint is 1234. If your administrator configures a PIN to access the advanced settings on the endpoint, Avaya CU360 prompts you to enter the PIN. After entering the PIN, Avaya CU360 displays the Advanced window. -
Page 155: Configuring Bandwidth Threshold For Wi-Fi In Avaya Cu360
The default PIN for Advanced settings on the endpoint is 1234. If your administrator configures a PIN to access the advanced settings on the endpoint, Avaya CU360 prompts you to enter the PIN. After entering the PIN, Avaya CU360 displays the Advanced window. -
Page 156: Glan Parameters Field Descriptions
The default PIN for Advanced settings on the endpoint is 1234. If your administrator configures a PIN to access the advanced settings on the endpoint, Avaya CU360 prompts you to enter the PIN. After entering the PIN, Avaya CU360 displays the Advanced window. -
Page 157: Configuring Advanced Wi-Fi Network Connectivity In Avaya Cu360
Configuring advanced Wi-Fi network connectivity in Avaya CU360 Before you begin Enable the Avaya CU360 advanced settings and Avaya CU360 network priority. Procedure 1. Do one of the following: • On the endpoint main menu, click Configure. October 2022 Installing and Administering Avaya Collaboration Unit CU360 Comments on this document? infodev@avaya.com... -
Page 158: Wi-Fi Parameters Field Descriptions
The default PIN for Advanced settings on the endpoint is 1234. If your administrator configures a PIN to access the advanced settings on the endpoint, Avaya CU360 prompts you to enter the PIN. After entering the PIN, Avaya CU360 displays the Advanced window. -
Page 159: Configuring Nat And Firewall In Avaya Cu360
The default PIN for Advanced settings on the endpoint is 1234. If your administrator configures a PIN to access the advanced settings on the endpoint, Avaya CU360 prompts you to enter the PIN. After entering the PIN, Avaya CU360 displays the Advanced window. -
Page 160: Nat Field Descriptions
NAT field descriptions Name Description NAT Traversal The option to enable a NAT router and firewall for Avaya CU360. Configure the Avaya CU360 port ranges. Select No if Avaya CU360 has a public IP address. NAT Discovery The options to discover the public IP address of Avaya CU360. -
Page 161: Defining The Priority Of Media In Avaya Cu360
The default PIN for Advanced settings on the endpoint is 1234. If your administrator configures a PIN to access the advanced settings on the endpoint, Avaya CU360 prompts you to enter the PIN. After entering the PIN, Avaya CU360 displays the Advanced window. -
Page 162: Registering Avaya Cu360 With Sip Servers
Registering Avaya CU360 with SIP servers About this task Register Avaya CU360 endpoints with SIP servers to maintain the mapping list of names or numbers and successfully establish call routes. This configuration is available only if your administrator enables the advanced settings for users. -
Page 163: Sip Field Descriptions
Use Server 3 (Optional) • Avaya CU360 uses the Server 1 as the default SIP server. • If the Server 1 fails, Avaya CU360 uses the Server 2 and Server 3. Server 1 DNS Name The DNS name or IP address of each SIP server. -
Page 164: Configuring Tls In Avaya Cu360
The default PIN for Advanced settings on the endpoint is 1234. If your administrator configures a PIN to access the advanced settings on the endpoint, Avaya CU360 prompts you to enter the PIN. After entering the PIN, Avaya CU360 displays the Advanced window. -
Page 165: Configuring The Presence Status Of Avaya Cu360 Users
Configuring the presence status of Avaya CU360 users About this task Register Avaya CU360 to an XMPP server to publish its presence status and view the presence status of other contacts such as other Avaya CU360 and devices registered to the presence server. -
Page 166: Presence Field Descriptions
The default PIN for Advanced settings on the endpoint is 1234. If your administrator configures a PIN to access the advanced settings on the endpoint, Avaya CU360 prompts you to enter the PIN. After entering the PIN, Avaya CU360 displays the Advanced window. -
Page 167: Disabling Sip-Based Calls In Avaya Cu360
By default, this option is in enabled state. Disabling SIP-based calls in Avaya CU360 About this task Configure Avaya CU360 to disable SIP–based calls on GLAN, Wi-Fi, or both network interfaces. This configuration is available only if your administrator enables the advanced settings for users. October 2022 Installing and Administering Avaya Collaboration Unit CU360 Comments on this document? infodev@avaya.com... -
Page 168: Disabling H.323-Based Calls In Avaya Cu360
The default PIN for Advanced settings on the endpoint is 1234. If your administrator configures a PIN to access the advanced settings on the endpoint, Avaya CU360 prompts you to enter the PIN. After entering the PIN, Avaya CU360 displays the Advanced window. -
Page 169: Activating The Avaya Cu360 Licenses
The default PIN for Advanced settings on the endpoint is 1234. If your administrator configures a PIN to access the advanced settings on the endpoint, Avaya CU360 prompts you to enter the PIN. After entering the PIN, Avaya CU360 displays the Advanced window. -
Page 170: Generating Certificate Signing Requests For Avaya Cu360
The default PIN for Advanced settings on the endpoint is 1234. If your administrator configures a PIN to access the advanced settings on the endpoint, Avaya CU360 prompts you to enter the PIN. After entering the PIN, Avaya CU360 displays the Advanced window. -
Page 171: Configuring Web Access For Avaya Cu360
The default PIN for Advanced settings on the endpoint is 1234. If your administrator configures a PIN to access the advanced settings on the endpoint, Avaya CU360 prompts you to enter the PIN. After entering the PIN, Avaya CU360 displays the Advanced window. -
Page 172: Web Field Descriptions
Web field descriptions Name Description Web Management The option to enable remote access to Avaya CU360 using the web interface. Enable All Addresses The option to allow remote access to Avaya CU360 using all IP addresses or restrict remote access to a specific range of IP addresses. -
Page 173: Configuring The Avaya Cu360 Web-Video
Avaya CU360 blocks users for the duration specified in Login Denied Time. Avaya CU360 displays a message inviting the user to retry later. Login Denied Time The period during which Avaya CU360 blocks users from logging in to the web interface. The options are: •... -
Page 174: Web Video Field Descriptions
Advance administration If your administrator configures a PIN to access the advanced settings on the endpoint, Avaya CU360 prompts you to enter the PIN. After entering the PIN, Avaya CU360 displays the Advanced window. 3. Click Utilities > Remote Access > Web Video. -
Page 175: Live Streaming Using Avaya Cu360
Avaya CU360 is delivered. This configuration is available only on the Avaya CU360 endpoint. Important: Your key of the streaming platform is personal data. Delete your key from Avaya CU360 when you disable live streaming. Before you begin Get the RTMP URL and key of the streaming service. -
Page 176: Starting Live Streaming In Avaya Cu360
About this task View live streaming on your screen, including the local menu or the Android desktop. If you incorrectly configured live streaming, Avaya CU360 does not display the More option on the home page to start live streaming. You cannot start live streaming when you are recording conferences in a local USB. -
Page 177: Configuring Remote Updates For Avaya Cu360
Configuring remote updates for Avaya CU360 About this task You can remotely upgrade Avaya CU360 with new firmware from a remote computer running the Avaya CU360 upgrade program. The Avaya Certificate Root Authority signs Avaya CU360 software packages. Avaya CU360 accepts verified signed software packages. -
Page 178: Download Field Descriptions
Avaya CU360. Controlling Avaya CU360 with AT commands About this task You can use AT commands to control the functions of Avaya CU360 on the endpoint and web interface. Avaya CU360 can receive AT commands from: •... -
Page 179: At Commands Field Descriptions
• No: Disables the remote access to Avaya CU360 using AT commands through the TCP, SSH and RS232 serial port. • IP only: Restricts the remote access to Avaya CU360 using AT commands to only the TCP connection. 5. Configure the following fields:... - Page 180 IP section Name Description Enable All Addresses The option to allow remote access to Avaya CU360 using AT commands from all IP addresses or restrict the AT commands access to a specific range of IP addresses. The options are: • Yes: Enables the remote access to Avaya CU360 using AT commands from any IP address.
-
Page 181: Configuring Telnet In Avaya Cu360
The default PIN for Advanced settings on the endpoint is 1234. If your administrator configures a PIN to access the advanced settings on the endpoint, Avaya CU360 prompts you to enter the PIN. After entering the PIN, Avaya CU360 displays the Advanced window. -
Page 182: Managing Avaya Cu360 From Avaya Meetings Management
The default PIN for Advanced settings on the endpoint is 1234. If your administrator configures a PIN to access the advanced settings on the endpoint, Avaya CU360 prompts you to enter the PIN. After entering the PIN, Avaya CU360 displays the Advanced window. -
Page 183: Equinox Management Field Descriptions
About this task You can configure the screen link and mobile link to share your desktop automatically. When you connect your computer to Avaya CU360, by default Avaya CU360 requests you to enter a PIN. You can disable the PIN request. -
Page 184: Screen Link/Mobile Link Field Descriptions
The default PIN for Advanced settings on the endpoint is 1234. If your administrator configures a PIN to access the advanced settings on the endpoint, Avaya CU360 prompts you to enter the PIN. After entering the PIN, Avaya CU360 displays the Advanced window. - Page 185 • Manual: Removes linked devices only when you manually initiate the removal . • When the meeting ends: Removes linked devices when meeting ends. October 2022 Installing and Administering Avaya Collaboration Unit CU360 Comments on this document? infodev@avaya.com...
-
Page 186: Chapter 6: Using Avaya Cu360 With Avaya Spaces
You can use Avaya Spaces on your laptop at work, your tablet at home, or your phone on the go. Avaya Spaces provides the right balance of features and simplicity for teams that need an effective way to enable communications, manage tasks, and be more productive. -
Page 187: Joining Avaya Spaces Meetings With Avaya Cu360 As Room Or Personal Device
Joining Avaya Spaces meetings with Avaya CU360 as Room or Personal device Interaction with Avaya CU360 built-in UC experience When you make or answer a call on the Avaya CU360 built-in UC experience, an active call on the Avaya Spaces application ends. -
Page 188: Working With Avaya Cu360 For Avaya Spaces As A Room Device
• To invite Avaya CU360 as a Room in Avaya Spaces using the Avaya Spaces mobile application, scan the QR code. • To invite Avaya CU360 as a Room in Avaya Spaces using the Avaya Spaces Web client, type the string verification code. -
Page 189: Joining Avaya Spaces Meetings From The Avaya Cu360 Calendar
About this task Your Avaya CU360 can join an Avaya Spaces meeting limited to members-only if a member invites this Avaya CU360 using the paring code or the QR code displayed in the home page of the Avaya CU360 application. -
Page 190: Joining Avaya Cu360 In Avaya Spaces Meetings Using The Web Browser
About this task Your Avaya CU360 can join an Avaya Spaces meeting limited to members-only if a member invites this Avaya CU360 using the paring code or the QR code displayed in the home page of the Avaya CU360 application. -
Page 191: Configuring Avaya Spaces Integration In The Avaya Cu360 Application
You can disable Avaya Spaces integration or change the default Avaya Spaces domain address (only if you are using a test or internal solution). Avaya CU360 endpoint can accept invitations and calls only in the same cloud domain as specified in the configuration. -
Page 192: Automating Password Insertion When Dialing Into An Avaya Spaces Url
Ensure that you have an account on Avaya Spaces. Procedure If the password of your Avaya Spaces is 123456, prefix a “?” or “&” to the password at the end of the URL. • The Prefix “?”, for example, https://spaces.avayacloud.com/spaces/5e..e69?pwd=123456. -
Page 193: System Name Field Descriptions
• System Name: Displays the name that you entered in System Name. Saving your favorite Avaya Spaces in the Avaya CU360 contacts About this task Assign customized names to your favorite Avaya Spaces saved as contacts in Avaya CU360. Procedure 1. Do one of the following: •... -
Page 194: New Favorite Field Descriptions
Group The group name to associate the contact to a particular group of contacts. If you add the name of a new group name, Avaya CU360 creates the new group. This field is optional. Table continues… October 2022 Installing and Administering Avaya Collaboration Unit CU360 Comments on this document? infodev@avaya.com... -
Page 195: Preventing Avaya Spaces Meetings Participants From Unmuting Audio
Working with Avaya CU360 for Avaya Spaces as a Room Device Name Description Type The protocol to use in calls. The options are: • H.323: The protocol for calls to H.323–based endpoints, such as Avaya endpoints, and for ® meetings that are hosted on Avaya Scopia Elite 6000 MCU and Avaya Meetings Media Server. -
Page 196: Raising Hand In The Avaya Cu360 Application To Seek Permission From The Moderator To Speak
About this task In Avaya Spaces, as a participant, you can virtually raise your hand to ask a question or to draw the attention of the moderator during the meeting. If the moderator accepts your request, you can unmute yourself. The Lower Hand icon replaces the Unmute icon, and you can use the Mute key button from the remote control or web interface and graphical interface of the Avaya CU360 application. -
Page 197: Changing The Audio Device During A Call In The Avaya Spaces Application
About this task By default, Avaya CU360 uses speakers to transmit audio. If you have a headset or handset connected to your Avaya CU360 endpoint, you can select which audio device to use in a call. October 2022 Installing and Administering Avaya Collaboration Unit CU360... -
Page 198: Leaving An Avaya Spaces Meeting
• Use the advanced option to send a presentation to your computer and share content from your computer screen during an Avaya Spaces call or meeting. For this, log in to Avaya Spaces and your computer using the same enterprise account. -
Page 199: Opening Avaya Spaces From The Avaya Cu360 Endpoint
Before you begin To view the Avaya CU360 home screen, press the home button on the remote control or the round icon on the bottom bar (move the mouse to the bottom of the screen if it is not visible). -
Page 200: Logging In To Avaya Spaces
Joining Avaya Spaces meetings from the Avaya CU360 calendar About this task Join Avaya Spaces meetings from the Avaya CU360 calendar with a single click. The Avaya CU360 application can parse meeting invitations that contain the Avaya Spaces URL. Procedure 1. Do one of the following: •... -
Page 201: Using Avaya Spaces In-Meeting Controls
• To access advanced display controls, such as sending a presentation to a PC or an external monitor, on the active Avaya Spaces meeting screen, click • To view the tabs of Avaya Spaces and access the chat window or view participants, do the following: 1. -
Page 202: Sending Video And Presentation To An External Monitor During An Avaya Spaces Meeting
Recording an Avaya Spaces meeting in the Avaya Spaces application About this task You can record an Avaya Spaces live meeting if you are a member or administrator of the meeting room. If you join the Avaya Spaces meeting as a guest, you cannot record the meeting. Procedure 1. -
Page 203: Making A Digital Call To An Avaya Spaces Contact
If you are on an active call on the Avaya CU360 endpoint and accept an incoming Avaya Spaces call, the call on the Avaya CU360 endpoint is put on hold. Conversely, if you accept a call on the Avaya CU360 endpoint during an Avaya Spaces call, the Avaya Spaces call gets disconnected. -
Page 204: Accepting Or Declining An Avaya Spaces Digital Call
Using Avaya CU360 with Avaya Spaces • : To call the selected person line number using the Avaya CU360 application. The audio call option is only available if the contact has a phone number associated with their Avaya Spaces account. -
Page 205: Chapter 7: Maintenance
Result Avaya CU360 imports the contacts to the endpoint. Avaya CU360 software upgrades Avaya provides upgrades to the Avaya CU360 software, OS, and the web interface through an auto-extracting software package. October 2022 Installing and Administering Avaya Collaboration Unit CU360... -
Page 206: Enabling Avaya Cu360 Software Upgrades Using The Endpoint
Upgrading Avaya CU360 using the endpoint About this task Avaya CU360 displays a green icon to notify that a software upgrade is available. Avaya CU360 displays the notification only if you enable the option to automatically upgrade the software from the endpoint. -
Page 207: Upgrading Avaya Cu360 Using A Usb Drive
Avaya CU360 restarts the video conferencing application. Upgrading Avaya CU360 using a computer About this task Use a computer connected to LAN to upgrade Avaya CU360. If you use a wireless network, the upgrade process might be very slow. October 2022 Installing and Administering Avaya Collaboration Unit CU360 Comments on this document? infodev@avaya.com... -
Page 208: Upgrading Avaya Cu360 Using The Web Interface
Upgrading Avaya CU360 using the web interface About this task You can use a computer or a mobile device to upgrade Avaya CU360 using the web interface. The file name of the upgrade package is in the CU-360_Vx_y_z.exe format. Do not change the file name. -
Page 209: Chapter 8: Troubleshooting
2. (Optional) Click More for the status of the following connections: • Presence server • Cloud server • Calendar Result Avaya CU360 displays the status of the network connections. October 2022 Installing and Administering Avaya Collaboration Unit CU360 Comments on this document? infodev@avaya.com... -
Page 210: Testing The Avaya Cu360 Network Connections
• The computer supports the following operating system to use the USB AV bar mode: - Computer running Windows 10 or later - Computer running macOS 10.12 or later • If your laptop is not detected, connect the USB 3.0 cable to the USB-C port of the Avaya CU360 endpoint. October 2022 Installing and Administering Avaya Collaboration Unit CU360 Comments on this document? infodev@avaya.com... -
Page 211: Testing Acoustic Pairing In Avaya Cu360
Avaya CU360 endpoint. Do not use a USB cable suitable only for charging the Avaya CU360 endpoint. • Avaya CU360 does not support any additional USB camera if the USB bar mode is active. • Use the default Apple Thunderbolt cable for macOS devices. The Avaya CU360 endpoint does not detect the Apple Thunderbolt cable, reconnect the cable and configure the Always Active mode. -
Page 212: Testing The Monitor Image Of Avaya Cu360
Testing the monitor image of Avaya CU360 About this task Test the monitor image of Avaya CU360 to check for the optimization of the aspect ratio and color rendering of the monitor display. You can use the test image to finely tune monitor colors and aspect ratio using the remote control of the monitor provided by the vendor. -
Page 213: Enabling The Avaya Cu360 Logs
Retrieving the Avaya CU360 logs • Internal system activities and memory dump logs, offering a snapshot of Avaya CU360 status of an error. Customer support only analyzes the log files. Enabling the Avaya CU360 logs About this task Use Avaya Meetings Management to restore and take a backup of the Avaya CU360 endpoint remotely. -
Page 214: Enabling The Avaya Cu360 Remote Initialization
Enabling the Avaya CU360 remote initialization About this task Use Avaya Meetings Management to restore and take a backup of the Avaya CU360 endpoint remotely. You can use configuration files to duplicate the same settings across multiple Avaya CU360 endpoints in an organization. -
Page 215: Enabling The Avaya Cu360 System Logs
You need to retrieve log files when contacting customer support with network traffic problems, such as poor video quality caused by increased packet loss. Before you begin • Connect the computer to the Avaya CU360 web interface for retrieving logs. • Ensure that the NetLog option is enabled on Avaya CU360. Procedure 1. -
Page 216: Retrieving The Avaya Cu360 Customer Support Packages
3. Select the link to download the log package file. When downloading an existing log package file, Avaya CU360 displays an alert and prompts the user to create a new file if the existing file is outdated. A two hours older file is considered outdated. -
Page 217: Verifying The Avaya Cu360 Audio
4. Redial the same contact number. Verifying the Avaya CU360 audio Avaya CU360 volume settings Solution Ensure the Avaya CU360 endpoint volume is not set to zero on the Avaya CU360 remote control unit. October 2022 Installing and Administering Avaya Collaboration Unit CU360... -
Page 218: Verifying Echo Canceler On External Microphones In Avaya Cu360
Troubleshooting Headset connection Solution If you are using a USB headset, check that the USB headset is connected to the Avaya CU360 endpoint. If you are using a BT headset, ensure that the BT headset is paired with Avaya CU360. -
Page 219: Verifying The Avaya Cu360 Camera For Video Conference
Verifying the video in the Avaya CU360 meetings About this task Check the Avaya CU360 video if users do not send or receive video files during the meeting. Before you begin Enable the web video option to view the video remotely from the Avaya CU360 web interface. -
Page 220: Restoring The Avaya Cu360 Default User Settings
The default PIN for Advanced settings on the endpoint is 1234. If your administrator configures a PIN to access the advanced settings on the endpoint, Avaya CU360 prompts you to enter the PIN. After entering the PIN, Avaya CU360 displays the Advanced window. -
Page 221: Verifying Avaya Cu360 Screen Link Resolution
3. Restart Screen Link. Configuring access to Avaya CU360 Avaya has developed a method for service personnel to access Avaya CU360 securely. Using this method, service personnel can identify any issues of Avaya CU360 remotely or from an onsite location. Avaya CU360 and other Avaya products support Enhanced Access Security Gateway (EASG). - Page 222 4. Upload the site certificate. Avaya CU360 automatically loads the site certificate. Next steps Customers can delete the certificate from the Avaya CU360 when the Avaya Service Personnel no longer require access. Customers can display information about the certificates using Command Line Interface.
-
Page 223: Chapter 9: Resources
For example, for user guides, click User Guides in the Content Type filter. The list only displays the documents for the selected category. 7. Click Enter. October 2022 Installing and Administering Avaya Collaboration Unit CU360 Comments on this document? infodev@avaya.com... -
Page 224: Avaya Documentation Center Navigation
For some programs, the latest customer documentation is now available on the Avaya Documentation Center website at https://documentation.avaya.com. Important: For documents that are not available on Avaya Documentation Center, click More Sites > Support on the top menu to open https://support.avaya.com. Using the Avaya Documentation Center, you can: •... -
Page 225: Accessing The Port Matrix Document
• Links to other pertinent information If you are an authorized Avaya Partner or a current Avaya customer with a support contract, you can access the Knowledge Base without extra cost. You must have a login account and a valid Sold-To number. - Page 226 Use the Avaya InSite Knowledge Base for any potential solutions to problems. 1. Go to http://www.avaya.com/support. 2. Log on to the Avaya website with a valid Avaya user ID and password. The system displays the Avaya Support page. 3. Click Support by Product > Product-specific Support.
- Page 227 ............45 bandwidth threshold configuration for Wi-Fi ...... for Avaya Meeting Server ..........bandwidth threshold for LAN ..........for Avaya Meeting Server using the quick setup ..bandwidth threshold for Wi-Fi ..........for Pexip Meeting ............49 basic settings overview ............37...
- Page 228 ....IP camera ............102, automatically for device enrollment services using IP camera for CU360 ..........102, the quick setup ............IP field descriptions ............ October 2022 Installing and Administering Avaya Collaboration Unit CU360 Comments on this document? infodev@avaya.com...
- Page 229 ............QoS priority ..............161 Avaya AV Grabber ............regional audio settings ..........Avaya CU360 endpoint as a USB AV bar .....96 regional audio settings field descriptions ....Avaya CU360 endpoint to the computer .......96 remote access for web ..........
- Page 230 ............personal endpoint ............QoS ................remote initialization .............214 Quick Setup ..............room endpoint .............187 regional audio and advanced video settings ....119 system logs ............213, October 2022 Installing and Administering Avaya Collaboration Unit CU360 Comments on this document? infodev@avaya.com...
- Page 231 ............ stopping ..............InSite Knowledge Base ............225 live streaming installing overview ..............Google Play Store from Avaya CU360 quick setup ..local directory modification prevention .......122 Google Play Store from Avaya CU360 wizard ....75 local name configuration ............128...
- Page 232 Avaya Cloud Office rooms using controller application modifying pairing phones using controller application ......59 preventing users from modifying local directory ..pairing phones with Avaya Cloud Office rooms ....monitor image test ............. pairing remote control unit ........... monitor settings configuration ..........143 pairing tablets or phones monitor zoom adjustment ..........
- Page 233 ...........124 searching contacts starting live streaming ............176 from external directory ..........122 stopping live streaming ............searching for content ............streaming live sessions ............175 October 2022 Installing and Administering Avaya Collaboration Unit CU360 Comments on this document? infodev@avaya.com...
- Page 234 ................web-video configuration .............173 automating password insertion ........192 Wi-Fi configuration from endpoint ........73 USB AV bar mode activation ..........98 Wi-Fi configuration from web interface ........ October 2022 Installing and Administering Avaya Collaboration Unit CU360 Comments on this document? infodev@avaya.com...
- Page 235 Wi-Fi display casting computer display ..........casting mobile device display ........overview ............... Wi-Fi network connectivity configuration ......wiping user data ...............92 wrap-around navigation configuration ........125 October 2022 Installing and Administering Avaya Collaboration Unit CU360 Comments on this document? infodev@avaya.com...
Need help?
Do you have a question about the CU360 and is the answer not in the manual?
Questions and answers