
Related Manuals for Mirrorstone HELIOS MS-HEL-12J


Summary of Contents for Mirrorstone HELIOS MS-HEL-12J
- Page 1 HELIOS BAR HEATER MANUAL MS-HEL-12J / MS-HEL-18J MS-HEL-24J / MS-HEL-30J MS-HELREM-12D / MS-HELREM-18D MS-HELREM-24D / MS-HELREM-30D *Remote control and Wi-Fi features ONLY available with remote control variant.
-
Page 2: Table Of Contents
CONTENTS 1. BEFORE USING YOUR HEATER FOR THE FIRST TIME 2. IMPORTANT SAFEGAURDS 3. INSTALLATION GUIDE 4. PRODUCT INSTRUCTION FOR HELIOS NON- REMOTE HEATERS 5. PRODUCT INSTRUCTION FOR HELIOS REMOTE CONTROLLABLE HEATERS PAIRING YOUR REMOTE CONTROL HELIOS BAR HEATER TO YOUR WI-FI NETWORK 7. -
Page 3: Before Using Your Heater For The First Time
BEFORE USING YOUR HEATER FOR THE FIRST TIME Please read all the instructions in this manual carefully, even if you have prior experience of using an infrared heater. This manual should be kept in a safe place for future reference. Should you need to make any kind of warranty claim with the manufacturer, you will need to make note of the complete model number (located on the product card at the back of the heater), the date on which you received the product, and your receipt of purchase. - Page 4 • The most common cause of overheating is dust or fluff deposits getting stuck in the heater. You can prolong the life and ensure the safety of your heater by disconnecting it regularly and vacuum cleaning the air vents and grilles. •...
- Page 5 • The outer surface of the heater can get very hot and cause burns if contact is made with the skin for prolonged periods of time. Please pay attention when children or vulnerable people are present. • The heater should be installed at a minimum of 2.2 metres from the floor. •...
-
Page 6: Installation Guide
INSTALLATION GUIDE Model L (mm) L1 (mm) MS-HEL-12J MS-HELREM-12D 2x Brackets with notch 2x Brackets without MS-HEL-18J 1240 1007 notch MS-HELREM-18D MS-HEL-24J 1540 1307 MS-HELREM-24D MS-HEL-30J 1840 1607 MS-HELREM-30D The brackets have a notch, the one with the These holes at the back of the bar heater are not notch goes into the bar heater, without the for the screws, they allow air to ow. - Page 7 Step One: Use the screws provided to install two of the brackets to the back of the heater, as shown in Fig. A. Step Two: Use the screws provided to install two of the brackets to the wall or ceiling, as shown in Fig.
- Page 8 (Spare parts purchased separately) For suspended installation, the heater will hook up to the suspension cables and hang from the ceiling, as shown in Fig. 3.
-
Page 9: Product Instruction For Helios Non- Remote Heaters
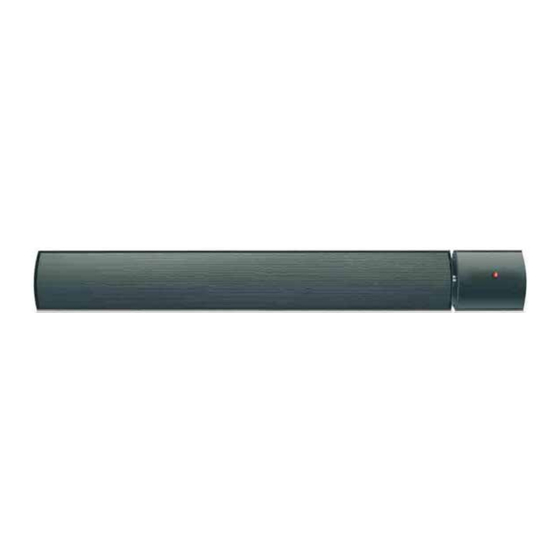
PRODUCT INSTRUCTIONS FOR HELIOS NON- REMOTE HEATERS Outer Casing Heating Plate Control Box Product Size Model Power Length (mm) Width (mm) Height (mm) MS-HEL-12J 1200W MS-HELREM-12D MS-HEL-18J 1800W 1240 MS-HELREM-18D MS-HEL-24J 2400W 1540 MS-HELREM-24D MS-HEL-30J 3000W 1840 MS-HELREM-30D Circuit Diagram Power Indicator Heating plate 220-240VAC 50/60Hz... - Page 10 Replacement of Power Cord Should the power cord become damaged, it must be replaced by a qualified electrician or the manufacturer. Child Supervision This heater is not intended for use by children or vulnerable people without supervision.
-
Page 11: Product Instruction For Helios Remote Controllable Heaters
PRODUCT INSTRUCTIONS FOR HELIOS REMOTE CONTROLLABLE HEATERS Outer Casing Heating Plate Control Box Product Size Model Power Length (mm) Width (mm) Height (mm) MS-HEL-12J 1200W MS-HELREM-12D MS-HEL-18J 1800W 1240 MS-HELREM-18D MS-HEL-24J 2400W 1540 MS-HELREM-24D MS-HEL-30J 3000W 1840 MS-HELREM-30D Circuit Diagram Heating Plate Switch 220-240VAC 50/60Hz... - Page 12 Before first use, please read the following points carefully: • When removing the heater from the box, please take care to ensure that you do not damage the heater, and that you retain the box for storage purposes. Install the heater according to the instructions provided in this manual. •...
- Page 13 To use the automatic temperature control feature, use the Up Button and Down Button to set your target temperature in 1°C increments, up to a maximum temperature of 45°C, which you can see on the screen. Once set, the screen will revert back to displaying the current room temperature.
-
Page 14: Pairing Your Remote Control Helios Bar Heater To Your Wi-Fi
PAIRING YOUR REMOTE CONTROL HELIOS BAR HEATER TO YOUR WI-FI NETWORK Scan this QR code to view our video guide on pairing your heater to your Wi-Fi network. Before starting, ensure your smart device is connected to a 2.4GHz Wi-Fi signal. All Wi-Fi routers emit a 2.4GHz signal, but some new models also emit 5GHz. -
Page 15: Day Timer
Timer 7-DAY TIMER Using The 7-Day Timer With Your Heater: On the home screen of the Smart Life app, press the 'Timer' button in the bottom right corner. Then, press 'Add' in the middle of your screen. The following screen allows you to set your timer settings: Use the sliders at the top of the screen to set what time you want your heater to switch on or off. - Page 16 Add Schedule Save Add Schedule Save PM 2:23 PM 2:23 Every day Every day Switch ON Switch ON Repeat Once Repeat Once No timer data Note Note Notification Notification Switch Switch Timer Figure 1 Figure 2 Figure 3 Figure 4 Repeat Schedule Add Schedule...
- Page 17 Table for information requirements for electric local space heaters MS-HEL-12J MS-HEL-18J MS-HEL-24J MS-HEL-30J Model identifier(e): MS-HELREM-12D MS-HELREM-18D MS-HELREM-24D MS-HELREM-30D Item Symbol Value Unit Heat output Nominal heat output Pnom Minimum heat output Pmin (indicative) Maximum continuous Pmax heat output) Auxiliary electricity consumption At nominal heat output elma 1.137...
-
Page 18: Warning
WARNING Please ensure that the heater is installed correctly, as per this instruction manual, and that it is facing the correct way. The heater should be installed in a place where the controls cannot be used by someone who is using a bath or a shower. The heater should not be installed directly above an electrical socket. - Page 19 86 Scudamore Road Leicester, LE3 1UQ +44 (0) 116 436 2250...
Need help?
Do you have a question about the HELIOS MS-HEL-12J and is the answer not in the manual?
Questions and answers