
Subscribe to Our Youtube Channel
Related Manuals for Mirrorstone MS-ZEN-12J


Summary of Contents for Mirrorstone MS-ZEN-12J
- Page 1 ZENOS INFRARED BAR HEATER MANUAL MS-ZEN-12J/MS-ZEN-18J/MS-ZEN-24J/MS-ZEN-30J MS-ZEN-12W/MS-ZEN-18W/MS-ZEN-24W/MS-ZEN-30W...
-
Page 2: Table Of Contents
CONTENTS Before using your heater for the rst time Important Safeguard Installation Guide Product Instructions for Non-Remote Controllable Zenos Heaters Product Instructions for Remote Controllable Zenos Heaters Wi-Fi Operation Using the 7-day Timer With Your Heater Warning... -
Page 3: Before Using Your Heater For The Rst Time
BEFORE USING YOUR HEATER FOR THE FIRST TIME Please read all the instructions in this manual carefully, even if you have prior experience of using an infrared heater. This manual should be kept in a safe place for future reference. Should you need to make any kind of warranty claim with the manufacturer,you will need to make note of the complete model number (located on the product card at the back of the heater), the date on which you received the product, and your receipt of purchase. - Page 4 • In the event of such an occurrence, please return the heater to a qualified electrician for examination, adjustment, service or repair. • Do not touch the appliance with wet hands. • The most common cause of overheating is dust or fluff deposits getting stuck in the heater. •...
- Page 5 the skin for prolonged periods of time. Please pay attention when children or vulnerable people are present. • The heater should be installed at a minimum of 2.2 metres from the floor. • Should the power cord become damaged, it must be returned to the manufacturer, or be repaired by a qualified electrician.
-
Page 6: Installation Guide
INSTALLATION GUIDE 2x Brackets with notch 2x Brackets without notch The brackets have a notch, the one with the These holes at the back of the bar heater are not notch goes into the bar heater, without the for the screws, they allow air to ow. notch goes into the wall. - Page 7 Step 1: Use the screws provided to install two of the brackets to the back of the heater, as shown in Fig. A. Step 2: Use the screw provided to install two of the brackets to the wall or ceiling, as shown in Fig.
- Page 8 For wall installations,the height from the floor should be at least 1.8 metres,as shown in Fig.3. For suspended installation,the heater will hook up to the suspension cables and hang from the ceiling, as shown in Fig.4. Zenos Infrared Bar Heater Manual...
-
Page 9: Product Instructions For Non-Remote Controllable Zenos Heaters
PRODUCT INSTRUCTIONS FOR NON REMOTE CONTROLLABLE ZENOS HEATERS Outer casing Heating Plate Indicator Light Product Size Model Power Length(mm) Height(mm) Depth(mm) MS-ZEN-12J 1200W MS-ZEN-18J 1800W 1240 MS-ZEN-24J 2400W 1540 MS-ZEN-30J 3000W 1840 Power Indicator Before first use,please read this manual carefully. - Page 10 When you require any service or repair, contact your local service centre or qualified electrician. Should the power cord become damaged, it must be replaced by a qualified electrician or the manufacturer. This heater is not intended for use by children or vulnerable people without supervision. Zenos Infrared Bar Heater Manual...
-
Page 11: Product Instructions For Remote Controllable Zenos Heaters
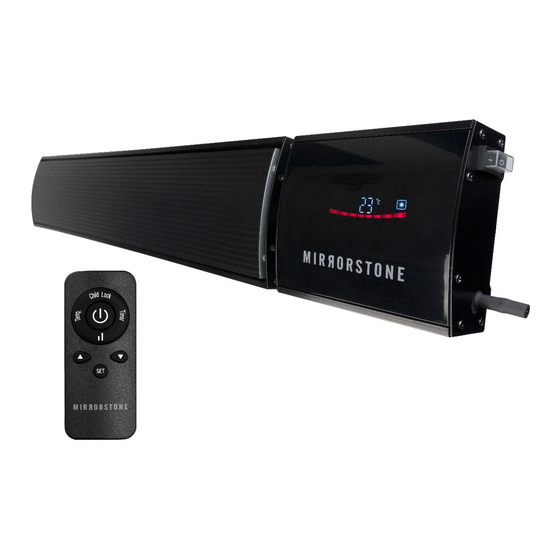
PRODUCT INSTRUCTIONS FOR REMOTE CONTROLLABLE ZENOS HEATERS Outer casing Heating Plate Control Box Product Size Model Power Length(mm) Height(mm) Depth(mm) MS-ZEN-12W 1200W MS-ZEN-18W 1800W 1240 MS-ZEN-24W 2400W 1540 MS-ZEN-30W 3000W 1840 Circuit Diagram Remote Control 1.Power on/off buttons 2.Temperature button 3.Timer button 4.Child lock button 5.High/Low switch buttons... - Page 12 Before first use, please read the following points carefully. When removing the heater from the box,please take care to ensure that you do not damage the heater,and that you retain the box for storage purposes. Install the heater according to the instructions provided in this manual. The heater should be connected to its own power supply, and should not share a circuit with other high-power appliances, otherwise the circuit may overload.
- Page 13 to tell you which setting it is on. To put the heater in standby, press the Set button twice. The display will switch off except for the high power and low power symbol. Press the Set button twice again to switch the heater back on.
-
Page 14: Wi-Fi Operation
WI FI OPERATION Scan the QR code with your mobile phone, to download and install the Smart Life app. Create an account if you haven’t already. Make sure to keep your password somewhere safe. Open the app, click Add device,or click on the + in the top right corner, then select the electric heater option. - Page 15 Click OK, then connect to your Wi-FI. Make sure you’re using a 2.4GHz connection, as a 5Ghz connection will not work. When scanning your available networks, if you see a single network belonging to you, then this will be the correct band. If you see two networks, the name of the network should help you identify which band it belongs to, so a 2.4GHz net- work will have 24G, 2.4, 24 or something similar in the name, whilst the 5GHz network will have 5 or 5G in the name).
- Page 16 screen that the LED light is blinking. Enter your Wi-Fi network details on the next screen (network name and password), before connecting your phone to a new Wi-Fi network named “SmartLife_XXXX” where the “XXXX” will be randomised numbers. Once you’re connected to “SmartLife_XXXX”, click the button that says Confirm the hot spot, next , the app will begin attempts to connect to the wireless temperature sensor.
-
Page 17: Using The 7-Day Timer With Your Heater
USING THE 7 DAY TIMER WITH YOUR HEATER On the home screen of the Smart Life app,press the Timer button in the bottom right corner. Then, press Add in the middle of your screen. On the next screen, you’ll be able to choose your timer settings. Use the sliders at the top of the screen to set what time you want your heater to switch on or off. -
Page 18: Warning
WARNING Please ensure that the heater is installed correctly, as per this instruction manual, and that it is facing the correct way. The heater should be installed in a place where the controls cannot be used by someone who is using a bath or a shower. The heater should not be installed directly above an electrical socket. - Page 19 86 Scudamore Road Leicester, LE3 1UQ +44 (0) 116 436 2250...
Need help?
Do you have a question about the MS-ZEN-12J and is the answer not in the manual?
Questions and answers