
Related Manuals for Ferno F3S Monobloc


Summary of Contents for Ferno F3S Monobloc
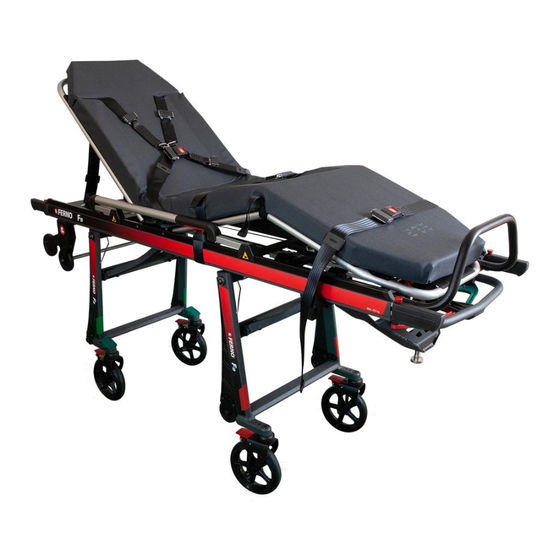
- Page 1 Model Monobloc Read this Manual and Retain for Future Reference Instructions for Use October 2023 50-8340-004...
-
Page 2: Ferno Customer Relations
The label is located on the backrest. Limited Warranty Statement The products sold by Ferno are covered by a limited warranty, which is printed on all Ferno invoices. The complete terms and conditions of the limited warranty, and the limitations of liability and disclaimers, Ferno Slovakia s.r.o. -
Page 3: Table Of Contents
Telescoping Handles _______________________________ 12 IV Pole (Optional) __________________________________ 13 Footrest _________________________________________ 14 Wheels __________________________________________ 14 5 - Using the Cot _________________________________________ 15 Before Placing the Cot in Service ______________________ 15 General Guidelines for Use ___________________________ 15 © Ferno / 50-8340-004 / October 2023... -
Page 4: Safety Information
10g Certification: The F3 Monobloc Cot, Trolley & Stretcher, when ● entangled in, the locking mechanism. used with a Ferno® F1 ( 3-Point) Fastening System, meets European Pushing the cot by the backrest can cause it to tip and Harmonized Standards. -
Page 5: Symbol Glossary
Definition The symbols defined here are used on the cot and/or in this’ manual. General warning of potential injury Ferno uses symbols recognized by the International Standards Organization (ISO), American National Standards Institute (ANSI) and the emergency medical services industry. -
Page 6: Operator Focus
Visually inspect the cot for readiness. See “Inspecting the Cot” on ● page 19. Rotate the cot in a circle to verify it rolls easily. ● Load the cot into ambulance and secure it in the fastening system. ● © Ferno / 50-8340-004 / October 2023... -
Page 7: Using Additional Help
250 kg Follow local protocols. Inspect the cot if the load capacity has 550 lb been exceeded. See “Inspecting the Cot” Ferno recommends that helpers work in pairs to help maintain cot ● 39.4 st balance. on page 19. Refer to the chart for suggested placement for operators and helpers. -
Page 8: About The Cot
A patient mattress and set of restraints are required, but not included (available separately). See “Accessories” on page 23. The cot is compatible with Ferno® fastening systems (not included): Ferno® F1 (3-Point) fastening system (10g system, CE Certified) ●... -
Page 9: Cot Positions
Model F3 Monobloc 3.3 Cot Positions © Ferno / 50-8340-004 / October 2023... -
Page 10: 4- Features
(Figure 3). Raise or lower the backrest to the desired position. Release the backrest control handle. Raise or lower the backrest until it locks into the new position. Fasten and adjust patient restraints. © Ferno / 50-8340-004 / October 2023... -
Page 11: Shock Frame
Working from the control-end of the cot, use the lifting strap to lift the shock frame slightly. With your thumb, press the shock frame control lever to disengage the support bars, then lower the shock frame. Fasten and adjust the restraint(s). © Ferno / 50-8340-004 / October 2023... -
Page 12: Compatible Fastening Systems
Model F3 4.5 Compatible Fastening Systems CE CERTIFIED 10g Certification: The F2 Monobloc Cot, when used with a Ferno® F1 (3-Point) Fastening System (Figure 6), meets European Harmonized Standards. To use the cot with the fastening system, see “Loading the Cot”... -
Page 13: Pole (Optional)
Mounting Points The mounting point may be attached to any corner of the cot. See “Setup” on page To purchase additional mounting points, see ”Accessories” on page 23. IV Pole Storage Clip (2) © Ferno / 50-8340-004 / October 2023... -
Page 14: Footrest
To return to in-line rolling, the operators roll or push the cot toward the loading end. The wheels will align and the detent will automatically snap into place. All wheels swivel 360 degrees. © Ferno / 50-8340-004 / October 2023... -
Page 15: Using The Cot
Ferno Model 430 series, and a metal-buckle harness restraint such as the Ferno Model 417-1. See “Accessories” on page 2 3. Keep restraint and accessory users’ manuals with this manual ●... -
Page 16: Changing Positions
Both Operators: If the legs have not locked, raise the cot a little higher until you hear an audible “click” from the locking mechanism, then retest. © Ferno / 50-8340-004 / October 2023... -
Page 17: Transferring The Patient Onto The Cot
(Figure 15), grasp the main frame with both hands, and roll the cot. Attend to and communicate with the patient. ONE OPERATOR If permitted by local protocols, one trained operator may roll an empty cot (no patient). Follow the instructions above. © Ferno / 50-8340-004 / October 2023... -
Page 18: Loading The Cot
#2 control handle and continue pushing the cot into the ambulance. Both Operators: Secure the cot in a Ferno fastening system. ONE OPERATOR If permitted by local protocols, one trained operator may load an empty cot (no patient). -
Page 19: Maintenance
To disinfect, wipe all surfaces with disinfectant. Follow the disinfectant Does the legs lock, unlock, and fold properly? ● manufacturer’s instructions for application method and contact time. Ferno Does the cot load and unload properly? ● recommends you inspect the cot for damage as you disinfect it. -
Page 20: Lubricating The Cot
Leg brace hinges and pivot points (both legs, x6) WRL-191S or E-Z-1 Telescoping handles (x4) WRL-191S or E-Z-1 Positioning bar LUBRICATION-FREE ITEMS Sidearm bearings (plastic) Do not lubricate Do not lubricate Loading wheel (greaseless) Do not lubricate Do not lubricate © Ferno / 50-8340-004 / October 2023... -
Page 21: Setup
Ferno recommends a restraint system consisting of one-piece or two-piece, metal-buckle restraints such as the Ferno Model 430 series, and one harness restraint such as the Ferno Model 417-1 (Figure 22). Keep restraint and accessory users’ manuals with this manual for ●... -
Page 22: Attaching A Harness Restraint
Adjust the straps so the links will meet the lap buckle. Wrap the loop end of a pelvis strap around the cot main frame (Figure 25). Patient Right Link Links Oriented Properly © Ferno / 50-8340-004 / October 2023... -
Page 23: Attaching One-Piece Lap And Leg Restraints
Wrap both ends of the restraint around the cot main frame (Figure 27). Ferno recommends you position the restraint between the shock frame crosstube and control-end mount to prevent interference with the IV pole (optional) or other elements (Figure 28). -
Page 24: Training Record
Model F3 Monobloc TRAINING RECORD Training Method Trainer Date Printed Name Signature Initials Read Video/ Hands-On Manual Online © Ferno / 50-8340-004 / October 2023... -
Page 25: Maintenance Record
Model F3 Monobloc MAINTENANCE RECORD Date Maintenance Performed © Ferno / 50-8340-004 / October 2023...
Need help?
Do you have a question about the F3S Monobloc and is the answer not in the manual?
Questions and answers