Table of Contents
Advertisement
Quick Links
Advertisement
Table of Contents

Related Manuals for Bernard Controls AQXL Series


Summary of Contents for Bernard Controls AQXL Series
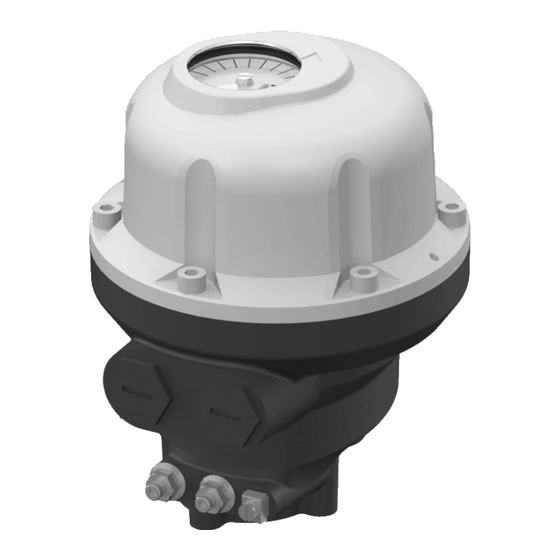
- Page 1 AQXL RANGE SUG_18005_EN – Ind. E Start Up Guide Art.: 5100708EX...
-
Page 3: Table Of Contents
TABLE OF CONTENTS DEFINITIONS ---------------------------------------------------------- 5 SAFETY INFORMATION ----------------------------------------- 5 1.1 Reference standards and documents 1.2 Marking 1.3 Electrical and temperature parameters 1.4 Installation area 1.5 Device integrity STORAGE -------------------------------------------------------10 2.1 Packaging 2.2 Storage MECHANICAL INSTALLATION ---------------------------------11 3.1 Adapting the actuator to your valve input 3.2 Fastening the actuator on the flange ELECTRICAL WIRING AND TESTS ----------------------------13 4.1 Opening cover... - Page 4 RESUMING FACTORY CALIBRATION -------------------------16 5.1 Mechanical stop calibration (Quarter-turn only) 5.2 Cam calibration (Quarter-turn only) 5.3 Travel limits calibration (Multi-turn version) 5.4 Travel limits calibration (Quarter turn version) CALIBRATION OF POSITIONER OR TRANSMITTER ----------20 6.1 Calibration of position transmitter (OPTION - ¼ turn only) 6.2 Calibration of positioner (OPTION) POSITION INDICATOR -----------------------------------------24...
-
Page 5: Safety Information
English DEFINITIONS Tip or info. Warning requiring a check and/or a compulsory action. Warning requiring a check and/or a compulsory action on the device because of risks of damages for the device or danger for the staff working on the device. Warning requiring a check and/or a compulsory action on the device because ignoring it may cause an explosion. - Page 6 BERNARD CONTROLS S.A. or BERNARD CONTROLS Inc. cannot be judged responsible for the non-respect of these rules. Our equipment complies with the CSA and FM Standard and is therefore CSA marked with indicators “C”...
-
Page 7: Marking
English 1.2 Marking ATEX IECEx CSA C&US Name and BERNARD CONTROLS address of the 4 rue d’Arsonval 95505 Gonesse, France manufacturer Actuator type AQXL Serial number Serial n°XXXXXXXX.YYY CCC- Certificate INERIS 19 ATEX IECEx INE 202031230700014 CSA 70197743X number 0003 X 19.0005X... -
Page 8: Electrical And Temperature Parameters
English 1.3 Electrical and temperature parameters The power supply voltage and frequency are indicated on the identification tag and (or) on the electric wiring diagram. The minimum ambient temperature is -40 °F (-40 °C) and the maximum +140 °F (60 °C) unless another information is mentioned on the identification tag. -
Page 9: Device Integrity
English Groups This actuator is designed for the surface industries and the following groups of atmospheres. Group and Subgroup Typical gas subgroup (IECEx / (CSA/FM) or typical dust ATEX/CCC) Propane Ethylene IIIC Combustible metal dusts Combustible carbonaceous dusts Other combustible dusts For other gases, please consult a notified body (e.g., CSA or INERIS or CQST). -
Page 10: Storage
English 2 STORAGE 2.1 Packaging The AQXL actuator is delivered in a cardboard box equivalent to the size of the actuator and sits in a cardboard wedge. 2.2 Storage It should be stored under a shelter, in a clean and dry place and protected from wide temperature variations. -
Page 11: Mechanical Installation
English 3 MECHANICAL INSTALLATION 3.1 Adapting the actuator to your valve input After assembly, the actuator can operate in any position. However: • it is not recommended to install actuator with cover downwards • cable glands must not be oriented upwards (loss of water tightness) Adapters Actuator is supplied with a set of adapters to ensure the output fits... -
Page 12: Fastening The Actuator On The Flange
English Flange spacer (option) If the valve input rod is too long and does not allow to mount the actuator on the valve flange, you can mount a spacer under the actuator. This spacer is assembled on the AQXL flange as shown below. 3.2 Fastening the actuator on the flange Once actuator is coupled with the valve, you need to fasten it on the valve flange. -
Page 13: Electrical Wiring And Tests
English 4 ELECTRICAL WIRING AND TESTS 4.1 Opening cover Do not open the cover when the actuator is under power or if an explosive atmosphere is present. Be careful not to damage the flameproof joint surfaces of the cover at the opening of the cover. If these surfaces are damaged, you should change this cover by a spare one. -
Page 14: Wiring
English Tighten the cable glands and plugs while ensuring the following minimum numbers of threads are screwed in the housing. 5 threads min. Plug Cable gland Put threadlock (Loctite 577 from Henkel or equivalent) on the threads of the cable glands and plugs as NPT threads are not IP68. -
Page 15: Grounding
English 4.4 Grounding A connection to the earth must be wired using the actuator internal and external grounding plugs. External grounding plug accepts wires with a cross-sectional area of maximum 4 mm² or 10 AWG). 4.5 Checking after wiring Once the actuator wiring is completed, the following points must be checked: Make sure that power supply voltage matches information on... -
Page 16: Resuming Factory Calibration
English 5 RESUMING FACTORY CALIBRATION As a standard, AQXL actuators close in the clockwise direction. 5.1 Mechanical stop calibration (Quarter-turn only) Mechanical stops are calibrated for an electrical travel of 90±5°. Mechanical stops are calibrated at the factory. Their calibration does not require to be resumed. - Page 17 English How to adjust a single cam Make sure the cams contact the switch according to their proper direction of travel, otherwise you could damage the switch. At the desired position of the actuator output: 1) Turn the setting screw of corresponding with a flathead or a Phillips screwdriver.
-
Page 18: Travel Limits Calibration (Multi-Turn Version)
English 5.3 Travel limits calibration (Multi- turn version) Remove the cover and after power supply is connected, proceed to the following test. A planetary reduction system makes our indicator can show multi-turn position. There is no cam block system in multi- turn actuators. - Page 19 English How to test the factory calibration (with positioner) Electrically drive the actuator clockwise to the end position. According to the situation: If end position cam trips the switch at the same time as the valve is closed, you do not need to resume calibration.
-
Page 20: Calibration Of Positioner Or Transmitter
English 6 CALIBRATION OF POSITIONER OR TRANSMITTER Take care that board is supplied during calibration process. This operation must be carried out by a qualified electrician. This operation must take place outside of the explosive atmosphere. 6.1 Calibration of position transmitter (OPTION - ¼ turn only) proportional transmitter board allows... - Page 21 English How to calibrate the position transmitter Supply the actuator for opening. Push during 5s on SW1 button. Yellow LED is blinking every 500 ms. When the actuator reaches the OPEN position, press on SW1 to validate this position as OPEN position. Cut-off supply for opening.
-
Page 22: Calibration Of Positioner (Option)
English 6.2 Calibration of positioner (OPTION) Take care that board is supplied during calibration process. This operation must be carried out by a qualified electrician. This operation must take place outside of the explosive atmosphere. The proportional analog command allows to drive the valve to intermediate positions. - Page 23 English Use the O buttons to operate the actuator and go to the open position. Once the actuator is in the right position, press the SW1 button to save the value. The LED should be blinking 100 ms long. Use the C buttons to operate the actuator and go to the closed position.
-
Page 24: Position Indicator
English 7 POSITION INDICATOR Indicator disk Green opening with 24 divisions symbol on the index Red closing symbol on the disk Shaft: Should not turn during the setup Locking operation screw How to set up the position indicator While tightening or loosening the locking screw, always hold the shaft under the position indicator (see image above) so that it does not turn, as this may damage the mechanical parts. -
Page 25: Operation
English 8 OPERATION 8.1 Duty cycle Motors are designed for an intermittent operation; it means that they should be stopped for a sufficient period of time after each operation in order to enable them to cool down. Duty cycle has to be respected in order to prevent excessive temperature rise of the motor and damage. -
Page 26: Maintenance
English 9 MAINTENANCE The actuator mechanical parts are greased for product lifetime and do not need any specific maintenance. In case of a disassembly/reassembly operation, make sure that all moving parts are correctly greased to prevent any electric spark. Explosionproof joint surfaces cannot be serviced. In case a joint is damaged, the corresponding part must be replaced. - Page 27 English...
- Page 28 Tel.: +33 (0)1 34 7 71 00 / Fax: +33 (0)1 34 07 71 01 / mail@bernardcontrols.com CONTACT BY OPERATING AREAS > AMERICA > EUROPE > INDIA, MIDDLE EAST & AFRICA NORTH AMERICA BELGIUM BERNARD CONTROLS UNITED STATES BERNARD CONTROLS BENELUX AFRICA HOUSTON NIVELLES (BRUSSELS) BERNARD CONTROLS AFRICA inquiry.usa@bernardcontrols.com inquiry.belgium@bernardcontrols.com ABIDJAN - IVORY COAST Tel.
Need help?
Do you have a question about the AQXL Series and is the answer not in the manual?
Questions and answers