Advertisement
Quick Links
Advertisement

Related Manuals for Energizer Force 3.8DC


Summary of Contents for Energizer Force 3.8DC
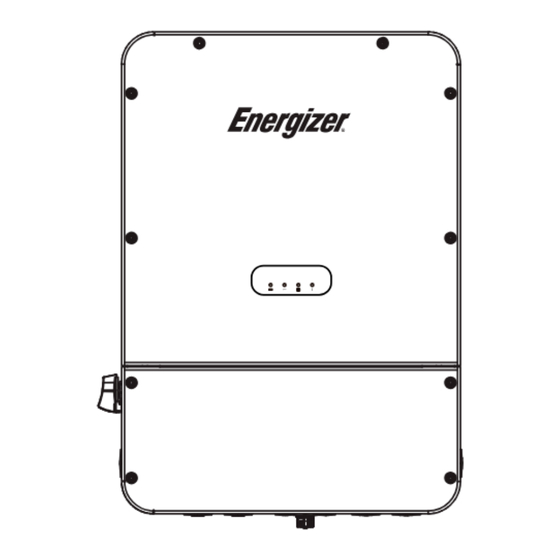
- Page 1 ENERGIZER SOLAR PEAK 3000 ENGLISH Force D/A Hybrid Inverter Quick Install Guide...
- Page 2 1. The informa�on in this document may not be modified, copied or reproduced, in whole or in part, without the prior wri�en permission of Energizer Solar. All informa�on in this document is provided to the best of our knowledge and efforts, but does not cons�tute a warranty of any kind,...
- Page 3 1.2 Energizer Solar Gateway Package Box Energizer Solar Gateway Inverter Bracket SUITABLE FOR USE AS SERVICE EQUIPMENT ONLY The mounting bracket for the demonstration is aligned with IN USA WHEN EQUIPPED the inverter mounting bracket. WITH MAIN BREAKER SERVICE DISCONNECT...
- Page 4 Quick Installa�on Guide DESC DESC Expansion Tube & Expansion Set Screw Screw Fixing Bracket Waterproof Cover Footstand RJ45 Communica�on Cable Junc�on Box (BMS-inverter) (9.8�) Grounding Cable (9.8�) Plug DC Output Cable (9.8�) Cable Gland Quick Installa�on Guide For PS : Quick Installa�on Guide...
- Page 5 Required Tools Insula�ng Safety Dust Mask Helmet Steel Toe Gloves Goggles Boots Phillips-Head Flat-Head Wire Stripper Adjustable Electric Drill Screwdriver Wrench Screwdriver Hole Punch Level Tape Sleeve Hex Wrench Phone Mul�meter DANGER: Special care must be taken to protect personal safety. PPE must be worn during transfer and installa�on.
- Page 6 Installa�on Steps 3.1 Installa�on Environment Shelter Shelter Shelter 3.2 System Installa�on Space Energizer Solar Gateway Inverter#1 Inverter#2 Inverter#N(≤4) Recommended Recommended Recommended 12in.(300mm) 12in.(300mm) 41in.(300mm) 8in.(200mm) 8in.(200mm) 8in.(200mm) Recommended Recommended Recommended 10.3in.(260mm) 10.3in.(260mm) 10.3in.(260mm) Recommended 41in.(1040mm) Ba�ery Ba�ery Ba�ery 33in.(840mm) 7 Layers 3.3 Inverter Installa�on...
- Page 7 No�ce Steps ② ③ ① 65-70mm Deep ⑤ ④ 3.4 Energizer Solar Gateway Installa�on ① ② Ene rgiz er Sola r Gat ewa y 45-50mm Inve rter Bra cke t The mou ntin Deep g bra cke t for dem ons trat...
- Page 8 Sugges�on: the height difference between the highest installa�on holes of the Energizer solar gateway and the highest installa�on holes of the inverter bracket is 3.5in. (89.3mm). Installa�on Holes of the Energizer Solar Gateway 13.5in. Inverter Bracket 16in. 3.5in. 5.2in. 19.3in.
- Page 9 Main Power Cable Communica�on Cable Auxiliary Power Cable Standby GEN CT (in Generator Gateway ) Smart Loads If exist Load Grid Energizer Solar Gateway Main Panel Backup Loads U�lity U�lity Grid CT Meter (in Gateway ) Combiner Panel (Provided by Customer) ..
- Page 10 GEN CT (in Solar CT (in PV Panel Solar Generator Gateway ) Gateway ) Inverter Smart Loads Load Grid Energizer Main Panel Backup Loads U�lity Grid CT U�lity Solar Gateway Meter (in Gateway) Combiner Panel (Provided by Customer) ..BAT PV...
- Page 11 4.2 Par�al-home Backup Par�al-home Backup (DC Couple) (Energizer Solar Gateway as Service Panel) Main Power Cable Communica�on Cable Auxiliary Power Cable Standby GEN CT Generator (in Gateway) Smart Loads If exist Load Grid U�lity Backup Loads Subpanel U�lity Grid CT...
- Page 12 Par�al-home Backup (DC Couple) (Energizer Solar Gateway not as Service Panel) Main Power Cable Communica�on Cable Auxiliary Power Cable Standby GEN CT (in Generator Gateway) Smart Loads If exist Load Grid Subpanel U�lity Backup Main Panel U�lity Grid CT Energizer...
- Page 13 Par�al-home Backup (AC Couple) (Energizer Solar Gateway as Service Panel) Main Power Cable Communica�on Cable Auxiliary Power Cable Smart Loads PV Panel Solar CT (in Solar Gateway) Inverter Load Grid U�lity Backup Loads Subpanel U�lity Grid CT(in Meter Energizer Gateway)
- Page 14 Par�al-home Backup (AC Couple) (Energizer Solar Gateway not as Service Panel) Main Power Cable Communica�on Cable Auxiliary Power Cable PV Panel Solar Solar CT Smart Loads Inverter (in Gateway) Load Grid Subpanel Backup U�lity Main Panel U�lity Grid CT Loads...
-
Page 15: Terminal Blocks
System Wiring Steps 5.1 Energizer Solar Gateway Overview Terminal Blocks Solar CT Grid CTs Hub-Power COM-IN COM-OUT E-STOP Generator Generator Smart Circuit Terminals Grid Relay Exis�ng Solar Energizer Inverter Terminal Backup Load Standby Terminal Generator Terminal Non-backup Load Terminal Ground... - Page 16 5.2 Is the Energizer Solar Gateway Installed as Service Panel? When the Energizer solar gateway is used as the service panel, ① a. main breaker and line side barriers (Eaton TICSR300C) need to be installed; Solar CT Grid CTs Hub-Power...
- Page 17 When the Energizer solar gateway is not used as the service panel, bonding ② jumper needs to be removed. Solar CT Grid CTs Hub-Power COM-IN COM-OUT E-STOP Generator Generator Remove Recommended Breaker Models ③ Circuit Compa�table Breaker CH230, CH235, CH240, CH245, CH250, CH260, CH270, CH280,...
- Page 18 ④ NEC 2023 Requirement of Current ra�ng: 1.705.12 (b)(1): bus bar ra�ng shall not less than main breaker ra�ng + breaker of other power source (125% of power source output) 2.705.12 (b)(2): only two power sources: primary power source is located on oppo- site end of other power source.
- Page 19 5.3 Energizer Solar Gateway Power Cable Wiring The Inverter Connec�ons to the Energizer Solar Gateway (One Energizer Inverter) · Inverter 3/4’’ 6 AWG 3/4’’ 6 AWG 3/4’’ 6 AWG 3/4’’ 6 AWG Solar CT Grid CTs Hub-Power COM-IN COM-OUT E-STOP...
- Page 20 The Inverter Connec�ons to the Energizer solar gateway (2 to 4 Energizer · Inverters) Energizer Solar Energy Solar CT Grid CTs Hub-Power COM-IN COM-OUT E-STOP Generator Generator Combiner Panel (Prepared by Customer) 1.4N.m L2 L1 L2 L1 L2 L1 L2 L1...
- Page 21 Number of Parellel Inverters Wire Gauge (Combiner Panel—Inverter) 2 Inverters 6 AWG 3 Inverters 6 AWG 4 Inverters 6 AWG Backup Loads Connec�ons to the Energizer Solar Gateway · Energizer Solar Gateway Solar CT Grid CTs Hub-Power COM-OUT COM-IN E-STOP...
- Page 22 · Non-backup Loads Connec�ons to the Energizer Solar Gateway Energizer Solar Gateway Solar CT Grid CTs Hub-Power COM-IN COM-OUT E-STOP Generator Generator 3/4’’ 6 AWG - 250 kcmil 3/4’’ 6 AWG - 250 kcmil 3/4’’ 6 AWG - 250 kcmil 3/4’’...
- Page 23 · The Grid AC Power Connec�ons to the Energizer Solar Gateway 3/4’’ 3/4’’ 6 AWG - 4/0 AWG 6 AWG - 250 kcmil 3/4’’ 3/4’’ 6 AWG - 4/0 AWG 6 AWG - 250 kcmil 3/4’’ 3/4’’ 6 AWG - 250 kcmil 6 AWG - 4/0 AWG 3/4’’...
- Page 24 To Exis�ng Solar Inverter NOTE: The condi�ons for connec�ng the exis�ng solar inverter to the main panel are: the system has only one Energizer inverter, no generator, and the power ra�ng of the exis�ng solar inverter is below the Energizer inverter’s power ra�ng.
- Page 25 The Smart Loads Connec�ons to the Energizer Solar Gateway (Op�onal) · 3/4’’ 3/4’’ 6 AWG - 2/0 AWG 6 AWG - 1/0 AWG 3/4’’ 3/4’’ 6 AWG - 2/0 AWG 6 AWG - 1/0 AWG Energizer Solar Gateway Energizer Solar Gateway...
- Page 26 The Standby Generator Connec�ons to the Energizer Solar Gateway (Op�onal) · Energizer Solar Gateway Solar CT Grid CTs Hub-Power COM-OUT Generator Generator COM-IN E-STOP 3/4’’ 6 AWG - 250 kcmil 3/4’’ 6 AWG - 250 kcmil 3/4’’ 6 AWG - 250 kcmil 3/4’’...
- Page 27 5.4 Inverter Power Cable Wiring The Ba�ery Connec�ons to the Inverter · BAT+ BAT- 1A+ 1A- 1B+ 1B- 2+ 2- 3+ 3- Inverter 3/16’’ 6 AWG Ba�ery 3/16’’ 6 AWG 3/16’’ 6 AWG...
- Page 28 If there are 4 PV strings, the number of PV panels connected to terminals 1A+, 1A- needs to be the same as that connected to terminals 1B+, 1B-. 5.5 Energizer Solar Gateway Wiring (Communica�on & Auxiliary Power) The Inverter Connec�ons to the Energizer Solar Gateway (1 to 4 Inverters) · 16 AWG Ø...
- Page 29 A1 B1 H1 L1 12V GND COM-OUT Hub-Power Energizer Solar Gateway 12V GND A1 B1 H1 L1 COM-OUT COM-IN Hub-Power Inverter #1 A1 B1 H1 L1 COM-OUT COM-IN Inverter #2 A1 B1 H1 L1 A1 B1 H1 L1 COM-OUT COM-IN...
- Page 30 120Ω resistors. ② The twisted cables use shielded twisted pair with drain wire. ③ The maximum cable lengths between Energizer solar gateway and Invert- er #1, between inverters, and between the ba�ery and inverter are 50m, 5m, and 50m, respec�vely .
- Page 31 Grid CTs Hub-Power COM-OUT COM-IN E-STOP Generator Generator Energizer Solar Gateway NOTE: The condi�on for installing the solar CT in main panel is that the system has only one Energizer inverter and no generator. Please refer to SLD for CT loca�on.
-
Page 32: Standby Generator
GEN CTs Standby Generator Energizer Solar Gateway White Blue White Blue Solar CT Grid CTs Hub-Power COM-IN COM-OUT Generator Generator Energizer Solar Gateway NOTE: The GEN CTs are installed in Energizer solar gateway. Please refer to SLD for CTs loca�on. - Page 33 Solar CT Grid CTs Hub-Power COM-OUT E-STOP Generator Generator COM-IN Energizer Solar Gateway NOTE: The condi�on for installing Grid CTs in main panel is par�al home with Energizer solar gateway not as service panel. Please refer to SLD for CTs loca�on.
- Page 34 5.7 Ba�ery Communica�on Wiring Inverter Communica�on Cable Ba�ery...
- Page 35 E-STOP Generator Generator E-STOP GND E-STOP Step 1: remove the jumper on the P6 socket of the Energizer Solar Gateway. Step 2: connect the pins 1 and 2 of the P6 to the E-STOP. WARNING: Energizer inverter Do not remove the jumper on the P6 socket of the 5.9 Smart WiLAN Connec�on...
- Page 36 · LAN Installa�on: insert the network cable into the Smart WiLAN, and connect the Smart WiLAN to the Energizer Solar Gateway. Energizer Solar Gateway System Turn on Please refer to the following steps to switch on the system. 1. Ensure all cables are connected properly.
- Page 37 Commissioning Please scan the QR code below to download the Energizer Solar Connect app.
- Page 40 © 2024 Energizer. Energizer and certain graphic designs are trademarks of Energizer Brands, LLC and related subsidiaries and are used under license by 8 Star Energy Pty Ltd. All other brand names are trademarks of their respective owners. Neither 8 Star Energy Pty Ltd nor Energizer Brands is affiliated with the respective owners of their trademarks.
Need help?
Do you have a question about the Force 3.8DC and is the answer not in the manual?
Questions and answers