Godox KNOWLED P600R Hard Instruction Manual
Led light panel
Hide thumbs
Also See for KNOWLED P600R Hard:
- Instruction manual (51 pages) ,
- Instruction manual (56 pages)
Table of Contents
Advertisement
Quick Links
Advertisement
Table of Contents

Related Manuals for Godox KNOWLED P600R Hard


Summary of Contents for Godox KNOWLED P600R Hard
- Page 1 日期: 2023/11/29 705-P600RH-00 P600R Hard 说明书 105g 哑粉纸 单色印刷 吴水宁 杨柳 印刷请使用 PDF 转曲文件...
- Page 2 合格证 Wechat Official Account 神牛微信公众号 深圳市神牛摄影器材有限公司 地址:深圳市宝安区福海街道塘尾社区耀川工业园厂房 2 栋 电话:0755-29609320(8062) 传真:0755-25723423 邮箱:godox@godox. com GODOX Photo Equipment Co., Ltd. Add.: Building 2, Yaochuan Industrial ZoneTangwei Community, Fuhai Street, Bao'an District, Shenzhen 518103, China Tel: +86-755-29609320(8062) Fax: +86-755-25723423 E-mail: godox@godox.com www.godox.com Made in China | 705-P600RH-00...
- Page 3 诺力 LED 影视板灯 KNOWLED LED Light Panel 使用手册 Instruction Manual...
- Page 4 重要的安全说明及注意事项 首先作为最基本原则: 本产品为专业灯光布景设备, 应由专业灯光师使用或在专业人士指导 下使用。 使用时必须始终遵循基本的安全预防措施, 具体安全预防措施如下: 使用前必须阅读并理解产品说明书。 专业灯具,禁止儿童使用。当儿童靠近时,家长或陪护人必须密切监督,以免儿童因碰 撞灯具或私用灯具造成人身伤害。 本灯具并非普通照明灯具,不可用于普通照明,任何有过眼部损伤或眼部敏感的人群均 应避免使用本灯具。 灯具点亮时,必须小心使用,禁止接触高温部件,如 LED 灯珠,以免造成灼伤。 灯具点亮时,任何情况下均禁止直视灯珠。应该在专业灯光师指导下使用强光,任何情 况下避免长时间处于强光环境,如引起眼睛不适,请及时关闭灯具,暂停使用,请及时 就医。 倘灯珠损坏或因热变形,应停止使用,并及时联系制造商、服务代理商或合格的维修人 员更换灯珠,以免发生意外。 本产品仅适用于 -20~45℃工作环境温度及正常湿度环境下使用。 请勿使用损坏的设备或设备配件,待专业维修人员检查维修,确认设备正常方可使用。 在使用过程中,如果本产品由于跌落、受到挤压或遭受强烈冲击而造成外壳破裂的,请 勿继续使用,以免因接触到内部电子元件而受到电击伤害。 如需要延长线,请使用额定电流≥该设备额定电流的延长线。如延长线额定电流小于该设 备,可能导致过热。 产品电源线较长, 请合理放置电源线, 使其处于安全位置。 避免电源线接触过热物体表面、 避免放置不当导致拉扯损坏或绊倒现场人员。请使用本厂原装电源线,如使用非本厂电 源线导致产品损坏,概不在本厂维修范围内。 在清洁和维修之前,请务必从电源插座上拔下该设备插头。不使用时,禁止拉扯电源线 以将设备插头从电源插座中拔出。正常断电,应是用手抓住该设备插头两端,将插头从 电源插座中拔出。此设备需连接到接地插座中。 本设备没有防水性能,请让设备保持干燥,请勿将本设备浸入水中或其他液体中。设备 需安装在干燥且通风处,避免在雨天、潮湿、多尘或过热环境下使用。请勿将任何物体 置于灯具上或使液体流入灯具内部,以免发生意外。 请勿私自拆卸产品,如产品出现故障,须由本公司或授权的维修人员进行检查维修。 存放本设备之前,请确保设备已完全冷却。存放时,将电源线从设备上拔出。设备应放...
- Page 5 上神牛官网查看最新的电子版说明,了解产品最新资讯。 一年保修期,消耗品电池、适配器、电源线等配件不在此保修范围内。 经发现,擅自检修设备,将取消一年保修期,维修需要收取相关费用。 对于不规范操作引起的机器故障不在保修范围内。 保存这些说明...
- Page 6 前言 感谢您购买神牛产品。 神牛全新推出一款诺力 LED 影视板灯 P600R Hard,输出高达 600W,支持 AC 100V-240V 电压范围,适用于全球范围内的拍摄场景;拥有灯控一体、超高亮度、千分级亮度调节、 4 种调光曲线、1800K-10000K 色温、4 种调色模式、14 类场景光效、平均 CRI ≥ 96、平均 TLCI ≥ 96、多种无线控制等诸多特性;适用于大型摄影棚、影视基地、演播室、户外外景以 及大型实地场等多种拍摄场景。 主要特点 灯控一体设计,节省空间的同时,布光更加便捷; 600W 超强输出功率,全色温段足功率输出; 真正千分级调节,能从 100%完美平滑调光至 0%。; 4 种调光曲线:线性、S 曲线、指数、对数; 宽广色温,调节范围:1800K-10000K; 多种调色模式:HSI 模式、RGBW 模式、GEL 模式、X-Y 坐标轴模式; 多种智能控制:DMX 512 控制台控制,支持 RDM 协议、LumenRadio CRMX 控制、蓝 牙...
- Page 7 部件名称 1. 吊环 1 8. USB-A 接口 15. PRESET 按键 22. 挂线装置 2. 吊环 2 9. DMX IN 接口 16. LOCK 按键 23. 提手 2 3. 吊环 3 10. DC INPUT 接口 17. MENU 按键 24. 支架柄 4. 吊环 4 11.
- Page 8 连接 DMX 控制台 无线 DMX 连接 LumenRadio CRMX TX 无线符号 CRMX DMX512 无线符号 CRMX 无线符号 CRMX 有线 DMX 连接 DMX 连接 DMX512 DMX 连接 DMX 连接 DMX 连接 注:DMX 连接线需另购。 物品清单 灯体 ×1 U 架 ×1 交流电源线 ×1 六角扳手 ×1...
- Page 9 钢丝绳 ×1 说明书 ×1 DMX 实用表 ×1 温馨提示:说明书线图均为示意图,仅供参考。由于产品不断更新与升级,产品实物与线图可能存在差异,请以实物为准。 可另购附件 交流电源线 MC15C、吊装绳 SCH01 、太空灯柔光罩 P600BHSS、裙边 P600BHSSS、方 形柔光箱 P600BHS22、格栅 P600BHS22G、航空箱 FC01、V 口电池挂板 DBP-V、安全绳 SW01、偏移支架 HJ02、多灯头支架 HJ04、柔光片 P600RHD、柔光罩 P600RHDo、蜂巢 P600RHH30、蜂巢 P600RHH60、插槽 P600RHS、拼接框架 AB02、拼接框架 AB04 开关机 接通电源,拨动电源开关按键,实现开机(-)或关机 (O)。 色温模式 短按 MODE 按键进入模式选择界面,旋转调节 旋钮可选色温模式(CCT),短按调节旋钮进入 色温模式。 旋转调节旋钮可选亮度调节...
- Page 10 HSI 模式 短按 MODE 按键进入模式选择界面,旋转调节 旋钮可选 HSI 模式, 短按调节旋钮进入 HSI 模式。 旋转调节旋钮可选亮度调节 / 色相调节 / 饱和度 85.2 调节,短按调节旋钮进入某项设置,左旋调节 旋钮减少参数值,右旋调节旋钮增加参数值。 界面参数展示如下: 亮度:0% ~100%(以 0.1%为增量) 色相:0° ~360° ( 以 1°为增量 ) 饱和度:0% ~100% ( 以 1%为增量 ) RGBW 模式 短 按 MODE 按 键 进 入 模 式 选 择 界 面, 旋 转 调 节...
- Page 11 GEL 模式 短按 MODE 按键进入模式选择界面,旋转调节 旋钮可选色片模式(GEL),短按调节旋钮进入 色片模式。 85.2 旋转调节旋钮可选亮度调节 / 色片类型 / 色片组 类型 / 颜色选择 / 色温 / 色相 / 饱和度,短按调 节旋钮进入某项设置,左旋调节旋钮减少参数 值,右旋调节旋钮增加参数值。 界面参数展示如下: 亮度:0% ~100%(以 0.1%为增量) 色片类型:R-GEL/L-GEL 色片组类型 : Color correction/CalColor/Storaro Selection/Cinelux(R-GEL) Color correction/Color Filters/600 Series/ Cosmetic Filters/700 Series (L-GEL) 色温:3200K 或...
- Page 12 FX 模式 短按 MODE 按键进入模式选择界面,旋转调节 1. 闪光灯 旋钮可选 FX 模式, 短按调节旋钮进入 FX 模式。 旋转调节旋钮可选闪光灯 / 雷闪电 / 多云 / 坏灯 泡 / 电视机 / 蜡烛 / 火 / 烟花 / 爆炸 / 焊接 / 警 车 /SOS/ 彩光循环 / 派对,短按调节旋钮进入某 项设置。...
- Page 13 4. 坏灯泡 此光效模拟一盏损坏的灯泡闪光,常用于营造 亮度:0% ~100%(以 0.1%为增量) 昏黄的环境氛围。 开关:开启 / 关闭 类型:CCT/HSI 通过旋转调节旋钮选择某项设置,短按调节旋 色温 / 色相:1800K-10000K/0° -360° 钮进入选项,根据需求旋转调节旋钮进行调节。 速度:1-100 设置完毕,短按调节旋钮返回上一级。 5. 电视机 此光效模拟电视机或屏幕的光线效果,常用于 亮度:0% ~100%(以 0.1%为增量) 营造出一种冷淡、机械或数字化的氛围。 开关:开启 / 关闭 类型:CCT/HSI 通过旋转调节旋钮选择某项设置,短按调节旋 速度:1-100 钮进入选项,根据需求旋转调节旋钮进行调节。 设置完毕,短按调节旋钮返回上一级。 6. 蜡烛 此光效模拟蜡烛的光线效果,常用于营造出一 亮度:0% ~100%(以 0.1%为增量) 种柔和、温暖、闪烁的氛围。...
- Page 14 9. 爆炸 此光效模拟爆炸的光线效果,常用于营造出一 亮度:0% ~100%(以 0.1%为增量) 种明亮、猛烈、闪烁氛围。 开关:开启 / 关闭 触发 : 手动 / 自动 通过旋转调节旋钮选择某项设置,短按调节旋 类型:CCT/HSI 钮进入选项,根据需求旋转调节旋钮进行调节。 色温 / 色相:1800K-10000K/0° -360° 设置完毕,短按调节旋钮返回上一级。 余烬 : 1-100 注:选中手动,通过短按一次调节旋钮触发一次爆炸光效。 速度:1-100 10. 焊接 此光效模拟焊接的光线效果,常用于营造出一 亮度:0% ~100%(以 0.1%为增量) 种炽热、机械的氛围。 开关:开启 / 关闭 通过旋转调节旋钮选择某项设置,短按调节旋 类型:CCT/HSI 色温...
- Page 15 14. 派对 此光效模拟彩色光线、闪光灯和激光等效果, 亮度:0% ~100%(以 0.1%为增量) 常用于营造出一种狂欢、欢乐、高能氛围。 开关:开启 / 关闭 通过旋转调节旋钮选择某项设置,短按调节旋 饱和度:0% ~100%(以 1%为增量) 速度:1-100 钮进入选项,根据需求旋转调节旋钮进行调节。 设置完毕,短按调节旋钮返回上一级。 菜单设置 短按 MENU 按键进入菜单设置,旋转调节旋钮 选择 DMX、CRMX、蓝牙、调光曲线、控制模式、 色域空间、风扇、屏幕设置、语言、系统升级、 关 恢复出厂设置、关于本机。 系统升级 恢复出厂设置 关于本机...
- Page 16 1.DMX 短按调节旋钮进入 DMX 设置界面。旋转调节旋 钮选择地址 /DMX 模式 /RDM 状态 /DMX 丢失 关于本机 地址 状态 / 终止开关 /DMX 增强通道。短按调节旋钮 进入选项设置,通过旋转调节旋钮完成选项设 DMX 模式 置。 01:CCT8bit 开 RDM 状态 DMX 丢失状态 保持最后状态 开 终止开关 开 DMX 增强通道 连接有线 DMX,灯体界面 DMX 模式:01 CCT 8Bit DMX 终端:关...
- Page 17 灯具直接熄灭 保持最后状态 2 分钟熄灭 失去 DMX 控制信号后,持续使用最后一次接收的 DMX 控 制信号 2 分钟,2 分钟后灯具熄灭。注:如 2 分钟内接收到 有效 DMX 控制信号,则使用新的 DMX 控制信号。 终止开关 开启 开启 DMX 终端 关闭 关闭 DMX 终端 增强通道 开启 开启增强通道信号 关闭 关闭增强通道信号 注:使用 DMX/RDM 控制台控制灯具,可参照附件《DMX 实用表》。电子版可登录官网 https://www.godox.com.cn 下载。...
- Page 18 连接状态 未连接 注:CRMX 仅有接收功能。 3. 蓝牙 短按调节旋钮进入蓝牙设置界面。旋转调节旋钮 蓝牙 选择蓝牙开关 / 蓝牙重置,短按调节旋钮进入某 蓝牙 开 项设置。 蓝牙开关:通过旋转调节旋钮完成设置。 重置 复位 蓝牙重置:通过短按按钮完成设置。 蓝牙 MAC 码:位于界面右下角,方便查找灯具 MAC:BA54 蓝牙。 设置完毕,短按 MENU 按键返回上一级。 扫描下面二维码即可下载“Godox Light”手机 app(安卓和苹果系统都可以使用)。 注: 1. 首个移动设备(手机或平板电脑)可直接使用 app 操控灯体。更换其他移动设备时,灯体需进行蓝牙重置方可正常使 用 app。 2.App 需升级至 V3.0 以上版本。...
- Page 19 4. 调光曲线 短按调节旋钮进入调光曲线设置界面。旋转调 调光曲线 节旋钮选择线性、S 曲线、指数、对数。设置完 毕,短按调节旋钮 /MENU 按键返回上一级。 线性 S 曲线 指数 对数 5. 控制模式 短按调节旋钮进入控制模式。短按调节旋钮选中 控制模式 模式,旋转调节旋钮选择对应模式,设置完毕, 模式 常规 短按 MENU 按键返回上一级。 频率 6. 色域空间 短按调节旋钮进入色域空间。短按调节旋钮选 色域空间 中色域空间,旋转调节旋钮选择对应色域,设 原始色域 置完毕,短按 MENU 按键返回上一级。 色域空间:原始色域、校色色域、REC 709、 DCI-P3。...
- Page 20 7. 风扇 短按调节旋钮进入风扇设置。旋转调节旋钮选 风扇 择静音、自动、中速、高速。选择完毕,短按 调节旋钮 /MENU 按键返回上一级。 静音 不同状态下灯体最大亮度值(%) 风扇状态 线性 S 曲线 指数 对数 静音 36.5% 52.4% 8.7% 自动 中速 高速 自动 100% 100% 100% 100% 中速 75%-100% 60%-100% 86%-100% 40%-100% 高速 100% 100% 100% 100% 注 : 风扇处于中速模式时 , 最大亮度值随着环境温度变化而变化。 8.
- Page 21 的 U 盘,重启灯具进 行升级 V 0.04 升级详情 1. 在官网 ( ) 下载新固件到 U 盘上。 https://www.godox.com.cn/firmware-continuous-light 2. 在关机的状态下,将存有新固件的 U 盘插入 USB-A 端口。 3. 开机,灯具 P600R Hard 自动进入升级界面。 4. 升级完毕自动跳回主界面。 注: 1. 必须在官网上下载新固件,存放在 U 盘根目录里,而且仅有一个 BIN 文件。 2. USB-A 端口支持供电,输出电压电流 5V/1.2A,请勿接入大功率 USB 设备。...
- Page 22 12. 关于本机 短按调节旋钮进入关于本机,在此界面可查看 关于本机 型号、UID 号、固件版本、灯头温度、环境温度 等信息。 查看完毕, 短按 MENU 按键返回上一级。 型号:P600R Hard UID 号:085500000000 固件版本:V0.04 灯头温度:80℃ 环境温度:25℃ 锁定设置 短按 LOCK 按键,屏幕出现〈 〉表示当前界面 被锁定;再次短按 LOCK 按键便可解锁。 预存设置 短按 PRESET 按键进入预存灯具光效界面。旋转 预设 调节旋钮选择 1-20 组预设,短按调节旋钮进入 预设组设置,通过旋转调节旋钮可选应用 / 保存 应用 / 取消,最后短按调节旋钮完成设置。设置完毕, 短按...
- Page 23 维护保养 一年保修期,消耗品电池,适配器,电源线等配件不在此保修范围内。 经发现,擅自检修此 LED 影视灯,将取消 LED 影视灯一年保修期,维修需要收取相关费用。 对于不规范操作引起的机器故障不在保修范围内。 所有维修—概由本厂指定的可供原配件的维修部负责。 如本品出现故障或者被水淋湿,在专业人员维修后方可继续使用。LED 影视灯灯在工作时, 如发现异常,应立即关掉电源,查明原因。 照度数据 色温 测试状态 照度单位 1800K ≈ 40400 ≈ 4840 ≈ 1800 ≈ 990 ≈ 690 ≈ 3760 ≈ 449 ≈ 167 ≈ 92 ≈ 64 2800K ≈ 62600 ≈...
- Page 24 规格参数 型号 P600R Hard 供电 100V-240V~50/60Hz 7A 最大功率 ≈ 700W 色温 1800-10000K 调光范围 0% -100% 调光模式 线性 /S 曲线 / 指数 / 对数 平均≥ 96 TLCI 平均≥ 96 控制方式 DMX 512 控制台控制,支持 RDM 协议 LumenRadioCRMX 控制 / 蓝牙 App 控制 / 灯体控制 蓝牙控制距离...
- Page 25 Safety Instructions and Attentions First of all, as the most basic principle: This product is a professional lighting set equipment and should be used by professional lighting engineers or under the guidance of professionals. Basic safety attentions must always be followed during use, as follows: Before use, please read and understand these instructions and attentions.
- Page 26 The safety instructions are formulated according to the strict testing of the factory, and the design and specifications of the equipment are subject to change without prior notice. For latest product information, please check the GODOX website and view latest electronic instruction.
-
Page 27: Main Features
Foreword Thank you for purchasing a Godox product. Godox is proud to introduce our latest product, the KNOWLED LED Light Panel P600R Hard, which outputs up to 600W and supports a voltage range of AC 100V-240V, making it suitable for shooting scenes worldwide. The P600R Hard features a built-in light control system, ultra-... -
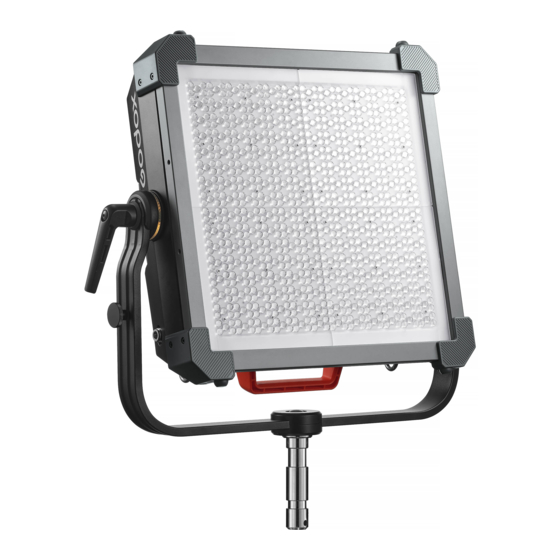
Page 28: Name Of Parts
Name of Parts 1. Ring 1 8. USB-A Port 15. PRESET Button 21. Antenna 2. Ring 2 9. DMX IN Port 16. LOCK Button 22. Lanyard End 3. Ring 3 10. DC Input Port 17. MENU Button 23. Handle 2 4. - Page 29 Installation Instructions for Yoke Install one side first: Place Thread the screw post Install the other side: the luminaire vertically through the metal washer Install following the steps and insert a plastic washer and Yoke mounting mentioned above. between the luminaire hole, tighten by rotating mounting hole and the Yoke clockwise using the...
-
Page 30: Optional Accessories
Wired DMX Connection DMX connection DMX512 DMX connection DMX connection DMX connection Note: DMX cable is sold separately. What’s Inside P600R Hard Light Body ×1 Yoke x1 Main Cable ×1 Hex Wrench ×1 DMX Practical Table x1 Safety Wire x1 Instruction Manual x1 Note: Due to continuous updates and upgrades of the products, there may be differences between the actual products and the pictures. -
Page 31: Power Switch
Power Switch To turn on or off the device, connect the power supply and toggle the power switch button to the ‘-’ position to turn it on or ‘O’ position to turn it off. CCT Mode To access the mode selection screen, press the MODE button briefly. - Page 32 RGBW Mode Press the MODE button briefly to enter the mode RGBW selection interface. Rotate the select dial to select RGBW, and press the select dial briefly to enter 100% the RGBW Mode. Rotating the select dial allows you to adjust 100% 85.2 brightness/red/green/blue/white color.
- Page 33 X-Y Mode Press the MODE button briefly to enter the mode selection interface. Rotate the select dial to select the X-Y Mode, and press the select dial briefly to enter the X-Y Mode. 85.2 Rotating the select dial allows you to adjust brightness/X-coordinate/Y-coordinate.
- Page 34 2. Lightning This light effect simulates the lightning of Brightness: 0%~100% (in increments of 0.1%) thunder, often used to create a tense, terrifying, or On/Off: Turn the light on or off mysterious atmosphere. Color Temperature: 1800K-10000K Rotate the select dial to select a specific setting. Trigger: Manual/Auto Press the select dial briefly to select an option Flashes: Random/1-10...
- Page 35 6. Candle This light effect simulates the lighting effect of a Brightness: 0%~100% (in increments of 0.1%) candle and is often used to create a soft, warm, and On/Off: Turn the light on or off flickering atmosphere. Speed: 1-100 Rotate the select dial to select a specific setting. Press the select dial briefly to select an option and then adjust the parameter by rotating the dial as needed.
- Page 36 10. Welding This light effect simulates the lighting effect of Brightness: 0%~100% (in increments of 0.1%) welding and is often used to create a hot and On/Off: Turn the light on or off mechanical atmosphere. Type: CCT/HSI Rotate the select dial to select a specific setting. Color Temperature/Hue: 1800K-10000K/0°-360°...
-
Page 37: Menu Settings
14. Party This lighting effect simulates the effects of Brightness: 0% to 100% (in increments of 0.1%) colorful lights, flash lights, and lasers, and is On/Off: Turn the light on or off commonly used to create a festive, joyful, high- energy atmosphere. - Page 38 1.DMX Press the select dial briefly to enter the DMX settings interface. Rotate the dial to choose from Address/DMX Mode/RDM Status/DMX Loss 关于本机 Address Status/Termination Switch/Enhanced Channel. Press the dial briefly to enter the option settings, DMX Mode and adjust the settings by rotating the dial as needed.
- Page 39 Turn off DMX terminal Extended DMX Turn on extend DMX channels Turn off extend DMX channels Channels Note: Please refer to the "Practical Table" to control the device by DMX/RDM. The electronic version can be downloaded from the official website https://www.godox.com.cn/...
- Page 40 Download“GODOX Light”App Scan the QR code to download the "Godox Light" smartphone App (can be used in Android and iOS). Note: 1.The app can be used directly on the firstly installed device (smartphone or laptop). When change to other mobile device (smartphone or iPad), the light shall be reset before the normal connection of the app.
-
Page 41: Dimming Curves
4.Dimming Curves Press the select dial briefly to enter dimming Dimming Curves curves setting interface. Rotate and press the select dial briefly to choose among linear, S-curve, exponential and logarithmic. Once the settings are Linear S-Cerve complete, press the MENU button briefly to return to the previous menu. - Page 42 7.Fan Press the select dial briefly to enter fan setting interface. Rotate and press the select dial briefly to choose among silent, auto, medium speed and high speed. Once the settings are complete, press the MENU button briefly to return to the previous menu.
-
Page 43: Version & Upgrade
Software Upgrade 1. Download the new firmware to the U disk from official website (https://www.godox.com.cn/firmware-continuous-light). 2. Turn off the device. Insert the U disk with new firmware into the USB Type-A port. 3. Turn on the device, and it will automatically enter the upgrade interface. -
Page 44: Lock Setting
12. Fixture Info Press the select dial briefly to enter fixture Fixture Info info setting interface to check model, UID NO., firmware version, light head temp., etc. Then, Model:P600R Hard press the MENU button briefly to return to the UID:085500000000 previous menu. -
Page 45: Maintenance
Maintenance This product, except consumables, is supported with a one-year warranty. Unauthorized service will void the warranty. Maintenance of the light must be performed by our authorized maintenance department which can provide original accessories. If the product had failures or got wet, do not use it until it is repaired by professionals. Shut down the device immediately should abnormal operation be detected. -
Page 46: Technical Data
Technical Data Model P600R Hard Power Supply 100V-240V~50/60Hz 7A Max. Power ≈700W 1800-10000K GM Adjustment -100%~100% Brightness Range 0%-100% Dimming Curves linear, S-curve, exponential, logarithmic ≥96 TLCI ≥96 Controlling Methods DMX 512 Control(support RDM protocol/LumenRadioCRMX)/ Ethernet (support Art-Net & sACN protocol)/Bluetooth Control/Light Body Control Bluetooth Controlling Distance Max. -
Page 47: Declaration Of Conformity
Maximum EIRP Power: 5dBm Declaration of Conformity GODOX Photo Equipment Co.,Ltd. hereby declares that this equipment are in compliance with the essential requirements and other relevant provisions of Directive 2014/53/EU. In accordance with Article 10(2) and Article 10(10), this product is allowed to be used in all EU member states. - Page 48 产品保修 尊敬的用户, 本保修卡是申请保修服务的重要凭证, 请您配合销售商填写并妥善保管, 谢谢! 产品信息 型号 产品条码 用户信息 姓名 联系电话 通信地址 销售商信息 名称 联系电话 通信地址 销售日期 备注 注: 此表应由销售商盖章确认。 产品信息 本文件适用于相关 《产品保修信息》 ( 见后面说明 ) 所列产品, 其他非属此范围的产品或部件 ( 如促销品、 赠品及其他出厂后附加的部件等 ) 不在此保修承诺内。 保修期 产品及部件的相应保修期按相关的 《产品保修信息》执行。 保修期自产品首次购买日起算, 购买日以 购买产品时保修卡登记日期为准。 如何获得保修服务 您可直接与产品销售商或授权服务机构联系,...
- Page 49 不适用保修情況 如产品存在下列情况, 本文件项下的保证和服务将不适用 : ①产品或部件超过相应保修期; ②错误 或不适当使用、 维护或保管导致的故障或损坏, 如: 不当搬运; 非按产品合理预期用途使用; 不当插 拨外接设备; 跌落或外力挤压; 接触或暴露于不适当温度、 溶剂、 酸碱、 水浸或潮湿环境; ③由非神 牛授权机构或人员安装、 修理、 更改、 添加或拆卸造成的故障或损坏; ④产品或部件原有识别信息被 修改变更或除去; ⑤无有效保修卡; ⑥使用非合法授权、 非标准或非公开发行的软件造成的故障或 损坏; ⑦因不可抗力或意外事件造成的故障或损坏; ⑧其他非因产品本身质量问题导致的故障或损 坏。 遇上述情况, 您应向相关责任方寻求解决, 神牛对此不承担任何责任。 因非在保修期或保修范围 内的部件、 附件或软件导致产品不能正常使用的, 不是保修范围内的故障。 产品使用过程中正常的脱 色,...
-
Page 50: Warranty
If maintenance service is needed, you can directly contact the product distributor or authorized service institutions. You can also contact the Godox after-sale service call and we will offer you service. When applying for maintenance service, you should provide valid warranty card. If you... - Page 51 Once met these situations above, you should seek solutions from the related responsible parties and Godox assumes no responsibility. The damage caused by parts, accessories and software that beyond the warranty period or scope is not included in our maintenance scope.
Need help?
Do you have a question about the KNOWLED P600R Hard and is the answer not in the manual?
Questions and answers