Advertisement
Quick Links
Important:
1. Check the Rhino-Rack website to ensure you have the latest issue of these instructions.
2. Please refer to your fitting instruction to ensure that the roof racks are installed in the correct locations.
3. Check the contents of kit before commencing fitment and report any discrepancies.
4. These instructions must be followed for warranty to be upheld.
Fit Time: 30 mins
Thank you for choosing Rhino-Rack!
WELCOME TO THE HERD.
For peace of mind register
your product by heading to
rhinorack.com/register
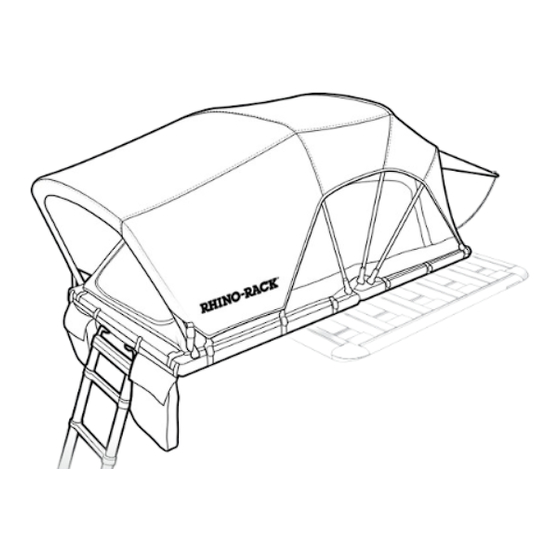
Soft shell Roof Top Tent - 2 Person
61026
1
2
RHINORACK.COM
Doc. No: 520-RFI-00176
Issue No: 03
Issue Date: 21/12/2023
Advertisement

Subscribe to Our Youtube Channel
Related Manuals for Rhino-Rack 61026


Summary of Contents for Rhino-Rack 61026
- Page 1 61026 Important: 1. Check the Rhino-Rack website to ensure you have the latest issue of these instructions. 2. Please refer to your fitting instruction to ensure that the roof racks are installed in the correct locations. 3. Check the contents of kit before commencing fitment and report any discrepancies.
- Page 2 61026 // MAKE SPACE FOR ADVENTURE C O N T E N TS 2 - General Warnings 10 - Unpacking Contents 3 - Ladder and Safety Notes 11 - Installation Before Use Determine Your Required Configuration 12 - Mount Bracket + Tent...
-
Page 3: Before Use
61026 // MAKE SPACE FOR ADVENTURE TAP HERE Youtube.com/Rhinorackaustralia LADDER AND SAFETY NOTES BEFORE USE Remove any slippery contaminants from the ladder Inspect operation of ladder locks, rungs and telescopic rungs such as mud, oil, grass or snow to ensure a parts before use each time. - Page 4 61026 // MAKE SPACE FOR ADVENTURE USING THE LADDER 2.4m / 7.9ft Maximum vehicle roof height that the Collapse ONLY the top-most ladder rungs. ladder can accommodate is 2.4m / 7.9ft LADDER AUTOMATIC LOCKS: The PUSH locks found on both ends of each ladder rungs. When both PUSH locks are pressed simultaneously, the side rail and rungs above the lock collapses inside the telescopic rail.
- Page 5 It is your responsibility to ensure these fitting instructions are given to the end user or client. These instructions remain the property of Rhino-Rack Australia Pty. Ltd. and may not be used or changed for any other purpose than intended.
- Page 6 61026 // MAKE SPACE FOR ADVENTURE DIMENSIONS CLOSED DIMENSIONS 1360mm 1100mm CHECK MAX 53.5in 43.3in HEIGHT 210mm OF YOUR 8.3in VEHICLE OPENED DIMENSIONS 1360mm 2460mm Internal Dimensions: 53.5in 96.9in 1300mm 51.2in 1000mm 39.4in 2168mm 85.4in Sleeping Capacity = 2 people...
-
Page 7: Tool Required
61026 // MAKE SPACE FOR ADVENTURE Parts Roof Top Tent Cover (PRE-INSTALLED) Left Bend Tent Bracket M6 x 16mm Hex Head Flanged Right Bend Tent Bracket Bolt M8 x 16mm Hex Head Flanged M6 24mm x 21mm x 4mm M8 20mm x 20mm x 11mm 1/4”... - Page 8 61026 // MAKE SPACE FOR ADVENTURE M OUNT I NG O PT I ON S Tent underbars ( ) must be oriented correctly according to your roof rack system. Refer to the SET UPS below to determine your required underbar mounting orientation.
- Page 9 61026 // MAKE SPACE FOR ADVENTURE FOR REAR OPENING TENTS SET UP 3 SET UP 4 [Cross Bar - Rear opening] [Platform - Rear opening] Underbars are Underbars are perpendicular perpendicular to Cross Bars to Platform slats The underbars are pre-installed for Reposition underbars on Page 28 before commencing installation on Page 12.
-
Page 10: Un Pack I N G Con T E N Ts
UN PACK I N G CON T E N TS 61026 // MAKE SPACE FOR ADVENTURE Page 10 of 35... - Page 11 61026 // MAKE SPACE FOR ADVENTURE Parts Open Open Refer to ENTRANCE LOCATION Note on Page 4 IN STA LL ATI O N: DE TE R M IN E YO UR R EQ UI R ED CONFI G URATI O N NOTE: U n de rb ars a re p re - in sta l le d in Conf ig.
- Page 12 INSTA L LAT I O N : M O U N T B R AC K ET + T E NT 61026 // MAKE SPACE FOR ADVENTURE FOR PLATFORMS AND RECONN-DECK BARS: 35-35 35MM SPACING UNLOCKED FOR VORTEX BARS: Page 12 of 35...
- Page 13 61026 // MAKE SPACE FOR ADVENTURE FOR CROSS BARS (For Platforms, Skip to Step 9) REAR VIEW SIDE VIEW U-shape to face OUTSIDE FOR RECONN-DECK BARS: FINGER TIGHT FOR VORTEX BARS: FRONT: Proceed to Step Page 13 of 35...
-
Page 14: Side View
61026 // MAKE SPACE FOR ADVENTURE FOR PLATFORMS (For Cross Bars, Skip to Step 11) SIDE VIEW REAR VIEW U-shape to face OUTSIDE FINGER TIGHT Page 14 of 35... - Page 15 61026 // MAKE SPACE FOR ADVENTURE Distribute the tent to the centre of the roof rack system. Avoid point loads concentrated at the front or rear. kg / lbs kg / lbs kg / lbs kg / lbs kg / lbs...
- Page 16 61026 // MAKE SPACE FOR ADVENTURE NOTE: Example depicts Pioneer Platforms. Also applies to Cross Bars SIDE VIEW: Page 16 of 35...
- Page 17 61026 // MAKE SPACE FOR ADVENTURE 25Nm 18LB/FT 4.4LB/FT For Pioneer Platforms and Reconn-Deck Bars Page 17 of 35...
- Page 18 61026 // MAKE SPACE FOR ADVENTURE CHECK FITMENT IS SECURE Page 18 of 35...
- Page 19 T E N T U S AG E : O PE N IN G T HE T ENT 61026 // MAKE SPACE FOR ADVENTURE Store in safe place T E N T US AG E : L A DD ER S E T U P...
- Page 20 61026 // MAKE SPACE FOR ADVENTURE Pull down on the ladder to “lever” the small base open 180° Page 20 of 35...
- Page 21 61026 // MAKE SPACE FOR ADVENTURE Collapse ONLY the top-most ladder rungs. 75° EXAMPLES: When adjusting the height of the ladder, make sure that it is securely fastened with a “click” CHECK LADDER RUNGS ARE LOCKED IN PLACE BEFORE ATTEMPTING TO CLIMB LADDER...
- Page 22 TENT U SAGE : T EN T SET U P 61026 // MAKE SPACE FOR ADVENTURE CLICK! Push CLICK! Unlock Extend Pole Lock Fully Page 22 of 35...
- Page 23 61026 // MAKE SPACE FOR ADVENTURE Undo internal bungee cords T E N T U S AG E : LE D L IG HT BA R Portable USB-A Power Bank (not included) Storage for Power Bank Page 23 of 35...
- Page 24 TENT STOWAGE - TA KE D OW N 61026 // MAKE SPACE FOR ADVENTURE • Make sure there are no sharp items left in the tent. • Allow tent to dry completely before stowing, otherwise wipe dry asap. • Close the zippers of the doors and windows most of the way, leaving them slightly open to allow the tent to air out while it is folded.
- Page 25 61026 // MAKE SPACE FOR ADVENTURE Retract Pole Secure Push CLICK! Page 25 of 35...
- Page 26 61026 // MAKE SPACE FOR ADVENTURE Retract Ladder completely Take caution not to pinch your fingers when retracting the ladder. Ensure tent fabric is tucked in on all sides and oriented correctly. NOTE: Location of entrance Page 26 of 35...
- Page 27 TENT R E M OVA L 61026 // MAKE SPACE FOR ADVENTURE LOOSEN SIDE Do not fully unscrew NOTE: Mount brackets can remain on the roof rack system! Page 27 of 35...
- Page 28 APPE ND I X : R EPOSI TI ON I N G UND E R BAR S 61026 // MAKE SPACE FOR ADVENTURE Add it io na l steps fo r c ha n g i n g you r u nd er b a r conf i g ura t i on: O nly requ i red fo r S e t Up s 2 a n d 3 - Refe r to p a g e 8 a n d 9.
- Page 29 61026 // MAKE SPACE FOR ADVENTURE Undo all frame straps LIFT UNHINGED SIDE Page 29 of 35...
- Page 30 61026 // MAKE SPACE FOR ADVENTURE LOOSEN & REMOVE Page 30 of 35...
-
Page 31: Side View
61026 // MAKE SPACE FOR ADVENTURE SIDE VIEW Page 31 of 35... - Page 32 61026 // MAKE SPACE FOR ADVENTURE SIDE VIEW LOOSELY ASSEMBLE 745mm / 29.3in 745mm / 29.3in 6.6LB/FT Page 32 of 35...
- Page 33 61026 // MAKE SPACE FOR ADVENTURE Refasten all frame straps PULL TIGHT O n ce co m p le te , co n t in u e to S tep o n Page 12 Page 33 of 35...
- Page 34 61026 // MAKE SPACE FOR ADVENTURE NOTES Page 34 of 35...
- Page 35 61026 // MAKE SPACE FOR ADVENTURE NOTES Page 35 of 35...
- Page 36 RHINORACK.COM Rhino-Rack AUSTRALIA 22A Hanson Pl, Eastern Creek, NSW, 2766 Rhino-Rack USA 19822 E 22nd Ave, Aurora, CO, 80011...
Need help?
Do you have a question about the 61026 and is the answer not in the manual?
Questions and answers