Advertisement
Quick Links
Important:
Please read these instructions carefully prior to installation.
Please refer to your fi tting instruction to ensure that the roof racks are installed in the correct locations.
Check the contents of this kit before commencing fi tment and report any discrepancies.
Place these instructions in the vehicle's glove box after installation is complete.
Care Instruction: Wash vehicle roof prior to installing Rhino roof racks, regularly clean ladder rack.
Maximum permissible load: 42kg
Recommendations:
It is essential that all bolt connections be checked after driving a short distance when you fi rst install your ladder rack. Bolt connec-
tions should be checked again at regular intervals (probably once a week is enough, depending on road conditions, usage, loads
and distances travelled). You should also check the cross bars each time they are re-fi tted.
Make sure to fasten your load securely. Please ensure that all loads are evenly distributed and that the centre of gravity is kept as
low as possible.
Use only non-stretch fastening ropes or straps.
Sensitivity to cross winds, behaviour in curves and braking.
The handling characteristics of the vehicle, changes when you transport a load on the roof. For safety reasons, we recommend you
exercise extreme care when transporting wind-resisting loads; special consideration must be taken into account when braking.
Please remove ladder rack and cross bars when putting vehicle through an automatic car wash.
Unsealed Road Factor of Safety:
When the T7-SLRS Sliding Ladder Rack System is to be used in off-road conditions, please build a safety of factor of 1.5 into
maximum permissible load limit. Increasing the number of mount points to the vehicle does not increase the vehicles maximum
permissible roof loading.
Note for Dealers and Fitters:
It is your responsibility to ensure instructions are given to the end user or client.
Rhino-Rack
3 Pike Street, Rydalmere,
NSW 2116, Australia.
(Ph) (02) 9638 4744
(Fax) (02) 9638 4822
These instructions remain the property of Rhinorack Australia Pty Ltd and may not be used or changed for any other purpose than intended.
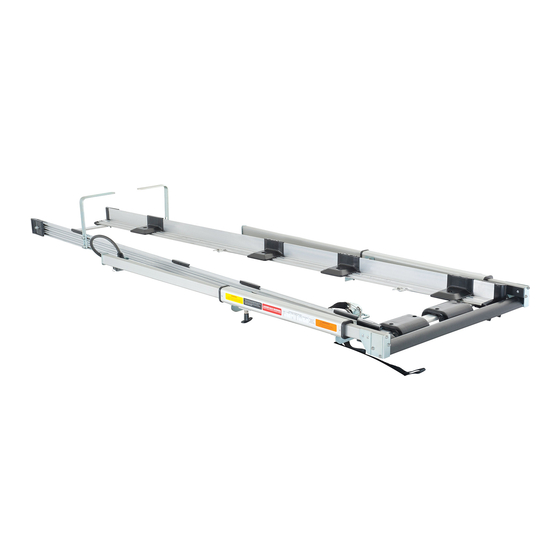
T7-SLRS - Sliding Ladder Rack System
Important Information
Document No: R319
Prepared By: Sam Whelan
Authorised By: Chris Murty
CONTROLLED
Fit Time: 1hour 45min
Issue No: 04
Issue Date: 15/03/2017
Page 1 of 15
Advertisement

Related Manuals for Rhino-Rack T7-SLRS


Summary of Contents for Rhino-Rack T7-SLRS
- Page 1 Unsealed Road Factor of Safety: When the T7-SLRS Sliding Ladder Rack System is to be used in off-road conditions, please build a safety of factor of 1.5 into maximum permissible load limit. Increasing the number of mount points to the vehicle does not increase the vehicles maximum permissible roof loading.
- Page 2 T7-SLRS - Sliding Ladder Rack System Parts List: Description [A] Front Cross Bar Front Cross Bar B096 M8 x20mm T-Bolt A519 346mm Drilled Front Bar W020 M8 x 17mm Flat Washer N028 M8 Nyloc Nut Rear Cross Bar A518 585mm Drilled Rear Bar...
- Page 3 T7-SLRS - Sliding Ladder Rack System Description [G] Slide Rail End Plate Ladder Restraining Bracket C066 Ladder Hoop Bracket N028 M8 Nyloc Nut B096 M8 x 20mm T-Bolt W020 M8 x 17mm Flat Washer Slide Rail End Plate [F] Ladder...
- Page 4 T7-SLRS - Sliding Ladder Rack System Parts List: Aerial Bracket Assembly [N] Aerial Bracket Assembly M581 Aerial Bracket H004 5mm Rivet Included Equipment: H002 5mm Allen Key Ball Handle M790 Ball Handle Tools Required: 8 & 10mm [Item 75] Spanner...
- Page 5 T7-SLRS - Sliding Ladder Rack System Sliding Ladder Rack Sub Assembly Before you start: It is reccommended this assembly takes place on a fl at surface. This is to prevent injury, damage of the product and loss of small parts.
- Page 6 T7-SLRS - Sliding Ladder Rack System Sliding Ladder Rack Sub Assembly Step 1: Screw Slide Rail (Right)[D] to Rear Slide Bar [H] using 2x M6 x 20 Trilobe Screws [Item 22]. The Rear Slide Bar Slip Strip [Item 41] must be facing up. Make sure screws are securely fastened to 4-5Nm.
- Page 7 T7-SLRS - Sliding Ladder Rack System Sliding Ladder Rack Assembly Before you start: It is reccommended this assembly takes place on a fl at surface. This is to prevent injury and prevent loss of small parts. T7-SLRS Assembly You will need:...
- Page 8 T7-SLRS - Sliding Ladder Rack System Sliding Ladder Rack Assembly (ii) Step 1: (i) Slide Front Cross Bar [A] into the bottom channel of Ladder Rail [C]. Repeat for other Ladder Rail [C]. Front ONLY (ii) Bolt Front [I] and Side [J] End Caps to each Ladder Rail [C] and position Front Cross Bar [A] up against End Caps [I][J] as shown.
- Page 9 T7-SLRS - Sliding Ladder Rack System Sliding Ladder Rack Assembly (ii) Step 5: (i) Turn over assembly so Ladder Rails [C] are facing downwards. Remove singular M8 T-Bolts [Item 1] and M6 Hex Head Bolts [Item 23] from Attaching Bracket [Item 24].
- Page 10 T7-SLRS - Sliding Ladder Rack System Sliding Ladder Rack Assembly Step 9: Slide Sliding Ladder Rack Sub Assembly in until it locks and tighten front bolts. Make sure sliding is smooth. If not, loosen and retighten until slide smoothly reaches closed position.
- Page 11 [Item 52] from edge is 20mm. 52/61 Step 2: HEAVY: 2 people are required to lift assembly. Place the Assembled T7-SLRS Sliding Ladder Rack System ontop of the installed vehicle roof racks. Extended Sliding Rails should be at the rear of the vehicle.
- Page 12 T7-SLRS - Sliding Ladder Rack System Assembly Rack Fitment Step 3: Two People Required. Person 1(i): Hold front of Sliding Ladder Rack System to prevent movement. Person 2(ii): Extend Slide Rails [D] to locked posi- tion and check the Rear Slide Bar [H] is clear of the vehicle tailgate.
- Page 13 T7-SLRS - Sliding Ladder Rack System Assembly Rack Fitment Step 7: Open the boot and ensure the Ladder Rack Assembly is not in the way. The Sliding Ladder Rack Sub Assembly can now be extended by pulling on the Locking Pin [Item 32].
- Page 14 T7-SLRS - Sliding Ladder Rack System Optional: Aerial Bracket Installation You will need: Aerial Bracket Assembly T7-SLRS Sliding Ladder Rack Assembly Step 1: Slide out rail until vehicle aerial contacts the Rear Slide Bar [H]. Step 2: Place the Aerial Bracket [Item 45] where the vehicle’s...
- Page 15 T7-SLRS - Sliding Ladder Rack System Aerial Bracket Installation Step 3: Drill both marked dots with 5mm drill bit. Step 4: Install Rivets [Item 74] into each hole using pop-rivet gun. HEAVY: 2 people are required to lift assembly. Lift back onto roof racks and secure down using instructions in Assembly Rack Fitment.
Need help?
Do you have a question about the T7-SLRS and is the answer not in the manual?
Questions and answers