
Subscribe to Our Youtube Channel
Related Manuals for Miele professional PG 8528


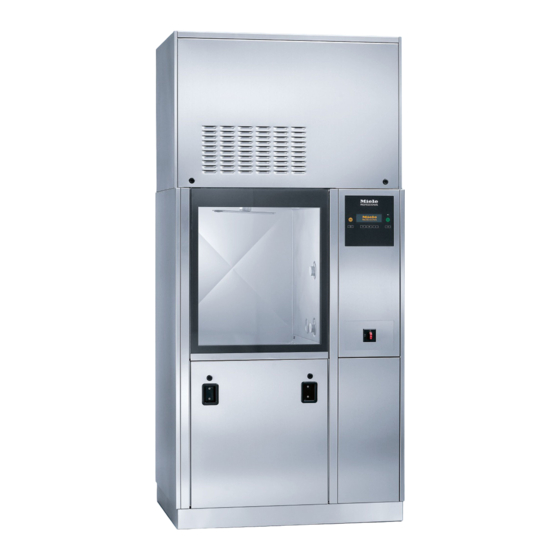
Summary of Contents for Miele professional PG 8528
- Page 1 Operating and Installation Instructions Laboratory Glassware Washer PG 8527 / PG 8528 en - US, CA To prevent accidents and appliance damage read these instructions before installation or use. M.-Nr. 07 207 090...
-
Page 2: Table Of Contents
Contents IMPORTANT SAFETY INSTRUCTIONS....... . . 4 Description of labwasher ......... . . 8 Guide to the labwasher . - Page 3 Contents Maintenance ........... . . 47 Process validation .
-
Page 4: Important Safety Instructions
IMPORTANT SAFETY INSTRUCTIONS Please pay attention to the following This machine conforms to current notes to maintain safe procedures. safety requirements. However, The machine should be inappropriate use can lead to commissioned and maintained only by personal injury and property a Miele Service Technician. - Page 5 IMPORTANT SAFETY INSTRUCTIONS Take care when handling liquids Always allow mobile units, modules, such as detergents, neutralizing inserts, and loads to cool before agents, wetting agents and rinse aids. removing. Be sure to empty any water These may contain irritant or corrosive from concave items into the wash ingredients, acids or alkalis.
- Page 6 IMPORTANT SAFETY INSTRUCTIONS The following points should be The machine must only be operated observed to assist in maintaining with water and the recommended cleaning agents. Organic solvents must quality standards for critical labware not be used in the machine as there is and to avoid damage to the loads the danger, under certain being cleaned.
- Page 7 IMPORTANT SAFETY INSTRUCTIONS To avoid any corrosion damage Disposal of an old appliance ensure that solutions or steam When discarding a labwasher, containing hydrochloric acid do not disconnect it from the power supply come in contact with the stainless steel and cut off the power cord.
-
Page 8: Description Of Labwasher
Description of labwasher The Miele PG 8527/ 8528 Laboratory In these operating instructions, the Glassware Washer is designed for general terms labware and glassware high-throughput, centralized wash are used to cover a range of laboratory areas. This unit is ideal for cleaning equipment and medical items. -
Page 9: Guide To The Labwasher
Guide to the labwasher Loading side a Housing unit for Drying System DS d Main Switch "On/Off" and/or Steam Condensor SC e Barcode scanner mount (optional) b "Profitronic" electronic control system f Service panel (see "Programming manual") g Docking station for transfer cart c Multiport MF 27/28 h Lift door (closed) - Page 10 Guide to the labwasher Loading side a Lift door (open) e Container for dispensing systems DOS 1 - DOS 4 b Connection for transfer cart and modules c Lower spray arm d Filter combination...
- Page 11 Guide to the labwasher Unloading side (PG 8528 only) a Lift door (closed) e Printer (optional) b Service panel with docking station f "Door" button for transfer cart MF 27/28 g Display c Multiport d Barcode scanner mount (optional)
-
Page 12: Electronic Controls
Guide to the labwasher Electronic controls... - Page 13 Guide to the labwasher a On/Off button s g and i Selection buttons - e turn washer on and off – shift position of marking in display – changed marked value b Door button a – scroll open and close the door –...
-
Page 14: Optional Equipment
Optional equipment Optional modules: – Drying unit – Steam condensor – Pre-heater – Conductivity meter – Report printer – Barcode scanner connection – up to 3 additional internal dispensing systems – Glass doors and wash cabinet lighting – combination steam/electric wash cabinet heating... -
Page 15: Context Menu
Context menu Certain functions are available through the context menu at any time, regardless of the operating level: – change display language – change operating level, – enter Delay Start – for convertible washers: change heating type, – loading package to arrange barcode scanner. The current fault messages can be shown in operating level D (if available). -
Page 16: Change The Display Language
Context menu Change the display language You can use the context menu to change the language used in the display. This setting is stored until the washer is switched off with the s button or the main switch. The language set under "Settings - Language J"... -
Page 17: Change The Operating Level
Context menu Change the operating level Four operating levels are available for selection. Operating Authorized access for : levels A and B selecting from a list of approved programs. automatic program assignment by mobile unit code. open program selection through the Program overview, Programming and Settings J menus. - Page 18 Context menu ^ Select the menu item Change operating level , confirm with OK. Select the user User ABC Administrator Technical Service ^ Select the user group and confirm with OK. ^ Enter the required code. Change operating level F F F Enter code ^ Select - e to change the numbers.
-
Page 19: Delay Start
Context menu Delay start The start time for a program can be pre-selected. ^ Select Delay start and confirm. ^ To activate the Delay start option, go to the menu item Activate and select Delay start Activate Delay start ^ To use this feature, select Delay start and confirm. - Page 20 Context menu The selected program, the delay start time, the current time of day, and the time remaining until the program starts are displayed. LAB-STANDARD Start time 5:15 3:20 1:55 Remaining time The selected program automatically starts at the delay start time.
-
Page 21: Change The Heating Type
Context menu Change the heating type Loading package In convertible labwashers, you can use If a barcode scanner is activated and the context menu to change the heating installed to the machine, loading type - e. g. from electric to steam packages can be arranged in the Loading package heating. -
Page 22: Automatic Mobile Unit Recognition (Awk)
Automatic mobile unit recognition (AWK) Mobile unit coding In operating level C the AWK (optional) attributes a fixed program place to a The automatic mobile unit recognition mobile unit with valid coding. feature assigns a program place to a Program places 1-15 are reserved for mobile unit. -
Page 23: Setting Mobile Unit Coding
Automatic mobile unit recognition (AWK) Mobile unit coding strip Setting mobile unit coding 15 different codes can be set. They are To set or alter the coding of a mobile assigned to program places 1 to 15. unit with automatic recognition (AWK) proceed as follows: Under "System function - Selector switch organization"... - Page 24 Automatic mobile unit recognition (AWK) ^ Place the track in the holder of the ^ Set the program place coding. mobile unit and screw firmly in place. Bit 6 is not an integral part of the modifiable magnetic strip. Make sure that you code mobile units with side coupling to a track where Bit 6 is set to I.
-
Page 25: Application
Application Check before cleaning The labwasher can be fitted with a variety of mobile units, baskets and – Are the items to clean correctly inserts, depending on the cleaning sorted, loaded and connected? application desired. – Are the spray arms clean and can they rotate freely? –... - Page 26 Application ^ Tall, narrow pieces should be placed Loading tips in the center of the baskets. This Select mobile units, baskets and ensures good water coverage. inserts appropriate for the ^ Mobile units with an adapter must application. engage correctly. ^ Load the items to be washed so that ^ Engage inserts correctly into the water can access all surfaces.
- Page 27 Application Laboratory glassware (LG) Loading the machine Wide-necked glassware, such as wide Removing excess soils necked erlenmeyer flasks and petri ^ Empty all glassware before loading dishes or glassware with a cylindrical form, e.g. test tubes, can be cleaned into the machine. Take any hygienic inside and out with the rotating spray measures necessary to avoid arm.
-
Page 28: Adding Liquid Detergents And Neutralizers
Adding liquid detergents and neutralizers The washer comes equipped, as Use only detergents and standard, with two internal dispensing neutralizers specially designed for systems: labwashers. Always observe the – Dispensing system DOS 1 for use manufacturer's recommendations for with alkaline products, e.g., liquid use. -
Page 29: Dispensing Systems
Adding liquid detergents and neutralizers Dispensing systems Adding liquid detergents and neutralizers Four 10 l containers of processing chemicals can be placed behind the service panel in the washer. Any additional containers will need to be set up outside the washer. Use caution when handling processing chemicals. - Page 30 Adding liquid detergents and neutralizers Message "Check dispensing system [X]" The currently running program pauses. ^ Check the container(s) and dispensing hoses indicated in the display. Refill or replace as needed. Containers and dispensing systems that are not in use can be shut off, to avoid fault messages in the display (see "Machine function - Container inquiry"...
-
Page 31: Operation
Operation Main Switch - On/Off Turning On ^ Press and hold the s button . The main switch disconnects the labwasher from the power supply The activating time for the s button ^ Turn the main switch to I-ON. can be set to a maximum of 10 Once the start procedure is completed, seconds (see "System functions - the labwasher is ready to for use. -
Page 32: Starting A Program
The door opens or closes. default programs in the Program To open the door on the clean side charts in the Appendix of the (PG 8528), note the following: Programming Manual. – programs with a process requirement must have been... - Page 33 Operation Operating levels A and B Operating level C A list of all selectable programs Make sure that no metallic parts appears in the display. or pieces are stuck to the magnetic ^ Select the desired program with - e, strip or its underside.
-
Page 34: Program Sequence
Operation Program sequence Canceling a program Once started, the program proceeds A program can only be interrupted automatically. The program steps are or canceled in operating levels B shown in the display. and D. Detailed information on the program ^ Press the +C button. sequences is available in the The program is interrupted. -
Page 35: Interrupting A Program
Operation Interrupting a program Note PG 8528: Which door can be opened depends A program can only be interrupted on which setting has been programmed or cancelled in operating levels B under "Machine Function - Automatic and D. door" (see the Programming Manual). -
Page 36: Barcode Scanner (Optional)
Barcode scanner (optional) Barcode scanners can be connected to the labwasher via the multiport on the unclean side and, if available, on the clean side as well. The configuration of the serial interface for the barcode scanner is described in the section "PC / Print functions - Serial Interface configuration"... -
Page 37: User Scan Load
Barcode scanner (optional) User scan load User scan unload User scan load When is activated, after User scan unload is activated, you program selection the following will be prompted to scan the user message is displayed (immediately in barcode once a program has ended: the case of automatic mobile unit recognition on operating level C): End of program -... -
Page 38: Scan The Load
Barcode scanner (optional) Scan the load When load scan is switched on, the following message prompts the operators to scan the load: Scan the load Scan the load ^ Scan the first barcode of the load. Scan the load In the menu the barcode numbers of the scanned load are listed. - Page 39 Barcode scanner (optional) Cancel load scan Finish load scan ^ After all the load bar codes have If no load was scanned, the load scan can be cancelled using +C. The been scanned, finish the process by program overview is displayed again. pressing OK.
- Page 40 Barcode scanner (optional) If this is the case, the following message is displayed: Use loading package? ^ Acknowledge the message by selecting All loading packages are displayed: Select loading package 1_14.02.2007_08:23 2_14.02.2007_09:11 ^ Select a loading package and confirm with OK. h flashes and the program can be started.
-
Page 41: Loading Packages
Barcode scanner (optional) Loading packages Loading packages can be created to optimize the function sequences when loading the labwasher. To do this, the load scan must be activated, see "System functions - Barcode" in the Programming Manual). Context menu Loading package Change display language F Change operating level Loading package... - Page 42 Barcode scanner (optional) Add loading package To create a loading package, open the Context menu, then select and confirm Loading package Loading package Move loading package Add loading package Display loading package ^ Select and confirm Add loading package The following message appears: Scan the load ^ Scan the individual components of the load.
- Page 43 Barcode scanner (optional) Display loading package To display the loading packages, open the context menu, then select and confirm Loading package ^ Select and confirm the menu item Display loading package The list with all the loading packages is displayed. Each loading package is identified by a number, date and time.
- Page 44 Barcode scanner (optional) Delete loading package To delete a loading package, open the context menu, then select and confirm the Loading package menu item ^ Select and confirm Delete loading package All existing loading packages are displayed with number, date and time. Delete loading package 1_14.02.2007_08:23 2_14.02.2007_09:11...
- Page 45 Barcode scanner (optional) Move loading package To move a loading package, open the context menu, then select and confirm the Loading package ^ Select and confirm the menu item Move loading package All existing loading packages are displayed with number, date and time. Move loading package 1_14.02.2007_08:23 2_14.02.2007_09:11...
-
Page 46: Serial Interface (Data Transfer)
Serial interface (data transfer) Each washer comes supplied with a Pin position of the 9-pole Sub-D plug 16.5 ft. (5 m) interface cable and RJ45 (serial interface): plug, for data transfer between the ground Profitronic system and an external transmit report printer or PC. -
Page 47: Maintenance
Maintenance Labwashers should undergo routine Also during maintenance, the following maintenance by the Miele Technical function checks are conducted: Service every 1000 operating hours – a test program is run or at least once every 6 months. – wash temperatures are measured Maintenance covers the following: –... -
Page 48: Process Validation
Maintenance Process validation Routine checks As a rule, it is the responsibility of the The user must complete these checks user to ensure that items cleaned in the every day before using the washer. A labwasher meet the required checklist is supplied with the washer. standards. -
Page 49: Cleaning The Filters In The Wash Cabinet
Maintenance Cleaning the filters in the wash Cleaning the fine filter cabinet The filters in the base of the wash cabinet prevent large particles from entering the system. The filters can become clogged, they need to be checked regularly and cleaned as needed. -
Page 50: Cleaning The Filter System For The Circulation Pump
Maintenance Cleaning the filter system for the circulation pump To protect the circulation pump, there are two additional filters under the flat filter. ^ Pull the filters up and out of the holder to remove. Clean if necessary. ^ Replace the filter combination in reverse order. -
Page 51: Cleaning The Spray Arms
Maintenance Cleaning the spray arms Spray arms on basket / inserts ^ Use a wrench to loosen the nut on The spray arms can become clogged. Check daily and clean if needed. the spray arm guide, then pull the spray arm downward. ^ Use a sharp, pointed object to push any particles into the spray arm jets, If you notice wear and tear on the... -
Page 52: Cleaning The Control Panel And Glass Door (Optional)
Maintenance Cleaning the control panel and Do not hose down the washer or glass door (optional) the immediate vicinity, e.g., with a ^ Press s to turn off the washer. water hose or pressure washer. ^ Clean the control panel and the glass Cleaning the wash cabinet door with a damp cloth or glass cleaner. -
Page 53: Baskets And Inserts
Maintenance Baskets and inserts If there are spray arms: To ensure that the mobile units, baskets – Do the spray arms rotate freely? and inserts function properly, they must – Are the spray jets clogged? See the be checked routinely. A checklist is section on "Cleaning and Care / supplied with the labwasher. -
Page 54: Report Printer (Optional)
Maintenance Report printer (optional) Replacing the ribbon cartridge ^ Open the front panel of the printer by Replacing the print paper the upper edge, and pull down. When the red indicator light on the front ^ The ribbon cartridge is above the panel of the printer lights, the print paper roll. -
Page 55: After Sales Service
After sales service In the event of a fault which you cannot easily fix yourself, please contact the Miele Technical Service Department at the address on the back of this booklet. When contacting Technical Service please quote the serial number and model of the appliance. -
Page 57: Installation Instructions
INSTALLATION INSTRUCTIONS... -
Page 58: Electrical Connection
Electrical connection This unit is convertible for use with All electrical work must be carried steam or electric heating. out by a qualified electrician in Hook up requirements are as follows: accordance with local and national safety regulations. 1. Electric heat only: 208 V 3 phase 60 HZ 60 amp Installation, repairs and other work 2. -
Page 59: Plumbing
Plumbing Water connection The machine cannot be operated with an inflow pressure of less than 10 psi. This machine must be connected to The machine is supplied with the water supply in accordance with 3 connection hoses 5 ft. (1.5 m) long all national and local plumbing with "... - Page 60 Plumbing Requirements 3. DI water connection One ½" (13 mm) deionized water (refer to the Installation Diagram for supply line with a standard " (19 mm) more information) male hose thread faucet is needed. The machine cannot be operated 1. Cold water connection conventionally with a flow pressure of less than 10 psi.
-
Page 61: Technical Data
Technical data Height 98 7/16" 250 cm (minimum room height) Width 45 1/4" 115 cm Depth 34 1/4" 87 cm Weight (net) approx. 1210 lbs 550 kg Operating weight approx. 1760 lbs 800 kg Voltage (volts) see data plate Connected load (watts) see data plate Current (amps) see data plate... -
Page 62: Caring For The Environment
Caring for the environment Disposal of the packing Disposal of an old appliance materials Old appliances may contain materials that can be recycled. Please contact The cardboard box and packing your local authorities about recycling in materials protect the appliance during your area. - Page 64 Alteration rights reserved / 2609 M.-Nr. 07 207 090 / 00...
Need help?
Do you have a question about the PG 8528 and is the answer not in the manual?
Questions and answers