Table of Contents
Advertisement
Quick Links
Advertisement
Table of Contents

Related Manuals for Miele professional PW 811


Summary of Contents for Miele professional PW 811
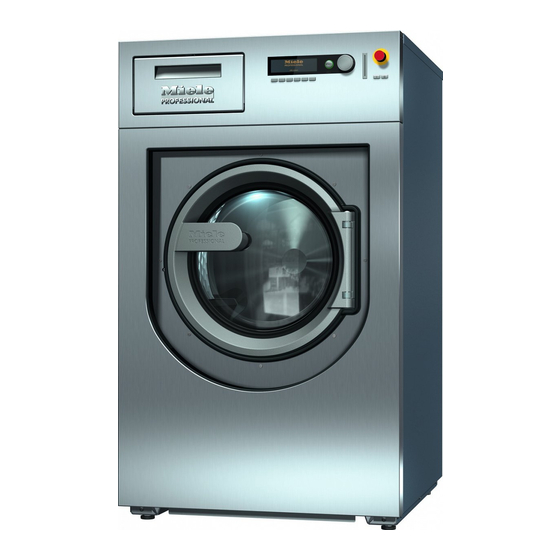
- Page 1 Operating and installation instructions Commercial Washing Machine PW 811 PW 814 PW 818 To avoid the risk of accidents or damage to the en-IE,ZA,AE machine, it is essential to read these instructions before it is installed and used for the first time.
-
Page 2: Energy And Water Consumption
The packaging is designed to protect Energy and water consumption against transportation damage. The – To get the most out of your machine, load packaging materials used are selected from the maximum dry load for the programme materials which are environmentally friendly you are using. -
Page 3: Table Of Contents
Contents Warning and Safety instructions.................. 10 Notes on using chlorine bleach and perchloroethylene (PCE) ........ 17 Anti-chlorine treatment.................... 17 Description of the machine (with detergent dispensing compartment) ...... 19 Models with detergent dispensing compartment (WEK)............. 19 Description of the machine (without detergent dispensing compartment).... 20 Models without detergent dispensing compartment (WEK) .......... - Page 4 Contents Starch ..........................40 Adding via the detergent compartment ................. 40 Adding directly into the drum .................. 41 Without spin ........................41 Programme stop........................42 Programme cancellation...................... 42 Cancelling a locked programme..................42 Skipping a programme ......................43 Optional modules: ...................... 45 Liquid dispensing (optional for machines with dispenser compartment)......
- Page 5 Contents Removing the transport safety panels ................69 Plumbing ..........................70 Connection to the cold water supply .................. 70 Dispensing agent connection to the liquid dispensing mixing compartment ..... 71 Water drainage ........................72 Electrical connection ......................72 Programme chart ...................... 73 Programme chart - Basic programmes ................
- Page 6 Contents Programme chart - Sluice ....................105 Sluice programme sequence.................. 106 Programme chart - Water recovery (WRG)................ 107 Control panel ........................ 108 Control panel ........................108 Function buttons ....................... 109 General information ...................... 111 Overview of function levels ....................111 Access to Supervisor level / changing the password.......... 112 Password...........................
- Page 7 Contents Block programming ......................136 Entering Block programming.................. 136 Basic parameter settings.................... 136 Block name ........................ 137 1. Block activation...................... 138 2. Programme stop 1.................... 138 3. Programme stop signal 1 .................. 138 4. Heating ........................ 139 5. Free temperature selection.................. 139 6.
- Page 8 Contents Settings option ........................148 Sub-menu options:....................... 148 Memory function ...................... 149 Basic programme lock .................... 149 Buzzer........................... 149 Unit Temperature, Second, Minute, Hour, Length, Mass, Volume, Pressure, Revolutions . 149 Maximum temperature selection.................. 151 Maximum spin speed selection.................. 151 Display..........................
- Page 9 Washing and heating ..................... 174 Drainage with agitation.................. 174 Spin .......................... 174 Function combinations .................... 175 Technical data........................ 176 PW 811 machine data ....................... 176 Electrical connection .................... 176 Installation dimensions.................... 176 Weight and floor load .................... 176 Emissions data ...................... 176 Product safety ......................
-
Page 10: Warning And Safety Instructions
Warning and Safety instructions This washing machine complies with all relevant current local and national safety requirements. Inappropriate use can, however, lead to personal injury and damage to property. It is essential to read the operating instructions before using the washing machine for the first time. - Page 11 Warning and Safety instructions Always supervise any children in the vicinity of the washing machine. Never allow children to play with the washing machine. Disinfection programmes must not be interrupted, as this can have a limiting effect on the disinfection result.
- Page 12 Warning and Safety instructions Preventing problems Do not use chemical cleaning agents such as those use for dry cleaning in this washing machine. There is a risk of fire or explosion with most cleaning agents, e.g. benzine. When washing with high temperatures, remember that the porthole glass becomes hot. Do not let children touch it during a wash programme.
- Page 13 Warning and Safety instructions Technical safety Before setting up the washing machine, check it for any externally visible damage. Do not install or use a damaged machine. The electrical safety of this washing machine can only be guaranteed when correctly earthed.
- Page 14 Warning and Safety instructions If the machine is to be hard-wired, there must be a means of disconnecting all poles from the power supply. The mains switch must be close to the washing machine and be clearly identifiable, unhindered and easily accessible at all times.
- Page 15 Warning and Safety instructions Correct use The maximum dry laundry weight for the PW 811 is 12 kg, for the PW 814 it is 16 kg, and for the PW 818 it is 20 kg. The maximum recommended loads for individual programmes are given in the Programme chart. ...
- Page 16 Warning and Safety instructions Avoid contact of stainless steel surfaces with liquid cleaning and disinfecting agents which contain chlorine or sodium hypochlorite. These agents can have a corrosive effect on stainless steel. Aggressive vapours containing chlorine bleach can also be corrosive. Do not store open containers of these agents near the machine.
-
Page 17: Notes On Using Chlorine Bleach And Perchloroethylene (Pce)
Warning and Safety instructions Chlorine and component damage Frequent use of chlorine products increases the risk of damage to components. Notes on using chlorine bleach and perchloroethylene (PCE) The use of substances containing chlorine, such as sodium hypochlorite and chlorine bleach in powder form, can result in damage of the protective layer of stainless steel and corrosion on componentry, depending on the chlorine concentration, the exposure time and the temperature. - Page 18 Warning and Safety instructions Accessories Accessory parts may only be fitted when expressly approved by Miele. If other parts are used, guarantee, performance and product liability claims will be invalidated. Disposal of your old machine Before disposing of an washing machine it is important to disable the door lock. This way you will prevent the risk of children accidentally locking themselves in and endangering their lives.
-
Page 19: Description Of The Machine (With Detergent Dispensing Compartment)
Description of the machine (with detergent dispensing compartment) Models with detergent dispensing compartment (WEK) ⑰ ⑯ ② ⑧ ⑨ ⑧ ⑥ ① ⑦ ⑩ ⑪ ⑬ ⑫ ⑮ ③ ④ ⑭ ⑱ ⑤ Display Connections for external dispenser see "Control panel" pumps Emergency off switch Vapour extraction / free outlet Type AB... -
Page 20: Description Of The Machine (Without Detergent Dispensing Compartment)
Description of the machine (without detergent dispensing compartment) Models without detergent dispensing compartment (WEK) ① ⑮ ② ⑯ ⑥ ⑦ ⑧ ⑨ ⑫ ⑩ ⑪ ④ ⑭ ③ ⑰ ⑬ ⑤ Display Connections for dispenser pumps see "Control panel" Vapour extraction / free outlet Type AB Emergency off switch Communication module slot see "Control panel"... -
Page 21: Operating The Washing Machine
Operating the washing machine Control panel Display When the machine is switched on the welcome screen will appear briefly, followed by the programme list. The last started programme is highlighted. Function buttons These buttons can be allocated specific functions depending on the status of the machine. -
Page 22: Function Buttons
Operating the washing machine Emergency off switch The emergency off switch puts the machine into a safe state in the event of danger or in order to prevent danger. The emergency off switch must be placed in such a way that the user can activate it immediately in an emergency. -
Page 23: Supervisor Card
Operating the washing machine Aa change from upper case to lower case Water intake Dosage Dispensing switched off Washing and heating Drainage with agitation Card Marked Programme locked If a programme is locked, after 1 minute it can no longer be stopped and cancelled with the finish button. -
Page 24: Preparing For Use
Preparing for use Commissioning The machine should be commissioned by a Miele service technician or an authorised Miele Service dealer only. Open the supply valves for water and steam, depending on heating type. Switch the machine on at the on-site mains switch. ... -
Page 25: Preparing The Laundry
Preparing for use Preparing the laundry Empty all pockets. Foreign objects (e.g. nails, coins, paper clips, etc.) can cause damage to fabrics and to components in the machine. Max. load (dry laundry) PW 811 PW 814 PW 818 max. 12 kg max. 16 kg max. -
Page 26: Washing With Dispenser Compartment
Washing with dispenser compartment Adding detergent using the detergent dispenser compartment For standard wash programmes add the detergent for the main wash to the drawer and if desired, add detergent for a pre-wash to the drawer. Add fabric conditioner to the front of the drawer. -
Page 27: Bleaching Agent
Washing with dispenser compartment Bleaching agent Only use bleach on fabrics with the Δ symbol on the wash care label. Liquid bleaching agents must only be dispensed through the designated dispenser drawer compartment. The agent will then be dispensed automatically during the 2nd rinse. Liquid bleaching agents should only be used on coloured textiles which have a wash care label stating that they are colour fast and suitable for bleaching. -
Page 28: Washing Without Dispenser Compartment
Washing without dispenser compartment Continuing the programme after a "Dispensing system fault" message When the dispenser is empty, the pump and the machine switch themselves off and the washing machine indicates a lack of liquid agent. Dosiersystemfehler Dosierbehälter ?? füllen Starttaste betätigen ... - Page 29 Washing without dispenser compartment When a dispenser pump is selected, the following will appear in the display: Dosierkalibrierung Dosierpumpe 1 100 ml nein Tip: The dispensing amount can be set from 0 to 9999 ml in 1 ml increments. Press multifunction button 0/1.
- Page 30 Washing without dispenser compartment The measured value is assigned to the pump. Reattach the hose. ...
-
Page 31: Washing
Washing Detergent dispensing Detergent Avoid dispensing more than the required amount as this can cause dispensing excessive foaming. – Only use low foaming detergents. – Dispense according to the detergent manufacturer's recommendations. The amount to dispense will depend on: – the amount of laundry –... -
Page 32: Changes Before Starting The Programme
Washing Kochwäsche 11,0/11,0 °C Vorwäsche °C Hauptwäsche 1150 U/min + The "" field is highlighted in the display. Tip: The function can be de-selected by pressing the button again. Tip: Press the "Starch stop" button to starch the laundry. Tip: If you do not want a spin after the final rinse, press the ... -
Page 33: Starting A Programme
Change the spin speed by turning the multifunction selector. Press the multifunction selector to confirm the setting. Maximum spin PW 811 PW 814 PW 818 speeds 1150 rpm 1075 rpm 1075 rpm The maximum spin speeds depend on the programmes selected. - Page 34 Washing Press the "Information" button. Further information will appear in the display. For example: 1 Kochwäsche Starttermin: 10.07.2010 Startzeit: 9:47 Kochwäsche Zeit nach Start 23 min Restzeit 0 h 11 min 1 Kochwäsche Restzeit 0 h 11 min Wiederholung nein ...
-
Page 35: Opening The Drum Door After The Programme Has Finished
Washing Opening the drum door after the programme has finished At the end of the programme, when the drum has stopped rotating and no water is left in the machine, the following (for example) appears on the display: Kochwäsche Programmende Tür kann geöffnet werden ... -
Page 36: Procedure In The Event Of A Programme Interruption During Operation
Washing Procedure in the event of a programme interruption during operation: If the programme is interrupted when there is water remaining in the machine or during a spin, the following (e.g.) will appear in the display: Kochwäsche Programmende mit Wasser in der Maschine ... -
Page 37: Washing By Card Operation
Washing by card operation Card operation Cards with at least one programme are intended for a particular type of machine. Blank cards can be used in any machine. Switch on the machine with the I "Power On" button. The welcome screen will appear in the display. Insert the card. -
Page 38: Laundry Load Operation
Washing by card operation If the card is not suitable for this model of machine, the following message will appear in the display: Karteninhalt Vorhandene Programme auf der Karte sind nur für den Maschinentyp ?? geeignet. Insert a suitable card for the model of machine. ... -
Page 39: Additional Functions
Additional functions Language selection The language can be changed temporarily via the flag symbol before starting the programme. The language selected is reset 5 minutes after the end of the programme when the door is opened. Kochwäsche °C Buntwäsche °C Buntwäsche intensiv °C ... -
Page 40: Cancelling The Start Time
Additional functions The current time and date always appear. The entry field for hours is highlighted. Press the multifunction selector to select the hour. Set the hour by turning the multifunction selector. Press the multifunction selector to confirm the value. Press the multifunction selector to select the "Minutes"... -
Page 41: Adding Via The Detergent Compartment
Additional functions Adding via the Starching can be selected before the programme starts by pressing the "Starch stop" button. detergent compartment The wash time will automatically be increased by 4 minutes. Press the "Starch stop" button. The "" field will be highlighted in the display. Tip: The function can be de-selected by pressing the button again. -
Page 42: Programme Stop
Additional functions When programme stage "Without spin" is reached, "Programme stop through Without spin" will flash in the display. End the programme without a spin and with water still in the machine by pressing the "Stop/Finish" button. Tip: The programme can be continued with a spin by pressing the "START"... -
Page 43: Skipping A Programme
Additional functions Kochwäsche °C Hauptwäsche Verriegelt Fertig um 12:35 The display will show the locked state if an attempt is made to cancel the programme by pressing the "Stop/Finish" button. Tip: The programme can be unlocked by pressing the "Unlock" button and entering the password. - Page 44 Additional functions Bereich 2: Hauptwäsche Block 1: Hauptwäsche Schritt Waschzeit 2 Turn the multifunction selector to highlight Area and confirm by pressing the multifunction selector. Select and confirm areas: 1 Pre-wash, 2 Main wash or 3 Rinse. Turn the multifunction selector to highlight Block and confirm by ...
-
Page 45: Optional Modules
Optional modules: Liquid dispensing (optional for machines with dispenser compartment) Dispenser pump Siphon Hose connection (suction side) Hose connection (pressure side) Leakage outlet Suction inlet opening Empty indicator. When the dispenser is empty the pump and the machine switch themselves off. Continuing the programme after a "Dispensing system fault"... -
Page 46: Amount To Be Dispensed
Optional modules: Kochwäsche °C Buntwäsche °C Buntwäsche intensiv °C Switch liquid dispensing off manually using the "Dispensing off" function button. After the programme has started, no detergent will be dispensed via the dispenser pumps and the following message (for example) will be displayed: Kochwäsche 11,0/11,0... -
Page 47: Dispenser Calibration
Optional modules: Dispenser calibration Dispensing calibration is used to measure the throughput of individual dispensing pumps. To go directly to Press and hold multifunction button 2 and switch the machine on "dispenser with "Power On". calibration" when Dosierkalibrierung Hauptmenü the machine is Dosierpumpe 1 switched off:... -
Page 48: Cleaning And Maintenance Of The Dispensing System
Optional modules: Dosierkalibrierung Dosierpumpe 1 100 ml P: nein Press multifunction button 0/1. Stop the pump by pressing button 0/1, or the pump will stop automatically after 60 seconds. Measure the required amount in the measuring vessel. Dosierkalibrierung Dosierpumpe 1 P: 200 ml min... -
Page 49: Peak-Load Negotiation
Optional modules: Peak-load negotiation When a peak-load signal is received, the heating is deactivated and the programme stopped. Activate the peak-load function. The following message appears in the display: Kochwäsche Programmstop durch Spitzenlastfunktion Programm läuft selbständig weiter ... - Page 50 Optional modules: – Deleting data – Module (delete total data and programme data) – Total data (only delete total data) – Programme data (only delete programme data) Tip: The function can be deselected by pressing the "Operating data" button again. If the data storage capacity in the operating data module is full, a message appears when the "START"...
-
Page 51: Total Data
Optional modules: Total data Modul Betriebsdaten Gesamtdaten Programmdaten Select the Total data menu option. After selecting Total data, the following appears in the display (for example): Modul Betriebsdaten Gesamtdaten Gesamteinschaltzeit 200.987 h Betriebsstunden 123456 h ... - Page 52 Optional modules: Select the relevant programme from the programme list and confirm your selection by pressing the multifunction selector. Then a list of all programme starts of "Programme 1 Cottons" will appear with date and start time. Programmdaten Kochwäsche Datum 21.05.2015 Startzeit:...
-
Page 53: Deleting Data
Optional modules: – Block 1: Pre-wash – Duration: 6 min – Water volume: 20 l – Dispensing phase 1: Amount ml (after selecting and pressing the multifunction selector, the 6 dosages are displayed.) – Max. temperature: 12 °C – Holding time: 6 min – Dispensing phase 2: No Deleting data Modul Betriebsdaten Programmdaten... -
Page 54: Weighing System / Weighing Base
Optional modules: Betriebsdaten wirklich löschen? Press the "Save" button. The data is deleted. Weighing system / Weighing base If the machine is equipped with a weighing base, the laundry load weight is displayed in 0.2 kg increments during loading. The max. loading weight for the programme is displayed beside it. -
Page 55: Troubleshooting
Troubleshooting Opening the door and drain valve in an emergency Power failure Switch the machine off. during the Switch off at the on-site mains electricity switch. washing process Close the supply valves for water or steam. To remove the laundry, first the drain valve must be opened manually and then the drum door manually unlocked. - Page 56 Troubleshooting Caution! Danger from rotating drum and danger of scalding. Before inserting the Torx wrench, make sure that the machine is disconnected from the power supply, the drum has stopped and there is no water in the machine. Turn the release element with the inner hexagon with a Torx wrench ...
-
Page 57: Service Interval And Bgr Display
Troubleshooting Tip: It is not necessary to screw the emergency release back up. The door can now be opened. Service interval and BGR display If the following message appears after "Power On" in the machine display, either a service or the annual BGR check must be carried out. - Page 58 Troubleshooting Türschlossfehler Rufen Sie den Kundendienst, wenn Neustart ohne Erfolg. If the door lock fault occurs again after a restart, proceed as described in "Opening the door in an emergency". Call the Service Department if restart does not work. Heizsystemfehler ...
-
Page 59: Miele Service
Troubleshooting Kartenfehler Karte falsch im Kartenleser Insert the card into the card reader correctly. Miele Service In the event of a any faults please call Miele Service. When contacting your dealer or the Service Department, please quote the model and serial number of your machine. These can be found on the data plate: visible above the porthole glass when the drum door is open, or on the back of the machine at the top. -
Page 60: Problem Solving Guide
Problem solving guide Problem solving guide With the help of the following notes, minor faults in the performance of the machine, some of which may result from incorrect operation, can be put right without contacting the Service Department. This will save time and money. The following guide may help you to find the reason for a fault, and to correct it. -
Page 61: An Unsatisfactory Wash Result
Problem solving guide An unsatisfactory wash result Problem Cause and remedy Liquid detergent does not Liquid detergents usually contain no bleaching agents. give the required result. They do not remove fruit, coffee and tea stains. Use a general purpose powder detergent containing a ... -
Page 62: General Problems With The Washing Machine
Problem solving guide General problems with the washing machine Problem Cause and remedy The machine vibrates The machine feet are not level. during the spin cycle. Level the machine and adjust the feet. Fabric softener is not The siphon tube is not correctly positioned or is clogged. completely dispensed or Clean the siphon, see "Cleaning and care - Cleaning the ... -
Page 63: Possible Reasons For Increased Levels Of Foaming
Problem solving guide Possible reasons for increased levels of foaming Problem Cause and remedy Excessive foaming Detergent type Only use detergent formulated for use in commercial washing machines. Domestic laundry detergent is not suitable. Overdosing of detergent Dispense detergent following the instructions on the ... -
Page 64: Large Items Stretched
Problem solving guide Large items stretched Problem Cause and remedy Stretching of large items Please contact Miele Service. during spinning Large items can get stretched during spinning. -
Page 65: Cleaning And Care
Cleaning and care Cleaning and care Carry out cleaning and maintenance of the machine after use if possible. Do not use a pressure washer or hose to clean the machine. Clean the machine casing, control panel and plastic parts with a ... - Page 66 Cleaning and care Remove the siphons, clean with hot water and replace. Cleaning the drip Pull the flap of the detergent compartment on the right hand side channel and down to 45°. siphon If the drip channel and its drain connector are blocked, then these should be cleaned.
-
Page 67: Installation And Connection
Installation and connection Installing the washing machine The washing machine must be installed by Miele Service or by an authorised dealer. Please observe the information on the installation diagram. This washing machine is only intended for items of laundry which have not been impregnated with dangerous or inflammable substances. -
Page 68: For Easy Maintenance
Installation and connection For easy maintenance For ease of future maintenance and servicing, the minimum dimensions and distance to the wall must be observed to enable access. The minimum dimensions and distance to the wall must be observed. Minimum distance to the wall approx. 400 mm to allow for maintenance. -
Page 69: Transport Safety Panels
Installation and connection Transport safety panels Removing the transport safety panels The 2 transport safety panels at the front are each secured with 3 hexagon screws. The transport safety panels at the back are each secured with 4 hexagon screws. The transport safety panels must only be removed when the machine is in place, before it is commissioned. -
Page 70: Plumbing
Installation and connection Retain the transport safety panels. They need to be refitted should the machine ever need to be moved again. Plumbing Water pressure (flow pressure) of a minimum 1 bar (100 kPa) / maximum 10 bar (1000 kPa) is required to guarantee problem free programme operation. -
Page 71: Dispensing Agent Connection To The Liquid Dispensing Mixing Compartment
Installation and connection Dispensing agent connection to the liquid dispensing mixing compartment Connections 1 and 2 are provided for viscous agents. These connections are sealed and need to be drilled open using an 8 mm drill bit. Care must be taken to drill through the first wall (1) only, as there is a deflecting wall (2)10 mm behind it. -
Page 72: Water Drainage
Installation and connection Water drainage AV machines: DN 70 on the machine, DN 70 sleeve on-site. Throughflow rate 200 l/min. If the slope for drainage is extremely steep, the piping must be vented to prevent formation of a vacuum in the machine's drain system. Foam and vapour venting kit BWS If excessive suds form, foam may escape from the vapour vent. -
Page 73: Programme Chart
Fill ratio/Load size Fabric Cotton, linen and mixed fibre fabrics, for example 1:10 - 1:9 bed linen and towelling PW 811 11 - 12 kg Programme + Pre-wash 40 °C, optional PW 814 sequence Main wash 90 °C, Cool down can be activated... -
Page 74: Cottons Programmes
Last rinse hot Final spin Cottons intensive 60 °C 1:10 - 1:9 Fabric Heavily soiled cotton, linen or mixed fibre, e.g. PW 811 bed linen and towelling 11 - 12 kg Programme + Pre-wash 30 °C, optional PW 814 sequence Main wash 60 °C... - Page 75 Programme + Pre-wash 30 °C, optional sequence Main wash 30 °C 1:10 - 1:9 2 rinses PW 811 Final spin 11 - 12 kg Cottons Eco short PW 814 14 - 16 kg Fabric Lightly soiled cotton, linen and mixed fibre...
-
Page 76: Minimum Iron Programmes
Programme + Pre-wash 30 °C, optional sequence Main wash 60 °C 2 rinses 1:20 Final spin PW 811 - 5.6 kg Minimum iron 30 °C PW 814 - 7 kg Fabric Normally soiled synthetic and mixed fibre fabrics PW 818 - 9 kg Programme +... -
Page 77: Delicates And Woollens Programmes
Fabric Machine washable woollens and wool mixtures with a woollens care label 1:25 Programme Main wash 30 °C PW 811 - 4.4 kg sequence Wash rhythm "very gentle" PW 814 - 5.6 kg 2 rinses PW 818 - 7.2 kg Final spin Woollens handwash 30 °C... -
Page 78: Separate Rinse Programme
Programme chart Separate rinse programme Separate rinse Fabric Fabrics that only need to be rinsed and spun Programme 1 rinse sequence Final spin Separate spin programme Separate spin Fabric Items which have been washed and only need to be spun in the machine Programme Final spin sequence... -
Page 79: Programme Chart - Hotel/Restaurant/Catering
Mattress covers 60 °C Fill ratio/Load size Fabric Synthetic waterproof mattress protectors 1:13 Programme + Pre-wash 30 °C, optional PW 811 - 8.6 kg sequence Main wash 60 °C PW 814 - 10.8 kg 2 rinses PW 818 - 13.8 kg Final spin... -
Page 80: Spa Towelling Programmes
Fabric Coloured and white cotton, linen and mixed fibre fabrics, e.g. bed linen and towelling, with heavy 1:13* oil and grease stains. PW 811 - 8.6 kg Programme Main wash 50 °C PW 814 - 10.8 kg sequence + Extra main wash 75 °C, optional** PW 818 - 13.8 kg... -
Page 81: Curtains Programme Package
Pre-wash 40 °C sequence Main wash 90 °C, Cool down can be activated 2 rinses 1:10 Final spin PW 811 - 11 kg Table linen 60 °C PW 814 - 14 kg Fabric Coloured cotton, linen and mixed fibre table linen PW 818 - 18 kg Programme Pre-wash 40 °C... -
Page 82: Programme Chart - Duvets
Programme chart Programme chart - Duvets These programmes are suitable for washing down, natural fibre and synthetic quilts, unquilted and quilted duvets. These wash programmes are only suitable for washing fabrics with a care label stating that they are suitable for machine washing. Down duvets 60 °C Fill ratio/Load... - Page 83 The maximum loads are set out in the chart below. The loads given are approximate only and vary depending on the size and thickness of the bedding. Model Quantity* PW 811 2 pillows or 1 single duvet PW 814 3 pillows or 1 pillow + 1 single duvet...
-
Page 84: Programme Chart - Disinfection
Programme Disinfection 90 °C, 10 min., Cool down can be sequence activated 2 rinses 1:10 Final rinse PW 811- 11 kg Chemo-therm. 60 °C PW 814 - 14 kg Disinfection PW 818 - 18 kg Fabric Cotton, linen e.g. bed linen, towelling Programme +... - Page 85 Pre-wash 40 °C Disinfection 90 °C, 10 min., Cool down can be activated 1:13 3 rinses Final spin PW 811 - 8.6 kg PW 814 - 10.8 kg Incontinence laundry 90 °C PW 818 - 13.8 kg Fabric Heavily soiled personal clothing, cotton...
-
Page 86: Disinfection - General Information
Programme chart Disinfection - general information What is disinfection? Deactivation and reduction in number of pathogens transmitting diseases to such an extent that the transmission of diseases and infection is no longer to be anticipated. Thermal disinfection Thermal disinfection is carried out by the action of a defined temperature over a holding time. -
Page 87: Vah List
Programme chart VAH list VAH = Association for Applied Hygiene (previously DGHM = German Society for Hygiene and Microbiology) The VAH/DGHM list describes the procedures required for routine prophylactic disinfection, and in particular for the prevention of infection in hospitals, doctors' offices, public areas and other areas where there may be the risk of infection spreading. With respect to an officially directed disinfection, § 18 of the Infection Protection Act is invoked. -
Page 88: Clean Machine' Programme
Programme chart 'Clean machine' programme For cleaning the detergent dispenser drawer, the drum, the suds container and the drainage system. Carry out the "Clean machine" programme regularly if you frequently use disinfection programmes or low temperature programmes, or to get rid of coarse soiling. Clean machine* Material Without load... -
Page 89: Programme Chart - Facility Management
Final spin Mops standard 60 °C / 90 °C + finish 1:10 Fabric Cotton, viscose, polyester and microfibre mops PW 811- 11 kg PW 814 - 14 kg Programme Programme sequence as for Mops standard, PW 818 - 18 kg sequence then:... - Page 90 Cotton, viscose, polyester and microfibre mops Programme Pre-spin sequence Pre-rinse 1:10 + 2nd pre-rinse, optional PW 811- 11 kg Disinfection* 60 °C, 20 min. PW 814 - 14 kg 3 rinses PW 818 - 18 kg Final spin For number, Mops Ch. Th. Disin.
-
Page 91: Mop Load Size (Cotton)
Programme Pre-spin sequence Pre-rinse + 2nd pre-rinse, optional 1:10 Pre-wash 30°C PW 811- 11 kg Main wash 90 °C, Cool down can be selected PW 814 - 14 kg 3 rinses PW 818 - 18 kg Final spin For number, New mops 60 °C / 90 °C... -
Page 92: Mats / Pads Programmes
Final spin Pads 40 °C / 60 °C Fabric Polishing pads 1:50 Programme Pre-rinse PW 811 - 2.2 kg sequence + 2nd pre-rinse, optional PW 814 - 2.8 kg Main wash 40 °C / 60 °C PW 818 - 3.6 kg 3 rinses Final spin Tip: The number of mats per load may vary depending on the size, stiffness and thickness of the mats. -
Page 93: Cleaning Cloth Programmes
Cotton, viscose, polyester and microfibre cloths Programme Programme sequence as for Cloths standard, sequence then: 1:20 Finishing agent, damp PW 811 - 5.6 kg or activate block: approx. 350 Damp, wet, dripping wet cloths Th. Dis. cloths 90 °C PW 814 - 7 kg approx. - Page 94 + Pre-wash, optional Disinfection 70 °C, 10 min. 3 rinses Final spin 1:20 Ch. Th. Dis. cloths + 70 °C PW 811 - 5.6 kg finish approx. 350 cloths Fabric Cotton, viscose, polyester and microfibre cloths PW 814 - 7 kg Programme Programme sequence as for Cloths chemo- approx.
-
Page 95: Programme Chart - Fire Service
Programme chart Programme chart - Fire service These programmes are suitable for washing and reproofing fire suits, jackets and trousers, breathing masks and chemical protective suits. Protective clothing programmes Wash protective clothing 60 °C Fill ratio/Load size Fabric Nomex fire suits, jackets, trousers Programme Pre-wash 40 °C sequence... - Page 96 Programme chart Preparing protective clothing for washing Do not stick any labels on. Remove carabiner hooks if possible, or enclose in a side pocket. Close Velcro fastenings or cover with Velcro tape. Wash sheepskin linings separately. Do not wash garments inside out.
-
Page 97: Mask Programmes
Spin damp, empty bags using the Spin wash bags programme. Masks 60 °C Fill ratio/Load size Load Face masks with head straps Programme Disinfection* 60 °C, 20 min. PW 811 - sequence 4 rinses 10 masks Masks with pre-wash 60 °C PW 814 - 13 masks Load For heavily soiled masks with head straps... -
Page 98: Chemical Protective Suits Programmes
A chemo-thermal disinfection (60 °C / 20 min.) is carried out, for which suitable detergents are to be used. Protective suits 60 °C Fill ratio/Load size Fabric Chemical protective suits made of multi-layer laminate PW 811 - Programme Disinfection 60 °C, 20 min. 1 suit sequence 3 rinses PW 814 - Protective suits special 40 °C... -
Page 99: Programme Chart - Professional Cleaners
WetCare sensitive 25 °C Fill ratio/Load size Fabric For non washable garments 1:20 - 1:15 PW 811 Programme + Pre-wash 25 °C, optional 5.6 - 7.4 kg sequence Main wash 25 °C PW 814 Waterproof finish 25 °C 7 - 9.4 kg... -
Page 100: Programme Chart - Immersion Proofing
Fabric For all washable garments requiring reproofing (e.g. outdoor clothing) Programme + Pre-wash 30 °C, optional sequence Main wash 40 °C 1:20 - 1:15 2 Rinses PW 811 Reproofing 40 °C 6.6 kg Final spin PW 814 Rinse/reproof 40 °C 8.2 kg PW 818... -
Page 101: Programme Chart - Equestrian
Programme chart Programme chart - Equestrian This programme is suitable for washing and reproofing horse blankets, saddle cloths, gaiters, hoof boots, bandages, textile halters. Horse blankets 60 °C Fill ratio/Load size Fabric Horse blankets, saddle-cloths, gaiters, hoof boots, bandages, textile halters Programme Pre-rinse sequence... - Page 102 Model Load, maximum 3/4 of the total recommended load Saddle cloths Summer blankets Winter blankets PW 811 PW 814 PW 818 Buckles Metal buckles, hooks and eye fasteners must be covered to protect the drum. Special bags for this purpose are available to order from Miele.
-
Page 103: Programme Chart - Sport
Fabric Polyester, polyamide Programme Main wash 40 °C sequence 2 rinses 1:20 Final spin PW 811 - 5.6 kg Track suits intensive 40 °C PW 814 - 7 kg Fabric Polyester, polyamide PW 818 - 9 kg Programme + Pre-wash 30 °C, optional sequence Main wash 40 °C... - Page 104 + Pre-wash 30 °C, optional sequence Main wash 40 °C 2 rinses 1:15 Reproofing 40 °C Final spin PW 811 - 7.4 kg PW 814 - 9.4 kg Reproof sportswear 40 °C PW 818 - 12 kg Fabric Polyamide and membrane items...
-
Page 105: Programme Chart - Sluice
Programme 2 pre-rinses sequence Pre-wash 60 °C, 5 min. Disinfection 65 °C, 10 min. 3 rinses 1:10 Final spin PW 811- 11 kg Sluice 71°C PW 814 - 14 kg Fabric Heavily soiled personal clothing, towelling and PW 818 - 18 kg bed linen... -
Page 106: Sluice Programme Sequence
Programme chart Sluice programme sequence Sluice Sensitive 65 °C Programme Liquid ratio Thermostop Temperatur Temperature Programmed stage holding time wash time (wash time 2) approx. Pre-wash 1 Cold 5 min Pre-wash 2 Cold 4 min Pre-wash 60°C 5 min 1 min. spin at 500 rpm Disinfection 65°C 10 min... -
Page 107: Programme Chart - Water Recovery (Wrg)
Programme chart Programme chart - Water recovery (WRG) Water recovery cleaning 80°C Fill ratio/Load size Fabric Programme Drain sequence Rinse Drain Wash Drain Rinse Drain Water recovery drainage Programme Drainage sequence... -
Page 108: Control Panel
Control panel Control panel Display When the machine is switched on the welcome screen will appear briefly, followed by the programme list. The last started programme is highlighted. Function buttons These buttons can be allocated specific functions depending on the status of the machine. These appear in the display above the buttons and are highlighted when selected. -
Page 109: Function Buttons
Control panel Emergency off switch The emergency off switch puts the machine into a safe state in the event of danger or in order to prevent danger. The emergency off switch must be placed in such a way that the user can activate it immediately in an emergency. - Page 110 Control panel Aa change from upper case to lower case Water intake Dosage Dispensing switched off Washing and heating Drainage with agitation Card Marked Programme locked If a programme is locked, after 1 minute it can no longer be stopped and cancelled with the finish button.
-
Page 111: General Information
General information Overview of function levels Operator Supervisor Access to Supervisor level using "Settings" function Access with Power On button and password or with card entry. Programme start for all Menu options in main menu programmes Programme start for special Language Time/Date programmes (Approved function) -
Page 112: Access To Supervisor Level / Changing The Password
Access to Supervisor level / changing the password Password The supervisor level is accessed by entering a four-digit password from the character set provided. It can only be selected at the start or end of a programme. Press the button. ... -
Page 113: Change Password
Access to Supervisor level / changing the password The display is reset. Press the "Save" button once you have entered all four characters. The supervisor level will open once you have entered the password. Betreiberebene Hauptmenü Sprache deutsch Uhrzeit/Datum : 11:43... -
Page 114: Language / Time, Date
Language / Time, Date Main menu options – Language – Time/Date – Dispensing – Access mode – Programming – Settings – Change password – Laundry loads Language option Selecting the local language Select the language menu option. Betreiberebene Hauptmenü Sprache deutsch Uhrzeit/Datum... -
Page 115: Time Of Day, Date Option
Language / Time, Date Time of day, Date option This menu option is used to set the current date and time. In the event of a power cut these are retained for approx. 6 weeks. After this time they will need to be reset. Select the Time, Date menu option: ... -
Page 116: Dispensing Option
Dispensing option Dispensing option This menu option allows you to change individual dispensing settings. Miele programmes are saved under the same M.-Nr. after changing the dispensing data. In this case the basic programme lock is not active. Betreiberebene Hauptmenü Dosierung ... -
Page 117: Dispensing Option
Dispensing option In the "Amount and concentration" setting, in dispensing phases 1 and 2 either "No" or "User defined" can be selected. Dosierphase 1 Benutzer definiert Dosierung Dosierpumpe Options: – Dispensing 1 to 6 Dispenser pump: – No – D1 to D13 Dosierphase 1 Benutzer definiert ... -
Page 118: Access Mode Optionaccess Mode Option
Access mode optionAccess mode option Access mode optionAccess mode option In this operating state only approved programmes can be selected and started if "On" has been selected. Betreiberebene Hauptmenü Freigabemodus: aus Programmierung Options: – Off – On Kochwäsche °C Buntwäsche... -
Page 119: Programming
Programming Programme structure Programme header Programme number, Programme name, Material number, Area 1-2-3, Name - area 1-2-3, Weigh, Nominal load, Min. water level, Fill type, Access mode, Lock, Peak load, Hot water control, Price Area 1 Pre-wash Pre-wash 1 to Pre-wash 10 (max. 10 blocks) Area 2 Main wash Main wash 1 to Main wash 10 (max. - Page 120 Programming Programme block Block name Block activation Programme stop 1 Programme stop signal 1 Heating Free temperature selection Temperature Hysteresis Warm up Level 1 Water inlet 1 Dispensing method Dispensing phase 1 Dispensing stop 1 Agitation from level Level stop 1 Wash time 1 Thermostop Level 2...
-
Page 121: Copy Menu Option
Programming Copy menu option Available programme packets, programmes, areas and blocks can be copied using this menu option. Betreiberebene Programmierung Kopieren Löschen When the multifunction selector is operated, the following appears in the display: Betreiberebene Kopieren Programm Bereich ... -
Page 122: Copy Area
Programming Kopieren Programm Zielprogrammnummer: 5 Anzahl Programme Enter the target programme number and copy it using the "Save" button. If you wish to copy to a target programme place that is already occupied by another programme, the security question will appear. Kopieren ... -
Page 123: Copy Block
Programming Kopieren Bereich Zielprogramm: Synthetikbetten Zielbereich 3 Spülen Go to target programme and confirm. Select the target programme number and confirm. Go to target area and confirm. Select the target area Pre-wash, Main wash or Rinse and confirm. ... -
Page 124: Deleting A Menu Option
Programming Go to Source area and confirm your choice. Select the source area Pre-wash, Main wash or Rinse and confirm your selection. Go to Source block and confirm your selection. Select the source block and confirm your selection. ... -
Page 125: Deleting A Programme
Programming Select "Programming Delete". When this is selected, the display will show the following: Programmierung Löschen Programm Bereich Programmierung Löschen Bereich Block Deleting a All programmes, a programme packet or an individual programme programme can be deleted with this menu option. -
Page 126: Deleting An Area
Programming Löschen Programm Vorhandene Daten löschen? Press the "Save" button. The overwriting process is carried out and the screen returns to the sub-menu. Tip: When the button is pressed, or if after 30 seconds no button has been pressed, deletion is not carried out and the display returns to the sub-menu. -
Page 127: Deleting A Block
Programming Löschen Bereich Programm : 1 Kochwäsche Vorwäsche Bereich Select the area Pre-wash, Main wash or Rinse and confirm your selection. Press the "Save" button. The security question will appear. Press the "Save" button. ... -
Page 128: Change Menu Option
Programming Löschen Block Bereich Vorwäsche Block 1 Vorwäsche Select the block and confirm your selection. Press the "Save" button. The security question will appear. Press the "Save" button. Deletion will be carried out and the screen will return to the sub- menu. -
Page 129: Create" Menu Option
Programming Press the "Save" button. The parameters that are already set will be saved. Tip: When the button is pressed, or if after 30 seconds no button has been pressed, the changes are not carried out and the display returns to the sub-menu. -
Page 130: Programme Number
Programming Neu erstellen Programm Programmkopf Bereich Programme When this is selected, the display will show the following: number Neu erstellen Programmkopf Programmnummer Programmname Use the multifunction selector to select a free programme number. ... -
Page 131: Programme Name
Programming Programme name Select the Programme name menu option. When this is selected, the display will show the following: Betreiberebene Programmkopf Programmname Materialnummer xxxxxxxxx Jump to the "Programme name" input field. Select a character and press the multifunction selector. -
Page 132: Weighing
confirm the selection. Maximum nominal load value is dependent on the model and is as follows: for PW 811 - 12 kg for PW 814 - 16 kg for PW 818 - 20 kg You have the following options: –... -
Page 133: Fill Type
Programming This value configures the lowest selectable level value. The maximum value is 300 mm. Neu erstellen Programmkopf Mindestwasserstand Füllart Wasserhöhe Select the menu option "Minimum water level". You have the following options: –... -
Page 134: Access Control
Programming Programmes with Absorption Max. recommended load ratio of laundry Laundry to suds ratio (kg:l drum volume) (Example) (kg:l liquid) 1:20 1:8 to 1:10 (PES/BW mixed fibres) 1:10* Medium 1:5 to 1:6 (Cotton flat woven) 1:10* High 1:5 to 1:7 (Cotton towelling) * e.g. -
Page 135: Hot Water Control
Programming If the input peak load signal is present and the programme is in a heating phase, the heating is switched off and the programme is stopped. "Programme stopped by peak load function" appears in the display. If the programme is in Thermostop, the safety interval of the Thermostop is maintained. -
Page 136: Block Programming
Programming You have the following options: – No If "No" is set, a price message will not appear. – 0.10 to 9999.90 in 0.10 increments Press the "Save" button. This concludes the programming of the programme header and you now enter block programming. -
Page 137: Block Name
Programming Programme block Stage Basic setting Block name 20 blank spaces 1. Block activation 2. Programme stop 1 3. Programme stop signal 1 4. Heating 5. Free temperature selection 6. Temperature Cold 7. Hysteresis Normal 8. Warm up * 9. -
Page 138: Block Activation
Programming Blockprogrammierung Blockparameter Blockname : 1. Blockaktivierung nein Enter the block name. 1. Block Block activation can be determined at the start of all block activation programming. Select from the following options in the display under Block ... -
Page 139: Heating
Programming The output "Programme stop" is activated for a programme stop. 4. Heating Used to allow suppression of the heating. Tip: This function can be used e.g. for warm rinses. Choose from the following options: – Yes The heating is activated normally in the heating regulation circuit to reach the required temperature. -
Page 140: Level
Programming Choose from the following options: – No – 1 °C/min to 10 °C/min Heating is permanently activated as required. 9. Level 1 In the programme header, the fill type can be selected between automatic load adjustment, water level, the water quantity and the suds ratio. -
Page 141: Dispensing Method
Programming The assignment of valves to detergent dispensers is as follows: Valves Pre-wash compartment K1, W1 Main wash compartment K2, W2 Fabric softener compartment Special application compartment Direct water intake KD, WD WRG inlet valve The following valves are activated depending on programme blocks: Programme structure Temperature range Actual temperature... -
Page 142: Dispensing Phase 1
Programming 12. Dispensing Determines the dispensing concentration for max. 6 dispenser phase 1 pumps. Choose from the following options: – No Detergent is not dispensed. – User-defined – Dispenser pump 1 dispenser pump per dispensation selectable from D1 to D13 –... -
Page 143: Level Stop 1
Programming Gentle+ 3/27 sec. Wash / Pause User-defined 2 to 99 sec. Off: 2 to 99 sec. Spin speed: Normal Scooping User defined 20 to 70 rpm Start drum rotation: Automatic load control 0 mm to Level 1 Water level 0 mm to Level 1 Water quantity 0 l to Level 1 Laundry to suds ratio... -
Page 144: Thermostop
Programming Duration: 0.15 to 59 sec. 0 to 99 min. Rhythm: Normal Gentle Gentle+ User-defined 2 to 99 sec. Off: 2 to 99 sec. Spin speed: Normal Scooping User defined 20 to 70 rpm Thermostop is locked when "No" is programmed in programme 17. -
Page 145: Dispensing Stop 2
Programming 21. Dispensing Settings as for Dispensing stop 1 stop 2 22. Level stop 2 Settings as for Level stop 1 23. Wash time 2 Settings as for Wash time 1 24. Cool Down Cooling the water to a defined temperature before drainage. Choose from the following options: ... -
Page 146: Drain Level
Programming 29. Drain level A water level can be selected. A residual amount of water can remain in the suds container until the high-speed spin starts. For certain types of laundry this results in an optimal distribution of laundry during spinning to minimise unbalances. No drum rotation takes place. -
Page 147: Repeat
Programming Duration: 0, 1 to 59 sec. 0 to 99 min. Rhythm: Normal Gentle Gentle+ User defined 3/12 to 99/99 sec.* Spin speed: Normal Scooping User defined 20 to 70 rpm 300 - max. rpm** *Total always ≥ 15 **The ranges 1 to 19 and 71 to 299 rpm cannot be selected Maximum spin speed depends on washing machine: Model Max. -
Page 148: Settings Option
Programming The "Block end" output relay was activated at the end of the block. The block end signal activated in the last block remains active until the Finish or Start button or the multifunction selector are pressed. Settings option Access the Settings option. Betreiberebene ... -
Page 149: Dispensing Throughput (D1 To D13)
Programming – Dispensing throughput (D1 to D13) – Dispensing correction factor (D1 to D 13) – Dispenser level reminder (D 1 to D 13) – Password required – Medium water pressure – Heater rating – Customer data – Currency Save the specified parameters. Specify the parameters. - Page 150 Programming Unit Temperature, According to the set language when "auto" is set, the appropriate unit Second, Minute, for temperature, second, minute, hour, length, mass, volume, Hour, Length, pressure or revolutions is used. Mass, Volume, Temperature - unit Pressure, Options: Revolutions –...
- Page 151 Programming – l Volume unit Options: – auto – l – USA gal – CDN gal Pressure - unit Options: – auto – bar – psi Speed - drum rotation Options: – auto – U/min – T/min – rpm – t/mn –...
- Page 152 Programming Area Stage Notes 1 to 19 rpm cannot be selected. 20 rpm to 70 rpm 1 rpm Replication of spin speeds 71 to 299 rpm cannot be selected. 300 rpm to max* 25 rpm Spin speed range for actual spinning When a speed of 500 rpm, for example, is selected, all programmes will spin at no higher than 500 rpm although a higher spin speed might be set in the selected programme.
- Page 153 Programming 1 Kochwäsche 14,0/14,0 kg Spülen Spülen 1 1075 U/min + 1 Kochwäsche 14,0/14,0 Spülen 2 1075 U/min + Options: – Normal – Detail Display standby If the "Display Standby: yes" setting is selected, the display is switched on by pressing any button.
- Page 154 Programming Date display Various different display formats are used in accordance with the language set. Select the date format from the chart below. Country Format Deutschland, England, Niederlande, Day/Month/Year Frankreich, Italien, Finnland, Portugal, Spanien, Dänemark, Norwegen, Griechenland Sweden Year / Month / Day Month/Day/Year Tip: The date format can be changed in accordance with the country.
- Page 155 Programming Run the hose of the dispenser pump that is being checked upwards into a measuring vessel. Irritant agents. Skin and eye irritation. Avoid contact with skin and eyes, wear protective clothing. Return to the main menu by pressing "Back". ...
- Page 156 Programming Einstellungen Förderleistung Dosierung Dosierpumpe 1 6000,0 Dosierpumpe 2 nein Options: – No – 1 to 9999.0 ml/min Dispensing The correction factor can be used if an adjustment is made to the correction factor liquid dispensing. If, e.g. the dispensing agent for Dispensing pump D (D1 to D 13) 1 were altered (to a higher concentration), a rapid modification can be made with the correction factor.
- Page 157 Programming Einstellungen Leermeldung Dosierung Dosierpumpe 1 Dosierpumpe 2 Options: – Yes – No Password The use of a password can be selected here. required Set whether or not you want to use a password. Options: – Yes –...
- Page 158 Programming – Nursing home – Fire brigades/rescue services – Restaurant / Café – Commercial laundry – Small businesses – Hotel/guesthouse – Industry – Youth hostel – Hospital – Riding stables – Schools – Dry cleaners – Housing associations – Other: Surname, First name Street, House number Town, Postcode...
-
Page 159: Laundry Load Menu Option
Programming Currency Options: - auto (in line with selected language) - EUR Euro - GBP pounds sterling - CHF Swiss francs - USD American dollars - RUB Russian roubles - CAD Canadian dollars - CZK Czech krone - DKK Danish krone - PLN Polish zloty - SEK... -
Page 160: Cards
Programming Cards Cards Cards are divided into different applications. There are two different types of card: Supervisor card Key card Supervisor card If a card with saved programmes is placed in the card reader before the programme is started, the controls no longer access the internal programme memory. - Page 161 Programming The programme is transferred to the memory in the controls. Remove the card from the card reader. Tip: The programme is only deleted from the memory when the programme is finished and the card has been removed from the card reader.
-
Page 162: Laundry Load Operation
Programming Key card This card allows access to the main menu in the operator level without entering a password. The card does not need to remain in the card reader to access additional functions. After inserting the card, the following will appear on the display: Betreiberebene ... -
Page 163: Data To Card
Programming Wäscheposten Kochwäsche °C Data to card With this menu option language, dispensing, programme and settings data can be written from the controls onto a card. Data from different machines cannot be combined onto one card. In the Main menu call up the "Data to card" display. ... - Page 164 Programming Betreiberebene Daten zur Karte Programm Dosierung Select "Programme". After selection, the following appears in the display: Daten zur Karte Programm Kochwäsche °C Buntwäsche °C 1-999 Press the multifunction selector to mark the programme you want. ...
- Page 165 Programming The following will then appear in the display during data transfer: Daten zur Karte Dosierung If there was already dispensing data on the card, the security question will appear. Daten zur Karte Dosierung Vorhandene Daten überschreiben? ...
- Page 166 Programming Tip: When the button is pressed, or if after 30 seconds no button has been pressed, overwriting is not carried out and the display returns to the previous menu. Language data Profitronic M provides 11 languages as standard. These can be accessed in the supervisor level via the menu option "Language".
- Page 167 Programming Betreiberebene Hauptmenü Daten zur Steuerung Karte löschen You have the following options: – Data to card – Data to control unit – Deleting a card Select "Data to control unit". When "START" is pressed the following appears in the display, depending on the data content of the card: Language If there is a language on the card, the following appears:...
-
Page 168: Programme
Programming However, existing dispensing data will only be overwritten following additional confirmation. For each programme, dispensing method, dispensing phase 1, 2 (dispenser pump, dispensing amount and level) and dispensing stop 1, 2 (yes or no) are listed. When the dispensed agent is changed, a fast and simple dispensing adjustment is therefore possible. - Page 169 Programming Tip: Existing programmes in the controls will be overwritten. Select the "Programme" menu option. After selection, the following appears in the display: Daten zur Steuerung Programm Programm 13:40 10.05.15 Press the multifunction selector to confirm your selection. ...
- Page 170 Programming If there is enough storage space in the controls, the following appears in the display during data transfer: Daten zur Steuerung Programm If a target programme place was chosen which is already occupied by another programme, the security question will appear. Settings With this menu option settings from the Supervisor level can be copied from the card to the controls.
- Page 171 Programming Betreiberebene Karte löschen Keine löschbaren Daten vorhanden All data has been deleted. Tip: If there are wash programmes on the card, for example, these can be deleted individually. Select the wash programme you want to delete. Betreiberebene ...
-
Page 172: Manual Control
Programming Manual control Switch to manual Manual control is possible before programme start or in a programme control. stop. Press the "Manual control" button to access the password entry screen. Passwort: _ _ _ _ ABCDEFGHIJKLMNOPQRSTUVWXYZ 0123456789 ... -
Page 173: Dispensing
Programming Turn the multifunction selector to select the relevant valve and press to confirm your selection. Handsteuerung Wasserzulauf Ventil : KH Niveau: 100 mm Turn the multifunction selector to select "Level" and press to confirm your selection. Turn the multifunction selector to set the level and press to confirm ... -
Page 174: Drainage With Agitation
Programming If dispensing has taken place, the programme will be ended. Tip: The programme will also be ended if the button is pressed. Washing and Temperature, spin speed and wash rhythm can be set. heating Press the "Washing and heating" function button. ... -
Page 175: Function Combinations
Programming Handsteuerung Niveau: Temperatur °C Drehzahl: nein Dos-Menge: Press the "Stop / Finish" button to end selected functions. Tip: Manual control is ended by pressing the "Stop / Finish" button again. Function Water inlet, dispensing, washing and heating can be selected combinations simultaneously in any combination*. -
Page 176: Technical Data
Technical data PW 811 machine data Electrical connection Voltage see data plate Frequency see data plate Total connected load see data plate Current draw see data plate Fuse rating see data plate Heater rating see data plate Installation dimensions Casing width (without add-on components) -
Page 177: Pw 814 Machine Data
Technical data PW 814 machine data Electrical connection Voltage see data plate Frequency see data plate Total connected load see data plate Current draw see data plate Fuse rating see data plate Heater rating see data plate Installation dimensions Casing width (without add-on components) 920 mm Casing height (without add-on components) 1450 mm... -
Page 178: Pw 818 Machine Data
Technical data PW 818 machine data Electrical connection Voltage see data plate Frequency see data plate Total connected load see data plate Current draw see data plate Fuse rating see data plate Heater rating see data plate Installation dimensions Casing width (without add-on components) 920 mm Casing height (without add-on components) 1450 mm... - Page 180 United Kingdom Miele Co. Ltd. Fairacres, Marcham Road Abingdon, Oxon, OX14 1TW Professional Sales, Tel: 0845 365 6608 E-mail: professional@miele.co.uk Malaysia Internet: www.miele.co.uk/professional Miele Sdn Bhd Australia Suite 12-2, Level 12 Miele Australia Pty. Ltd. Menara Sapura Kencana Petroleum ACN 005 635 398 Solaris Dutamas No.
Need help?
Do you have a question about the PW 811 and is the answer not in the manual?
Questions and answers