Table of Contents

Related Manuals for Miele professional PLW 8617


Summary of Contents for Miele professional PLW 8617
- Page 1 Operating instructions Washer-disinfector PLW 8617 To avoid the risk of accidents or damage to the en-GB machine, it is essential to read these instructions before it is installed and used for the first time. M.-Nr. 11 234 680...
-
Page 3: Table Of Contents
Contents Notes about these instructions.................. 6 Intended use ........................ 7 User profiles......................... 8 User administration ....................... 8 User profiles .......................... 8 Product description...................... 9 Appliance overview ....................... 9 Infeed and outfeed side....................9 Infeed and outfeed side without service panel .............. 10 Control elements on the display..................11 Main menu........................ - Page 4 Contents Selecting a programme ....................... 44 Selecting a load carrier....................44 Selecting programmes from Favourites ................. 45 Starting the programme ...................... 46 Programme sequence ......................47 End of programme....................... 47 Cancelling a programme ..................... 47 Delay start ........................... 48 Network connection...................... 49 Network connection ......................
- Page 5 Contents Technical faults on the cleaning machine ................71 List with active messages ....................71 Troubleshooting......................72 Technical faults without fault number................72 After sales service...................... 73 Electrical connection ...................... 74 Electromagnetic compatibility (EMC) .................. 75 Plumbing .......................... 76 Technical data........................ 77 Disposing of your old machine .................. 78 Appendix .......................... 80 User rights in the Main menu ....................
-
Page 6: Notes About These Instructions
Notes about these instructions Important warnings Information which is important for safety is highlighted in a thick framed box with a warning symbol. This alerts you to the potential danger of injury to people or damage to property. Read these warning notes carefully and observe the procedural instructions and codes of practice they describe. -
Page 7: Intended Use
– Load carriers which are tailored to the load Observe the information issued by the manufacturer of the load. Inappropriate use The PLW 8617 washer-disinfector may not be used for any purposes other than the appropriate use described. This applies in particular to: – Reprocessing of reprocessable medical devices –... -
Page 8: User Profiles
User profiles User administration Access to the machine is restricted to a certain group of people. Au- thorised users are entered in User management via the machine’s web interface. User management is described in the programming manual. A User ID and PIN are required for the user Login on the machine. User actions such as starting a reprocessing programme are saved. -
Page 9: Product Description
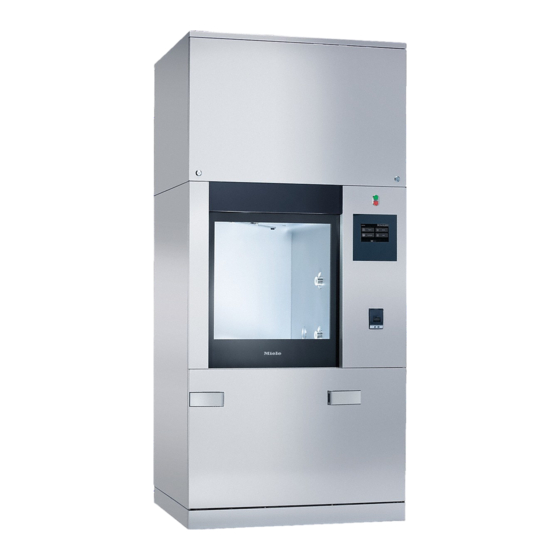
Product description Appliance overview Infeed and out- feed side Service panel for the Customer Service Department I/0 power switch Display Docking system for transfer trolleys, service panel lock Service panel Door closed... -
Page 10: Infeed And Outfeed Side Without Service Panel
Product description Infeed and out- feed side without service panel Door open Water supply for load carriers Filter combination Connections for the Customer Service Department Drawer with containers and connections for process chemicals Data plate Lower machine spray arm Upper machine spray arm... -
Page 11: Control Elements On The Display
Product description Control elements on the display Main menu The machine display shows the control elements light on a black background. In these operating instructions, the display is shown as black on a light background in order to improve legibility. ... - Page 12 Product description Symbols in the Symbol Description/function of the button main menu Opens the list of reprocessing pro- Reprocessing grammes which are assigned to the load carrier Favourites Opens the list of favourites Opens the list of available reprocessing ...
-
Page 13: Programme Start Display
Product description Programme start Once the Reprocessing load carrier, for example, has been selected display in the A 500 menu and the associated Universal reprocessing pro- gramme has been confirmed, the following is displayed: user/ USER Universal 18.06.2018 15:05 0 : 0 0 Duration The pictogram of the load carrier and the selected reprocessing pro- gramme are displayed in the header. - Page 14 Product description Programme start/ Symbol Description/function of the button programme se- Programme start quence buttons/ Programme cancellation symbols Opens the input screen for selecting the start time Door locked Shows the programme sequence display in the default ...
- Page 15 Product description °C Example of a pro- After the programme has started, the following display is shown: gramme sequence Universal user/ USER display 18.06.2018 15:05 Programme phase Main wash 1 0 : 2 5 75 °C Temperature Duration The current programme phase and the temperature reached are also...
-
Page 16: Warning And Safety Instructions
Warning and Safety instructions Risk to health and risk of damage if the operating instructions are not followed. Failure to follow the operating instructions – and in particular the safety instructions and warnings they contain – may result in per- sons being seriously injured or property being seriously damaged. - Page 17 Warning and Safety instructions Label machines which have been taken out of operation and se- cure them from being switched on again without authorisation. The machine may only be put back into operation once it has been suc- cessfully repaired by the Miele Customer Service Department. ...
- Page 18 Warning and Safety instructions Mobile units, modules, inserts and the load must be allowed to cool down before they are unloaded. Any water remaining in contain- ers could still be very hot. Empty them into the wash cabinet before taking them out.
- Page 19 Warning and Safety instructions Pre-treatments with cleaning or disinfecting agents can create foam, as can certain types of soiling and chemical agents. Foam can have an adverse effect on the cleaning and disinfection result. Processes must be set up such that foam cannot escape from the wash cabinet.
- Page 20 Warning and Safety instructions The amount of residual solvents and acids on items going into the cabinet should be minimal. There should be no more than a trace of any solvents with a flash point of below 21 °C. Chlorous solutions, in particular hydrochloric acid, must not be placed in the cabinet.
-
Page 21: Symbols On The Machine
Warning and Safety instructions Symbols on the machine Warning: Observe the operating instructions! Warning: Danger of electric shock! Warning: Hot surfaces: It can be very hot inside the wash cabinet when the door is opened! Disposing of your old machine ... -
Page 22: Main Menu
Main menu Main menu Login Main menu 18.06.2018 15:05 Favourites Reprocessing Documentation System Actions in The main menu of the machine is split into headers and footers and the Main menu 4 menus. The following actions can be performed using the buttons: –... -
Page 23: Login
Main menu Changing the dis- Changing the display language has no impact on the set system lan- play language guage. Reports and printouts are issued in the system language. Press the button in the header of the display. ... -
Page 24: Logout
Main menu Logout The logged-in user is automatically logged out after 24 hours if no button has been pressed on the display in that time, or if the machine carries out an automatic restart. The automatic restart can be set in the web interface under “System, Automatic restart”. -
Page 25: Areas Of Application
Areas of application General information Load carriers The machine can be fitted with a variety of load carriers, which can be combined with a variety of modules and inserts depending on the type and shape of load items requiring cleaning and disinfection. Select load carriers and other equipment, e.g. -
Page 26: Preparing The Load
Areas of application Preparing Only load items which have been declared by their manufacturer as the load suitable for machine reprocessing may be processed. The manu- facturer’s specific reprocessing instructions must be observed. Contaminated load items pose a health risk. Contaminated load items can result in various hazards to the health, which can lead to infections, poisoning, injuries and more depending on the type of contamination. -
Page 27: Preparing The Load
Areas of application – Broken glass can result in serious injury when loading or unloading. Damaged glass load items must not be reprocessed in the ma- chine. – Nickel and chrome-plated load items, and load items made of alu- minium, require special procedures and are not generally suitable for machine reprocessing. - Page 28 Areas of application Empty all load items before loading into the machine, paying partic- ular attention to relevant regulations. Remove non-water soluble residues such as paint, adhesives and polymer compounds using appropriate solvents. Rinse load items which have been in contact with solvents, chloride ...
-
Page 29: Before Starting A Programme
Areas of application Before starting Carry out a visual check before starting every programme: a programme – Is everything correctly loaded/connected for cleaning? – Can the wash water consistently permeate load items with 2 open- ings, such as pipettes and viscometers? –... -
Page 30: Laboratory Glassware And Utensils
Areas of application Laboratory glassware and utensils ... wide-necked Load items with wide necks, e.g. glass beakers, wide-necked Erlen- meyer flasks and petri dishes, or cylindrical items, e.g. test tubes, can be cleaned and rinsed inside and out using rotating spray arms. To do this, the load is positioned in inserts and placed in an empty mobile unit with a spray arm. -
Page 31: Programme Chart
Areas of application Programme chart At delivery, the reprocessing programmes are assigned to the A 503 mobile unit. The fol- lowing modules can be used in various combinations: – A 612 – A 620 – A 621 – A 622 Exceptions to this are the Vials Pipettes programmes (see table). -
Page 32: General Programmes
Areas of application General programmes Programme Area of application Mobile unit Mini – Very short programme for a lightly soiled load and very low final A 503 rinse requirements – For a wide range of soiling – Not suitable for denatured residues such as protein –... -
Page 33: Programmes For Specific Soiling
Areas of application Programmes for specific soiling Programme Area of application Mobile unit Inorganic – Programme for a lightly soiled to moderately soiled load and A 503 moderate to high final rinse requirements – For removing inorganic, acid-soluble residues such as metallic salts –... -
Page 34: Programmes For Specific Loads
Areas of application Programmes for specific loads Programme Area of application Mobile unit Plastics – Programme for lightly soiled to moderately soiled plastics and A 503 moderate final rinse requirements – For temperature-sensitive laboratory equipment, e.g. plastic bottles that are resistant to temperatures of up to 55 °C –... -
Page 35: Additional Programmes
Areas of application Additional programmes Programme Area of application Mobile unit Disin 93/10 – Programme for cleaning and thermal disinfection at 93 °C and A 503 10 min holding time in the first programme phase; wash water is only pumped out after the disinfection process –... -
Page 36: Chemical Processes And Technology
Chemical processes and technology In this section you will find a description of the causes of common chemical reactions which can occur between different types of soiling, chemical agents and the components of the machine, along with their remedies as necessary. This section is intended as a guide. - Page 37 Chemical processes and technology Process chemicals Problem Measures The ingredients in process chemicals have – Follow the process chemical manufac- a strong influence on the longevity and turer’s instructions and recommendations. functionality (throughput) of the dispensing – Carry out regular visual inspections of the system.
- Page 38 Chemical processes and technology Soiling Problem Measures The following substances can damage the – Depending on usage, wipe the lower door elastomers in hoses and seals, as well as seal on the machine periodically with a the plastics in the machine: lint-free cloth or sponge.
- Page 39 Chemical processes and technology Reaction between process chemicals and soiling Problem Measures Natural oils and fats can be emulsified with – Use the programme. alkaline process chemicals. This can lead to – Use a special programme that dispenses a heavy build-up of foam. pH-neutral emulsifiers containing surfact- ants in the pre-rinse.
-
Page 40: Dispensing Liquid Chemical Agents
Dispensing liquid chemical agents Unsuitable process chemicals pose a health risk. Using unsuitable process chemicals will generally cause an unsat- isfactory reprocessing result and can pose a health risk or cause damage to property. Only use process chemicals designed specifically for use in washer-disinfectors and follow the manufacturer‘s instructions on their use. -
Page 41: Containers For Process Chemicals
Dispensing liquid chemical agents 4 external dispensing systems can be connected instead of the 4 op- tional internal dispensing systems. If a dispensing system is to dispense different process chemicals, the chemicals must be changed by the Miele Customer Service Department or an authorised technician. Containers for The drawer for containers with process chemicals is located behind process chemic-... -
Page 42: Filling Containers With Process Chemicals
Dispensing liquid chemical agents Filling containers Fill the containers for process chemicals or replace them with a full with process container if a corresponding message is displayed, e.g. Fill con- chemicals tainer for dispensing system 1 Unlock the service panel on the machine . ... -
Page 43: Filling The Dispensing System
Dispensing liquid chemical agents Push the siphon tube into the neck of the container and screw it into place. Place the container in the drawer. The siphon must be located on the lower side of the support. Push the drawer into the machine. ... -
Page 44: Operation
Operation Switching the machine on and off The I/0 power switch disconnects the machine from the power sup- ply. The switch is located above the display. Press the I power switch to switch the machine on. Once the boot process has finished, the machine is ready for opera- tion. -
Page 45: Selecting Programmes From Favourites
Operation System, Selecting pro- If reprocessing programmes have been defined in the grammes from Manage favourites menu, the programme can be selected using Favourites Favourites the button. Favourites Press the button. Select load carrier menu is displayed. Press the button for the required load carrier, e.g. A 503. ... -
Page 46: Starting The Programme
Operation Starting the programme Check whether the right reprocessing programme is displayed for the load carrier. With the button, you can open the menu for selecting the repro- cessing programmes if you wish to choose a different reprocessing programme. ... -
Page 47: Programme Sequence
Operation Programme sequence The programme will run automatically once it has been started. You can find detailed information about the programme sequence and the programme parameters on the machine display (see “Machine de- scription”, “Control elements on the display”). End of programme After the programme has ended, the following is displayed: –... -
Page 48: Delay Start
Operation Delay start The start of a programme can be delayed, for example, to benefit from economy rates of electricity at night. The delay start period can be set to the exact minute. If soiling is left to dry on the load for longer, the reprocessing result can be adversely affected. -
Page 49: Network Connection
Network connection Network connection The machine can be integrated into an internal network via an Ether- net interface. Only the systems required for machine access via a web interface and for the documentation of reprocessing results (e.g. a PC on which the documentation software is installed) may be oper- ated on this network. -
Page 50: Network Protocols
Network connection Network protocols The machine supports communication via the following network pro- tocols: Network Description Port protocols DHCPv4 Assigning dynamic IPv4 addresses 68/UDP DHCPv6 Assigning dynamic IPv6 addresses 546/UDP Time server 123/UDP HTTPS Web interface for configuring the 443/TCP washer-disinfector The ICMPv4 and ICMPv6 protocols are also supported. -
Page 51: System Settings
System settings System System The menu contains the following functions: user/ USER System Network connections Machine functions Restart Data plate Manage favourites The sub-menus are opened with the buttons. The functions in the sub-menus are described on the following pages. Network connections Network connections menu contains network configuration and... -
Page 52: Changing The Pin
System settings Changing the PIN A user can change their PIN at any time. The minimum length of the PIN depends on the user level: Operator – 4 digits Technician – 6 digits Administrator – 6 digits Change PIN Press the button. -
Page 53: Configuring The Printer
System settings This Pairing PIN must be entered in the external application to com- plete the pairing process. Disconnecting or An existing pairing connection can be disconnected and a pairing re- rejecting pairing quest can be rejected at any time. Press the button next to the corresponding application. -
Page 54: Setting The Network
System settings Network Setting the net- The Ethernet connection is configured in the menu. The net- work work can be configured on the machine display or using the web in- terface. Before the machine is connected for the first time, e.g. to a network printer, the network must be configured on the machine dis- play. -
Page 55: Machine Functions
System settings Machine functions Machine functions menu contains service functions, e.g. for dis- Machine functions pensing systems and for built-in tanks. Once the menu has been opened, the following menu will appear on the dis- play: user/ USER System Machine functions Programme test Self-disinfection Iterative programme... - Page 56 System settings Starting the con- A repeated programme start can be defined for a reprocessing pro- Iterative programme tinuous pro- gramme in the menu. This function can be used gramme for wash-related trials, e.g. material tests, or for periodic decontamin- ation in the event of long downtimes.
-
Page 57: Filling The Dispensing System
System settings Fill dispensing system Filling the dis- function is used to prime the relevant dis- pensing system pensing system. The function must be carried out after a container for process chemicals is filled or replaced with a full container. Fill dispensing system Press the button. -
Page 58: Carrying Out A Programme Test
System settings Carrying out a Newly created or modified reprocessing programmes can be checked programme test Programme test with the . The programme can only be enabled with Programme test parameter if a reprocessing programme has run Checked through the without any faults (see programming handbook, “Programme administration”). - Page 59 System settings The available reprocessing programmes are displayed. Press the button for the required reprocessing programme. The following message will appear on the display: Programme test: Skip programme block with . Door can be opened at end of each programme block. Press OK to confirm the message.
-
Page 60: Restarting
System settings Restarting Restart shuts down the machine controls and then reboots them. Restart This can be used, for example, when you get the prompt Switch machine off and on when you are troubleshooting. Restart Press the button. Restart? confirmation prompt is displayed. -
Page 61: Managing Favourites
System settings Managing favourites You can define your 4 most commonly used programmes as favour- Manage favourites ites in the menu. If the Automatic programme allocation is not activated: Reprocessing After the button has been pressed, all reprocessing programmes assigned to the load carrier are displayed. Favourites If you select the reprocessing programme via the ... -
Page 62: Maintenance
Maintenance Periodic checks This washer-disinfector should be inspected in accordance with local and national safety regulations after every 2000 operating hours, or every 12 months by a Miele approved service technician. Maintenance covers the following: – Electrical safety according to national regulations (e.g. VDE 0701/0702 in Germany) –... -
Page 63: Routine Checks
Maintenance Routine checks Before the start of each working day, the user must carry out a num- ber of routine checks. A checklist is supplied with the machine for this purpose. The following need to be inspected: – All filters in the wash chamber –... -
Page 64: Cleaning The Filters In The Wash Cabinet
Maintenance Cleaning the filters in the wash cabinet The filters in the floor of the wash chamber prevent coarse soiling from coming into contact with the circulation system. Filters can be- come blocked by soiling. They therefore need to be checked every day and cleaned as necessary. -
Page 65: Cleaning The Spray Arms
Maintenance Remove the microfine screen filter. Remove deposits and soiling with running water, using a brush if necessary. Blast the microfine screen filter with compressed air against the dir- ection of flow of the wash water. Insert the microfine screen filter back into the sump. ... -
Page 66: Machine Spray Arms
Maintenance Remove the spray arms as follows: Machine spray Remove any mobile units from the wash chamber. arms Remove the securing clip on the spray arm connection and then pull the lower spray arm upwards and the upper spray arm down- wards. -
Page 67: Cleaning The Machine
Maintenance Cleaning the machine Locking the dis- The machine display can be locked for cleaning and surface disinfec- play tion. Press the button in the header. The following will appear on the display: To unlock the machine display, hold the button for around 3 s. ... -
Page 68: Cleaning The Front Of The Machine
Maintenance Cleaning the front The stainless steel front should only be cleaned with a damp cloth of the machine and a cleaning and disinfecting agent or with a non-abrasive stain- less steel cleaner. To help prevent re-soiling (fingerprints, etc.), a suitable stainless ... -
Page 69: Built-In Printer (Optional)
Maintenance Built-in printer (optional) Lever for opening the flap Paper feed Acknowledgement button LED status Printer status Power supply fault Ready for operation Flashing x1 Not ready for operation Flashing x2 Fault on the printer head Flashing x3 Paper jam/paper roll empty Flashing x4 Temperature fault Replacing the pa-... -
Page 70: Thermal Paper
Maintenance Thermal paper Replacement rolls of thermal paper with a width of 60 mm and an ex- ternal diameter of approx. 50 mm can be obtained from the machine manufacturer. When this is stored under the following conditions, the text will re- main legible for at least 7 years: –... -
Page 71: Error Messages And Instructions
Error messages and instructions The error messages on the machine display are designed to help you to find the cause of a malfunction and to resolve it. However, please observe the following: Repairs may only be performed by the Miele Customer Service Department or an authorised technician. -
Page 72: Troubleshooting
Error messages and instructions Press the button with the message in the left-hand column to open the description of the fault number with information on rectifying the fault. Troubleshooting user/ USER 2841 Fault 18.06.2018 15:05 Description Confirm message with OK. Check user administration. -
Page 73: After Sales Service
After sales service Repairs may only be carried out by the Miele Customer Service Department or an authorised technician. Unauthorised repairs can expose the user to considerable risk. To avoid unnecessary service visits, check that the fault has not been caused by incorrect operation when an error message first appears. -
Page 74: Electrical Connection
Electrical connection All electrical work must be carried out by a suitably qualified electrician in accordance with local and national safety regulations. – The electrical installation must comply with current local and na- tional safety regulations (DIN VDE 0100 in Germany/BS 7671 in the UK). -
Page 75: Electromagnetic Compatibility (Emc)
Electrical connection Electromagnetic compatibility (EMC) The machine has been tested for electromagnetic compatibility (EMC) in accordance with EN 61326-1 and is suitable for operation in com- mercial environments, such as hospitals, medical practices and labor- atories and other similar environments which are connected to the mains power supply. -
Page 76: Plumbing
Plumbing Health risk and risk of damage due to contaminated incoming water. The quality of the incoming water must correspond to the drinking water specification of the country in which the machine is being operated. Please refer to the installation diagram supplied with the machine. –... -
Page 77: Technical Data
Technical data Height 2495 mm Width 1150 mm Depth 990 mm Wash chamber dimensions: Height 680 mm Width 640 mm Depth 800 mm Weight (net) 550 kg Maximum floor load 8 kN/m Voltage, rated load, fuse rating See data plate Compressed air connection: technical 600–750 kPa Steam connection 250–1000/140–180 kPa/°C Water connection water temperature: Cold water/steam condenser... -
Page 78: Disposing Of Your Old Machine
Disposing of your old machine Electrical and electronic machines often contain valuable materials. They also contain materials which, if handled or disposed of incor- rectly, could be potentially hazardous to human health and to the en- vironment. They are, however, essential for the correct functioning of your machine. -
Page 79: Appendix
Appendix... -
Page 80: User Rights In The Main Menu
Appendix User rights in the Main menu Action Open and close the loading door Open and close the unloading door after the end of a pro- gramme depending on the Authentification - End of pro- gramme setting in the web interface ... -
Page 81: User Rights In The System Menu
Appendix User rights in the System menu Main menu/System Network connections Change PIN Pairing Printer Network Machine functions Self-disinfection Iterative programme Fill dispensing system ... -
Page 82: Power Levels Of The Programmes/Mobile Units/Module Combinations
Appendix Power levels of the programmes/mobile units/module combinations Mobile unit Modules Programmes/power levels A 500 – A 603 Mini Standard Universal Intensive Organic Inorganic Agar Plastics Disin 93/10 A 501 Mini Plus Standard Plus Universal Plus Intensive Plus Organic Plus Inorganic Plus Oil Plus Agar Plus Plastics Plus Disin 93/10 Plus... - Page 83 Appendix Mobile unit Modules Programmes/power levels A 503 1–3 modules: Mini – A 606 Standard Universal – A 612 Intensive – A 620 Organic – A 621 Inorganic – A 622 – A 623 Agar Plastics Disin 93/10 A 503 4–6 modules: Mini Plus – A 606 Standard Plus Universal Plus –...
- Page 84 Appendix Mobile unit Modules Programmes/power levels E 941 – 1–4 E 943/2 Mini Plus Standard Plus – 1–4 E 944/2 Universal Plus – 1–2 E 945/2 + 2 extra modules: E 943/2 or E 944/3 Intensive Plus Organic Plus Inorganic Plus Oil Plus Agar Plus Plastics Plus Disin 93/10 Plus E 941 –...
-
Page 85: Optional Extras
Appendix Optional extras Features Standard Version Drain valve (AV) Electric heating (EL) Conductivity monitoring (CS) Spray arm monitoring (RS) Option to switch between steam/electric heating for wash chamber and VE tank (if present) (EL/S) Recycling tank (RT) VE tank (TH) Additional options: 1–4 additional internal dispensing systems (DS) Drain pump (DP) - Page 88 United Kingdom Miele Co. Ltd. Fairacres, Marcham Road Abingdon, Oxon, OX14 1TW Professional Sales, Tel: 0845 365 6608 E-mail: professional@miele.co.uk Malaysia Internet: www.miele.co.uk/professional Miele Sdn Bhd Australia Suite 12-2, Level 12 Miele Australia Pty. Ltd. Menara Sapura Kencana Petroleum ACN 005 635 398 Solaris Dutamas No.
Need help?
Do you have a question about the PLW 8617 and is the answer not in the manual?
Questions and answers