Table of Contents
Advertisement
Quick Links
Advertisement
Table of Contents

Subscribe to Our Youtube Channel
Related Manuals for Miele professional PW 6241


Summary of Contents for Miele professional PW 6241
- Page 1 Operating instructions Washer-Extractor PW 6241 PW 6321 en - AU, NZ To avoid the risk of accidents or damage to the machine it is essential to read these instructions before installing, M.-Nr. 09 179 270 commissioning and using it for the first time.
- Page 2 Gas-heated appliances Safety precautions to take if you smell gas ^ Turn off the gas emergency control valve immediately. This is usually located near the gas meter. ^ Eliminate all sources of ignition in a safe manner. Do not smoke, light cigarette lighters or matches. ^ Do not operate electrical lights or switches, i.e.
-
Page 3: Table Of Contents
Gas connection ............. 41 Abbreviated operating instructions PW 6241, PW 6321 ......42 Warranty . -
Page 4: Warning And Safety Instructions
Warning and Safety instructions Petrol, paraffin, or any easily flammable Explanation of the Warning and liquid must not be stored or used near the machine. Do not use the machine lid as Safety symbols on the machine a storage shelf. Fire and explosion hazard. - Page 5 Warning and Safety instructions Gas-heated washer-extractors Connection should be made via a suitable isolator which complies with Important After installation, maintenance, local and national safety regulations and conversion, repairs and before using for the which is easily accessible for disconnecting first time it is essential that a test for possible the machine from the electricity supply.
- Page 6 Warning and Safety instructions The washer-extractor may only be should be removed using specialist operated without supervision if there is a detergents and/or programmes. floor drain (gully) in the immediate vacinity. Do not use a pressure washer or hose to If the washer-extractor is switched off clean the machine.
- Page 7 Warning and Safety instructions Chlorine and component damage Disposing of your old machine Before disposing of an old machine, first Notes on using chlorine bleach and make the door lock unusable. This way perchlorethylene you will prevent children from accidentally Frequent use of chlorine increases the locking themselves in and endangering their risk of component damage.
-
Page 8: Caring For The Environment
Caring for the environment Tips on saving energy Disposing of the packing material The packaging is designed to protect the To save energy and water, try to load the machine from damage during transportation. maximum for the programme selected. The packaging materials used are selected Underloading is uneconomical. -
Page 9: Description Of The Machine
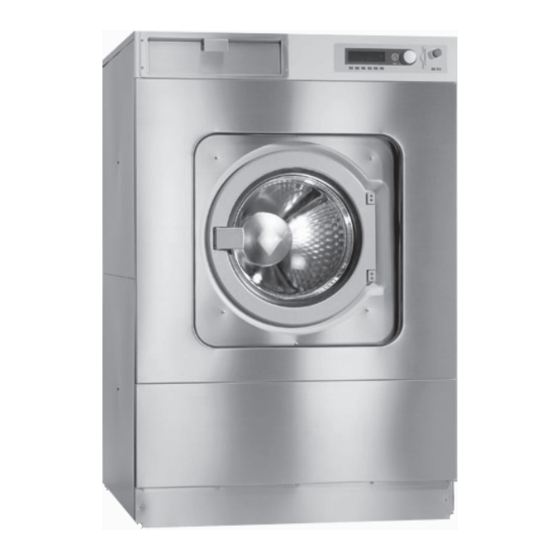
Description of the machine a Emergency stop switch f Service panel Press the red button to switch the machine off. g Plinth b Control panel c Detergent dispenser drawer Pull the handle to open the compartment. d Drum door Pull the door handle to open the drum door. Do not use force to open it. -
Page 10: Control Elements
Description of the machine f g h i d PC / Optical interface Control elements This interface is used for transferring data to a Display the control unit from a PC and vice versa. Cottons 90 °C e Rotary selector Cottons universal 60 °C Turning the selector brings up options and... - Page 11 Description of the machine $ Programme locked Function buttons Once a locked programme has been Pressing the button activates the function started, the End button can only be used to and pressing the button again deactivates it. stop and cancel it during the first minute. f Stop/End Programme unlocked The function button on the right-hand side is...
-
Page 12: How To Wash Correctly
How to wash correctly Sort the laundry The machine must be commissioned by a Miele service technician or a technician authorised by the manufacturer before it is used for the first time. ^ Turn on the on-site taps for water and depending on the type of heating, gas or steam. -
Page 13: Maximum Loads For The Standard Programmes
How to wash correctly Maximum loads for the standard Add cleaning agent programmes (Dry weight of laundry) PW 6241 PW 6321 1 Cottons 90°C 2 Cottons universal 60°C 3 Cottons intensive 60°C 4 Cottons universal 30°C 5 Cottons intensive 30°C 6 Cottons Eco short max. -
Page 14: Detergent Dispensing
How to wash correctly Detergent dispensing Bleaching agents It is important to avoid adding too much Only use bleaching agents on textiles with the x symbol on the wash care label. detergent as this causes excessive foam. – Do not use detergents which create a lot Liquid bleaching agents may only be placed of foam. -
Page 15: Select A Programme
How to wash correctly Select a programme If you do not wish to make any further alterations to the programme: ^ Turn the rotary dial to select a programme ^ Press the START button. The programme (e.g. Programme 1 Cottons universal). will start. - Page 16 If you wish to make alterations before the Spin speed in 25 rpm increments from 0, start of the programme, e.g. to the load 300 to max. 1100 (PW 6241) or 1000 rpm size, temperature or spin speed: (PW 6321).
-
Page 17: Open The Door At The End Of The Programme
How to wash correctly Once a programme has started the programme sequence will appear in the Block 2: Rinse 2 display. Block step: Wash time 1 Cottons Actual level: 22 mm 40 °C Pre-wash 20 °C Rqrd. level: 60 mm Main wash Ready at 12:35... - Page 18 How to wash correctly If the programme was interrupted with water in the drum, or if the programme was stopped, for example, during the spin the following message will appear in the display: Cottons Programme finished. Water in the drum. Cottons Programme finished.
-
Page 19: Card Operation
Card operation Cards on which a programme has been If the card is inserted the wrong way round saved can only be used on the machine the following message will appear in the type for which they have been written. display: Unwritten cards can be used universally. -
Page 20: Additional Options
Additional options Language selection The following (example) will appear in the display: The language shown in the display can be changed briefly before starting a Cottons 10.0 /16.0 kg programme if you wish. To do so use the Start time: : 10 Start date: 2.4.2010 button underneath the flag symbol. - Page 21 Additional options Dispensing directly into the drum With pre-wash Make the starch up following the For heavily soiled laundry the standard manufacturer's instructions on the programmes 1 to 10, can have a pre-wash packaging. Once the "Starch stop" added. To do so press the "Block+" button programme stage has been reached open the door and add the starch.
-
Page 22: Programme Stop
Additional options Programme stop Programme cancelled with a locked programme To halt the programme press the f button. The programme remains stationary. It is not possible to stop or cancel a programme if the programme is locked. Cottons Programme stop Cottons 90 °C Main wash... -
Page 23: Changing The Programme Order
Additional options Changing the programme order The order of the programme in progress can be changed or programme blocks can be repeated. ^ Press the f button and the programme will stop. Cottons Programme stop ü ^ After pressing the ü button the current area, block or step will appear in the display. -
Page 24: Optional Modules
Optional modules Liquid dispensers To deselect the liquid dispensing system Cottons 90 °C Dispenser pump Suction pipe Cottons universal 60 °C Cottons intensive 60 °C ä You can switch off the liquid dispensing system manually before starting a programme by setting the ä "Dispensing" system to off. - Page 25 Optional modules Commissioning the dispensing pumps Dispenser calibration ~ Main menu Before the liquid dispensing pumps can be Dispenser pump 1 used the liquid agent must be drawn up into Dispenser pump 2 the system and the amount to be dispensed set.
-
Page 26: Peak Load Cut-Out
Optional modules Peak load cut-out Operating data By pressing the \ "Operating data" button If the peak-load cut out function is activated the heating will switch itself off and any the operating data module can be used to programme running will be stopped. The read or delete operating data either before following message will appear in the display: the start of a programme, or after it has... - Page 27 Optional modules Programme data ~ 1 Cottons Total data Date: 21.05.2010 Start time: 11:30 Operating data module Date: 21.05.2010 Start time: 12:30 Total data Programme data Select the required programme start from the list for programme 1 Cottons and confirm After selecting Total data the following your choice by pressing the rotary dial.
-
Page 28: Weighing System
Optional modules Weighing system Delete data If the machine has been equipped with a Operating data module weighing system module the weight of the Programme data laundry in the machine will be displayed in Delete data 0.2 kg increments. The maximum load for the programme selected will show next to the actual weight in the drum. -
Page 29: Problem Solving Guide
Problem solving guide The door will not open Power cut ^ Press against the door handle and at the same time switch the machine off and then Programme stop on again. Then try to open the door again. Press the start button. ü... - Page 30 ^ Use a low foaming detergent or contact your detergent supplier for advice. Please contact the Miele Professional Service Department. – Very soft water ^ In areas with very soft water (hardness level 1) dispense less detergent as specified by the detergent manufacturer.
-
Page 31: Error Messages
^ To continue the programme with heating press the START button. If a disinfection programme was running the programme will be cancelled if this message appears. Call the Miele Professional Service Department. The display remains dark. There is no power to the machine. -
Page 32: After Sales Service
When contacting the Professional Service ^ If the programme still will not start please Department, please quote the Model, Serial call the Miele Professional Service number (SN) and Material number (M.Nr) of Department. your machine. These are shown on the data plate. -
Page 33: Cleaning And Care
Cleaning and care The machine should be cleaned and The grille over the cooling fan at the back of checked over immediately after use where the machine should be checked for soiling possible. from time to time and cleaned if necessary. Do not use a pressure washer or hose to clean the machine. - Page 34 Cleaning and care Clean the filter as follows: ^ Place a suitable 2 litre capacity container below the filter. The filters in the water inlet valve should be checked from time to time for soiling and cleaned if necessary. ^ Turn the lid a half to a full turn anti-clockwise to open the filter.
- Page 35 Cleaning and care Drum bearings When the machine is not in use Once the service interval has been reached If the machine is not going to be used for a the following message will appear in the longer period of time (4 weeks or more) the display: drum bearings should be lubricated as described above and the drum rotated a few...
-
Page 36: Explanation Of Symbols On The Data Plate
16 Indentification/Year of manufacture 17 Commissioning date Registered on the A scale 18 Electric heating Washing Spinning 19 Fuse rating (on-site) PW 6241 60 dB 82 dB 20 Indirect steam heating PW 6321 60 dB 80 dB 21 Direct steam heating... -
Page 37: Notes For The Installer
Notes for the installer Unscrew the hex screws from the bottom This machine must be installed by a Miele edge of the front access panel and then take authorised technician only. the access panel off. Unscrew the hex screws from the back panel and then take the back panel off. -
Page 38: Plumbing
Notes for the installer Cold water Hard water Hot water Plumbing Connection must be made to the water supply via a tap which conforms to local and national regulations. This work must be carried out by an authorised person in accordance with local and national regulations. -
Page 39: Dispenser System Connections
Notes for the installer Connection to cold water supply only 1" Be carefull to only drill through the first wall (1). There is a second one located 10 mm behind it to deflect the agent and this must not be drilled into. Any connections that have been drilled open 3/4"... -
Page 40: Electrical Connection
The electric heating is set ex-works to The electrical components of machines PW 24 kW (PW 6241), 30 kW (PW 6321). 6241and PW 6321 comply with EN 60335-1 and EN 60335-2-7. The heating will only be activated with a minimum suds levels of 110 mm column of water. -
Page 41: Steam Connection
Notes for the installer Steam connection Steam connection must only be carried out by an authorised installer. See installation diagram and installation instructions supplied with the machine. A steam valve and condensate trap are available to order from the Miele Spare Parts Department. -
Page 42: Abbreviated Operating Instructions Pw 6241, Pw 6321
Abbreviated operating instructions PW 6241, PW 6321 1. Sort the laundry Only use this machine to wash items which are specified by the manufacturer to be machine-washable on the wash-care label. Any other applications may be dangerous. The manufacturer is not liable for damage resulting from improper use or operation. -
Page 43: Warranty
Warranty Please contact Miele for details concerning warranty terms and conditions. See the back cover for contact details. M.-Nr. 09 179 270... - Page 44 M.-Nr. 09 179 270 / 00 Alteration rights reserved/3513...
Need help?
Do you have a question about the PW 6241 and is the answer not in the manual?
Questions and answers