Table of Contents
Advertisement
Quick Links
Advertisement
Table of Contents

Related Manuals for Miele professional PW 413 SES


Summary of Contents for Miele professional PW 413 SES
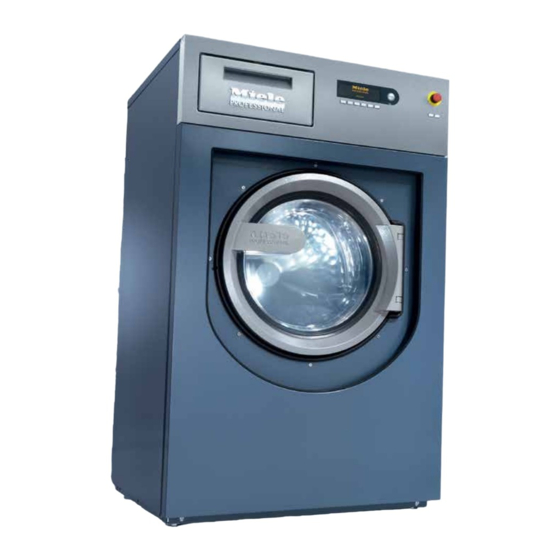
- Page 1 Operating and installation instructions Commercial Washing Machine PW 413 SES PW 418 SES To avoid the risk of accidents or damage to the en-AU,NZ appliance, it is essential to read these instructions before it is installed and used for the first time. M.-Nr. 10 709 710...
-
Page 2: Disposing Of Your Old Appliance
Caring for the environment Disposal of the packing material Energy saving tips The packaging is designed to protect the Energy and water consumption washing machine from damage during – To get the most out of your machine, load transportation. The packaging materials the maximum dry load for the programme used are selected from materials which are you are using. -
Page 3: Table Of Contents
Contents Caring for the environment .................... 2 Disposing of your old appliance.................... 2 Warning and Safety instructions.................. 6 Correct application........................ 6 Preventing problems ......................8 Technical safety........................9 Correct use.......................... 11 Chlorine and component damage..................13 Notes on using chlorine bleach and perchloroethylene (PCE) ........ 13 Anti-chlorine treatment.................... - Page 4 Opening the door and drain valve in an emergency ............35 Opening the door in an emergency in case of a power cut ........... 36 Fault messages ...................... 37 Miele Professional Service ..................... 38 Problem solving guide ..................... 40 Problem solving guide ......................40 The programme does not start....................
- Page 5 Contents Display standby........................63 Contrast setting ........................63 Clock display........................63 Date display......................... 64 Dispenser calibration......................64 Dispensing throughput (D1 to D13) ..................66 Dispensing correction factor (D1 to D13) ................66 Dispenser level reminder (D1 to D13).................. 67 Password..........................68 Medium water pressure.......................
-
Page 6: Warning And Safety Instructions
Warning and Safety instructions This washing machine complies with current safety requirements. Inappropriate use can, however, lead to personal injury and damage to property. It is essential to read the operating instructions before using the washing machine for the first time. They contain important information on the safety, use and maintenance of the washing machine. - Page 7 Warning and Safety instructions Always supervise any children in the vicinity of the washing machine. Never allow children to play with the washing machine. Disinfection programmes must not be interrupted, as this can have a limiting effect on the disinfection result.
-
Page 8: Preventing Problems
Warning and Safety instructions Preventing problems Do not use chemical cleaning agents such as those used for dry cleaning in this machine. There is a risk of fire or explosion with most cleaning agents, e.g. benzine. When washing with high temperatures, remember that the porthole glass becomes hot. Therefore, prevent children from touching the porthole glass during the wash process. -
Page 9: Technical Safety
Warning and Safety instructions Technical safety Check for any visible exterior damage before installing and operating the washing machine. Do not install or operate a damaged washing machine. The electrical safety of this washing machine can only be guaranteed when continuity is complete between it and an effective earthing system which complies with current local and national safety regulations. - Page 10 Warning and Safety instructions Demand for provision of a central emergency stop mechanism A separate and easily accessible central emergency stop mechanism which can be connected to any machine must be provided on-site by the operator. (Reference: DIN EN ISO 10472-1:2009-10 Safety requirements for industrial laundry machinery - sub-section 5.2 Electrical hazards)
-
Page 11: Correct Use
Warning and Safety instructions Correct use The maximum dry laundry weight for the PW 413 is 13-14 kg and for the PW 418 it is 18-20 kg. See the "Programme chart" for the maximum recommended loads for individual programmes. Before using the machine for the first time, ensure that the transit bars have been removed (see "Installation and connection - Removing the transit bars"). - Page 12 Warning and Safety instructions Avoid contact of stainless steel surfaces with cleaning and disinfecting agents containing liquid chlorine or sodium hypochlorite. These agents can cause corrosion on stainless steel. Aggressive chlorine bleach vapour can also cause corrosion. Do not store open containers of these agents near the appliance.
-
Page 13: Chlorine And Component Damage
Warning and Safety instructions Chlorine and component damage Frequent use of chlorine products increases the risk of damage to components. Notes on using chlorine bleach and perchloroethylene (PCE) The use of substances containing chlorine, such as sodium hypochlorite and chlorine bleach in powder form, can result in damage to the protective layer of stainless steel and corrosion on componentry, depending on the chlorine concentration, the exposure time and the temperature. -
Page 14: Accessories
Warning and Safety instructions Accessories Only use genuine Miele spare parts and accessories with this machine. Using spare parts or accessories from other manufacturers will invalidate the warranty, and Miele cannot accept liability. Disposing of your old appliance Before disposing of a washing machine, it is important to disable the door lock. -
Page 15: Guide To The Machine
Guide to the machine ① ⑭ ⑤ ⑥ ⑦ ⑧ ⑨ ⑪ ⑩ ③ ⑬ ② ⑫ ④ Display 2 x hard water connection see "Control panel" (Optional) Door handle Connections for dispenser pumps Drum door Vapour extraction / free outlet Type AB Four adjustable feet Communication module slot The XKM RS232 communication module... -
Page 16: Operating The Washing Machine
Operating the washing machine Control panel ① ② ③ ④ ⑤ ⑥ Display When the machine is switched on the welcome screen will appear briefly, followed by the first programme or the last programme started. Function buttons These buttons can be allocated specific functions depending on the status of the machine. -
Page 17: Function Buttons
Function buttons Stop/Finish The right-hand function button is used as the finish button after a programme has started. After pressing the button, the selected programme is stopped. If it is pressed again, the programme is cancelled. Settings Back Return to previous display page. /... -
Page 18: Preparing For Use
Preparing for use Commissioning The machine must be commissioned by a Miele service technician or a technician authorised by Miele. Open the supply valves for water and steam, depending on heating type. Switch the machine on at the on-site mains switch. ... -
Page 19: Max. Load
Preparing for use Max. load (dry laundry) PW 413 PW 418 max. 13 kg max. 18 kg Maximum load weights are given in the programme chart. Loading the washing machine Switch on the washing machine with the button. Pull the door handle to open the drum door. ... -
Page 20: Washing
Washing Amount to be dispensed Please follow the detergent manufacturer's instructions. It is particularly important to observe manufacturer's instructions when using a combination of cleaning agents and special application products. Products must only be used for applications approved by the manufacturer to avoid any material damage or the occurrence of strong chemical reactions. - Page 21 Washing When a dispenser pump is selected, the following will appear in the display: Dispenser calibration Dispenser pump 1 100 ml P: No Useful tip: The dispensing amount can be set from 0 to 9999 ml in 1 ml increments. Press the multifunction button ...
-
Page 22: Detergent Dispensing
Washing Press the "Save" button. The measured value is assigned to the pump. Reattach the hose. Detergent dispensing Avoid dispensing more than the required amount as this can cause excessive foaming. – Only use low foaming detergents. – Dispense according to the detergent manufacturer's recommendations. -
Page 23: Starting A Programme
Washing Maximum spin PW 413 PW 418 speeds 1025 rpm 950 rpm The maximum spin speeds depend on the programmes selected. Starting a programme Press the "START" button. The wash programme will start. After the programme has started, the programme sequence is shown in the display. -
Page 24: Opening The Drum Door After The Programme Has Finished
Washing Opening the drum door after the programme has finished At the end of the programme, when the drum has stopped rotating and no water is left in the machine, the following (for example) appears in the display: Cottons universal Programme finished The door can be opened ... - Page 25 Washing Cottons universal Programme finished, machine still hot Wait until the laundry has cooled down. The door can then be opened. If no further wash programmes are planned: Switch off the machine with the 0 "Power Off" button. ...
-
Page 26: Programme Chart
Programme chart These programmes are suitable for washing all machine-washable fabrics in the commercial laundry sector. Cottons programmes Cottons universal 60 °C Fill ratio/Load size Fabric Normally soiled cotton, linen and mixed fibre fabrics, e.g. bed linen and towelling Programme +... -
Page 27: Bedding Programmes
Programme chart Intensive + Pre-wash 60 °C Fill ratio/Load size Fabric Heavily soiled cotton, linen or mixed fibre, e.g. bed linen and towelling 1:10 Programme Pre-wash 30 °C PW 413 - 13 kg sequence Main wash 60 °C PW 418 - 18 kg 2 rinses Last rinse hot* Final spin * The standard programme Cottons 60 °C is programmed for hot water rinses. - Page 28 Programme chart Bedding load sizes The maximum loads are set out in the chart below. The loads given are approximate only and vary depending on the size and thickness of the bedding. Model Quantity* PW 413 3 pillows or 1 pillow + +1 duvet PW 418 4 pillows or 2 pillows + +1 duvet or 2 duvets * A duvet is equal to approx.
-
Page 29: Additional Functions
Additional functions Programme cancellation The programme can be cancelled as follows. Press the "Stop/Finish" button twice in succession. The programme will be cancelled. If the programme is interrupted when there is water remaining in the machine or during a spin, the following will appear in the display: Cottons universal Programme finished. -
Page 30: Communication Module
Additional functions Press the "Unlock" button and enter the password. When the password is entered, the following appears in the display: Unlock programme? Press the "Save" button. The normal display content will appear and the programme can now be cancelled. -
Page 31: Optional Modules
Optional modules Liquid dispensing a c b Dispenser pump Siphon Hose connection (suction side) Hose connection (pressure side) Leakage outlet Suction inlet opening Level sensor for level indicator. When the dispenser container is empty, the pump and the machine switch themselves off. Continuing the programme after a "Dispensing system fault"... -
Page 32: Amount To Be Dispensed
Optional modules Amount to be dispensed Please follow the detergent manufacturer's instructions. It is particularly important to observe manufacturer's instructions when using a combination of cleaning agents and special application products. Products must only be used for applications approved by the manufacturer to avoid any material damage or the occurrence of strong chemical reactions. -
Page 33: Commissioning The Dispenser Pumps
Optional modules Commissioning the dispenser pumps Before the liquid dispenser pumps can be used, the liquid detergent must be drawn into the system and the amount to be dispensed set. Dispenser calibration Dispenser calibration is used to measure the throughput of individual dispenser pumps. - Page 34 Optional modules Dispenser calibration Main menu Dispenser pump 1 Dispenser pump 2 Select a dispenser pump. Dispenser calibration Dispenser pump 1 P: No 100 ml Press the multifunction button Stop the pump by pressing the button, or the pump will stop automatically after 60 seconds.
-
Page 35: Troubleshooting
Troubleshooting Opening the door and drain valve in an emergency Power cut during Switch the machine off. the washing Switch off at the on-site mains electricity switch. process Close the supply valves for water or steam, depending on heating ... - Page 36 Troubleshooting Opening the door The drum door cannot be opened. in an emergency Caution! Caution! Danger from rotating drum and danger of in case of a power scalding. Before inserting the Torx wrench, make sure that the machine is disconnected from the electricity supply, the drum has stopped and there is no water in the machine.
-
Page 37: Fault Messages
Troubleshooting The turn resistance will noticeably reduce. When the emergency release element moves freely, the door is unlocked. Useful tip: It is not necessary to screw the emergency release back The door can now be opened. Fault messages Repairs to electrical appliances must only be undertaken by a suitably qualified service technician to ensure safety. -
Page 38: Miele Professional Service
Check the on-site drain system and press "START". A defective drain valve must only be repaired by Miele Professional Service. Dispensing system fault Fill dispenser 1. Press the start button. - Page 39 Troubleshooting Miele Contact Miele Professional Service in the case of any faults. Professional When contacting the Miele Professional Service Department, please Service quote the model, serial number and material number of your machine. This information can be found on the data plate. The data plate is visible above the porthole glass when the drum door is open, or on the back of the machine at the top.
-
Page 40: Problem Solving Guide
Problem solving guide Problem solving guide With the help of the following notes, minor faults in the performance of the machine, some of which may result from incorrect operation, can be put right without contacting the Miele Professional Service Department. This will save you time and money because you won't need to book a service technician. -
Page 41: An Unsatisfactory Wash Result
Problem solving guide An unsatisfactory wash result Problem Possible cause and remedy Grey, greasy particles Insufficient amounts of detergent were used to break down cling to washed laundry. the particles of grease in heavily soiled laundry. Use more liquid detergent. ... -
Page 42: General Problems With The Washing Machine
Problem solving guide General problems with the washing machine Problem Possible cause and remedy The washing machine The machine feet are not level. vibrates during the spin Level the machine and adjust the feet. cycle. The display is in a different A different language has been selected in the "Settings "... -
Page 43: Possible Reasons For Increased Levels Of Foaming
Problem solving guide Possible reasons for increased levels of foaming Problem Possible cause and remedy Excessive foaming An unsuitable detergent was used. Only use detergent formulated for use in commercial washing machines. Domestic laundry detergent is not suitable. Excess detergent was used. Dispense detergent following the instructions on the ... -
Page 44: Large Items Stretched
Problem solving guide Large items stretched Problem Possible cause and remedy Stretching of large items Large items can get stretched during spinning. during spinning This can mostly be prevented by reprogramming. Contact Miele Professional Service. -
Page 45: Cleaning And Care
Cleaning and care Cleaning and care Carry out cleaning and maintenance of the machine after use if possible. Do not use a pressure washer or hose to clean the machine. Clean the machine casing, control panel and plastic parts with a ... -
Page 46: Installation And Connection
Installation and connection Installing the washing machine The washing machine must be installed by a Miele authorised installer. Please observe the instructions in the installation plan. This washing machine is only intended for items of laundry that have not been proofed with dangerous or inflammable substances. To avoid the risk of frost damage, the machine must not be located ... -
Page 47: For Easy Maintenance
Installation and connection For easy maintenance For ease of future maintenance and servicing, the minimum dimensions and distance to the wall must be observed to enable access. The minimum dimensions and distance to the wall must be observed. Minimum distance to the wall approx. 400 mm to allow for maintenance. -
Page 48: Installation On A Raised Plinth
Installation and connection Installation on a raised plinth When installed on a raised plinth, the machine must be secured to the plinth. When installed on a concrete base, the machine must be secured to the base. The plinth must be secured to the floor. Transport safety devices... -
Page 49: Removing The Transport Safety Devices
Installation and connection Removing the transport safety devices The 2 transport safety devices at the front are each secured with 3 screws. The transport safety device at the back is secured with 4 screws. The transport safety devices must only be removed when the machine is in place, before it is commissioned. -
Page 50: Connection To The Cold Water Supply Only
Installation and connection Connection to the cold water supply only The Y-piece is supplied with the machine. A non-return valve supplied separately with the machine is required between the mains water tap and Y-piece. Dispensing agent connection to the liquid dispensing mixing compartment Connections 1 and 2 are provided for viscous agents. -
Page 51: Water Drainage
Installation and connection Care must be taken to drill through the first wall (1) only, as there is a deflecting wall (2) 10 mm behind it. If the drilled out connections are no longer required, they must be resealed. Connections 3 to 12 are provided for liquid dispensing. These connections are sealed and must be cut to suit the diameter of the hose with a suitable hacksaw. -
Page 52: Electrical Connection
Installation and connection Electrical connection The electrical connection must only be carried out by a suitably qualified electrician in accordance with local and national regulations. Useful tip: Open the machine lid. The connection terminals are located on the machine support. When installing a residual current device (RCD) it must be Type B. -
Page 53: General Information
General information Overview of function levels Operator Supervisor Access via "Settings" button and password. Access with Power On Programme start for all programmes Menu options in main menu Programme start only after insertion of coins or Language Time/Date with pre-paid card Choice of user language for the Set date and time duration of a programme... -
Page 54: Access To Supervisor Level / Changing The Password
Access to Supervisor level / Changing the password Password The Supervisor level is accessed by entering a four-digit password from the character set provided. It can only be selected at the start or end of a programme. Press the button until the symbol changes to . ... -
Page 55: Changing The Password
Access to Supervisor level / Changing the password Changing the password You can change the password with this menu option. Main menu/Supervisor level Select Supervisor level Main menu Settings Change password Change password Select and confirm your entry with the OK button. -
Page 56: Language / Time, Date
Language / Time, Date Main menu options – Language – Time/Date – Dispensing – Settings – Change password Language option Select the required language. Select the Language option. Supervisor level Main menu Language english (GB) Time/Date : 11:43 12.9.2015 ... -
Page 57: Time/Date Option
Language / Time, Date Time/Date option This menu option is used to set the current date and time. In the event of a power cut these are retained for approx. 6 weeks. After this time they will need to be reset. Time/Date Select the option. -
Page 58: Dispensing Option
Dispensing option Dispensing option This menu option allows you to change individual dispensing settings. Supervisor level Main menu Dispensing Settings Dispensing Select After selection, the following appears in the display: Supervisor level Dispensing 1 Mops standard °C ... - Page 59 Dispensing option Dispensing phase 1 User defined Dispensing Dispenser pump: Options: – Dispensing 1 to 6 Dispenser pump: – D1 to D13 – Dispensing phase 1 User defined Dispensing amount 0 ml Dispensing delay ...
-
Page 60: Settings Option
Settings option Access the Settings option. Supervisor level Main menu Settings Change password Use the arrow buttons to access the following content: Supervisor level Settings Memory function : Buzzer : Yes ... -
Page 61: Unit Options
Settings option Save the specified parameters. Specify the parameters. Press the "Save" button to save the specified parameters. The parameters are saved and the display switches back to the sub- menu. Useful tip: When is pressed, or if after 30 seconds no button has been pressed, the settings are not saved and the display returns to the main menu. - Page 62 Settings option – hr Unit - length Options: – auto – mm – inches Unit - mass Options: – auto – kg – l Unit - volume Options: – auto – l – USA gal – CDN gal Unit - pressure Options: –...
-
Page 63: Buzzer
Settings option Buzzer If "Yes" is programmed, the buzzer is activated along with the programme stop signal 1 and 2, the block end signal and the fault stop signal. The buzzer frequency is increased with the fault stop signal. The buzzer is switched off after 5 minutes or when a button is pressed. -
Page 64: Date Display
Settings option Options: – 24 h – 12 h Date display Various display formats are used in accordance with the language set. Select the date format from the chart below. Country Format Germany, England, Netherlands, France, Day/Month/Year Italy, Finland, Portugal, Spain, Denmark, Norway, Greece Sweden Year/Month/Day... - Page 65 Settings option Dispenser calibration Dispenser pump 1 100 ml P: No Useful tip: The dispensing amount can be set from 0 to 9999 ml in 1 ml increments. Press multifunction button 0/1. The dispensing hose will fill up. Stop the process by pressing button 0/1. ...
-
Page 66: Dispensing Throughput (D1 To D13)
Settings option Dispensing throughput (D1 to D13) The throughput of the connected dispenser pumps can be set from 0 ml/min to 9999 ml/min in 1 ml/min steps. Access the following content: Supervisor level Settings Dispensing throughput Dispensing correction factor ... -
Page 67: Dispenser Level Reminder (D1 To D13)
Settings option Once you exit the supervisor level, the new dispensing amounts are used in the programmes but the programming is not changed. Dispenser level reminder (D1 to D13) The machine must be programmed if a container level reminder is required. -
Page 68: Password
Settings option Password The use of a password can be deselected here. Set whether or not you want to use a password. Options: – Yes – No However, if a password has already been assigned and the operator then selects "No", they will be prompted to enter the current password when they press . - Page 69 Settings option Sector A sector can be selected here. Options: – Nursing and care homes – Doctors' surgery – Convalescence home – Fire/emergency services – Restaurant/Café – Commercial laundry – Small business – Hotel/guesthouse – Industry – Youth hostel – Hospital –...
-
Page 70: Currency
Settings option Currency Options: - auto (in line with selected language) - EUR Euro - GBP Pounds sterling - CHF Swiss francs - USD U.S. dollars - RUB Russian roubles - CAD Canadian dollars - CZK Czech Koruna - DKK Danish Krone - PLN Polish Zloty... -
Page 71: Technical Data
Technical data PW 413 machine data Electrical connection Connection voltage see data plate Frequency see data plate Total rated load see data plate Current draw see data plate Fuse rating see data plate Heater rating see data plate Installation dimensions Casing width (without add-on components) 795 mm Casing height (without add-on components) -
Page 72: Pw 418 Machine Data
Technical data PW 418 machine data Electrical connection Connection voltage see data plate Frequency see data plate Total rated load see data plate Current draw see data plate Fuse rating see data plate Heater rating see data plate Installation dimensions Casing width (without add-on components) 920 mm Casing height (without add-on components) - Page 74 Miele Australia Pty. Ltd. ACN 005 635 398 ABN 96 005 635 398 Miele Experience Centre and Miele New Zealand Limited Head Office Melbourne: IRD 98 463 631 1 Gilbert Park Drive Head Office: Knoxfield, VIC 3180 Level 2, 10 College Hill Miele Experience Centre South Melbourne: Freemans Bay, Auckland 1011 206-210 Coventry Street...
Need help?
Do you have a question about the PW 413 SES and is the answer not in the manual?
Questions and answers