Advertisement
Quick Links
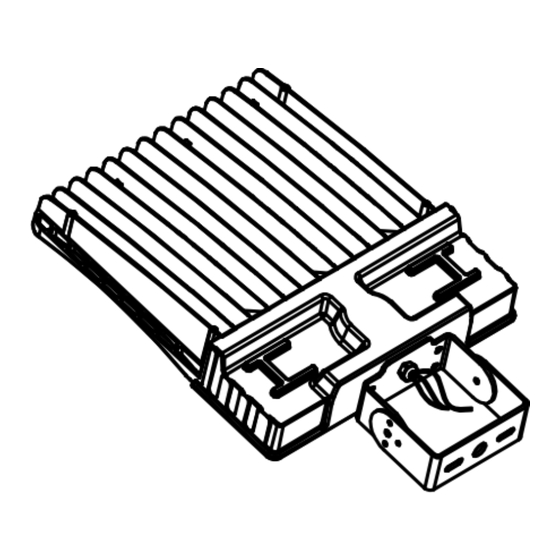
PKL2
Parking Lot Light 2
nd
KEY TECHNICAL DATA
INPUT VOLTAGE
120 - 277V
CONTROL
MOTION SENSOR, REMOTE CONTROL
WORKING TEMP.
-30°F ~ 113°F
SAFETY INFORMATION
BE SURE THE POWER IS OFF! RISK OF ELECTRICAL SHOCK: Always use the switch to
power off. The electrical system you want to connect the device to must be grounded.
Read the instructions before using or powering this device. The safety instructions
must remain with the unit in case of transfer. Any damage to the device linked to an
inappropriate use is excluded from support by the warranty. Before connecting, make
sure that the current and voltage are compatible with this device. We highly recommend
that all installations are made by QUALIFIED ELECTRICIAN. We are NOT responsible by
any means for the use or misuse of the following information. We are NOT responsible in
whole or part for any harm or damage that may or may not be caused. We reserve the right
to revise the components of any product, due to part availability or change ETL, CUL, UL
standards without assuming any obligation or liability to modify any products previously
manufactured and without notice. These instructions do not cover all details of variations
in equipment, nor do they provide every possible contingency to be met. Turn off / unplug
power when installing or service device.
PRE. INSTALLATION
•Carefully remove the fixture from the carton.
•Before beginning assembly, installation, or operation of product, make sure all parts are present.
Compare parts with package contents list and diagram on previous page. If any part is missing or
damaged, do not attempt to assemble, install or operate the product. Contact customer service for
replacement parts.
• Tools required for assembly (Not Included): screwdriver, phillips screwdriver, pliers, electrical tape,
wire cutters, safety glasses, ladder, wire stripper.
ARM MOUNT DIMENSIONS
ARM ASSEMBLY DRAWING
702 Interchange Blvd, Newark DE 19711
Generation
www.spitzerlighting.com
WARNINGS
• To prevent personal injury or product damage, only licensed electricians should install
• To avoid electric shock or component damage, disconnect power before attempting
installation or servicing
• This product must be installed in accordance with the national electric code (NEC) and
all applicable federal, state, and local electric codes and safety standards
• Disconnect product and allow cooling prior to servicing
• Any alteration or modification of this product is expressly forbidden as it may cause
serious personal injury, death, property damage and/or product malfunction
• To prevent product malfunction and/or electrical shock this product must be properly
MOUNTING GUIDES
grounded
• This luminaire is designed to operate in ambient temperatures ranging from -22°F to
104°F and to be horizontally mounted with the LEDs facing down
ARM MOUNTING FOR SQUARE POLE
Arm dimensions
A
B B B
AM1
PKL2-TB-S2P, Straight to square Pole Mount for
PKL2 & PKLH series
Installation Manual
AM2 ADAPTER
PKL2-TB-S2P, Straight to Round
Pole Mount for PKL2 & PKLH
series, includes the PKL2-AB-
ADPT adapter for the round pole
1
Advertisement

Subscribe to Our Youtube Channel
Related Manuals for Spitzer LIGHTING PKL2


Summary of Contents for Spitzer LIGHTING PKL2
- Page 1 ARM MOUNTING FOR SQUARE POLE ARM MOUNT DIMENSIONS Arm dimensions B B B PKL2-TB-S2P, Straight to square Pole Mount for PKL2 & PKLH series ARM ASSEMBLY DRAWING AM2 ADAPTER PKL2-TB-S2P, Straight to Round Pole Mount for PKL2 &...
- Page 2 PKL2 Parking Lot Light 2 Generation Installation Manual ARM MOUNT INSTALLATION →Before beginning installation, turn off the circuit breaker →STEP 2 →STEP 1 Install the attachments Install arm adapter onto and tighten the screws the lamp and tighten the according to the blown up adjusting angle screw for photo.
- Page 3 PKL2 Parking Lot Light 2 Generation Installation Manual SLIP FITTER ASSEMBLY DRAWING →STEP 1 →STEP 2 Drill holes on the square pole Connect the AC wire of the fixture corresponding to the holes on the and tighten the water-proof gasket...
- Page 4 PKL2 Parking Lot Light 2 Generation Installation Manual WIRING DIAGRAM PROBLEM POSSIBLE CAUSE SOLUTION CARE & MAINTENANCE CAUTION: Before attempting to clean the fixture, disconnect the power to the fixture by turning Light will not come on A. Light switch is turned off.
Need help?
Do you have a question about the PKL2 and is the answer not in the manual?
Questions and answers