Advertisement
INTRODUCTION
You have just purchased the latest innovation in terms of espresso machines. Your machine is equipped with a filter holder that has three exclusive systems:
- One is for the progressive compression of the ground coffee when positioning the filter holder. (OPTIPRESS system).
- The second is for ejecting the used coffee.
- The last one is for the use of E.S.E. (Easy Serving Espresso)
![]() pods or soft pods.
pods or soft pods.
It can also be removed, so that you can clean it regularly to keep it in perfect working order. For your safety, the filter holder is fitted with a locking system so that it remains in place when the pressure rises.
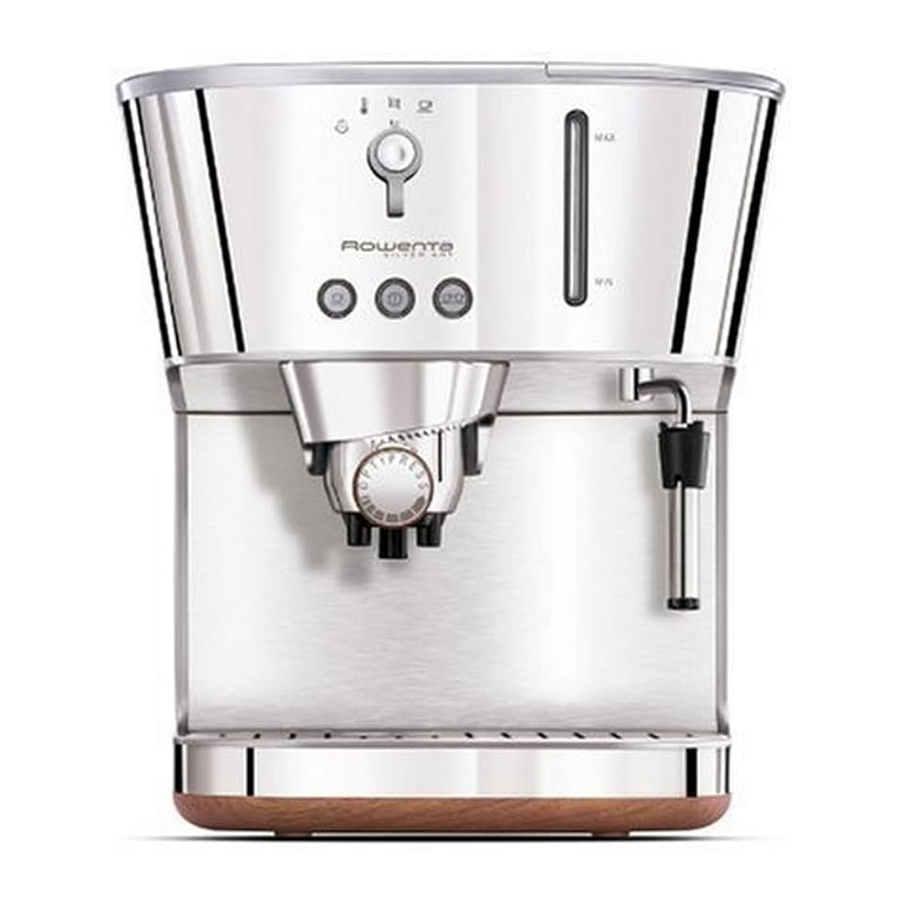
DESCRIPTION

- Water tank cover
- Removable water tank
- Cup tray
- Control panel:
- Selection knob (coffee or steam)
![]() = preheating of coffee
= preheating of coffee![]() = preparation of an espresso
= preparation of an espresso![]() = preheating of steam vapeur
= preheating of steam vapeur![]() = preparation of steam
= preparation of steam
- ON/OFF button with LED
- Button 1 cup with indicator light
- Button 2 cups with indicator light
- Selection knob (coffee or steam)
- Position for the filter holder
- Filter holder with ejection system for the used coffee or pod and progressive compression of the ground coffee or pod: OPTIPRESS system.
- Steam nozzle
- Drip tray grill
- Drip tray with level indicator
- Power cord
 = preheating of coffee
 = preparation of an espresso
 = preheating of steam vapeur
 = preparation of steam
TECHNICAL CHARACTERISTICS

Operating voltage:
This appliance is designed to operate solely with an alternating current of 220-240 V
Type of use: This product has been designed for domestic use only. Any commercial use, inappropriate use or failure to comply with the instructions, the manufacturer accepts no responsibility and the guarantee will not apply.
- Electromagnetic pump: 15-bar
- Filter holder with used coffee ejection system
- 1 or 2 cups
- Adjust the volume of coffee in the cup
- Automatic serving of the selected volume of coffee
- Compatible with all types of pods, E.S.E or soft
- Steam function
- Auto off after 9 minutes (environmental protection).
- Removable tank (capacity: 0,86 litre)
- Power rating: 1350-1600 W
- Tension: 220-240 V 50/60 Hz
- Overheating safety devices
- Dimensions: H. 322,5 mm, L. 291 mm, W. 214 mm
PRACTICAL ADVICE
Before first use, after prolonged periods of non-use or after descaling, the appliance must be cleaned as described in the paragraph "FIRST USE"
Remember to release the filter holder while pressing the "EJECT" button lightly before removing it from the appliance (fig. 1a).

- To obtain an espresso with an intense aroma, we recommend that you use freshly ground special espresso coffee that is suited to the delicate preparation of this type of coffee, as well as cups that are not bigger than 50 ml.
- Keep the ground coffee in the refrigerator, it will conserve its aroma for longer.
- Do not fill your filter holder to the top, use the measuring spoon (1 spoonful for 1 cup, 2 spoonfuls for 2 cups). Remove any excess ground coffee from the edge of the filter holder.
- If the appliance is not used for more than 5 days, empty and rinse the water tank.
- Before removing the tank to fill or empty it, always remember to switch off the appliance.
- Always ensure that the appliance is placed on a flat, stable, heat-resistant surface.
FIRST USE
Rinsing before first use
Before using your coffee machine, clean all of the accessories in water and washing up liquid then dry them.
- Fill the tank with cold water and fit it onto the appliance, ensuring that it is fitted correctly (fig. 1b).

- Switch on the appliance by pressing the ON/OFF button d2
![]() .
. - The temperature light flashes then remains lit. The appliance is ready for use (fig. 2).
![]()
- Insert the filter holder (without ground coffee) into the appliance: turn it towards the right as far as possible (fig. 3).
![]()
- Place a container with a volume of over ½ litre under the filter holder. Turn the switch d1 to the "coffee" position
![]() (fig. 4, 5, 6), then press on the two cup position
(fig. 4, 5, 6), then press on the two cup position ![]() , several times if necessary.
, several times if necessary.
![]()

- If the water doesn't run off (pump priming), repeat the process from the beginning.
- Let the water run from the tank. To stop the flow of water, turn the selector d1 to the position
![]() (fig. 7) and unplug the appliance.
(fig. 7) and unplug the appliance.
![]()
- Remove the tank, empty it and rinse it carefully and fit it back onto the appliance (fig. 1b and 8).
![]()


 , several times if necessary.


PREPARING AN ESPRESSO
If the espresso machine is being used for the first time, the appliance must be cleaned as described in paragraph "FIRST USE".
With ground coffee
The type of ground coffee that you use will determine the strength and taste of your espresso: the finer your coffee is ground, the stronger the espresso.
- Before removing the removable tank, place the selector d1 in the
![]() position (fig. 7).
position (fig. 7). - Fill the tank with cold water and fit it back onto the appliance (fig. 8).
- Switch on the appliance by pressing the ON/OFF button d2
![]() .
. - The LED flashes while the machine is warming up, then remains lit. The appliance is then ready for use.
- Release the filter holder by pressing the
![]() button lightly and turning it towards the left (fig. 9). Using the measuring spoon, place the ground coffee into the filter holder: one measuring spoon (filled to the top) per cup for a good espresso (fig. 10a).
button lightly and turning it towards the left (fig. 9). Using the measuring spoon, place the ground coffee into the filter holder: one measuring spoon (filled to the top) per cup for a good espresso (fig. 10a).

- Remove the excess ground coffee from the edge of the filter holder (fig. 10b).
![]()
- Insert the filter holder into the appliance tightening it by turning it towards the right as far as possible (fig. 12).
![]()
- Place a cup on the grill of the drip tray under the filter holder (fig. 13).
![]()
- Turn the selector d1 to the position
![]() (coffee) (fig. 4).
(coffee) (fig. 4). - Press either the d3 button
![]() for 1 cup or the D4 button
for 1 cup or the D4 button ![]() for 2 cups.
for 2 cups. - After a few moments, the coffee stars to flow.
- When the cups are full, the coffee stops flowing automatically. Move the selector d1 back to the
![]() position (fig. 7).
position (fig. 7). - Remove the cup.
- Release the filter holder: press the
![]() button lightly while turning the filter holder towards the left and remove it from the appliance. Throw away the used coffee using the ejection system by pressing the "push" button on the handle fully (fig. 16). Wash the filter holder under running water, while pressing the "push" button to eliminate the remains of ground coffee (see also paragraph "MAINTENANCE AND CLEANING - The filter holder" for deeper cleaning).
button lightly while turning the filter holder towards the left and remove it from the appliance. Throw away the used coffee using the ejection system by pressing the "push" button on the handle fully (fig. 16). Wash the filter holder under running water, while pressing the "push" button to eliminate the remains of ground coffee (see also paragraph "MAINTENANCE AND CLEANING - The filter holder" for deeper cleaning).
![]()


 position (fig. 7).
It is normal that each time the control selector d1 returns to the position ![]() there is a low noise of running water or steam, due to a specific device which eliminates the pressure from the circuits.
there is a low noise of running water or steam, due to a specific device which eliminates the pressure from the circuits.
With an E.S.E espresso pod
"ESE" for "Easy Serving Espresso" is a pod (44 mm in diameter) of 7g of coffee that has been selected, ground and compacted between two filter papers especially designed to make Italian style espresso ("ristretto" short coffee).
This system permits easy, simple, clean and comfortable use of your machine.
- Before removing the removable tank, remember to place the selector d1 in the position
![]() (fig. 7).
(fig. 7). - Fill the tank with cold water and fit it back onto the appliance (fig. 8).
- Switch on the appliance by pressing the ON/OFF button d2
![]() .
. - The LED flashes during preheating, then remains lit. The appliance is then ready for use.
- Release the filter holder by pressing the
![]() button lightly and turning it towards the left (fig. 15). If required, remove the paper around the pod following the dotted lines (fig. 11). Place the E.S.E pod with the red writing facing downwards (fold the corners of the filter paper back). Ensure that the paper is placed inside the filter, otherwise this could cause leaks. For creamier and thicker froth, the E.S.E pod must be positioned correctly. The pod is designed to make one cup of coffee. The use of 2 E.S.E pods on top of one another is not recommended.
button lightly and turning it towards the left (fig. 15). If required, remove the paper around the pod following the dotted lines (fig. 11). Place the E.S.E pod with the red writing facing downwards (fold the corners of the filter paper back). Ensure that the paper is placed inside the filter, otherwise this could cause leaks. For creamier and thicker froth, the E.S.E pod must be positioned correctly. The pod is designed to make one cup of coffee. The use of 2 E.S.E pods on top of one another is not recommended.
![]()
![]()
- Insert the filter holder into the appliance tightening it by turning it towards the right as far as possible (fig. 12).
- To prepare your espresso, follow the same procedure as for the preparation of an espresso with ground coffee.


With a soft pod
Your machine is also compatible with soft pods (generally 60 mm in diameter).
As this type of pod is not specifically designed for espresso machines, you will obtain a weaker espresso than with an E.S.E. pod.
- Before removing the removable tank, remember to place the selector d1 in the position
![]() (fig. 7).
(fig. 7). - Fill the tank with cold water and fit it back onto the appliance (fig. 8).
- Switch on the appliance by pressing the ON/OFF button d2
![]() .
. - The LED flashes during preheating, then remains lit. The appliance is then ready for use.
- Release the filter holder by pressing the
![]() button lightly and turning it towards the left (fig. 15). Place a soft pod into the filter holder. The pod is designed to make one cup of coffee. The use of 2 pods on top of one another is not recommended.
button lightly and turning it towards the left (fig. 15). Place a soft pod into the filter holder. The pod is designed to make one cup of coffee. The use of 2 pods on top of one another is not recommended. - Insert the filter holder into the appliance tightening it by turning it towards the right as far as possible (fig. 12).
- To prepare your espresso, follow the same procedure as for the preparation of an espresso with ground coffee.
INDIVIDUAL PROGRAMMING OF THE VOLUME OF COFFEE
To change the pre-programmed amount of water, proceed as follows:
- Fill the water tank and turn the machine on (fig. 1 abc, 2, and 4).
- Put a spoonful of coffee in the filter by using a measuring spoon or use an E.S.E. or soft pod.
- Put the filter holder in place and lock it by turning it to the right as far as it will go, up to the stop (fig. 12).
- Place a cup under the filter holder.
- Hold down the "1 cup" button (> 3 sec) until the"1 cup" light flashes quickly. The coffee flows out.
- When the desired amount of espresso is obtained, press the "1 cup" button. This amount will be saved automatically.
- The next time when you press the "1 cup" button, you will obtain the most recently recorded amount. Programming for 2 cups uses the same method, by pressing the "2 cups" button (> 3 sec).
- If you turn off the device, the volumes will need to be reprogrammed the next time you use it.
STEAM FUNCTION
Steam is used to foam milk (for example to make a cappuccino).
- To produce steam, turn the switch d1 to the position
![]() (fig. 17) (to obtain more steam, the temperature needs to be higher than when making coffee).
(fig. 17) (to obtain more steam, the temperature needs to be higher than when making coffee).
![]()
- The ON/OFF button LED flashes again then remains lit. The appliance is then ready for use.
- Put the milk into a container. For best results, we recommend you use a container with a small opening (small jug for example).
- Plunge the steam nozzle into the liquid.
- Turn the switch d1 to the position
![]() (steam) (fig. 18): the steam comes out into the milk.
(steam) (fig. 18): the steam comes out into the milk.
![]()
- In order to give the milk plenty of froth, move the appliance in a circular direction from top to bottom (fig. 19), making sure that the steam nozzle remains upright at the centre of the container. (fig. 21c).The pump operates intermittently, this is normal.
![]()

- To obtain a good froth on your milk, we recommend that you use fresh cold pasteurised semi-skimmed milk, skimmed milk or UHT milk.
- During operation, it is normal for the temperature light of the ON/OFF button to light up and then extinguish.
- When frothing is completed, stop the appliance device (switch d1 in position
![]() ).
). - When the selector d1 is in the position
![]() , the appliance cools down automatically. During the cooling down phase, the LED of the ON/OFF button flashes, and hot water runs into the drip tray. When the optimal temperature for preparing an espresso is reached, the LED remains lit.
, the appliance cools down automatically. During the cooling down phase, the LED of the ON/OFF button flashes, and hot water runs into the drip tray. When the optimal temperature for preparing an espresso is reached, the LED remains lit.


Once the steam has been stopped, clean the steam nozzle immediately and thoroughly using a damp sponge (to avoid residues from sticking) and let a little more steam run through into free air to rinse the inside of the nozzle.

The steam nozzle is still hot!
Be careful not to burn yourself.
MAINTENANCE AND CLEANING
The appliance
- Unplug the machine each time before cleaning and leave the appliance to cool down.
- Clean the outside of the appliance from time to time with a damp sponge. Wash the tank, the drip tray and its grill regularly and dry them.
- Rinse the inside of the tank regularly.
- When a fine white film obscures the tank, carry out a descaling operation. (see paragraph DESCALING).
- Do not use alcohol or solvent based cleaning products.
- Once the appliance has been unplugged, clean the hot water grill and the seal regularly, using a damp sponge (fig. 16).
- Only clean with a damp cloth, do not use detergents or abrasive products.
The filter holder
The appliance that you have purchased is equipped with a removable ejecting filter holder, which allows you to maintain it in perfect working order. We recommend that you clean it each time after use.
These removal/fitting operations must be carried out when the machine has cooled down.
- Removal of the filter holder:
- Remove the filter holder from your machine.
- Dispose of the used coffee or pod by pressing the"push" button (fig. 16).
- Rinse in clear water.
- Remove the back of the filter holder by turning to the left, while pressing in the two brackets.
- Cleaning and rinsing the filter holder:
The filter holder may then be cleaned using a household detergent and a scouring pad, but must be rinsed afterwards in clear water. For best results, you may press the ejection button several times while rinsing. We recommend shaking your filter holder vigorously in order to remove all water. - Fitting the filter holder:
Replace the bottom of the filter holder by rotating it anti-clockwise to lock.
The drip tray
When the drip tray full level is displayed, it must be emptied after removing the grid (fig. 20). The presence of water is normal, and does not mean there is a leak. If necessary, clean the drip tray and its grid with water and a little gentle washing-up liquid. Rinse and dry.

The steam nozzle (Fig 21 a, b)

This accessory consists of 2 parts: one part which is the plastic support and the other which is the metal protection cylinder.
- Before cleaning, unlock the nozzle from the articulated arm by turning it to the left.
- Then slide the metal cylinder along the plastic support.
- Clean these two parts with tap water and some mild washing-up liquid.
- Rinse and dry.
- Once the parts have been properly cleaned, put the metal cylinder back on the support.
- Make sure that you don't damage the silicone seal which makes the nozzle watertight.
- Insert the nozzle on the articulated arm then twist to the right.
DESCALING
- Regular descaling of your appliance, as mentioned in the following paragraphs for the coffee and steam functions, is the best guarantee of your machine's long life. The frequency of the descaling operations must be adapted to suit the hardness of your water. Ask for advice from your local water authority.
- During the operation, do not stand your appliance on a marble surface. The descaler could affect it.
- To make this clearer, please find below a summary table of the frequencies of the descaling operations according to the hardness of water and use:
| DESCALING FREQUENCY | |||
| Av. number of coffees per week | Soft water (<19°th) | Hard water (19-30°th) | Very hard water (>30°th) |
| Less than 7 | Once a year | Every 8 months | Every 6 months |
| From 7 to 20 | Every 4 months | Every 3 months | Every 2 months |
| More than 20 | Every 3 months | Every 2 months | Every month |
If in doubt, we recommend carrying out a descaling operation every month.
No repairs to your machine will be carried out due to:
- descaling not being carried out,
- scale.
Descaling of the coffee function
- Unplug the appliance.
- Insert the filter holder (without ground coffee) into the appliance and lock it into place by turning it towards the right as far as possible (fig. 3).
- Place a container with a volume of more than 1/2 litre under the filter holder (fig. 6).
- Check that the selector d1 is in the position
![]() .
. - Empty the tank and put it in place.
- Fill the tank with a mixture of three parts water to one part commercially available white vinegar (available from hardware stores) or citric acid.
- Switch on the appliance.
- Place the d3 button in the maximum volume position.
- When the temperature light of the ON/OFF button remains lit, you can then switch to the position
![]() (coffee) (fig. 4).
(coffee) (fig. 4). - Press the d4 2 cups button
![]() (fig. 14).
(fig. 14).
![]()
- Let the mixture flow through.
- Wait for 2 minutes then repeat the operation twice, from the step of pressing the d4 2 cups button
![]() (fig. 14).
(fig. 14). - Turn the selector to the position
![]() .
. - Now follow the instructions for descaling the steam function.

Descaling the steam function
- Next place the container under the steam nozzle.
- Turn the selector d1 to the position
![]() (steam heat) (fig. 17) (to obtain steam, the temperature must be higher than that required for coffee).
(steam heat) (fig. 17) (to obtain steam, the temperature must be higher than that required for coffee). - The LED of the ON/OFF button flashes then remains lit.
- Turn the selector d1 to the position
![]() (steam extraction) (fig. 18): the steam pours into the liquid. Let the rest of the mixture flow for 2 minutes.
(steam extraction) (fig. 18): the steam pours into the liquid. Let the rest of the mixture flow for 2 minutes. - During the operation, it is normal for the water temperature light to light up and then go out.
- After a few moments, stop the appliance (position
![]() ).
). - When the selector d1 is in the position
![]() , the appliance cools down automatically. During the cooling down phase, the LED of the ON/OFF button flashes and hot water runs into the drip tray.
, the appliance cools down automatically. During the cooling down phase, the LED of the ON/OFF button flashes and hot water runs into the drip tray.
Rinsing
- After descaling, rinse 2-3 times with clear water (without ground coffee), as described in paragraph "First use".
- Don't forget to rinse the steam nozzle (Fig. 21 a, b).
The appliance is descaled and ready to use again.
TROUBLESHOOTING
| Problems | Possible causes | Solutions |
| The filter holder is blocked. | You have forgotten to release the filter holder. | Press the  button while turning the filter holder towards the left (fig. 15). button while turning the filter holder towards the left (fig. 15). |
| The coffee is not dry after the water has passed through. | You have not tightened the filter holder correctly. | Tighten the filter holder more. |
| The espresso flows too slowly. | The coffee is too finely ground, too oily or powdery. | Choose a more coarsely ground coffee. |
| The filter holder is dirty. | Clean your filter holder according to the instructions in paragraph "MAINTENANCE AND CLEANING - The filter holder". | |
| The water grill is dirty. | When the appliance has cooled down, clean the water grill with a damp sponge. | |
| Water flows from the filter holder after the espresso has been made. | The selection knob has not been placed in the position "Resistor". | Turn the d1 control switch to  (fig. 7). (fig. 7). |
| Premature formation of scale due to very hard water. | Descale the espresso machine according to the instructions (paragraph DESCALING). | |
| Ground coffee in the cup. | The filter holder is dirty. | Clean the filter holder with hot water. Press the  button to eliminate any remaining coffee. Shake it to remove of any water (also refer to paragraph "MAINTENANCE AND CLEANING - The filter holder".) button to eliminate any remaining coffee. Shake it to remove of any water (also refer to paragraph "MAINTENANCE AND CLEANING - The filter holder".) |
| The coffee is too finely ground. | Use a more coarsely ground coffee. | |
| The espresso is not not frothy/has no crema. | The coffee is too old or has become stale. | Use a more recently ground fresher coffee. |
| The coffee is not suited to making espresso. | Use a finer espresso ground coffee, and only use Espresso ground coffee | |
| There is not enough coffee in the filter holder. | Add more coffee. | |
| The water tank leaks when it is moved. | The valve at the bottom of the tank is dirty or faulty. | Wash the water tank and activate the valve at the bottom of the tank with your finger. |
| The valve is blocked by scale | Descale the appliance as described in paragraph DESCALING. | |
| Water leaking underneath the appliance. | Inside leak. | Check that the tank is fitted correctly. If the problem continues, do not use the appliance, contact an approved service centre. |
| Cracking noises are heard from the filter holder. | This is normal: safety lock on the filter holder. | |
| The pump is abnormally noisy. | No water in the tank. | Switch off the appliance (position  ), fill the water tank and switch back on. ), fill the water tank and switch back on. |
| The cups are not filled equally. | The filter holder is dirty. | Refer to paragraph "MAINTENANCE AND CLEANING - The filter holder" for the maintenance of the filter holder. |
| The espresso leaks from the sides of the filter holder. | The filter holder is not fitted correctly. | Fit the filter holder in place and lock it (turn it from left to right as far as possible) (fig. 3). |
| The edge of the filter holder has coffee on it. | Remove the excess coffee (fig. 10b) and clean the water grill with a damp sponge. | |
| Your espresso has a bad taste. | After descaling, the appliance has not been rinsed correctly. | Rinse the appliance according to the instructions (paragraph MAINTENANCE AND CLEANING) and check the quality of coffee. |
| The pump is not operating | The pump has been drained due to lack of water. | Fill the water tank and restart the pump (see paragraph "FIRST USE"). Avoid emptying the water tank completely. |
| The removable water tank is not fitted correctly. | Push the water tank firmly to fit it correctly. | |
| The steam nozzle does not froth the milk. | The steam nozzle is blocked or scaled. | Descale the steam nozzle as described in the paragraph "DESCALING" or unblock it with a needle. |
| The milk is too warm or not fresh. | Use very cold, very fresh milk. | |
| The container is not the right shape. | Use a small jug. |
If the cause of the problem cannot be determined, contact an approved service centre. Do not dismantle the appliance yourself! (If dismantled, this will invalidate the guarantee).
HELPLINE:
If you have any product problems or queries, please contact our Customer Relations Team first for expert help and advice:
0845 602 1454 - UK (01)
677 4003 - ROI
or consult our website - www.rowenta.co.uk
SAFETY INSTRUCTIONS
- Before using your espresso machine, please read the instructions carefully.
- Only plug the appliance in to a socket with an earth pin. Check that the voltage on the rating plate of the appliance matches that of your electrical installation.
- Do not place your espresso machine on a hot surface (an electric hob for example) or close to flames.
- Do not remove the filter holder containing the ground coffee when water is passing through it as the appliance is pressurised at that time.
- Do not use the appliance unless the drip tray and the grill are fitted.
- Always unplug your appliance in the case of problems when making coffee or before cleaning your appliance.
- Do not unplug the appliance by pulling on the power cord and do not place the power cord on a sharp edge or corner.
- Avoid contact between the power cord or your hands with the hot parts of the appliance (cups warming tray, filter holder, steam nozzle).
- Do not immerse the appliance in water.
- Keep out of the reach of children and do not allow the power cord to dangle.
- Follow the instructions for descaling operations.
- Do not use the appliance if it is damaged or if the power cord has been damaged.
- If the power cord or any other specific element is defective, in order to avoid any danger they must only be replaced by a Rowenta approved service centre. Under no circumstances must the appliance be opened by the user.
- Check that the filter holder has been tightened before making the coffee.
- This appliance is not designed to be used by persons (including children) with reduced physical, sensory or mental capacities or persons with no experience or knowledge unless they have been provided with suitable instructions concerning the use of the appliance from a person responsible for their safety. Children should be supervised to ensure that they do not play with the appliance.
- The accessories and removable parts of the appliance are not dishwasher proof.
- Place on a flat, stable, heat-resistant work surface away from water splashes and sources of heat.
- This appliance is intended to be used only in the household.
- It is not intended to be used in the following applications, and the guarantee will not apply for:
- staff kitchen areas in shops, offices and other working environments,
- farm houses,
- by clients in hotels, motels and other residential type environments,
- bed and breakfast type environments.
Documents / Resources
References
Download manual
Here you can download full pdf version of manual, it may contain additional safety instructions, warranty information, FCC rules, etc.
Download Rowenta SILVER ART ES460010 - Espresso Machine Manual
Advertisement


Need help?
Do you have a question about the SILVER ART ES460010 and is the answer not in the manual?
Questions and answers