Table of Contents
Advertisement
Quick Links
Visit www.clevelandrange.com to locate a
service or sales representative in your area.
SteamChef
Gas Convection Steamers with Easy Timer
Operation, Installation & Maintenance Manual
This manual is updated as new information and models are released. Visit our website for the latest manual.
MODELS:
22CGT3.1
22CGT6.1
!
Read the manual thoroughly.
Improper installation, operation or
maintenance can cause property
damage, injury, or death.
For your future reference.
Model #
Serial #
0
Cleveland
Part # KE004043-21 Rev B
February 2024
Advertisement
Table of Contents

Related Manuals for Cleveland SteamChef 22CGT3.1


Summary of Contents for Cleveland SteamChef 22CGT3.1
- Page 1 Cleveland Visit www.clevelandrange.com to locate a service or sales representative in your area. SteamChef Gas Convection Steamers with Easy Timer Operation, Installation & Maintenance Manual This manual is updated as new information and models are released. Visit our website for the latest manual.
- Page 2 Cleveland Range, LLC s’est efforcé à fournir The information in this document may be des renseignements précis dans ce Cleveland Range, LLC se ha esforzado en...
- Page 3 FOR YOUR SAFETY / POUR VOTRE SÉCURITÉ / PARA SU SEGURIDAD FOR YOUR SAFETY POUR VOTRE SÉCURITÉ PARA SU SEGURIDAD Do not store or use gasoline or any Ne pas entreposer ou utiliser No guarde ni use gasolina o other flammable liquids and vapours d'essence ou d'autres liquides ou cualesquiera otros líquidos o in the vicinity of this or any other...
- Page 4 WARNING / AVERTISSEMENT / ADVERTENCIA Inspect unit daily for proper Heavy. / Lourd. / Pesado. operation. / Inspecter le bloc quotidiennement pour garantir le fonctionnement normal. / Team or mechanical lift. / Levage en équipe ou Inspeccione diariamente el mécanique. / Levantamiento en equipo o funcionamiento correcto de la mecánico.
-
Page 5: Table Of Contents
OPERATION, INSTALLATION & MAINTENANCE MANUAL STEAMCHEF MODELS 22CGT3.1 & 22CGT6.1 Table of Contents CHAPTER 1 GENERAL INFORMATION ....................5 A. Laws, Codes, and Regulations ........................... 5 B. Gas Leak Instructions ..............................5 C. Operational Safety ..............................5 D. Inspection for Shipping Damage ..........................6 CHAPTER 2 PRODUCT INFORMATION ..................... -
Page 6: Chapter 1 General Information
Improper installation, adjustment, alteration, service, or maintenance of this appliance, or installation of a damaged appliance can result in DEATH, INJURY, EQUIPMENT DAMAGE, and void the warranty. NEVER install damaged appliances, equipment, or accessories. ALWAYS have installation and service performed by qualified Cleveland Range authorized personnel. B. Gas Leak Instructions ⚠ DANGER Gas leaks are fire and explosion hazards. -
Page 7: Inspection For Shipping Damage
This appliance must be level both front-to-back and side-to-side in all installations. NEVER operate this appliance out of level. If this appliance is suspected to be out of level, shut it down at once and call your qualified Cleveland Range authorized service agency immediately. -
Page 8: Chapter 2 Product Information
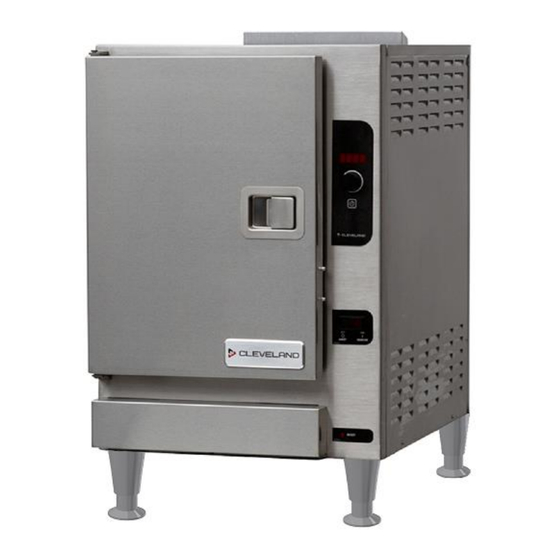
Figures 2-1, 2-2, and 2-3 illustrate the major external features of 22CGTs. B. Model Numbers and Serial Numbers 1. Cleveland Range, LLC assigns two product identification numbers to each appliance: a model number and a serial number. 2. Please provide the model number and serial number when you contact Cleveland Range or a qualified Cleveland Range authorized service representative. - Page 9 Easy Timer Control Panel ON-OFF Switch Reset Light 4” Adjustable Legs Figure 2-1 SteamChef Steam Cooker Front View (Model 22CGT3.1 Shown) Gas Inlet Condenser Water Inlet Fill Water Inlet Electric Connection Reset Circuit Breaker Drain Outlet Figure 2-2 SteamChef Steam Cooker Rear View (Model 22CGT3.1 Shown)
- Page 10 Figure 2-3 Dimensions and Clearances (Model 22CGT3.1 & 22CGT6.1 Shown)
-
Page 11: Chapter 3 Installation Procedure
NEVER operate this appliance out of level. If this appliance is suspected to be out of level, shut it down at once and call your qualified Cleveland Range authorized service agency immediately. -
Page 12: Lifting Points
Figure 3-1 Do NOT Lift from Sides D. Install the Legs 1. The legs on the SteamChef must be used for installing the appliance, unless it is installed with a Cleveland Range stacking stand. See the instructions included with the stand. -
Page 13: Position And Level The Steamchef
1. Move the SteamChef into position. 2. Place a level along the bottom edge of the SteamChef. 3. Use the adjustable legs of the SteamChef or the adjustable legs of the Cleveland Range stand to level the SteamChef front-to-back and side-to-side. -
Page 14: Water Connections For The Steamchef
Using water outside the limits specified in the Warranty without appropriate adjustment in the maintenance schedule voids warranty coverage. a) Contact your Cleveland Range sales representative for details on how to provide water per Minimum Water Quality Requirements in the Warranty, or how to increase the frequency of maintenance, cleaning, and descaling. - Page 15 Check local codes to determine exactly what type of anti-backflow / anti-siphon device is necessary to meet local requirements. Cleveland Range recommends the plumbing layout in either Figure 3-5 for installations using a single water supply or Figure 3-6 if a separate conditioned water supply is used for the water reservoir feed.
-
Page 16: Electric Connections For The Steamchef
Figure 3-5 Cleveland Range Single Water Supply Arrangement Figure 3-6 Cleveland Range Separate Water Supply Arrangement “Conditioned” indicates water that has been filtered or treated by a Cleveland Range approved method to meet or exceed the water quality standards in the Warranty. -
Page 17: Install The Free Air Vented Drain Line
• The main terminals are behind the control side panel in the service connection area. 2. The electrical supply must match all electrical and wiring requirements specified on the rating plate and the connection must be made in accordance with the following requirements: a) The SteamChef must be properly grounded by the installer. -
Page 18: Install The Fan Guard And Air Diverter
The following restrictions and requirements are critical to the safety of personnel and equipment, and must not be violated under any circumstances: 1. The drain lines must be installed in compliance with the Food Code (latest edition) of the Food and Drug Administration (FDA), and any other applicable national, state, or local codes and regulations. -
Page 19: Install The Kleanshield
c) Pull it down so that the narrow ends of the slots are pulled tight over the mounts. See Figure 3-8. d) Place the air diverter over the fan guard. Press lightly towards the rear wall until the air diverter drops into its slots in the fan guard. -
Page 20: Installation Check List
M. Installation Check List Installation Check List TASK REFERENCE COMPLETED Check Operating Location Clearances Chapter 2 Section D Test Supply Water Quality Chapter 3 Section G Verify Electric Power Requirements Chapter 3 Section H Verify Gas Supply Requirements Chapter 3 Section F Verify Exhaust Hood Requirements Chapter 3 Section B Verify SteamChef is Level... -
Page 21: Chapter 4 Cooking With The Steamchef
If the SteamChef door is stuck shut: • Turn OFF the steamer. • Call a qualified Cleveland Range authorized service technician. • Wait for the steamer to cool before servicing. ⚠ CAUTION Some foods drip juices. Use a solid catch pan under perforated pans when cooking food that drips juices. -
Page 22: Rethermalization
2. Refer to Easy Timer Operating Instructions in Chapter 5 to start cooking. • While cooking, occasionally check the water in the reservoir for food particles and oils. If the water is dirty or cloudy, change the water. See Chapter 8. •... -
Page 23: Chapter 5 Easy Timer Operating Instructions
CHAPTER 5 EASY TIMER OPERATING INSTRUCTIONS DIGITAL DISPLAY CONTROL KNOB Enabled with TIMED mode Disabled with MANUAL mode TIMER START/STOP BUTTON in TIMED mode TIMED/MANUAL SWITCH BUTTON (Press for 5 sec) ON-OFF SWITCH ⚠ CAUTION Press switch and button with fingertips only. INJURY and EQUIPMENT DAMAGE can result from pressing switches and buttons with anything else. -
Page 24: Main External Power Switch
A. Main External Power Switch Usually, the SteamChef’s Main External Power Switch is left ON during operating hours. If the Main External Power Switch is OFF, turn it ON as follows: 1. Turn the ON/OFF switch to the OFF position. 2. -
Page 25: Lighting And Shutdown Instructions (Normal Operation)
Do not try to light burners with a flame. Do not alter any gas control adjustments. If adjustment is required, contact a Cleveland Range authorized service center. Cleveland Range is in no way responsible for the operation or safety of this equipment if the controller, valve, igniter probe or any other gas system component is adjusted by anyone other than a qualified Cleveland Range authorized service representative. -
Page 26: Turn Off The Main Manual Gas Valve
The following START-UP SUMMARY is for quick reference ONLY. For safe operation and use of this equipment, the operator must comply with all safety and operating instructions in this manual. Lighting Instructions 1. Close the cooking compartment door. 2. Turn the ON/OFF switch clockwise to the ON position. •... -
Page 27: Chapter 6 Shutdown And Cleaning Procedure
• Cleveland Range does not recommend the use of detergent, but if detergent has been used to clean the inside of the steamer, be sure to rinse off the probe assembly with the vinegar solution. If detergent residue is not completely rinsed from the probe assembly, then the residue can prevent the water level control from operating. - Page 28 particles. 9. Do not use abrasive cleaning compounds or steel wool. 10. Rinse the inside of steamer compartment and drain valve thoroughly with clean water. 11. Inspect the probe assembly and clean it with a soft bristle brush or similar non-abrasive cleaning means. 12.
-
Page 29: Chapter 7 Operating Tests And Final Checkout Procedures
CHAPTER 7 OPERATING TESTS AND FINAL CHECKOUT PROCEDURES • This procedure must be performed by a qualified Cleveland Range authorized service representative. • Complete the Startup Procedure before starting the actual operating tests. • Read and understand all steps of this procedure before starting. -
Page 30: Startup Procedure
• Follow the Shutdown Instructions (below). • Call a qualified Cleveland Range authorized service representative to adjust the burner controls. 2. Shutdown Instructions Step 1: Turn OFF the electrical power to the SteamChef at the ON/OFF switch. Step 2: Wait for the 3-minute Drain Rinse Cycle to run. -
Page 31: Operating Tests (Continued From Drain Rinse Inspection)
If the water level continues to rise above the tip of the higher probe, see the Operator’s Troubleshooting Guide in the Operator’s Manual. • If the problem persists, have a qualified Cleveland Range authorized service representative check the probe circuit. Step 5: Close the compartment door to close the door interlock circuit. - Page 32 NOTE: After 60 minutes of uninterrupted operation of both the Timer model SteamChefs in Manual Mode, and ON/OFF model SteamChefs turned ON, the SteamChef automatically starts the Energy Saver feature. • The cooking compartment returns to standby mode. This saves energy and maximizes equipment life.
-
Page 33: Shutdown Of The Steamchef After Testing (Continued From Operating Tests) And Front Burner Cover Installation
Go to Step 6. • If there are any problems: STOP. Shut down the SteamChef and call Cleveland Range at 216-481- 4900 or 1-800-338-2204. Step 6: After completing the Operating Test Procedures and installing the Front Burner Cover, the SteamChef is ready for use. -
Page 34: Chapter 8 Preventative Maintenance
CHAPTER 8 PREVENTATIVE MAINTENANCE A. Maintenance Maintenance on the steamer must be performed on a regular basis to keep it running properly and efficiently. By following the maintenance instructions in this chapter and cleaning the equipment regularly as outlined in Chapter 6, problems with the steamer will be kept to a minimum. -
Page 35: Descaling Water Reservoir
Descaling is not normally required on a SteamChef. Frequency will depend on water quality, and the frequency of shutdown and cleaning of the water reservoir. d) The frequency of descaling must be determined by the owner and performed by qualified Cleveland Range authorized technicians or trained onsite maintenance personnel. - Page 36 21. Once the scale is removed and the drain flows freely, the steamer is ready for normal operation. ⚠ DANGER The liquid solution in Cleveland Range Descaler Solution Part No. 106174 can be harmful if not handled properly. Follow these basic safety rules for handling and using this product. Instructions and warnings on container labels supersede all other warnings and instructions.
-
Page 37: Chapter 9 Troubleshooting Guide
“Remedy / Reference” (right column) lists fixes for problems from easiest to hardest. • “Notes” in “Remedy / Reference column are at end of the Troubleshooting Guide. ATTEMPTING TO REPAIR OR CORRECT PROBLEMS REQUIRING A QUALIFIED CLEVELAND RANGE AUTHORIZED SERVICE REPRESENTATIVE VOIDS THE WARRANTY. PROBLEM... - Page 38 Inoperative controls. See Note 1. Steam and/or water The vent, the drain to the vent, and/or the Clear vent and collector openings. Clean draining around the the drain with NSF approved drain KleanShield opening is clogged or covered. compartment door. cleaner and flush drain thoroughly with fresh water If condition persists see Note See Warning under...
- Page 39 1. If the problem is inside the appliance, call a qualified Cleveland Range authorized service representative (Please have the model number and serial number ready when calling.) Cleveland Range will not pay for warranty repairs by unauthorized maintenance and repair centers.
- Page 40 Cleveland Cleveland Range, LLC 760 Beta Drive, Unit D Mayfield Village, Ohio 44143 216.481.4900 800.338.2204 Every new piece of Welbilt Foodservice equipment comes with KitchenCare® and you choose the level of service that meets your operational needs from one restaurant to multiple locations StarCare –...
Need help?
Do you have a question about the SteamChef 22CGT3.1 and is the answer not in the manual?
Questions and answers