Table of Contents
Advertisement
Quick Links
Advertisement
Table of Contents

Related Manuals for X-Rite Ci61


Summary of Contents for X-Rite Ci61
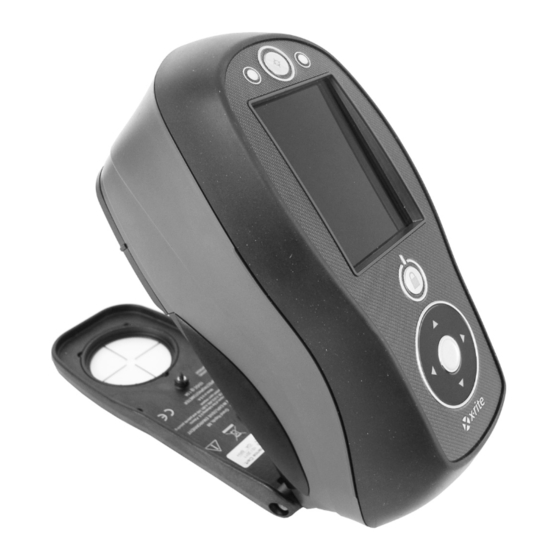
- Page 1 Ci61 Spectrophotometer User Guide...
- Page 3 Cet appareil numérique de la classe A est conforme à la norme NMB-003 du Canada. Equipment Information Use of this equipment in a manner other than that specified by X-Rite, Incorporated may compromise design integrity and become unsafe. WARNING: This instrument is not for use in explosive environments.
- Page 4 X-Rite, Incorporated. Patents: www.xrite.com/ip “© 2017, X-Rite, Incorporated. All rights reserved” X-Rite® is a registered trademark of X-Rite, Incorporated. All other logos, brand names, and product names mentioned are the properties of their respective holders. Warranty Information X-Rite warrants this Product against defects in material and workmanship for a period of twelve (12) months from the date of shipment from X-Rite’s facility, unless mandatory law provides for...
- Page 5 WARRANTIES, EXPRESSED OR IMPLIED, INCLUDING BUT NOT LIMITED TO THE IMPLIED WARRANTIES OF MERCHANTABILITY, FITNESS FOR A PARTICULAR PURPOSE OR APPLICATION, AND NON-INFRINGEMENT. NO EMPLOYEE OR AGENT OF X-RITE, OTHER THAN AN OFFICER OF X-RITE, IS AUTHORIZED TO MAKE ANY WARRANTY IN ADDITION TO THE FOREGOING.
-
Page 6: Table Of Contents
C i 6 1 S P E C T R O P H O T O M E T E R Table of Contents Introduction and Setup Packaging Attaching the Safety Strap Powering On and Off Locking the Navigation Control Power Save Modes Charging the Battery Pack Connecting the AC Adapter... - Page 7 C i 6 1 S P E C T R O P H O T O M E T E R Appendices Service Information Cleaning the Instrument General Cleaning Cleaning the Optics Cleaning the Calibration Reference Replacing the Battery Pack Troubleshooting Screen Messages Technical Specifications...
-
Page 8: Introduction And Setup
(up, down, left, and right) Shoe USB and AC adapter inputs Packaging Your instrument packaging should contain all the items listed below. If any of these items are missing or damaged, contact X-Rite or your Authorized Representative. • Ci61 instrument • Manuals CD •... -
Page 9: Attaching The Safety Strap
C i 6 1 S P E C T R O P H O T O M E T E R Attaching the Safety Strap A safety strap is included with your instrument. The strap attaches to the back of the instrument and around your wrist. -
Page 10: Powering On And Off
C i 6 1 S P E C T R O P H O T O M E T E R Powering On and Off The power button is used to initiate the instrument from a power off state. Simply press and hold the button for three seconds to turn on the instrument. -
Page 11: Power Save Modes
C i 6 1 S P E C T R O P H O T O M E T E R Power Save Modes The instrument utilizes two power save modes to conserve battery life during nonuse times. Standby Mode: The instrument is ready to measure, however the display is not on. A button press, measurement, power connection (if not connected), or USB connection will wake up the instrument. -
Page 12: Connecting The Ac Adapter
NOTE: The instrument can operate from the AC adapter only. The battery pack does not need to be installed. The AC adapter (X-Rite P/N SE30-277) overrides any charge condition of the battery pack in the instrument. Measurements can be taken even with a very low battery condition when using the AC adapter. -
Page 13: User Interface
C i 6 1 S P E C T R O P H O T O M E T E R USER INTERFACE Instrument Controls The instrument controls are used to navigate the screen, select options, and perform measurements. Navigation Control (up, down, left, right and center) The navigation control moves the focus of the highlight around the You can also use the screen. -
Page 14: General Sample Measurement
C i 6 1 S P E C T R O P H O T O M E T E R General Sample Measurement The instrument can take measures from just about any clean, dry surface that is reasonably flat. The instrument shoe should be able to rest flat and steady on the sample area. -
Page 15: Main Screen Menu
C i 6 1 S P E C T R O P H O T O M E T E R Main Screen Menu When the instrument is powered-up, the main (top level) screen appears after the diagnostics test is complete. The main screen consists of the header bar and operation modes. The operation modes are selected by using the navigation buttons located to the side of the display screen. -
Page 16: Main Column
C i 6 1 S P E C T R O P H O T O M E T E R • Controls Lock: Displays a locked or unlocked icon for the instrument controls. Refer to Locking the Navigation Control earlier in this manual for an explanation. •... -
Page 17: Configuration Mode
C i 6 1 S P E C T R O P H O T O M E T E R CONFIGURATION MODE Configuration mode is used to adjust and view the instrument’s settings. You should set the configuration options before using the instrument for the first time. However, you can go back and change these settings at any time. -
Page 18: Measurement Trigger
C i 6 1 S P E C T R O P H O T O M E T E R Exiting Configuration Mode After configuring options, use the Left navigation button to move the highlight focus to the Main screen icon in the Main column and tap the Select button to exit. -
Page 19: Date Format
C i 6 1 S P E C T R O P H O T O M E T E R Date Format This option is used to adjust the date format the instrument uses. The available settings are: MM/DD/YYYY (default), DD/MM/YYYY, DD.MM.YYYY, YYYY/MM/DD, and YYYY-MM-DD. NOTE: The date format automatically changes to the correct format for the selected language. -
Page 20: Calibration Mode
C i 6 1 S P E C T R O P H O T O M E T E R CALIBRATION MODE The calibration consists of a ceramic plaque for white measurements and a trap opening for black measurements. A calibration should be performed when prompted for by the instrument or when desired. - Page 21 C i 6 1 S P E C T R O P H O T O M E T E R Exit icon Calibration mode icon Next icon Information that appears when calibration is not currently required 3. Use the Right navigation control to move the highlight focus to the Progress column. Use the Down navigation control to highlight the Next arrow icon (→) if not highlighted and tap the Select button.
- Page 22 C i 6 1 S P E C T R O P H O T O M E T E R 9. Press the instrument firmly to the shoe and hold steady until the display indicates that the reading is complete. Release the instrument. 10.
-
Page 23: Measure Mode
MEASURE MODE The measure mode is the main operation mode of the instrument used to obtain sample data. Stored sample data is downloaded to the software application. The Ci61 can store 4000 measurement across user-selected projects. The measure mode screen displays the selected project name, sample data and measurement number with timestamp. -
Page 24: Projects
C i 6 1 S P E C T R O P H O T O M E T E R Projects Projects are typically created and downloaded from a software application. You must select the desired project that the sample measurements are stored in before taking measurements. The selected project is used until a different project is chosen. -
Page 25: Deleting A Project And Samples
C i 6 1 S P E C T R O P H O T O M E T E R 4. Tap the Left navigation button to move the highlight to the Add Project screen. 5. Tap the Select button to highlight the first character position. 6. -
Page 26: Locking A Project
C i 6 1 S P E C T R O P H O T O M E T E R 2. Tap the Select button and then tap the Left navigation button to move the highlight to the select option screen. 3. -
Page 27: Measuring A Sample
C i 6 1 S P E C T R O P H O T O M E T E R NOTE: Select the backspace character () and use the Left navigation button to delete the unwanted characters. 5. Use the Left or Right navigation buttons to move the two arrows to the character location and tap the Select button. -
Page 28: Renaming A Sample
C i 6 1 S P E C T R O P H O T O M E T E R Measure icon This icon is used to edit the default sample name if desired. Refer to Measurement number for the Renaming the Sample Name selected project and timestamp section that follows. -
Page 29: Measurement Averaging
C i 6 1 S P E C T R O P H O T O M E T E R 9. Tap the Right navigation button and highlight the Checkmark icon in the Progress Column. 10. Tap the Select button to save the name for the sample. NOTE: To exit the name without saving, highlight the Exit icon in the Progress Column and tap the Select button. -
Page 30: Appendices
For sales questions or to order cables and accessories, visit our web site ( ) or www.xrite.com contact your nearest X-Rite dealer or service center. • Problems and questions can also be faxed to your local X-Rite office listed on our web site. -
Page 31: Cleaning The Instrument
C i 6 1 S P E C T R O P H O T O M E T E R Cleaning the Instrument Your instrument requires very little maintenance to achieve years of reliable operation. However, to protect your investment and maintain reading accuracy, a few simple-cleaning procedures should be performed from time to time. -
Page 32: Cleaning The Calibration Reference
C i 6 1 S P E C T R O P H O T O M E T E R Cleaning the Calibration Reference The calibration reference consists of white and green ceramic plaques, and a black trap opening. The calibration reference should be cleaned periodically. - Page 33 C i 6 1 S P E C T R O P H O T O M E T E R Black Trap Cleaning Procedure 1. Take apart the two sections by compressing the two locking tabs on both sides with your fingers and separating.
-
Page 34: Replacing The Battery Pack
S P E C T R O P H O T O M E T E R Replacing the Battery Pack Use the rechargeable Li-ion battery pack provided (X-Rite P/N SE15-40); other types may burst causing personal injury. 1. Carefully turn the instrument over and rotate the shoe back until it is completely open. -
Page 35: Troubleshooting
C i 6 1 S P E C T R O P H O T O M E T E R Troubleshooting Prior to contacting the support department for instrument problems, try the applicable solution(s) described below. If the condition persists, contact us using one of the methods listed in the Service Information section. -
Page 36: Technical Specifications
C i 6 1 S P E C T R O P H O T O M E T E R Technical Specifications Measurement Geometrics d/8°, DRS spectral engine, choice of optical aperture: 8 mm measurement area/14 mm target window 14 mm measurement area/20 mm target window Receiver Blue-enhanced silicon photodiodes... - Page 38 X-Rite Asia Pacific Limited Suite 2801, 28th Floor, AXA Tower Landmark East, 100 How Ming Street Kwun Tong, Kowloon, Hong Kong Phone (852) 2568 6283 Fax (852) 2885 8610 Please visit www.xrite.com for a local office near you. P/N Ci61-500 Rev. C...
Need help?
Do you have a question about the Ci61 and is the answer not in the manual?
Questions and answers