Table of Contents
Advertisement
Advertisement
Table of Contents

Subscribe to Our Youtube Channel
Related Manuals for Smeg CW500


Summary of Contents for Smeg CW500
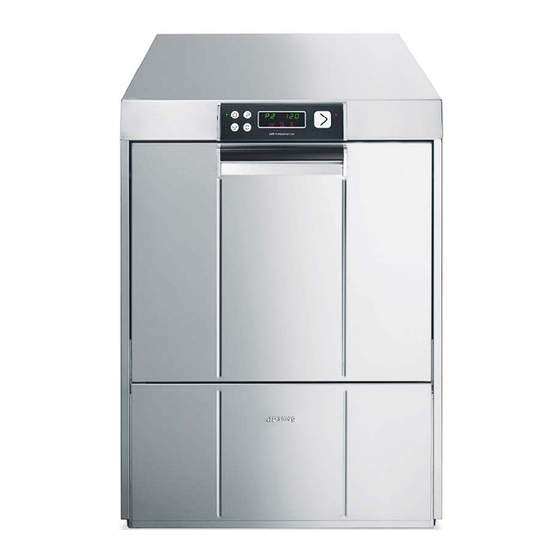
- Page 1 PROFESSIONAL DISHWASHER...
-
Page 2: After Sales Service
1 Precautions for safety and use 4 INSTALLATION INSTRUCTIONS FOR THE 7 Malfunctions shown on the display (for the technician) 8 INSTRUCTIONS FOR THE USER 13 Malfunctions shown on the display (for the user) You are advised to read all the instructions in this manual carefully to become familiar with the right conditions TECHNICAL INSTRUCTIONS: These are intended for the qualified staff who are to install, commission and test the appliance and carry out any servicing and repairs. - Page 3 1 Precautions for safety and use THIS MANUAL IS AN INTEGRAL PART OF THE DISHWASHER AND MUST ALWAYS BE KEPT WITH THE APPLIANCE. POSITIONING, REPLACEMENT OF THE POWER SUPPLY CABLE MUST BE CARRIED OUT BY SKILLED STAFF. THE DISHWASHER IS INTENDED ONLY FOR PROFESSIONAL USE BY TRAINED STAFF. IT IS DESIGNED TO WASH TABLEWARE (PLATES, CUPS, BOWLS, OVEN DISHES AND CUTLERY) AND SIMILAR ITEMS IN THE RESTAURANT AND INSTITUTIONAL CATERING SECTOR, AND COMPLIES WITH THE INTERNATIONAL STANDARDS ON ELECTRICAL AND MECHANICAL SAFETY (CEI-EN-IEC 60335-2-...
-
Page 4: Technical Data
Technical data Supply voltage - convertible to single-phase version Frequency Max. power absorption at 400V 3N ~ Max. power absorption at 230V 1N ~ Boiler heating element power at 400V 3N ~ Boiler heating element power at 230V 1N ~ Tank heating element power Water intake pressure Water intake temperature... -
Page 5: Installation And Positioning
3 Installation and positioning INSTALLATION and POSITIONING Bring the dishwasher to the installation site, remove the packaging and check the appliance and components for damage; any damage found must be reported to the transporter in writing. The packaging components (plastic bags, expanded polystyrene, nails, etc.) must not be left within reach of children and pets since they are potentially dangerous. -
Page 6: Water Connection
4 INSTALLATION INSTRUCTIONS FOR THE AFTER-SALES SERVICE 4.1 Water connection Water supply and drain connection: The water pipelines and electricity supply cable lead out of the bottom right-hand corner of the appliance. Connect the water intake hose to a connector with ¾” gas threaded fitting, fitting the filter A provided (in models with aquastop, the filter and ring- nut form a single unit). -
Page 7: Electrical Connection
4.1 Electrical connection The dishwasher and any additional equipment must be connected to the electrical system by authorised, skilled staff, in accordance with the relevant regulations; also comply with the technical instructions for the connection. The total rated power is stated on the appliance’s technical data plate. The electrical protection devices fitted for the dishwasher must serve this appliance only. -
Page 8: First Start-Up
FIRST START-UP The electrical protection system must undergo a functional test before the appliance is put into operation. The appliance must be installed and/or inspected by the qualified staff, who will start it up for the first time and provide the relevant operating instructions. PREPARING FOR USE Important: The rinse aid dispenser is fitted on all models, the detergent dispenser only on some. - Page 9 6.1 Dishwasher parameter modification procedure: (ONLY ACCESSIBLE AFTER FILLING IS COMPLETE or WITH THE DOOR OPEN) Indicator lights as follows: off; Access “programming mode” by pressing the seconds (UnLo 1:58 will appear on the display) with the appliance on (after the filling and heating phase);...
- Page 10 Energy consumption (kW) display The Pc option indicates the total kW consumed since installation of the dishwasher or since the latest reset. Customisation of duration of program P4. N.B.: the machine must be set on “P4”, see “6.7 Setting program P4 duration”.
-
Page 11: Rinsing Temperature Setup
6.1.3 Rinsing temperature setup 6.1.4 Washing temperature setup Indicator lights as follows: off; 6.1.5 Autostart function Set at “on” to start the cycle when the door is closed. Set at “off” for cycle start after confirmation with the start button 6.1.6 Regeneration frequency setup (models with softener) •... -
Page 12: Detergent Pump
6.1.7 tStP (minimum rinsing temperature) function Set at “on” for minimum rinsing temperature as set. Set as “off” to accept minimum rinsing temperature a few degrees lower than the setting if hot intake water is not used. 6.1.8 Rinse aid pump Display (also reset when needed) 6.1.9 Detergent pump Display (also reset when needed) - Page 13 6.1.12 Setting the Model (for After-Sales Service only) Modify by pressing 6.2 Starting the peristaltic pumps – rapid filling of detergent and rinse aid delivery circuit. Perform after the parameter modification procedure explained in the previous point. Indicator lights as follows: off;...
- Page 14 7 MALFUNCTIONS SHOWN ON THE DISPLAY The dishwasher is able to identify a number of malfunctions and show them on the display. If the problem persists after the dishwasher has been switched off and back on, proceed as described below: The anti-flooding system has been activated Err01 (for the relevant models only).
-
Page 15: Instructions For The User
8 INSTRUCTIONS FOR THE USER 8.1 Control panel On-off button Program selection button Start CONFIRM/PAUSE button Total emptying button (tank and boiler) Additional function selection button L1 Main power on light L2 Intake/standby cycle in progress light (orange/green) L3 Pump-out in progress light No rinse-aid symbol (if a system for monitoring outside the dishwasher is provided) Tank heating element on symbol No salt symbol (if softener is fitted) -
Page 16: Before Washing
Use only detergents and rinse aids for industrial dishwashers. Do not use detergents intended for hand washing. We recommend the use of Smeg products, specially developed for this dishwasher. When topping up the tanks, take care not to swap the products; this might damage the dishwasher and cause malfunctions. -
Page 17: Program Change
When the door is closed again, the last program is repeated. 8.4 Program change N.B.: During heating of the water in the boiler, the tank heating element may appear on the display. Filter presence sensor (on some models only) The filter is fitted with a sensor which checks that it is properly fitted; if it is not in the correct position, the word “FiLter”... -
Page 18: Choosing The Program
9 CHOOSING THE PROGRAM PROGRAM Glasses Glasses, cups and plates with light dirt Very dirty dishes and cutlery Depending on the duration set. The cycle duration stated above refers to three-phase appliances supplied with hot water at 50°C. If the appliance is supplied with cold water, the cycle duration might increase depending on the intake water temperature, since the dishwasher is fitted with the HTR system, which requires set temperature and pressure for rinsing. -
Page 19: Selecting The "Sanitisation" Function (Only Available In P3)
10.3 Selecting the “sanitisation” function (only available in P3) Increases the washing and rinsing temperature and the program duration N.B.: the supplementary function remains selected until the program is changed or the dishwasher is switched off ‐ by pressing the button. -
Page 20: Maintenance And Cleaning
TOTAL PUMP-OUT AT THE END OF THE DAY + Resin regeneration (form models with water softener) From time to time, on models with water softener, before the total pump-out at the end of the day the user will automatically be reminded to carry out the resin regeneration cycle, required after a number of washes which depends on the hardness of the water (about 30 for average setting H03). -
Page 21: Periodic Checks
Remove the filters (simply lift them out as shown here), taking care that no large residues fall into the sump underneath. Clean them to remove residues and rinse with plenty of water, then put them correctly back in place; do not use sharp or pointed tools. -
Page 22: Troubleshooting
If the system fails to pump out because the drain pump is fouled (as a result of incorrect filter positioning), proceed as follows: Bale out the dishwasher with a basin and disconnect it from the electrical mains. Unscrew the screw A, release the tang B and lift it. Check that the impeller of the drain pump underneath the cover turns freely, and is free from dirt, limescale residues, or pieces of glass. - Page 23 WATER IN TANK AFTER PUMP- 13 MALFUNCTIONS SHOWN ON THE DISPLAY The dishwasher is able to identify a number of malfunctions and show them on the display. If the problem persists after the dishwasher has been switched off and back on, proceed as described below: The anti-flooding system has been activated Err01 (for the relevant models only).
Need help?
Do you have a question about the CW500 and is the answer not in the manual?
Questions and answers